- Home
- Archive: June, 2022
How To Reset Tire Pressure On Honda Civic 2015
If your Honda Civic’s tire pressure monitoring system (TPMS) light illuminates, it means that the pressure in one or more of your tires is low. You can reset the system by adding air to your tires or, if your tires are already inflated to the proper pressure, by driving for a few miles. Here’s how to do both:
To reset the system by adding air to your tires:1. Park your Civic in a safe place and turn off the engine.2. Locate the tire that is low on pressure and remove the valve cap.
3. Press the valve stem firmly to release any air that may be left in the tire.4. Connect an air hose to the valve stem and inflate the tire to the recommended pressure.5. Replace the valve cap and repeat the process for each tire that is low on pressure.
- Park your Honda Civic on a level surface and turn off the engine
- Locate the tire pressure monitoring system (TPMS) reset button, which is usually located on the dash or center console
- Press and hold the TPMS reset button for approximately five seconds
- The TPMS light will flash to indicate that the system has been reset
- Check the tire pressure in all four tires and inflate or deflate as needed to achieve the recommended pressure
Where is the TPMS button on a 2015 Honda Civic?
If you need to reset the tire pressure on your Honda Civic 2015, there are a few things you need to do. First, find the tire pressure sensor on the driver’s side door. Second, use a tire pressure gauge to check the pressure in all four tires.
Third, use the Honda Civic 2015 Tire Pressure Reset Tool to reset the pressure in the tires. Finally, drive the car for a few miles to make sure the pressure is reset.
How do you reset the tire pressure sensor on a Honda Civic?
If your Honda Civic’s tire pressure monitoring system (TPMS) light is on, it means that one or more of your tires is significantly under-inflated. Inflating your tires to the correct pressure is important for both safety and fuel efficiency.To reset the TPMS light on your Honda Civic, start by finding the recommended tire pressure for your vehicle.
This information can be found in your owner’s manual or on a sticker inside the driver’s door. Once you know the correct tire pressure, use a tire pressure gauge to check the pressure of all four tires. If any of the tires are below the recommended pressure, use a air compressor or tire inflator to inflate them to the proper level.
Once all four tires are inflated to the correct pressure, the TPMS light should turn off automatically.
How do you reset the tire pressure sensor on a 2015?
If you need to reset the tire pressure on your Honda Civic 2015, there are a few things you need to do. First, find the reset button on the dash. It should be located near the odometer.
Once you’ve found the reset button, press and hold it for about three seconds.Next, turn the ignition to the “on” position without starting the engine. Once the ignition is on, press and release the reset button.
The tire pressure light on the dash should now be reset.If you have a Honda Civic with a tire pressure monitoring system (TPMS), there is a different process for resetting the system. For Civic models with TPMS, you need to use a scan tool to reset the system.
Consult your owner’s manual or a Honda dealer for more information on resetting the TPMS on your specific model.
Does 2015 Honda Civic have TPMS?
If your Honda Civic has tire pressure sensing valves, the process for resetting the tire pressure monitor is different than if it doesn’t. If your Civic is equipped with tire pressure sensing valves, follow these steps to reset the system:1. Start the engine and turn on the tire pressure monitor system.
2. Drive the vehicle for a few minutes to allow the system to stabilize.3. Stop the vehicle in a safe location and turn off the engine.4. Remove the cap from the tire pressure sensor valve.
5. Use a tire pressure gauge to check the pressure in all four tires.6. Adjust the pressure in each tire to the recommended level.7. Replace the cap on the tire pressure sensor valve.
8. Start the engine and turn off the tire pressure monitor system.9. Drive the vehicle for a few minutes to allow the system to recalibrate.
Reset tire pressure honda civic 2016
If you have a newer model Honda Civic (2015 or newer), then resetting your tire pressure is easy. All you need is the Honda Tire Pressure Monitoring System (TPMS) reset button. This button is located on the dash, near the steering wheel.
To reset your tire pressure, simply press and hold the TPMS reset button for about 5 seconds. The system will then automatically adjust the pressure in your tires to the recommended levels.If you have an older model Civic (2014 or older), then you’ll need to use a tire gauge to manually adjust the pressure in your tires.
First, find the recommended tire pressure for your vehicle in the owner’s manual.Then, use a tire gauge to check the pressure in each of your tires. If the pressure in any tire is below the recommended level, use a tire pump to add air until the pressure is at the recommended level.
That’s all there is to it!
How to reset tire pressure on honda civic 2017
If you have a Honda Civic from 2015 or newer, you may be wondering how to reset the tire pressure. The process is actually quite simple. Here’s what you need to do:
1. Park your Civic and turn off the engine.2. Locate the tire pressure sensor, which is located on the driver’s side near the door.3. Use a small object, such as a pen or paperclip, to press and hold the reset button for about 5 seconds.
4. Start the engine and drive around for a few minutes to allow the system to recalibrate.That’s all there is to it! By following these steps, you can easily reset the tire pressure on your Honda Civic.
How to reset tire pressure on honda civic 2019
If your Honda Civic has low tire pressure, you can reset the tire pressure sensor by following these steps:1. Locate the tire pressure sensor reset button. This is usually located on thedashboard, near the steering wheel.
2. Press and hold the reset button for five seconds.3. Release the reset button.4. Start the engine.
5. Drive the vehicle for a few miles to allow the tire pressure sensor to re-calibrate.
2015 honda civic tire pressure light keeps coming on
If you’re like most people, you probably don’t think about your car’s tire pressure unless there’s a problem. But did you know that properly inflated tires can save you money, improve your gas mileage, and extend the life of your tires?Unfortunately, it’s not always easy to keep track of your tire pressure.
That’s why it’s important to know how to reset the tire pressure on your Honda Civic.Here’s what you need to do:1. Use a tire pressure gauge to check the pressure of all four tires.
2. If any of the tires are low, remove the valve cap and use a tire inflator to add air until the tire is inflated to the proper pressure.3. Once all four tires are properly inflated, use the tire pressure gauge to check the pressure of the spare tire.4. If the spare tire is low, add air until it is inflated to the proper pressure.
Reset tire pressure honda civic 2021
If you have a 2015 Honda Civic, you may be wondering how to reset the tire pressure. Here’s a quick guide to help you out.Start by turning on your engine and pressing the “info” button on your dash.
Then, use the arrow keys to scroll over to the “vehicle” tab. From there, scroll down to “tire pressure” and press enter.Now, you should see a screen that shows the current pressure in each of your tires.
If any of the tires are low, you’ll need to add air. To do this, find the tire that’s low on pressure and press the “set” button.Enter the recommended pressure for that tire and press enter.
The tire will now be inflated to the proper pressure. Repeat this process for each tire that’s low on pressure.Once all of your tires are properly inflated, you can exit the menu by pressing the “info” button again.
Reset tire pressure honda civic 2020
If you’re like most people, you probably don’t think much about your car’s tire pressure. But if you’re driving a Honda Civic, it’s important to keep an eye on it. The 2015 Honda Civic has a Tire Pressure Monitoring System (TPMS) that alerts you when the pressure in one or more of your tires is low.
If the TPMS light comes on, it means that the pressure in one or more of your tires is below the recommended level. To reset the system, you’ll need to add air to your tires until the light goes off.Here’s how to do it:
1. Park your car in a safe place and turn off the engine.2. Locate the tire pressure sensor (it looks like a small black box) on each tire.3. Use a tire pressure gauge to check the pressure in each tire.
How to check tire pressure honda civic 2015
If your Honda Civic has low tire pressure, you can reset the tire pressure sensor by following these steps:1. Park your Honda Civic in a safe place and turn off the engine.2. Locate the tire pressure sensor reset button.
This is usually located on the dash near the steering wheel.3. Press and hold the reset button for about 5 seconds.4. Start the engine and drive around for a few minutes to allow the sensor to calibrate.
5. Check the tire pressure to make sure it is at the correct level.
2014 honda civic tpms reset
If you need to reset the tire pressure on your Honda Civic 2015, there are a few things you need to do. First, find the tire pressure sensor on the driver’s side door. Second, use a small flat-head screwdriver to press and hold the reset button for three seconds.
Finally, turn the screwdriver counterclockwise to release the button.
Conclusion
If your Honda Civic’s tire pressure light is on, it’s time to reset the tire pressure sensors. Here’s how to do it:1. Park your Civic on level ground and turn off the engine.
2. Locate the tire pressure sensor reset button. It’s usually on the dash, near the steering wheel.3. Press and hold the reset button for about 5 seconds.
4. Start the engine and drive for a few miles. The tire pressure light should go off.If the tire pressure light doesn’t go off, or if it comes back on, there may be a problem with the tire pressure sensors or the tire pressure sensor system.

How To Reset Tire Pressure Monitoring System?
If your car has a tire pressure monitoring system (TPMS), you’ll need to know how to reset it when you get new tires or swap out your winter tires for summer ones. Fortunately, it’s a pretty easy process. Here’s how to do it.
If your car has a tire pressure monitoring system (TPMS), you may need to reset it from time to time. There are a few different reasons why you might need to reset your TPMS, but the most common is after you’ve made a tire pressure adjustment. Here’s how to reset your TPMS:
1. Park your car in a safe, level spot.
2. Locate the TPMS reset button. This is usually located on the dash, near the steering wheel.
3. Press and hold the reset button for about 5 seconds.
4. Start the engine and drive around for a few minutes to allow the system to recalibrate. If your TPMS light is still on after resetting, there may be a problem with the system and you should have it checked out by a professional.
Can I reset tire pressure monitoring system?
If your car is equipped with a Tire Pressure Monitoring System (TPMS), you will need to reset the system when you get new tires or change your tire size.
Here’s how to do it:
1. Park your car in a safe location and turn off the engine.
2. Locate the TPMS reset button. This is usually located on the dash or near the steering wheel.
3. Press and hold the reset button for about 20 seconds.
4. Start the car and drive around for a few miles to allow the system to recalibrate.
5. That’s it! Your TPMS is now reset and ready to go.
Can you relearn TPMS without tool?
If your tire pressure monitoring system (TPMS) light is on, it means that your tires are low on air and you need to add air to them. You can usually do this yourself by using a air compressor or by going to a gas station that has an air pump. Once you’ve added air to your tires, you’ll need to reset the TPMS system so that the light will turn off.
To do this, find the TPMS reset button on your dash. It’s usually located near the steering wheel. Once you’ve found the button, press and hold it for about 30 seconds.
The light should turn off after a few seconds, indicating that the system has been reset.
Where is my TPMS reset button?
If your Tire Pressure Monitoring System (TPMS) light is on, it means that the pressure in one or more of your tires is low. You can often reset the light by adding air to the tires. However, if the light is on and you know that the tire pressure is fine, then there may be a problem with the TPMS itself.
In this case, you’ll need to reset the system. Here’s how to reset your TPMS:
1. Add air to your tires if needed. The TPMS light will often come on when the pressure in one or more tires is low. You can often reset the light by simply adding air to the tires.
2. Check the tire pressure with a gauge. Once you’ve added air to the tires, use a tire pressure gauge to check the pressure in each tire. Make sure that the pressure in each tire is at the correct level.
3. Find the TPMS reset button.
How do I reset TPMS calibration?
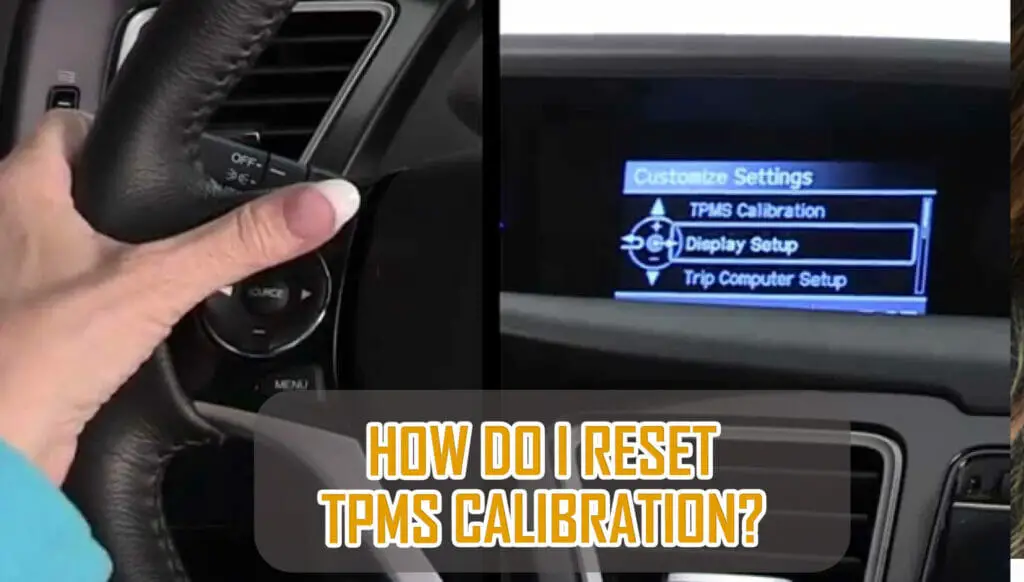
If your Tire Pressure Monitoring System (TPMS) light is on, it means that one or more of your tires is low on air. You’ll need to add air to your tires to bring them up to the recommended level. Once you’ve done that, you’ll need to reset your TPMS.
There are two ways to reset your TPMS:
1. The first way is to use your car’s onboard computer. Consult your owner’s manual to find the specific steps for your vehicle.
2. The second way is to use a TPMS reset tool. These tools are available at most auto parts stores. Once you’ve reset your TPMS, the light on your dash should go off.
If it doesn’t, you may have a problem with your TPMS sensors or system. Consult your owner’s manual or take your car to a qualified technician to have it checked out.
Where is the tpms reset button
If your vehicle has a tire pressure monitoring system (TPMS), you’ll need to know how to reset it. Otherwise, you’ll get false readings, and your vehicle won’t be able to properly monitor your tires.
Here’s a step-by-step guide on how to reset your TPMS:
1. Park your vehicle in a safe location and turn off the engine.
2. Locate the TPMS reset button. This is usually located on the dash or near the steering wheel.
3. Press and hold the reset button for a few seconds.
4. Start your engine and drive around for a few minutes to allow the system to recalibrate. If you’re still having trouble resetting your TPMS, consult your vehicle’s owner’s manual for further instructions.
How to reset the tire pressure sensor
If your car has a tire pressure monitoring system (TPMS), you may need to reset it from time to time. The TPMS is a feature that warns you when one or more of your tires are low on air, and it can be a valuable tool for keeping your car running safely. There are a few reasons why you might need to reset your TPMS.
If you get new tires, they may not have the right sensors for your TPMS, so you’ll need to reset the system to match the new tires. You may also need to reset the system if you get a flat tire and have to put on a spare. Whatever the reason, resetting your TPMS is a pretty easy process.
Here’s how to do it: 1. Start with your car’s ignition off. 2. Locate the TPMS reset button.
This is usually located on the dash, near the steering wheel.
Why is my tire pressure light on when my tires are fine
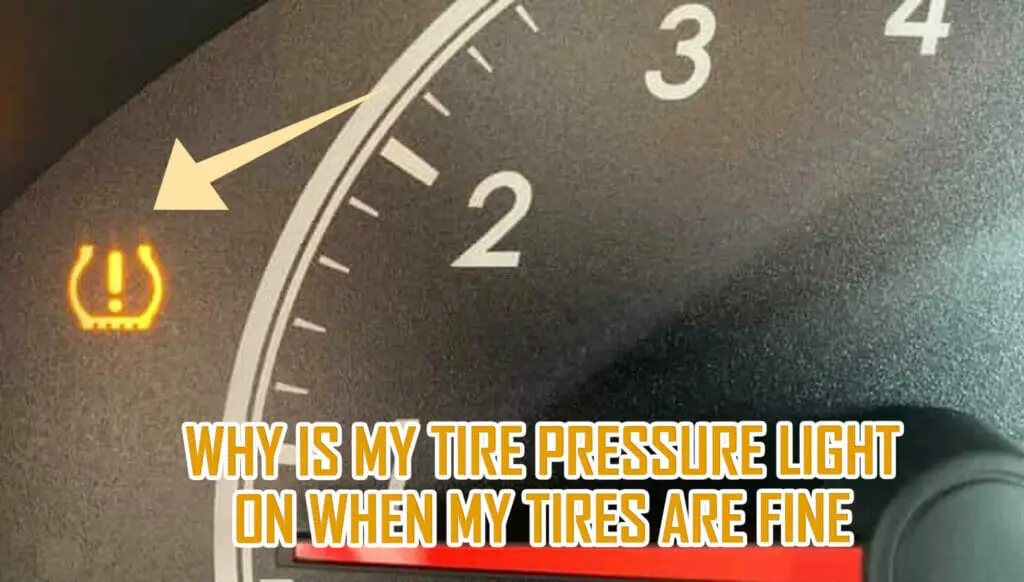
If your Tire Pressure Monitoring System (TPMS) light is on, it means that one or more of your tires is low on air. You can easily reset the system by following these simple steps:
1. Find the reset button. This is usually located on the dash, near the steering wheel.
2. Press and hold the reset button for a few seconds.
3. Start the engine and drive around for a few minutes.
4. The TPMS light should now be off. If your TPMS light doesn’t turn off after following these steps, it could mean that there is a problem with the system itself, and you should take your car to a mechanic to have it checked out.
Toyota tire pressure sensor reset
If your tire pressure monitoring system (TPMS) light is on, it means that one or more of your tires is low on air. You’ll need to add air to your tires to reset the TPMS. To reset your TPMS:
1. Add air to your tires. Check your owner’s manual to find out how much air to add.
2. Drive your car for a few miles. The TPMS light should go off once the tire pressure is back to normal. If the TPMS light doesn’t go off after you’ve added air to your tires, you may need to have your TPMS system checked by a mechanic.
Honda civic tire pressure light keeps coming on
If your tire pressure monitoring system (TPMS) light is on, it means that one or more of your tires is low on air. To reset the system, you’ll need to add air to your tires until the light goes off. There are two ways to do this:
1. Use a tire gauge to check the air pressure in each tire and add air as needed.
2. Drive your car for a few miles. The TPMS light will usually go off once the tires have warmed up and the air pressure has increased.
If you’re still having trouble, consult your car’s owner’s manual or take it to a mechanic.
Genesis g70 tire pressure reset

If your tire pressure monitoring system (TPMS) light is on, it means that one or more of your tires is low on air. You can typically find the specific tire that is low by looking at the corresponding light on your dash. Once you know which tire is low, use a tire gauge to check the pressure.
If the pressure is below the recommended level, add air until it reaches the proper level. If your TPMS light is on and you can’t find the specific tire that is low, it’s possible that the TPMS sensor is malfunctioning. In this case, you’ll need to reset the system.
The specific method for resetting your TPMS will vary depending on your vehicle, so consult your owner’s manual. In most cases, though, you can reset the system by driving at speeds above 25 mph for 10 minutes or so. Once the system is reset, the TPMS light should turn off.
Honda accord low tire pressure light on but tires are fine
If you have a tire pressure monitoring system (TPMS) in your vehicle, you may be wondering how to reset it. Depending on the type of TPMS you have, the process for resetting it may vary. Here are a few tips on how to reset your TPMS:
If you have a direct TPMS, the process for resetting it is usually pretty simple. All you need to do is re-learn the sensor IDs. This can usually be done by following the instructions in your owner’s manual.
If you have an indirect TPMS, the process for resetting it may be a bit more complicated. You may need to remove the sensor from the wheel and then place it back on. Once the sensor is back in place, you can then re-learn the sensor IDs.
Honda tire pressure light
If your Tire Pressure Monitoring System (TPMS) light is on, it means that one or more of your tires is low on air. Don’t ignore this warning! Low tire pressure can lead to tire failure, and can be dangerous.
To reset your TPMS light, you’ll need to add air to your tires until the light goes off. You can do this at any gas station or tire shop. Once your tires are inflated to the proper pressure, the light should reset itself.
If the light doesn’t reset, or if it comes on again after you’ve inflated your tires, there may be a problem with your TPMS system. In this case, you’ll need to take your car to a mechanic or dealership to have it checked out. Don’t let a TPMS light scare you!
With a little air in your tires, you’ll be back on the road in no time.
How to Reset Low Tire Pressure Light (TPMS)
Conclusion
If your check engine light is on, or you’re experiencing issues with your Tire Pressure Monitoring System (TPMS), you may need to reset the system. Here’s how: First, check your vehicle’s owner’s manual to see if there are any specific instructions for resetting your TPMS.
If not, the following steps should work:
1. Locate the TPMS reset button, which is usually located under the dash near the steering column.
2. Press and hold the reset button for about 30 seconds.
3. Start the vehicle and drive for about 15 minutes to allow the TPMS to relearn the new tire pressure readings. If you’re still having issues with your TPMS after resetting it, you may need to have the system checked by a professional.
How To Reset Tire Pressure Light On Honda Civic 2015
Honda civic 2015 has a tire pressure light that comes on when the pressure in any tire is low. To reset this light, you will need to add air to the tires until the light goes off. The light will come back on if the pressure in any tire drops below the correct level.
- Park your Honda Civic in a level area and turn off the engine
- Locate the tire pressure sensor reset button
- This button is usually located on the dash near the speedometer
- Press and hold the tire pressure sensor reset button for about 5 seconds
- Start the engine and drive for a few miles
- The tire pressure light should now be reset
How do you reset the tire pressure sensor on a 2015 Honda Civic?
If your Honda Civic has a tire pressure light that needs resetting, follow these steps:1. Find the tire pressure sensor. On the 2015 Honda Civic, it is located on the driver’s side doorjamb.
2. Use a small object, like a paperclip, to press and hold the reset button on the tire pressure sensor.3. While continuing to hold the reset button, turn the ignition key to the “On” position.4. Keep holding the reset button for a few seconds after the ignition is turned on, then release it.
5. The tire pressure light on the dash should now be reset and should not come on again unless there is a actual problem with the tire pressure.
How do you reset the low tire pressure light on a Honda Civic?
If your Honda Civic has a tire pressure light that won’t reset, there are a few things you can do to try and fix the problem. First, check the pressure in all four tires and make sure they are all inflated to the correct level. If they are, then you can try resetting the light by disconnecting the battery for a few minutes and then reconnecting it.
If that doesn’t work, you may need to take your car to a dealer or mechanic to have the system checked out.
Does 2015 Honda Civic have TPMS?
If your Honda Civic has a tire pressure light that won’t reset, there are a few things you can do to fix the issue. First, check the tire pressure in all four tires. If any of the tires are low, fill them up to the recommended pressure.
If the light still won’t reset, you may need to have the system checked by a Honda dealer or a qualified mechanic.
How do you reset the PSI on a Honda Civic?
If your Honda Civic has a Tire Pressure Monitoring System (TPMS) light that won’t reset, there are a few things you can do to reset it. First, check the pressure in all four tires and make sure they are at the correct pressure. If they are, then drive the car for a few miles to see if the light resets itself.
If it doesn’t, then you can try the following:1. Turn the ignition key to the “ON” position without starting the engine.2. Press and hold the reset button on the instrument panel for about 5 seconds.
3. Start the engine and drive for a few miles. The TPMS light should reset itself.If the above doesn’t work, then you may need to take the car to a Honda dealer to have the system checked.
How to reset tire pressure on honda civic 2016
If your Honda Civic has a tire pressure light that needs resetting, here’s how to do it. First, find the tire pressure sensor, which is located on the inside of the wheel well. Next, use a tire pressure gauge to check the pressure in all of your tires.
If any of the tires are low, fill them up to the recommended pressure. Finally, use a reset tool to clear the tire pressure light on your dash.If you have a Honda Civic from 2015 or newer, you may have noticed that the tire pressure light comes on from time to time.
This is because your car is equipped with a tire pressure sensor that monitors the pressure in your tires. If any of the tires are low, the light will come on as a reminder to fill them up.Fortunately, resetting the tire pressure light is a pretty easy process.
First, use a tire pressure gauge to check the pressure in all of your tires.
2015 honda civic tire pressure light keeps coming on
If your Honda Civic’s tire pressure light is on, it means that one or more of your tires is low on air. To reset the light, simply add air to the tire or tires that are low. Once the pressure is back to normal, the light will reset itself.
If you’re not sure which tire is low, you can check the pressure in all four tires with a tire pressure gauge. The proper pressure for your Civic’s tires is listed in the owner’s manual.If your tire pressure light is on, don’t ignore it!
Low tire pressure can lead to premature tire wear and even a blowout. So be sure to check your tires regularly and keep them inflated to the proper pressure.
How to reset tire pressure on honda civic 2017
If your Honda Civic 2015 has a tire pressure light that needs resetting, follow these steps:1. Locate the reset button. This is usually located on the dash near the speedometer.
2. Press and hold the reset button for about 5 seconds.3. The tire pressure light should now be reset and should go off when you start driving.
How to reset tire pressure on honda civic 2019
If your 2015 Honda Civic has a tire pressure light that needs resetting, here’s what you need to do. First, make sure that all four of your tires are inflated to the correct pressure. Once they are, turn on your car and press the button on your dashboard that looks like a car with a wavy line under it.
This is the button that controls your car’s settings and features. Find the tire pressure light in the menu and press the reset button. If the light doesn’t reset, consult your car’s owner’s manual for further instructions.
2014 honda civic tpms reset
If your Honda Civic has a tire pressure light that needs resetting, there are a few things you can do. First, check the pressure in all four tires and make sure they’re at the correct levels. Once you’ve done that, you can try one of the following methods to reset the light.
Method 1:1. Turn the key to the ON position without starting the engine.2. Press and hold the trip meter reset button.
3. While still holding the button, turn the key to the OFF position.4. Release the button and turn the key back to the ON position. The light should now be reset.
Method 2:1. Turn the key to the ON position without starting the engine.2. Press and hold the trip meter reset button.
3. While still holding the button, turn the key to the OFF position.
2014 honda civic tire pressure light keeps coming on
If your tire pressure light is on in your Honda Civic 2015, it’s time to reset it. Here’s how:1. Start by checking your tire pressure.
Make sure that all four tires are inflated to the correct pressure.2. Once your tires are inflated, turn on your Honda Civic and press the “Menu” button on your dash.3. Select “Vehicle Settings” from the menu.
4. Scroll down to “Tire Pressure” and select it.5. Select “Reset” and then press “OK.”Your tire pressure light should now be reset!
Reset tire pressure honda civic 2020
If your Honda Civic’s tire pressure light is on, it means that one or more of your tires is low on air. To reset the light, simply fill up your tires to the proper air pressure.There are a few things to keep in mind when checking and filling your tires.
First, make sure that you’re using a reliable tire pressure gauge. Many gas stations have air pumps that come with a gauge, but these are often inaccurate. Second, consult your Honda Civic’s owner’s manual to find out the proper air pressure for your tires.
Overinflating your tires can be just as dangerous as underinflating them, so it’s important to get it right.Once you’ve filled up your tires, the tire pressure light should reset itself. If it doesn’t, or if it comes back on after a short while, there may be a problem with one of your tire sensors.
2013 honda civic tpms reset
If the Tire Pressure Monitoring System (TPMS) light on your 2015 Honda Civic is on, it means that one or more of your tires is low on air pressure. You can usually reset the light by filling up your tires to the proper air pressure.To find out how much air your tires need, consult your owner’s manual.
Each tire should have the proper air pressure listed on the sidewall. Once you’ve filled up your tires, the TPMS light should reset itself.If the light doesn’t reset, or if it keeps coming on even after you’ve filled up your tires, there may be a problem with your TPMS system.
In this case, you’ll need to take your car to a Honda dealer or a qualified mechanic for diagnosis and repair.
Conclusion
If your Honda Civic has a tire pressure light that won’t reset, there are a few things you can try. First, check the tire pressure in all four tires. If the pressure is low in one or more of the tires, fill them up to the recommended pressure and see if the light will reset.
If the tire pressure is fine, then the next thing to check is the TPMS sensor in each tire. If a sensor is damaged or not working properly, it can cause the tire pressure light to stay on. You’ll need to have the sensor replaced if that’s the case.
If everything looks good with the tires and sensors, then the issue may be with the fuse or the TPMS system itself. Consult your Honda Civic’s owner’s manual for more information on troubleshooting the TPMS system.
How To Remove Transmission Cooler Lines From Radiator
The transmission cooler lines are responsible for keeping the transmission fluid cool as it circulates through the radiator. Over time, these lines can become clogged with debris and need to be replaced. Fortunately, this is a relatively easy process that can be completed in a few simple steps.
- Park your vehicle on a level surface and put the transmission in park or neutral
- Locate the transmission cooler lines at the radiator
- There will be two lines, one for the inlet and one for the outlet
- Place a drain pan under the radiator to catch any transmission fluid that may drip out
- Using a wrench, loosen the transmission cooler line fittings at the radiator
- Once the fittings are loose, remove the transmission cooler lines from the radiator
- Have a rag handy to clean up any transmission fluid that may have leaked out
- Repeat the process for the other transmission cooler line
How do you remove a radiator transmission line?
If you need to remove your transmission cooler lines from your radiator, there are a few things you need to do first. First, you need to disconnect the battery so you don’t accidentally electrocute yourself. Next, you need to drain the transmission fluid.
You can do this by disconnecting the transmission cooler line from the radiator and then starting the car. Once the fluid is drained, you can remove the transmission cooler lines from the radiator. Finally, you need to refill the transmission fluid.
You can do this by adding transmission fluid to the radiator through the transmission cooler line.
How do you remove transmission oil cooler lines?
If your car has an automatic transmission, then it likely has a transmission cooler. The transmission cooler is a small radiator-like device that helps to keep the transmission fluid cool. The transmission fluid is responsible for lubricating and cooling the transmission, so it is important to keep it at the correct temperature.
If you are doing any work on your car’s transmission, you may need to remove the transmission cooler lines from the radiator. This is not a difficult task, but it is important to be careful so that you do not damage the lines.The first step is to locate the transmission cooler lines.
They will be attached to the radiator at one end, and to the transmission at the other. You will need to follow the lines from the radiator to the transmission to find where they are attached.Once you have located the lines, you will need to disconnect them from the radiator.
There will be a clamp or fitting that is holding the line in place.
How do transmission cooler lines connect to radiator?
If your transmission cooler lines are leaking, you’ll need to remove them from the radiator so that you can repair or replace them. This can be a difficult task, but with a little patience and the right tools, you can do it yourself.First, you’ll need to locate the transmission cooler lines.
They’ll be running from the transmission to the radiator, and will likely be secured with clamps. Once you’ve found the lines, you’ll need to loosen the clamps so that you can remove the lines.Next, you’ll need to disconnect the lines from the transmission.
This can be done by using a wrench to loosen the fittings. Once the lines are disconnected, you can remove them from the radiator.Finally, you’ll need to clean the fittings on the transmission and the radiator.
This can be done with a wire brush or a piece of sandpaper.
How do you disconnect a transmission line?
If your car has an automatic transmission, then it likely has a transmission cooler. The transmission cooler is responsible for keeping the transmission fluid cool, and it does this by circulating transmission fluid through a cooling system. The most common type of cooling system is a radiator, and the transmission cooler lines are what connect the transmission cooler to the radiator.
If you need to remove the transmission cooler lines from your radiator, there are a few things you need to do first. First, you need to find the transmission cooler line that goes to the radiator. This is usually easy to find, as it will be the line that is closest to the radiator.
Once you have found this line, you need to follow it to the point where it connects to the transmission cooler.At the point where the transmission cooler line connects to the transmission cooler, you will see a nut that holds the line in place. This nut needs to be removed in order to disconnect the line from the cooler.
How to remove transmission cooler lines from radiator without tool
If you need to remove your transmission cooler lines from your radiator, there are a few things you need to know. First, make sure that your vehicle is turned off and the engine is cool before beginning this project. Next, locate the transmission cooler lines on your radiator.
There are usually two lines, one for the input and one for the output.To remove the transmission cooler lines, you will need to use a line wrench. Place the line wrench on the fitting that secures the line to the radiator.
Then, turn the line wrench counter-clockwise to loosen the fitting. Once the fitting is loose, you can pull the transmission cooler line off of the radiator.Repeat this process for the other transmission cooler line.
Once both lines are removed, you can proceed with whatever repair or replacement you need to do. Be sure to use new O-rings when reinstalling the transmission cooler lines to ensure a tight seal.
Transmission lines to radiator leaking
If you need to remove the transmission cooler lines from your radiator, there are a few things you need to know. First, you need to identify which line is the input and which is the output. The input line will be the one that’s attached to the transmission, and the output line will be the one that goes to the cooler.
Once you’ve identified the two lines, you can use a wrench to loosen the line nuts at the radiator. Be sure to have a drain pan handy to catch any fluid that may spill out. Once the nuts are loose, you can remove the lines and discard them.
How to remove transmission cooler lines from radiator ford
If you need to remove your transmission cooler lines from your radiator, there are a few things you’ll need to do. First, you’ll need to disconnect the battery to avoid any electrical issues. Next, you’ll need to drain the transmission fluid.
Once the fluid is drained, you can remove the cooler lines from the radiator. Be sure to have a catch pan handy to catch any fluid that may drip out. Finally, you can reinstall the transmission cooler lines and fill the transmission with fresh fluid.
How to connect transmission lines to radiator
If you need to remove your transmission cooler lines from your radiator, there are a few things you need to know first. First, transmission cooler lines are under pressure, so you will need to relieve that pressure before you can remove the lines. Second, the lines are held in place by clips or brackets, so you will need to remove those before you can take the lines off.
To remove the transmission cooler lines from your radiator, start by finding the clips or brackets that are holding the lines in place. These are usually located near the radiator. Once you have found the clips or brackets, use a screwdriver or a pair of pliers to remove them.
Once the clips or brackets are removed, you can now pull the transmission cooler lines off of the radiator. Be careful when doing this, as the lines are still under pressure. Once the lines are off, you can now proceed to install the new transmission cooler lines.
Transmission cooler lines diagram
Removing transmission cooler lines from a radiator can be a difficult and frustrating task. However, it is possible to remove them with the right tools and a little bit of patience.The first step is to locate the transmission cooler lines.
They will be located near the bottom of the radiator, on the side that faces the engine. Once you have located the lines, you will need to identify the line that goes to the transmission and the line that goes to the radiator. The line that goes to the transmission will be the larger of the two lines.
Next, you will need to disconnect the transmission cooler line from the radiator. To do this, you will need to use a pair of pliers. First, locate the retaining clip that holds the transmission cooler line in place.
The clip is usually located near the end of the line. Once you have located the clip, use the pliers to remove it.
Conclusion
Removing transmission cooler lines from a radiator can be a difficult and time-consuming task. However, with the proper tools and a little patience, it can be done relatively easily.First, disconnect the negative battery terminal to prevent any electrical shorts.
Next, locate the transmission cooler lines at the radiator. There are typically two lines, an upper and a lower.Using a wrench or pliers, loosen the retaining nuts or clamps that secure the lines to the radiator.
Once the clamps are loose, carefully pull the lines away from the radiator. There may be some fluid leakage, so have a drain pan ready to catch any drips.With the lines removed, the final step is to clean the radiator mating surfaces.
This can be done with a rag and some brake cleaner. Once the surfaces are clean, the new transmission cooler lines can be installed.Overall, removing transmission cooler lines from a radiator is not a difficult task.
How To Replace Main Bearings Without Removing Crank
If your main bearings are starting to go, you may be able to replace them without removing the crankshaft. This can be a tricky repair, so it’s important to follow the steps carefully. First, you’ll need to remove the engine’s oil pan.
Next, you’ll need to disconnect the connecting rods from the crankshaft. Once the connecting rods are disconnected, you’ll be able to remove the main bearings. To install the new bearings, you’ll need to press them into place.
Finally, you’ll need to reassemble the engine.
Can you replace main bearings without machining?
If you’re lucky enough to have a press in your shop, replacing main bearings without removing the crankshaft is a relatively easy job. The first step is to remove the oil pan and oil pump so that you have access to the bottom of the engine. Next, remove the main cap bolts and the main cap.
Once the main cap is off, you can press the old bearings out of the block and press the new ones in. Be sure to use plenty of bearing grease on the new bearings before you install them.If you don’t have a press, you can still replace the bearings without removing the crankshaft.
The first step is to remove the oil pan and oil pump so that you have access to the bottom of the engine. Next, use a hammer and punch to drive the old bearings out of the block. Be careful not to damage the bearing surfaces.
Once the old bearings are out, you can press the new ones in.
Can you just replace main bearings?
If you’re planning on replacing your main bearings without removing the crankshaft, there are a few things you need to know. First, you’ll need to support the engine so that the crankshaft doesn’t fall out when you remove the bearings. You can do this by using a block and tackle, or a floor jack and some wood blocks.
Once the engine is supported, you’ll need to remove the oil pan and the oil pump. Then, you’ll be able to access the main bearings. To remove the old bearings, you’ll need to heat them up with a torch.
Once they’re hot, you can pry them out with a screwdriver.To install the new bearings, you’ll need to first clean the bearing surfaces with a wire brush. Then, you’ll need to apply some bearing grease to the bearings.
Once the bearings are greased, you can press them into place.
How do you remove the main bearing on a crankshaft?
If your car is making a grinding noise, it may be time to replace the main bearings. The main bearings help support the crankshaft, so if they are worn out, the crankshaft can start to wobble and cause damage to the engine. You don’t have to remove the crankshaft to replace the main bearings, but it is a good idea to have a professional do it.
Here’s how to replace main bearings without removing the crankshaft:1. Jack up the car and remove the wheels.2. Disconnect the battery.
3. Remove the oil pan.4. Remove the main bearing caps.5. Remove the old bearings and clean the crankshaft.
6. Install the new bearings and main bearing caps.7. Reinstall the oil pan.8. Reconnect the battery.
How do you install main bearings?
If your main bearings are worn out, you’ll need to replace them. But, you don’t necessarily have to remove the crankshaft to do it. Here’s how to replace main bearings without removing the crankshaft:
1. Remove the oil pan and oil pump. This will give you access to the main bearings.
2. Use a press to remove the old bearings and install the new ones.
3. Reinstall the oil pan and oil pump.
4. Fill the engine with oil and you’re good to go! This is a pretty straightforward process, but it’s important to make sure that you press the new bearings in evenly.
If you don’t, it could cause problems down the road.
Conclusion
Assuming you are referring to an engine:The main bearing caps hold the bearings in place. To remove them, you will need a socket and ratchet.
Remove the bolts holding the cap in place. The bearings will be loose now, so be careful not to drop them. You can now remove the old bearings and install the new ones.
Make sure the new bearings are seated properly and then reinstall the bearing caps.
How To Remove Carrier Bearing Without A Press
If you’re looking to remove a carrier bearing without a press, there are a few methods you can try. One is to use a chisel and hammer to tap the bearing out of the housing. You can also try using a pry bar to gently pry the bearing out.
If either of these methods doesn’t work, you can try heating up the housing with a torch and then using a pry bar to remove the bearing.
- Jack up the vehicle and support it on jack stands
- Remove the driveshaft
- unbolt the carrier bearing from the housing
- using a pry bar, carefully pry the carrier bearing out of the housing
- clean the housing and install a new carrier bearing
- re-install the driveshaft
How do you remove carrier bearings without a puller?
Assuming you don’t have access to a press, the best way to remove a carrier bearing is to use a drift punch and a hammer. Start by gently tapping the drift punch on the inner race of the bearing. As you continue to tap, the bearing will start to loosen and eventually fall out.
You may need to use a little bit of force to get the bearing out, but be careful not to damage the race. Once the bearing is out, you can clean up the race and install a new bearing.
How do you remove a carrier bearing from a drive shaft without a press?
If you’re working on a car with a rear-wheel drive layout, there’s a good chance you’ll need to remove the carrier bearing at some point. This can be a tricky process, but with the right tools and a little bit of know-how, it’s not too difficult.The first step is to remove the driveshaft.
This will give you access to the carrier bearing bolts. Once the driveshaft is out of the way, you can use a socket and ratchet to remove the bolts.Once the bolts are out, the carrier bearing can be removed by hand.
Be careful not to damage the seal.Now that the carrier bearing is out, you’ll need to install the new one. This is where a press comes in handy, but if you don’t have one, you can use a few different methods.
One method is to use a socket and ratchet to thread the new bearing onto the bolts.
How do you remove a carrier bearing from a drive shaft?
If you’re attempting to remove a carrier bearing without a press, you’re in for a bit of a challenge. carrier bearings are designed to be extremely tight-fitting, so that they can handle the immense force and weight of a transmission. This means that they can be incredibly difficult to remove without the proper tools.
That being said, it is possible to remove a carrier bearing without a press, though it will undoubtedly be a difficult and time-consuming task. The first step is to remove the transmission from the vehicle. Once the transmission is out, you’ll need to remove the differential cover.
Once the cover is off, you’ll be able to see the carrier bearing. It will be held in place by four bolts. You’ll need to use a socket wrench to remove these bolts.
Once the bolts are removed, the carrier bearing can be pried off of the differential.
How do you press a wheel bearing into a hub without a press?
If you need to remove a carrier bearing without a press, you can use a few different methods. One is to use a chisel and punch to drive the bearing out. Another is to use a hydraulic jack to push the bearing out.
Whichever method you choose, be sure to use caution and go slowly to avoid damaging the bearing or the surrounding area.
Carrier bearing removal tool
If you’re looking to remove a carrier bearing without a press, there are a few ways you can go about it. The most common way is to use a bearing puller. This is a tool that essentially uses leverage to remove the bearing.
You can also use a Hydraulic Bearing Puller, which uses hydraulic pressure to remove the bearing. Finally, you can use a Slide Hammer and Bearing Puller Set. This method uses a hammer to hit the back of the bearing, which pops it out.
Drive shaft center support bearing removal tool
If you’re looking to remove your car’s carrier bearing without a press, there are a few different ways you can go about it. One option is to use a bearing separator, which is a tool that sits over the bearing and pulls it off. Another option is to use a gear puller, which is a tool that attaches to the teeth of the gear and pulls it off.
And lastly, you can use a hydraulic jack to push the bearing out from the inside.Here’s a step-by-step guide on how to remove your car’s carrier bearing without a press:1. Start by removing the bolts that hold the bearing in place.
You’ll likely need a socket wrench to do this.2. Once the bolts are removed, you can use a bearing separator to pull the bearing off. Just place the separator over the bearing and turn the handle to pull it off.
How to remove carrier bearing off drive shaft
If you’re planning on removing a carrier bearing without a press, there are a few things you’ll need to keep in mind. First, you’ll need to support the carrier bearing with a block of wood or something similar. This will prevent the carrier bearing from falling out while you’re removing it.
Next, you’ll need to use a hammer to gently tap on the carrier bearing. Be careful not to hit it too hard, as this could damage the bearing. Once the carrier bearing is loose, you should be able to remove it by hand.
Carrier bearing removal tool autozone
If you’re planning on removing your carrier bearing without a press, there are a few things you’ll need to keep in mind. First, you’ll need to support the weight of the differential with a jack or similar device. Next, you’ll need to remove the bolts that hold the carrier bearing in place.
Once the bolts are removed, the carrier bearing can be carefully removed by hand.Keep in mind that the carrier bearing is under a lot of tension, so be careful not to damage it when removing it. Also, be sure to clean the area around the carrier bearing before reinstalling it.
Once the new carrier bearing is in place, you can then bolt it down and lower the differential.
Diy carrier bearing puller
If you’re looking to remove a carrier bearing without a press, there are a few different methods you can try. One is to use a screwdriver and a hammer to gently tap the bearing out of its housing. Another is to use a pry bar to lever the bearing out.
Whichever method you choose, be careful not to damage the housing in the process. Once the bearing is out, you can inspect it for damage and replace it if necessary.
Heavy duty carrier bearing puller
If you’re faced with removing a carrier bearing without a press, never fear! There are a few ways to do it without all the fancy equipment.One way is to use a large screwdriver or pry bar.
Place the tip of the screwdriver or pry bar under the lip of the bearing, and then hit the other end with a hammer. This will slowly loosen the bearing. You may need to do this a few times to get the bearing completely loose.
Another way is to use a socket and a ratchet. Place the socket over the bearing, and then ratchet it until the bearing pops out.Once the bearing is loose, you can remove it by hand.
Be careful not to damage the shaft or the housing while you’re doing this.With a little elbow grease, you can remove a carrier bearing without a press!
Conclusion
If you’re looking to remove your carrier bearing without a press, there are a few different ways you can do it. One way is to use a slide hammer, which is essentially a large metal rod with a handle on one end and a hook on the other. You attach the hook to the bearing, and then use the handle to apply pressure and force the bearing out.
Another way you can remove the carrier bearing without a press is by using a pry bar. Place the pry bar under the bearing and then apply pressure to pry it out. You may need to use a few different pry bars to get the job done, depending on the size and strength of the bearing.
Once you have the carrier bearing removed, you can then proceed to remove the rest of the bearings in the same manner. Just be sure to work slowly and carefully to avoid damaging any of the other parts in the process.
How To Check Tire Pressure Honda Civic 2018
Assuming you would like a step-by-step guide on how to check the tire pressure for a Honda Civic in 2018:Start by parking your Honda Civic on level ground and turning off the engine. Next, locate the tire pressure gauge on the driver’s side door.
Unscrew the cap to the tire pressure gauge and press the gauge firmly onto the valve stem of the tire. The gauge will give you a reading of the current tire pressure. Compare this number to the recommended tire pressure for your Honda Civic, which can be found in the owner’s manual or on the door placard.
If the number on the gauge is lower than the recommended tire pressure, use a tire air pump to add air to the tire until it reaches the recommended pressure. If the number on the gauge is higher than the recommended tire pressure, use the tire air pump to release air from the tire until it reaches the recommended pressure.
- Open the driver’s side door and locate the tire pressure information label on the door frame
- Locate the recommended tire pressure for your Honda Civic on the label
- Use a tire pressure gauge to check the pressure of each tire
- Add air to each tire as needed to reach the recommended pressure
How do I check my tire pressure on Honda Civic?
It is important to check your tire pressure regularly to maintain optimal performance and safety while driving. The recommended tire pressure for a 2018 Honda Civic is 32 psi for the front tires and 30 psi for the rear tires.To check the pressure in your tires, use a digital tire pressure gauge.
Insert the gauge into the tire valve and wait for the reading to stabilize. Compare the reading to the recommended pressure for your tires. If the pressure is too low, add air to the tires until they reach the proper pressure.
If the pressure is too high, release air from the tires until they reach the proper pressure.It is also important to check the condition of your tires regularly. Look for signs of wear and tear, such as cracks, bald spots, or bulges.
If you notice any damage, replace the tire immediately.Driving on properly inflated and maintained tires will help improve your fuel economy and extend the life of your tires.
Does a 2018 Honda Civic tell you tire pressure?
It’s important to check your tire pressure regularly, and it’s especially important to do so before long trips. Here’s how to check the tire pressure on your 2018 Honda Civic:1. Park your Civic on a level surface and turn off the engine.
2. Locate the tire pressure monitoring system (TPMS) reset button, which is located on the driver’s side of the instrument panel.3. Press and hold the TPMS reset button for about 5 seconds.4. The TPMS system will chime and the low tire pressure warning light on the dash will turn off.
5. Use a tire pressure gauge to check the pressure of all four tires. The ideal pressure for the 2018 Civic is 32 psi.6. If any of the tires are low on pressure, use a air compressor to add air until the pressure is at the proper level.
7.
How do you check tire pressure on a 2018?
If you own a Honda Civic from 2018 or newer, you may be wondering how to check your tire pressure. Here’s a quick guide on how to do just that:First, locate the tire pressure monitoring system (TPMS) reset button on your dash.
It should be near the bottom of the center stack, to the left of the steering wheel.Next, use a tire pressure gauge to check the pressure in each of your tires. The ideal pressure for a Honda Civic is 32 psi (pounds per square inch).
If any of your tires are low on pressure, use a portable air compressor to add air until the pressure is at the correct level.Once you’ve checked and corrected the pressure in all four tires, press and hold the TPMS reset button for about five seconds. This will reset the system and allow it to properly monitor your tire pressure going forward.
That’s all there is to it!
Where is the TPMS button on a 2018 Honda Civic?
It is always important to keep your tires properly inflated. This helps with fuel economy and extends the life of your tires. You should check your tire pressure at least once a month.
You can do this easily at home with a tire pressure gauge.To check your tire pressure on a Honda Civic 2018, first locate the tire pressure monitoring system (TPMS) reset button. This is usually located on the driver’s side, near the instrument panel.
Once you have found the reset button, press and hold it for about 5 seconds.Next, use your tire pressure gauge to check the pressure in all 4 tires. The recommended tire pressure for a Honda Civic 2018 is 32 psi.
If any of your tires are low, use a portable air compressor to add air until the pressure is back to 32 psi.Finally, press the TPMS reset button again to turn off the tire pressure warning light.
How to check tire pressure honda civic 2016
If you own a Honda Civic 2018, you may be wondering how to check the tire pressure. Luckily, it’s a pretty simple process. All you need is a tire pressure gauge.
First, find the tire pressure sticker on your driver’s door. This will tell you the recommended tire pressure for your car. Then, use your tire pressure gauge to check the pressure in each tire.
If the pressure in any tire is below the recommended amount, use a air compressor to add air until it reaches the correct level. Then, check the pressure again to make sure it’s at the right level.That’s all there is to it!
Checking your tire pressure is a quick and easy way to keep your car running smoothly.
How to check tire pressure on honda civic 2019
If you own a Honda Civic 2018 or any other vehicle with tires, it’s important to know how to check the tire pressure. This is a simple process that only takes a few minutes and can save you a lot of money in the long run. Here’s how to do it:
1. Locate the tire pressure gauge. This is usually located near the air fill valve on the side of the tire.2. Remove the valve cap from the tire.
3. Place the tire pressure gauge on the valve and press down firmly to get a reading.4. Compare the reading to the recommended tire pressure for your vehicle. This can be found in the owner’s manual or on a sticker inside the driver’s door.
5. If the reading is lower than the recommended pressure, use an air compressor or tire inflator to add air to the tire until it reaches the proper pressure.
How to check tire pressure honda civic 2020
If you own a Honda Civic 2018, you may be wondering how to check the tire pressure. It’s actually quite simple! Here’s what you need to do:
1. Locate the tire pressure monitoring system (TPMS) reset button, which is located on the driver’s side door panel.2. Press and hold the reset button for about 5 seconds.3. The TPMS system will then enter learning mode, and the Tire Pressure light on the dash will illuminate.
4. Now, simply drive around for a bit until the light goes out. This means that the system has learned the new tire pressure and is now functioning properly.That’s all there is to it!
Checking the tire pressure on your Honda Civic 2018 is quick and easy. Now you can hit the road with peace of mind, knowing that your tires are properly inflated.
How to check tire pressure honda civic 2017
If you own a Honda Civic from 2018 or newer, checking your tire pressure is easy! All you need is a digital tire pressure gauge.To check your tire pressure:
1. Park your car on level ground and turn off the engine.2. Locate the tire pressure sensor on your tire. It will look like a small black cap with a white center.
3. unscrew the cap and place the tire pressure gauge on the sensor.4. The gauge will display the current pressure in your tires. Compare this number to the recommended pressure for your tires, which can be found in your owner’s manual or on the door placard on the driver’s side of your car.
5. If your tire pressure is low, use a portable air compressor to add air to your tires. If your tire pressure is too high, use the release valve to let some air out.
How to check tire pressure honda civic 2022
It’s important to check your tire pressure regularly to ensure your safety on the road. Here’s how to do it on a Honda Civic from 2018:1. Park your car on a level surface and turn off the engine.
2. Locate the tire pressure gauge on the driver’s side door pillar.3. Remove the cap from the gauge and press the button to turn it on.4. Press the tip of the gauge onto the valve stem of the tire you’d like to check.
5. The gauge will show you the current pressure in the tire. Compare this to the recommended pressure listed in your owner’s manual.6. If the pressure is low, use a tire inflator to add air until you reach the recommended level.
7. Replace the cap on the valve stem and put the tire pressure gauge away.
How to check tire pressure on honda civic 2021
It’s important to keep your tires properly inflated in order to improve gas mileage and extend the life of your tires. Under-inflated tires can lead to a blowout, so it’s important to check your tire pressure regularly. Here’s how to do it on a Honda Civic:
1. Locate the tire pressure monitoring system (TPMS) reset button, which is usually located near the steering wheel.2. Press and hold the TPMS reset button for about five seconds.3. The TPMS light on the dash will begin flashing, indicating that the system is resetting.
4. Once the light stops flashing, your Honda Civic’s tire pressure monitoring system is reset and you can check your tire pressure.
Reset tire pressure honda civic 2018
If you own a Honda Civic 2018 or any other vehicle for that matter, it is important to know how to check your tire pressure. This is not only for safety reasons, but also to keep your tires in good condition and extend their lifespan.There are a few different ways that you can check your tire pressure.
The first is to use a tire pressure gauge. This is the most accurate way to check your tire pressure. You can find a tire pressure gauge at most auto parts stores.
Another way to check your tire pressure is to use the tire pressure light on your dash. If this light comes on, it means that one or more of your tires is low on air. You can check your tire pressure by using the tire pressure gauge or by using the tire pressure light on your dash.
The last way to check your tire pressure is to look at your tires. If your tires look low on air, they probably are.
How to check tire pressure honda civic 2015
It’s important to keep your tires properly inflated because it can help improve your gas mileage and extend the life of your tires. You should check your tire pressure at least once a month, and more often if you drive frequently or live in an area with extreme weather conditions.To check the tire pressure on your Honda Civic 2018, you’ll need a tire pressure gauge.
You can find one at most auto parts stores, or you can purchase one online.To use the tire pressure gauge, first remove the cap from the tire valve. Then, press the tire pressure gauge onto the valve and hold it there for a few seconds.
The gauge will give you a reading in PSI (pounds per square inch).If the reading is below the recommended PSI for your tires, you’ll need to add air. You can do this at most gas stations or auto parts stores.
Conclusion
If you own a Honda Civic from the 2018 model year, then you’ll want to know how to check the tire pressure. It’s actually a pretty simple process, and only takes a few minutes. Here’s what you need to do:
1. Park your Civic on a level surface and turn off the engine.2. Locate the tire pressure monitoring system (TPMS) reset button, which is usually located on the driver’s side door panel or near the steering wheel.3. Press and hold the TPMS reset button for about five seconds.
4. The TPMS light on the dash should now be blinking.5. Use a tire pressure gauge to check the pressure in all four tires.6. Add air to any tires that are low, and then press the TPMS reset button again to turn off the light.
That’s all there is to it!
How To Change Tire On Rim Without Machine
It’s a pain having a flat tire, and it’s even worse when you don’t have access to a tire machine. If you’re stuck in this situation, there’s still hope. You can change a tire on a rim without a machine, but it’s a bit more difficult.
Here’s a step-by-step guide on how to do it.
- If you don’t have access to a tire machine, you can still change your tire by hand
- It’s a little more difficult, but it can be done
- Here’s how:1
- Loosen the lug nuts: Use a lug wrench to loosen the lug nuts on your wheel
- Turn them counterclockwise until they’re loose, but don’t remove them completely
- Lift the wheel off: Once the lug nuts are loose, you can lift the wheel off
- If you’re struggling, try using a jack to lift it up
- Take the old tire off: Remove the old tire from the rim
- You may need to use a tire iron to pry it off
- Put the new tire on: Put the new tire on the rim and make sure it’s seated correctly
- Tighten the lug nuts: Use the lug wrench to tighten the lug nuts
- Turn them clockwise until they’re
Can you remove a tire from the rim at home?
Assuming you don’t have a machine to help you, you’ll need to use a few household tools to help you remove and install a new tire on your rim. Here’s what you’ll need:– A tire iron or a lug wrench
– A jack
– A spare tire
– A socket wrench (optional)
First, you’ll need to loosen the lug nuts on your wheel. You’ll need to do this before you jack up the car, otherwise you won’t be able to turn the tire iron or lug wrench. Once the lug nuts are loose, you can jack up the car and place the jack under the frame or axle.
Make sure the car is secure before you continue.Now it’s time to remove the tire. You can do this by hand, but it’s often easier to use a socket wrench to remove the bolts holding the tire in place.
Once the bolts are removed, the tire should come right off.
Can you put a tire on a rim by hand?
If you have a flat tire, you may be able to change it without a machine. This is a good option if you are on the road and cannot get to a service station. It is also a good option if you do not have a machine or the tools to use one.
To change a tire on a rim without a machine, you will need the following tools:– A tire iron– A lug wrench
– A jack– A spare tire– A wheel chock
First, use the tire iron to loosen the lug nuts on the wheel. Do not remove them completely. Next, use the jack to lift the car up so that the wheel is off the ground.
Place the wheel chock behind the wheel that is still on the ground.Now you can remove the lug nuts and the wheel. Put the spare tire on the rim and tighten the lug nuts.
Can you change car tires without a machine?
If you have a flat tire, you may be tempted to just drive on it until you can get to a service station. But that’s not a good idea. Driving on a flat tire can damage the tire and the wheel, and it’s also a safety hazard.
It’s much better to change the tire yourself.Changing a tire is actually not that difficult, and you don’t need a machine to do it. You can change a tire on a rim without a machine.
Here’s what you’ll need to do it:1. Jack up the car. You’ll need to jack up the car so that you can remove the wheel.
Place the jack under the car at the jack point. Then crank the jack until the wheel is lifted off the ground.2. Remove the wheel.
Once the wheel is lifted off the ground, remove the lug nuts that hold the wheel in place. Then pull the wheel off the car.
How do you manually remove a tire from a rim?
If you don’t have access to a tire machine, changing a tire on a rim can be a little bit more difficult. Here are a few tips on how to change a tire on a rim without a machine:1. Use a tire iron to loosen the lug nuts on the wheel.
Be sure to loosen them in a counter-clockwise motion.2. Once the lug nuts are loose, remove them completely and set them aside.3. Use your hands to grab the tire and pull it off of the rim.
You may need to wiggle it a bit to get it to come off.4. Take your new tire and line it up with the rim. Slowly push it onto the rim, being careful not to damage the tire.
5. Once the tire is on the rim, replace the lug nuts and tighten them in a clockwise motion. Be sure to tighten them until they are snug.
How to put tire on rim without machine
If you don’t have access to a machine to change your tire, don’t worry – it’s still possible to do it by hand. Here’s how:1. Start by loosening the lug nuts on the wheel that you need to change.
You’ll need a wrench to do this.2. Once the lug nuts are loose, lift the wheel off of the car. If the wheel is stuck, you may need to use a tire iron to help pry it loose.
3. Take the old tire off of the wheel.4. Put the new tire on the wheel. Make sure that it is seated properly and that the lug nuts are tight.
5. Lower the wheel back onto the car. Again, use the wrench to tighten the lug nuts.And that’s it!
You’ve successfully changed a tire by hand.
How to change a tire without a tire changer
If you’re stranded on the side of the road with a flat tire, you may be wondering how you’re going to change it. After all, you can’t just take the tire off without a machine, right? Wrong!
With a little elbow grease, you can change a tire on a rim without a machine.Here’s what you’ll need:– A lug wrench
– A jack
– A spare tireFirst, loosen the lug nuts on the flat tire with the lug wrench.
Once they are loose, jack up the car so that the flat tire is off the ground. Finish taking the lug nuts off and remove the flat tire.Now, it’s time to put on the spare tire.
Put the spare tire on the rim and hand-tighten the lug nuts. Once the lug nuts are tight, lower the car back down to the ground. Now use the lug wrench to fully tighten the lug nuts.
Removing tires from rims for scrap
It is possible to change a tire on a rim without using a machine, but it is important to know a few things before attempting this. First, it is important to have the right tools. A tire iron and a jack are essential.
It is also helpful to have a lug wrench, although this is not strictly necessary. Second, it is important to know how to loosen the lug nuts. They should be loosened a few turns by hand before using the tire iron.
This will make it easier to remove them later. Third, it is important to know how to jack up the car. The jack should be placed under the frame of the car, not under the engine.
Fourth, it is important to remove the old tire. The tire iron should be used to remove the lug nuts, and then the tire can be pulled off the rim. Fifth, it is important to put the new tire on the rim.
How to change tire on rim with machine
It is not difficult to change a tire on a rim without using a machine, but it does require some effort. The first step is to remove the wheel from the vehicle. This can be done by loosening the lug nuts with a wrench and then lifting the wheel off.
Next, the old tire must be pried off the rim. This can be done with a crowbar or a flat head screwdriver. Once the old tire is off, the new tire can be put on in its place.
Again, the lug nuts must be tightened by hand to secure the wheel. Finally, the wheel can be replaced on the vehicle and the lug nuts tightened with a wrench.
How to break the bead on a tire
If you’re stranded on the side of the road with a flat tire, you may be wondering how to change it without a machine. It’s actually not as difficult as it may seem, and with a little know-how, you can have your tire changed in no time.First, you’ll need to loosen the lug nuts on your wheel.
You can use a lug wrench or a socket wrench to do this. Once the lug nuts are loose, you’ll need to jack up the car so that the flat tire is off the ground. Place the jack under the car at a point that is closest to the flat tire.
Once the car is jacked up, remove the flat tire and put the spare tire on the wheel. Make sure the tire is properly seated on the wheel before you start to tighten the lug nuts. Once the lug nuts are tight, lower the car back down to the ground and you’re ready to go!
Put tire on rim near me
Assuming you don’t have access to a machine and need to change your tire on the side of the road, here’s a step-by-step guide on how to do it:1. Park your car on a level surface and set the emergency brake. Make sure the area around your car is clear of any debris or obstructions.
2. Loosen the lug nuts on the wheel that you need to change. You’ll need a lug wrench for this.3. Once the lug nuts are loose, use your hands to remove the tire from the rim.
If the tire is stuck, you can use a tire iron or a pry bar to help loosen it.4. Take your new tire and place it on the rim. Make sure it’s seated properly.
5. Use your lug wrench to tighten the lug nuts. Make sure they’re tight, but don’t overdo it.
Conclusion
If you find yourself in a situation where you need to change a tire but don’t have access to a machine, don’t worry! It is possible to change a tire on a rim without a machine.The first step is to loosen the lug nuts.
You can do this with a lug wrench or a socket wrench. Once the lug nuts are loose, remove them and set them aside.Next, use a tire iron to pry the old tire off the rim.
Once the old tire is off, take a look at the new tire to make sure it is the right size and has the correct air pressure.To put the new tire on, line it up with the rim and then use the tire iron to push it onto the rim. Once the new tire is on, replace the lug nuts and tighten them down.
And that’s it! You’ve successfully changed a tire on a rim without a machine.

How To Dismount A Tire Without A Machine
There are a few different ways that you can dismount a tire without a machine. One way is to use a tire spoon. This is a tool that is specifically designed to help remove tires from rims.
Another way is to use a pry bar. You can insert the pry bar between the rim and the tire to help loosen the tire from the rim. Once the tire is loose, you can remove it by hand.
Finally, you can use a tire jack to help remove the tire from the rim.
- Park your car on a level surface and turn off the engine
- Loosen the lug nuts on the wheel you want to remove using a lug wrench
- Jack up the car using a jack and place jack stands under the car for support
- Remove the lug nuts and wheel from the car
- Use a tire iron to pry the tire off the wheel
- Inspect the tire and wheel for damage
- Repeat steps 1-6 for the other three tires

Credit: tiredealersites.com
What is the easiest way to take off a tire?
If you don’t have access to a tire machine, you can still dismount a tire by hand. It’s a bit of a process, but it can be done. Here’s how:
1. Loosen the lug nuts on the wheel. You’ll need a lug wrench for this.2. Once the lug nuts are loose, lift the wheel off of the ground.
3. Place the wheel on a stable surface, like a table or a bench.4. Use a tire iron to pry the bead of the tire away from the rim. Start at the bottom of the tire and work your way around.
5. Once the bead is loose, use your hands to pull the tire off of the rim.6. Reverse the process to mount the new tire. Place the tire on the rim and use the tire iron to push the bead of the tire over the edge of the rim.
How do you get a tire off without tools?
Dismounting a tire without a machine is a relatively easy process that can be done at home with a few tools. The most important thing to remember is to be careful and go slowly to avoid damaging the tire or the rim.To start, you’ll need a tire iron and a rubber mallet.
You’ll also need to loosen the lug nuts before you begin. Once the lug nuts are loose, you can use the tire iron to pry the tire off of the rim. Start by inserting the tire iron between the tire and the rim at the 12 o’clock position and prying the tire off of the rim.
Work your way around the tire, using the tire iron to pry the tire off of the rim at the 3 o’clock, 6 o’clock, and 9 o’clock positions.Once the tire is loose from the rim, you can use the rubber mallet to tap the tire off of the rim.
How do you dismount a tire by hand?
Assuming you don’t have access to a machine and need to do this by hand, you’ll need to start by loosening the lug nuts that hold the wheel on. You’ll need a wrench to do this – a socket wrench is ideal, but you can use a regular wrench if you don’t have one handy. Once the lug nuts are loose, you can jack up the car and remove the wheel.
To jack up the car, you’ll need to place the jack under the frame of the car. Once the jack is in place, you can crank it until the tire is off the ground. Be careful not to jack up the car too high – you just need to get the tire off the ground, not the whole car.
Once the tire is off the ground, you can remove the lug nuts and then the tire itself. To do this, simply grab the tire at the top and bottom and pull it straight off the wheel.
How to take a tire off a rim
If you’ve ever had a flat tire, you know the frustration of trying to get the tire off the rim. It’s not impossible to do it by hand, but it is difficult. The good news is, with a few tips and the right tools, you can dismount a tire without a machine.
First, you’ll need a tire iron. A standard tire iron is about 18 inches long and has a curved end. You’ll also need a rubber mallet.
Start by loosening the lug nuts with the tire iron. Once they are loose, use the mallet to tap around the edge of the tire. This will help break the seal between the tire and the rim.
Next, insert the tire iron between the tire and the rim and pry the tire off. It may take a few tries, but eventually you’ll get it.Once the tire is off, you can inspect the inside of the rim for any damage.
Removing tires from rims for scrap
If you’re like most people, you probably don’t think about how to dismount a tire until you have a flat. And when that happens, the thought of trying to do it without a machine can be daunting.But don’t worry, it’s not as difficult as it may seem.
With a few simple tools and a little know-how, you can easily dismount a tire without a machine.The first thing you’ll need is a tire iron. This is a tool that is specifically designed for changing tires.
It has a curved end that fits over the rim of the tire and a flat end that is used to pry the tire off the wheel.Next, you’ll need a jack. This is used to lift the car off the ground so that you can easily remove the tire.
Once you have these two things, you’re ready to get started.
How to break the bead on a tire
If you don’t have access to a tire machine, you can still dismount a tire with a few tools. You’ll need a tire iron, a pry bar, and a hammer.First, use the tire iron to loosen the lug nuts.
Then, use the pry bar to loosen the bead of the tire from the rim. Once the bead is loose, use the hammer to tap the tire around the circumference until it pops off the rim.Now you can replace the tire, or do whatever else you need to do.
To remount the tire, just follow these steps in reverse.
How to remove a tire from a rim with a machine
If you’ve ever been stranded on the side of the road with a flat tire, you know the feeling of frustration that comes with it. Even if you have a spare tire, changing it can be a pain, especially if you don’t have a machine to help you.But don’t worry, there is a way to change a tire without a machine.
With a few simple tools and a little know-how, you can get your car up and running in no time.Here’s what you’ll need:-A tire iron
-A lug wrench
-A jack
-A spare tire
First, use the tire iron to loosen the lug nuts on the flat tire. Once they are loose, use the lug wrench to remove them completely. Next, use the jack to lift the car up so that the flat tire is no longer touching the ground.
Now it’s time to put on the spare tire.
Put tire on rim near me
When it comes to dismounting a tire without a machine, there are a few things you’ll need to keep in mind. First, you’ll need to make sure that the tire is properly inflated. If the tire is under-inflated, it will be more difficult to dismount.
Next, you’ll need to loosen the bead of the tire from the rim. You can do this by using a tire iron or a similar tool. Once the bead is loosened, you’ll be able to pull the tire off of the rim.
Finally, you’ll need to remove the valve stem from the tire. This will allow you to deflate the tire and make it easier to remount.
How to change a tire without a tire changer
If you don’t have access to a tire machine, you can still dismount a tire by hand. It’s a bit more challenging and time-consuming, but it can be done. Here’s how:
1. Loosen the wheel nuts. You’ll need to do this before you can remove the tire.2. Pry the tire off of the wheel.
Start at one end and work your way around.3. Remove the wheel nuts and set them aside.4. Flip the tire over and repeat the process to remove the other side.
5. Once both sides are off, you can remove the tire from the wheel completely.6. To remount the tire, simply repeat the process in reverse.With a little patience and elbow grease, you can dismount a tire without a machine.
How to change a tire by hand
Assuming you don’t have access to a tire machine, you’ll need to dismount the tire from the rim by hand. It’s a good idea to have a few tools on hand to make the job easier, including a tire iron, a pry bar, and a hammer. You’ll also need a bucket or some other container to catch the tire bead as you work.
Start by loosening the lug nuts on the wheel. Once they’re loose, you can use the tire iron to pry the bead of the tire away from the rim. Work your way around the tire until the bead is completely loose.
Next, use the pry bar to pry the bead over the edge of the rim. You may need to use the hammer to tap the pry bar and help it along. Again, work your way around the tire until the bead is completely off the rim.
Once the bead is off the rim, the tire is free.
Tire removal machine
If you don’t have access to a tire machine, you can still dismount a tire by following these steps:1. First, you’ll need to remove the wheel from the vehicle. This can be done by loosening the lug nuts and then lifting the wheel off.
2. Once the wheel is off, you can begin to dismount the tire. Start by breaking the bead of the tire away from the rim.3. Once the bead is broken, you can use a tire spoon to work the tire off of the rim.
4. Once the tire is off the rim, you can deflate it and then remove it from the wheel.5. To remount the tire, simply follow these steps in reverse. Inflate the tire, place it on the rim, and then break the bead into place.
Finally, tighten the lug nuts and reattach the wheel to the vehicle.
Conclusion
It is possible to dismount a tire without a machine, but it is much more difficult. The first step is to remove the valve stem from the tire. Next, use a tire iron to pry the bead of the tire away from the rim.
Once the bead is loose, use your hands to grab the tire and pull it off of the rim. Finally, use the tire iron to pry the other bead of the tire off of the rim.

How To Compress Strut Spring Without Tool
Compressing a strut spring without a tool may seem like a daunting task, but it is actually quite simple. First, you will need to find a way to secure the strut in place. This can be done by placing a piece of wood or a block of concrete underneath the strut.
Next, you will need to find something to use as a lever. A piece of pipe or a crowbar will work perfectly. Once you have the lever in place, simply apply pressure to the top of the strut with the lever.
This will compress the spring and allow you to remove it.
- Remove the strut from the vehicle
- Remove the spring from the strut
- Using a spring compressor, compress the spring
- Reinstall the spring on the strut
- Reinstall the strut on the vehicle
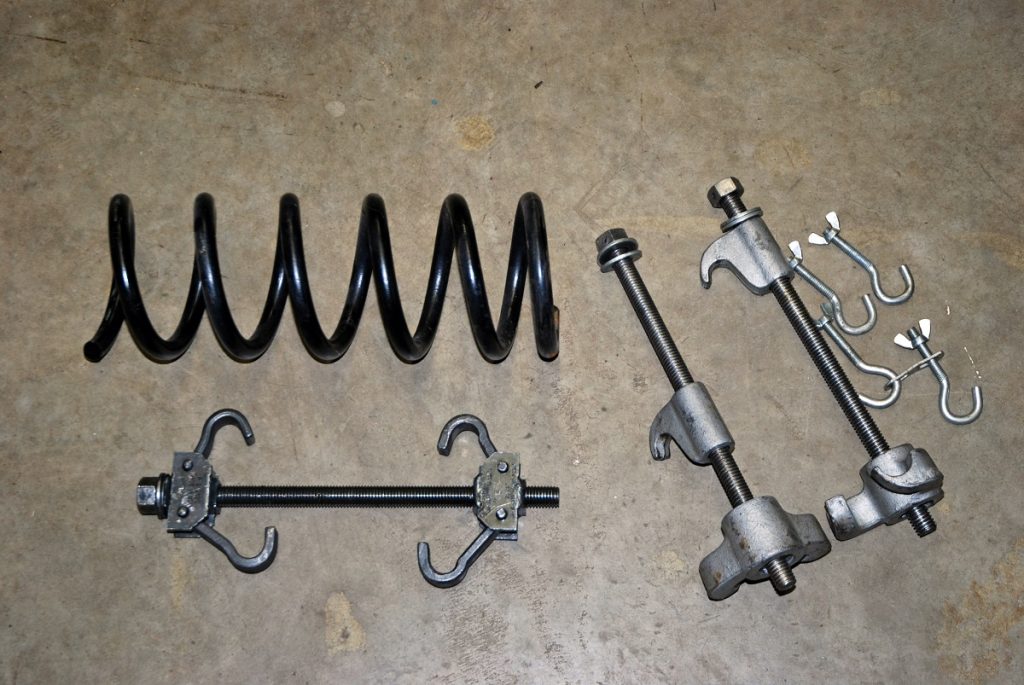
Credit: www.onallcylinders.com
How do you compress a strut spring?
If you’re wondering how to compress a strut spring without a tool, you’re in luck. There are a few different ways to do this, and we’ll walk you through each one.First, let’s talk about what a strut spring is.
A strut spring is a coil spring that is used in conjunction with a shock absorber to support the weight of a vehicle. The spring is compressed when the vehicle is driven over bumps or when the brakes are applied.Now that we know what a strut spring is, let’s talk about how to compress it without a tool.
One way to do this is to use a floor jack. Place the floor jack under the vehicle and raise the vehicle until the spring is compressed. Once the spring is compressed, you can remove the jack and the spring will stay compressed.
Another way to compress a strut spring without a tool is to use a ratchet strap.
How do you install a coil spring without a compressor?
A strut spring compressor is a tool that is used to compress the spring in a strut assembly. This is necessary when replacing the strut or performing other maintenance on the strut assembly. There are several different types of strut spring compressors available, but they all work in essentially the same way.
To use a strut spring compressor, first support the strut assembly so that it cannot fall and injure you while you are working on it. Next, attach the compressor to the spring. Most compressors have two jaws that clamp onto the spring, but some have a single bar that goes through the center of the spring.
Once the compressor is attached, tighten it until the spring is compressed enough to work on.Once the spring is compressed, you can remove the old strut, install the new strut, or perform whatever other maintenance you need to do. When you are finished, loosen the compressor and allow the spring to expand back to its normal size.
How do you compress truck struts?
If your car has coil springs instead of struts, you can use a coil spring compressor to safely compress the spring. This will allow you to remove the strut from the car. You can buy a coil spring compressor at most auto parts stores.
If your car has struts, you’ll need a different tool to compress the strut spring. One option is to use a spring compressor tool. This is a specialized tool that you can buy at most auto parts stores.
Another option is to use a ratchet strap. This is a less expensive option, but it’s a little more difficult to use. First, you’ll need to find a solid object to anchor the ratchet strap to.
A tree or a post will work. Then, you’ll need to loop the ratchet strap around the strut spring. Be sure to position the ratchet strap so that it’s not in contact with any moving parts.
How should you always compress a coil spring?
If you’re looking to compress a strut spring without a tool, there are a few things you can do. First, you’ll want to make sure that the spring is seated properly in the strut mount. You can do this by gently pushing down on the spring with your hand.
Once the spring is seated, you’ll want to compress the spring using a vise or clamp. Be sure to use a protective pad on the spring to avoid damaging it. Once the spring is compressed, you can remove the spring from the strut mount.
How to compress strut spring at home
If you’re planning on doing some work on your car’s suspension, you may need to compress the strut spring. This can be done without a special tool, but it does require a bit of know-how. Here’s a step-by-step guide on how to compress a strut spring without a tool:
1. Jack up the car and remove the wheel.2. Disconnect the strut from the lower control arm.3. Using a pry bar, compress the spring by pushing down on the lower control arm.
4. Once the spring is compressed, reconnect the strut to the lower control arm.5. Lower the car and repeat on the other side.With a little bit of effort, you can compress a strut spring without a tool.
This is a handy skill to have if you’re planning on doing any suspension work on your car.
Diy spring compressor
If your car has coil springs instead of struts, you can use a spring compressor to remove them. But if your car has struts, you’ll need a special tool called a strut spring compressor to remove the springs.Here’s how to use a strut spring compressor:
1. Jack up the car and remove the wheel.2. Disconnect the strut from the lower control arm.3. Use the strut spring compressor to compress the spring.
4. Remove the spring and the strut.5. Repeat the process for the other side.
How to compress a coil spring with ratchet straps
If you’re looking to compress a strut spring without a tool, there are a few things you can do. First, try using a large C-clamp. Place the clamp around the spring, making sure that the jaws of the clamp are lined up with the coils of the spring.
Then, simply tighten the clamp until the spring is compressed.If you don’t have a C-clamp, you can try using a length of pipe. Place the pipe over the spring and then use a wrench to twist the pipe, compressing the spring as you go.
Finally, if you’re in a bind and don’t have either a C-clamp or a length of pipe, you can try using a ratchet strap. Place the strap around the spring and then ratchet it tight. This will compress the spring enough that you should be able to remove it.
How to compress a small spring
If you’re looking to compress a strut spring without a tool, there are a few methods you can try. The first is to use a pair of vise grips. Place the jaws of the vise grips on either side of the spring, and then squeeze the handles together.
This will compress the spring enough that you can remove it from the strut.Another method is to use a C-clamp. Place the C-clamp on one side of the spring, and then tighten the screw until the spring is compressed.
This method may take a few tries to get the spring compressed enough, but it will eventually work.Once the spring is compressed, you can remove it from the strut and proceed with your repair.
Autozone spring compressor
Compressing a strut spring without a tool may sound like a daunting task, but it is actually quite easy to do. All you need is a few household items and a little bit of patience.First, you will need to find a way to prop up the car so that the strut is not under any tension.
You can use a jack or a set of jack stands for this. Once the car is securely propped up, remove the nut that holds the strut in place.Next, take a piece of wood or a metal rod and insert it into the coil of the strut.
Be careful not to damage the coil. Slowly twist the rod or piece of wood until the coil is fully compressed.Now, take a ratchet and thread it onto the end of the rod or piece of wood.
This will help you to keep the coil compressed while you reinstall the nut.Finally, reverse the process and lower the car back down.
Harbor freight strut spring compressor
Strut springs are one of the most important parts of your car’s suspension, and they need to be in good working order to ensure a smooth ride. Unfortunately, over time they can become damaged or worn out, which can lead to a bumpy ride. If you’re noticing that your car isn’t as smooth as it used to be, it’s likely that your strut springs need to be replaced.
While you could take your car to a mechanic to have the springs replaced, this can be a costly repair. If you’re handy with tools, you can replace the springs yourself and save a lot of money. The process is actually pretty simple, and all you need is a few basic tools.
To start, you’ll need to remove the old strut spring. This can be done by unscrewing the nut that holds it in place. Once the nut is removed, the spring should come right out.
Strut spring compressor tool autozone
If your car has coil springs instead of struts, you can still compress the springs to make more room in the engine compartment. All you need is a ratchet and a few sockets. Just follow these simple steps:
1. Find the right socket size for your ratchet. You’ll need a socket that’s just big enough to fit over the top of the spring.2. Place the socket over the top of the spring and ratchet it down tight.
3. Now, just push down on the ratchet handle to compress the spring.4. Once the spring is compressed, you can remove it from the car.
Diy hydraulic coil spring compressor
If your car has coilovers, you can compress the spring without a tool. Simply loosen the adjusting knob on the coilover until the spring is compressed to your desired height. If your car does not have coilovers, you will need a spring compressor tool to compress the spring.
Conclusion
If you’re looking to compress a strut spring without a dedicated tool, there are a few ways you can do it. One is to use a pair of vise grips to clamp down on the spring, then use a socket and ratchet to compress the spring. Another way is to use a C-clamp to compress the spring.
Whichever method you choose, make sure you’re careful not to damage the spring or yourself in the process.