- Home
- Archive: August, 2023
How to Tell Where Tires are Made
When you’re buying tires, it’s important to know where they’re made. There are a few different ways to tell where your tires were manufactured.One way is to look for the manufacturer’s code on the tire itself.
This code is usually a two- or three-digit number that indicates where the tire was made. For example, “01” indicates that the tire was made in Germany, while “02” means it was made in France.You can also find out where your tires were made by looking at the Tire Identification Number (TIN).
The TIN is a four-digit code that includes information about the manufacturer, as well as when and where the tire was made. The first two digits of the TIN indicate the week of production, while the last two digits indicate the year. For example, if a tire has a TIN of “1210,” that means it was produced during week 12 of 2010.
Finally, you can check the Tire and Rim Association Yearbook to find out which manufacturers produce tires in which countries.
- Look for the DOT code on the tire
- The first two numbers of the DOT code represent the week the tire was manufactured
- The last two numbers represent the year
- For example, if the DOT code is 2412, that means the tire was manufactured in the 24th week of 2012
How Can You Tell Where a Tire was Manufactured?
If you’re looking to buy a new tire, you may be wondering how to tell where it was manufactured. There are a few ways to do this.One way is to look at the DOT code on the tire.
This code will have 10-12 characters and will start with the letters “DOT.” The next two numbers indicate the week of the year that the tire was manufactured, and the last two numbers indicate the year. So, for example, if the DOT code on a tire says “DOT 3820,” that means the tire was manufactured in the 38th week of 2020.
Another way to tell where a tire was manufactured is by looking at its tread pattern. Different manufacturers have different tread patterns, so if you know what kind of tread pattern you’re looking for, you can narrow down which manufacturer made your tire.Finally, you can also usually tell where a tire was made by looking at its price point.
Tires made in China or other countries with lower labor costs are often cheaper than those made in America or Europe.So there are a few different ways that you can tell where a tire was manufactured. The best way to figure it out is by looking at the DOT code on the tire itself.
How Do You Tell If a Tire is Made in the Usa?
When looking for tires made in the USA, it is important to pay attention to the manufacturing location. The vast majority of tires sold in the US are manufactured overseas. However, there are still a few US-based manufacturers left, such as Cooper Tires and Goodyear.
To tell if a tire is made in the USA, you will need to look for a DOT code on the sidewall of the tire. This code will have a three-digit number following the letters “DOT.” The first two digits of this number indicate the week of manufacture, while the third digit indicates the year.
For example, if a tire has a DOT code of “DOT 1204,” this means that it was manufactured during week 12 of 2004.If you cannot find a DOT code on the sidewall of the tire, this does not necessarily mean that it is not made in the USA. Some US-based manufacturers do not use DOT codes on their products.
However, if you cannot find any indication of where the tire was manufactured, it is likely that it was made overseas.
How Can You Tell If a Tire is Made in China?
When looking for new tires, you may wonder if it is worth it to buy ones made in China. How can you tell if a tire is made in China?There are a few ways to tell if a tire is made in China.
One way is to look at the sidewall of the tire. If the sidewall says “Made in China,” then the tire was most likely manufactured there.Another way to tell if a tire is made in China is by its DOT code.
The first two numbers of the DOT code indicate where the tire was manufactured. If the code starts with “01” or “02,” then the tire was made in North America. If the code starts with “03,” then the tire was most likely made in Europe.
However, if the code starts with “04” or higher, then there is a good chance that the tire was made in Asia, which includes China.If you’re still not sure whether or not a particular tire was made in China, you can always contact the manufacturer directly and ask them about where their tires are manufactured.
Are Any Tires Made in the Usa?
Yes, there are tires made in the USA. There are several tire manufacturers that have plants in the United States, including Michelin, Bridgestone, and Goodyear. These companies make tires for both the domestic market and export.
Some of the brands that are made in the USA include Firestone, BFGoodrich, and Uniroyal.
What Tires are Made in the Usa
Tires are a critical part of every vehicle, and it’s important to know where they come from. Many tires are made in the USA, and these products have a reputation for being high-quality and reliable.There are several tire manufacturers located in the United States, and they produce a variety of different types of tires.
Some companies specialize in passenger car tires, while others make commercial truck tires or off-road tires.Some of the most popular brands of tires that are made in the USA include Michelin, Goodyear, and Bridgestone. These companies have been making tires for many years, and they’ve developed a strong reputation for manufacturing quality products.
If you’re looking for new tires for your vehicle, it’s definitely worth considering ones that are made in the USA. You can be confident that you’re getting a product that is well-made and will last for many miles.
Conclusion
You can usually tell where a tire is made by looking for markings on the sidewall. These markings are required by the U.S. Department of Transportation, and they include the manufacturer’s name or brand, the tire size, and the load index and speed rating. The DOT also requires that tires have a treadwear grade and a traction grade, but these are not always easy to find.
If you can’t find any of these markings, chances are good that the tire was made outside the United States.

How to Stack Tires in a Truck
If you’re looking for how to stack tires in a truck, there are a few things you need to know. First, when stacking tires in a truck, it’s important to make sure that the heaviest tire is on the bottom. This will help keep your truck from tipping over.
Second, you’ll want to use something to secure the tires in place. This can be anything from ratchet straps to bungee cords. Finally, when stacking tires in a truck, be sure to leave enough space between each tire so that they don’t rub together and cause damage.
- Drive the truck onto a level surface and set the parking brake
- Place a block of wood behind each rear tire
- Jack up the rear of the truck and remove the wheels
- Stack the tires on top of each other in the bed of the truck, starting with the largest tires and working your way down to the smallest tires
- Replace the wheels and lower the jack

Credit: mccoytrucktire.com
What’S the Best Way to Stack Tires?
There are many ways to stack tires, but the best way depends on the type of tire and the intended use. For example, if you are stacking tires for storage, you will want to avoid putting any weight on the tires. This can be accomplished by using a tire rack or stand.
If you are stacking tires for use, such as in a race pit area, then you will want to ensure that the tires are securely stacked so they don’t fall over. This can be done by using straps or chains to secure the stack.
Can Tires Be Stacked on Top of Each Other?
If you’re looking to save space in your garage or workshop, you may be wondering if you can stack tires on top of each other. The answer is yes, as long as you take a few precautions.First, make sure that the tires are the same size and type.
You don’t want to stack different sizes of tires together, as they may not balance properly and could topple over. Second, it’s a good idea to put something like a piece of plywood or cardboard between each tire so they don’t rub together and damage the treads. Finally, make sure the stack is stable and won’t fall over – you don’t want any tire-related accidents!
With these tips in mind, go ahead and stack those tires up!
How Many Tires Can You Stack on Top of Each Other?
When it comes to stacking tires, there is no definitive answer. The number of tires that can be stacked on top of each other will depend on a variety of factors, including the size and weight of the tires, the strength of the stack, and the stability of the surface on which they are being stacked. With that said, it is generally safe to say that you can stack anywhere from two to four tires on top of each other without issue.
Anything beyond that and you start to run into potential problems.The main factor that determines how many tires can be safely stacked on top of each other is the weight of the tires. The heavier the tire, the more pressure it puts on the ones below it in the stack.
This can eventually lead to toppling if not enough support is provided. For this reason, it is generally advisable to use smaller and lighter tires when stacking them on top of each other.Another important factor to consider is the strength of the stack itself.
A weak or poorly constructed stack is more likely to collapse under its own weight than a strong one. This means that you need to be careful about how you arrange your tire stacks. Make sure that they are stable and well-supported before adding more layers on top.
Finally, it is also important to consider the stability of the surface on which you are stacking your tires. A soft or uneven surface can cause even a well-constructed stack to topple over. It is best to build your stacks on level ground with plenty of support underneath them.
How Do You Stack Tires in a Warehouse?
There are a few different ways to stack tires in a warehouse, depending on the size and weight of the tires. For smaller, lighter tires, you can simply stack them on top of each other. However, for larger or heavier tires, you may need to use a tire rack.
A tire rack is basically a large metal frame that holds several tires in place. The advantage of using a tire rack is that it keeps the tires from tipping over or falling off of each other. You can usually find tire racks at auto parts stores or online.
When stacking tires on a tire rack, start by placing the heaviest and largest tire at the bottom of the rack. Then, work your way up, stacking progressively smaller and lighter tires on top. Make sure that each row of tires is level with the one below it before moving on to the next row.
If you’re stacking multiple rows of tires on top of each other, make sure to secure them with straps or ropes so they don’t topple over. Also, be careful not to overload the rack – too many heavy tires could cause it to collapse.
Stacking tires professionally
How to Stack Tires on a Trailer
If you’re transporting more than one vehicle on a trailer, you’ll need to know how to stack the tires properly. Here’s a step-by-step guide on how to stack tires on a trailer:1. Park the trailer on level ground and set the brakes.
2. Put chocks in front of and behind all four tires of the vehicles that will be loaded onto the trailer. This will prevent the vehicles from rolling while you’re loading them.3. Arrange the first row of tires so that they’re evenly spaced out and parallel to each other.
The outside edge of each tire should be about 6 inches from the edge of the trailer.4. Place the second row of tires on top of the first row, making sure to stagger them so that they’re not directly above or below any tire in the first row. This will help distribute weight evenly and prevent flat spots from forming on any one tire.
5 . Secure all four corners of each tire with straps or rope, being careful not to overtighten as this could damage the rim . Attach these securing lines to something solid on the trailer, such as an anchor point or another vehicle .
6 . Repeat steps 3-5 until all desired vehicles are loaded onto the trailer .
7 .
Double – check that all straps and ropes are secure before driving away .
Conclusion
It’s not uncommon to see a truck with four different sized tires. This is called “stacking” and it’s done for a variety of reasons. The most common reason is to get more traction in snow or mud.
When the ground is soft, the large tires will sink down and provide more grip. Another reason to stack tires is for looks. Some people think it looks cool and makes their truck look tougher.
If you’re going to stack tires on your truck, there are a few things you need to keep in mind. First, make sure the sizes are compatible. You don’t want to put a small tire on top of a large one – it could come loose and cause an accident.
Second, be aware of the weight distribution. Stacking heavier tires on the back end can make your truck harder to control. Lastly, make sure you have good quality tire chains that fit all of the sizes – you don’t want to get stuck in the middle of nowhere with no way to get out!

How to Store Tires Mounted on Rims
If you have tires mounted on rims, it’s important to store them properly to extend their life. Here are some tips for storing your tires:– Store your tires in a cool, dry place away from direct sunlight.
– If possible, store your tires on their side so they don’t develop flat spots.
– Make sure the valve stems are covered so dirt and debris don’t get inside.
– Check the pressure of your tires before storing them; if they’re too low, they can develop cracks.
- Park your vehicle on a level surface and engage the parking brake
- Loosen the lug nuts on the tire using a wrench, but do not remove them completely
- Lift the tire and rim off of the ground using a jack
- Place the tire in a clean, dry area where it will not be exposed to sunlight or extreme temperatures
- Cover the tire with a tarp or similar material to protect it from dirt and debris while it is being stored
Top 10 Tips For Storing Your Tires
What’S the Best Way to Store Tires on Rims?
If you have tires on rims that you need to store, the best way to do it is to put them on a tire rack. This will keep the tires from touching the ground and getting dirty or damaged. You can also put a sheet of plywood or cardboard under the tires to protect them from moisture.
When Storing Tires on Rims You Should Always?
When storing tires on rims you should always make sure that the rim is clean and free of any debris. You should also check to see that the air pressure in the tire is at the correct level. If you are going to be storing the tires for an extended period of time, you may want to consider putting a layer of protection on the rim, such as a piece of cloth or a plastic bag.
Is It Better to Store Tires Mounted Or Unmounted?
Assuming you are asking if it is better to store tires with or without wheels mounted, the answer is that it depends. If you have the space to do so, storing tires unmounted and away from direct sunlight will help prolong their life. This is because when a tire is mounted on a wheel, it is more exposed to the elements and can deteriorate faster.
However, if you don’t have the space to store your tires unmounted, mounting them on wheels can actually help protect them from being damaged by things like sharp objects.
How Long Can You Store Mounted Tires?
When it comes to storing mounted tires, there is no definitive answer. Ultimately, it depends on a number of factors, including the type of tire, where the tire is being stored, and the conditions under which it is being stored. With that said, here are a few general guidelines to follow when storing mounted tires:
If possible, store tires in a cool, dry place. Heat and humidity can cause tires to degrade prematurely.Avoid storing tires in direct sunlight.
UV rays can also cause degradation.Make sure tires are properly inflated before storage. Underinflated or flat tires can develop flat spots that may be difficult or impossible to repair.
If you must store tires for an extended period of time (more than six months), consider using tire covers or placing them in a box out of direct light exposure.
Credit: topgradetire.com
How to Store Tires on Rims in Garage
If you’re like most people, you probably have a few extra tires sitting in your garage. But did you know that there’s a right way and a wrong way to store them? Here’s what you need to know to make sure your tires stay in good shape for years to come.
The first thing you need to do is make sure the tires are clean before you store them. This means removing any dirt, debris or grime that could cause them to degrade over time. Once they’re clean, dry them off completely and then apply a thin layer of tire protectant.
This will help keep the rubber from drying out and cracking.Next, it’s important to choose the right location for storing your tires. They should be stored in a cool, dry place away from direct sunlight.
A dark corner of the garage or basement is ideal. And if possible, try to store them on their sides rather than stacked on top of each other. This will help prevent flat spots from forming on the treads.
Finally, when it comes time to put your tires back on your car, be sure to check the air pressure first. Tires that are stored for long periods of time can sometimes lose some of their air pressure. So it’s always best to err on the side of caution and add a little bit more air than you think they need before hitting the road again.
Conclusion
If you’re looking for tips on how to store tires mounted on rims, you’ve come to the right place. In this blog post, we’ll share some of our best tips to help you keep your tires in great shape.First, it’s important to choose the right location for storing your tires.
You’ll want to find a spot that’s cool and dry, away from direct sunlight or any other source of heat. Second, make sure the area is well-ventilated so that moisture doesn’t build up and cause your tires to rot.Once you’ve found the perfect location, it’s time to start prepping your tires for storage.
First, clean them thoroughly with soap and water to remove any dirt or grime. Next, inspect them for any signs of damage or wear and tear. If you notice any cracks or bulges, it’s best to replace the tire rather than try to repair it.
Once your tires are clean and inspected, it’s time to start storing them. If possible, hang them from their rims so they don’t touch the ground. This will help prevent flat spots from forming on the tires.
Alternatively, you can also stack them on top of each other if hanging isn’t an option. Just be sure not to put too much weight on top of the stack as this could cause the tires below to become damaged.With these tips in mind, storing your tires should be a breeze!
How to Add Air to Nitrogen Tires
Adding air to nitrogen tires is a simple process that can be done at home with the proper equipment. The first step is to locate the valve stem on the tire. The valve stem is the small metal piece sticking out of the side of the tire.
Once the valve stem has been located, use a tire gauge to check the pressure in the tire. If the pressure is low, use an air compressor to add air to the tire until it reaches the correct pressure.
- Locate the valve stem on your tire
- This is the part of the tire that you screw the air cap onto
- Unscrew the air cap and place it to the side
- Take your nitrogen tank and connect the hose to the valve stem on your tire
- Make sure that it is snug so that no air will escape
- Open up the nitrogen tank and allow the gas to flow into your tire until it reaches the desired pressure level
- Once it has reached the desired pressure, close off the nitrogen tank and remove the hose from your tire’s valve stem
- Screw on the air cap tightly so that no more air can escape from your tire
How Do I Add Air to My Nitrogen Tires
If your vehicle has nitrogen-filled tires, you may need to add air to them from time to time. Here’s how to do it:1. Locate the valve stem on the tire.
This is the part of the tire that sticks out and that you screw the air cap onto.2. Unscrew the cap from the valve stem.3. Use an air compressor or nitrogen tank to add air or nitrogen to the tire, respectively.
Make sure not to overfill the tire.4. Screw the cap back onto the valve stem.
How to Fill Tires With Nitrogen at Home
If you’re like most people, your car or truck has tires that are inflated with air. But did you know that there’s a better way? Nitrogen-filled tires are becoming increasingly popular, because they offer several advantages over traditional air-filled tires.
Here’s how to fill your tires with nitrogen at home:1. Purchase a nitrogen tank and regulator. You can find these online or at some auto parts stores.
2. Connect the regulator to the tank and open the valve.3. Place the end of the hose over the tire valve and slowly release nitrogen into the tire until it is full. Repeat for all four tires.
4. Check the pressure in each tire with a gauge to ensure that they’re properly inflated. Adjust as needed.That’s all there is to it!
Filling your own tires with nitrogen is quick and easy, and it can save you money in the long run by prolonging the life of your tires and improving fuel economy. Give it a try today!
Conclusion
Adding air to nitrogen tires is a simple process that can be completed in just a few minutes. First, locate the valve stem on the tire and remove the cap. Next, use a nitrogen-compatible air compressor to fill the tire with nitrogen.
Once the tire is full, replace the valve stem cap and you’re done!
How to Make Both Rear Tires Spin
To make both rear tires spin, you’ll need to engage the handbrake and then quickly release it while pressing down on the accelerator. This will cause the car to lurch forward and the weight of the engine will transfer to the rear wheels, causing them to spin. You’ll need to be quick with your release of the handbrake so that you don’t skid out of control.
The whole process should take less than a second.
- Turn off the traction control system if your car has one
- Get the car up to a speed of around 10 mph
- Put the car into a low gear so that it will be easier to make the tires spin
- Apply pressure to the accelerator pedal and keep it there until both of the rear tires are spinning
Do Both Rear Wheels Spin?
In a rear-wheel drive car, the engine sends power to the rear wheels. This is what makes them move forwards. The front wheels don’t do much except steer the car.
Most cars have four-wheel drive, which means all four wheels get power from the engine and all four help move the car forwards. But some cars, like many sports cars, only have rear-wheel drive.Do both rear wheels spin?
No, in a rear-wheel drive car only one of the rear wheels gets power from the engine. The other wheel just spins freely.
How Do I Make My Back Wheel Spin?
Assuming you would like tips on how to make your back wheel spin while riding a bicycle, here are a few things to keep in mind:-Use your body weight to shift the bike from side to side. This will help create momentum and get the rear wheel spinning.
-Get low! The lower you are on the bike, the easier it will be to generate power and get the rear wheel spinning. Use your arms and legs as shock absorbers to absorb any bumps along the way.
-Keep pedaling! Even if you’re not going very fast, pedaling helps maintain momentum and keeps the back wheel spinning. If you stop pedaling, it’ll be much harder to get going again.
So keep those legs moving!With a little practice, you’ll be able to get that back wheel spinning like a pro in no time!
Can You Spin Both Tires With Open Diff?
If you have an open differential, then you will only be able to spin one tire at a time. This is because the open differential will allow each wheel to rotate at a different speed – meaning that if one wheel is spinning faster than the other, the open differential will send more power to the slower-moving wheel in order to equalize the speeds. So, if you try to spin both tires with an open differential, you’ll only succeed in spinning one.
What Differential Makes Both Wheels Spin?
Differential is a device, usually consisting of gears, that allows two wheels on the same axle to rotate at different speeds. This is necessary when the vehicle is turning, because the inner wheel needs to travel a shorter distance than the outer wheel. Differentials are found in both front- and rear-wheel drive vehicles.
How to Make Both Tires Spin With Open Differential
If you have an open differential, both of your tires should already be spinning. However, if for some reason they are not, here is how you can make both tires spin with an open differential.First, check to see if your differential is indeed open.
You can do this by looking at the axle shafts. If they are connected directly to the wheels without any sort of gearing in between, then you have an open differential.If your differential is open, then both of your tires should be spinning.
However, if they are not, there are a few things you can try.One option is to put the car in neutral and rev the engine up until the tires start spinning. This usually works best on a hard surface such as concrete or asphalt.
Another option is to use a winch to pull one of the wheels that is not spinning. This will usually cause the other wheel to start spinning as well. Be sure to use caution when doing this so that you do not damage your car or injure yourself in the process.
Conclusion
Making both rear tires spin is a fun move to show off your driving skills. It’s also a great way to clean the tires before a race. Here’s how to do it:
1. First, find a large, open area where you can practice. You’ll need plenty of space to build up speed and make the turn.2. Next, get your car up to speed.
You’ll need to be going fast enough that when you let off the gas and turn the wheel, the car will keep going straight while the tires start to spin.3. When you’re ready, let off the gas and turn the wheel sharply to the left or right. The car should start to spin around in a circle while both rear tires stay spinning.
If done correctly, you’ll be able to complete one full revolution or more!4. Once you’re finished showing off, slowly bring the car back under control and come to a stop.
How to Get Free Tires for My Car
There are a few ways that you can get free tires for your car. One way is to check with your local tire store or automotive shop. Many times, these businesses will have promotions or coupons for free tires.
Another way to get free tires is to search online. There are many websites that offer deals on tires, and some of them even offer free shipping. Finally, you can also check with your insurance company.
Sometimes, insurance companies will give you a discount if you purchase new tires through them.
- Research what type and size of tires you need for your car
- You can find this information in your car’s owner’s manual or by contacting the dealership where you purchased your car
- Find a tire recycling center in your area
- To find a center near you, search online or call your local solid waste department
- Call the tire recycling center to see if they have the type and size of tires you need
- If they do, make an appointment to drop off your car
- At the appointment, the Tire Recycling Center will remove your old tires and install new ones for free!
What is the Best Month to Buy Tires?
There is no definitive answer to this question as it largely depends on the type of tire you are looking for and your personal budget. However, here are a few things to keep in mind that may help you decide when is the best time to buy tires.In general, the best time to buy tires is during the months of October and November.
This is because many manufacturers offer rebates and discounts during these months in order to encourage sales. Additionally, retailers are also more likely to offer deals and promotions during these months in order to clear out inventory before the winter season.If you are looking for specific types of tires (e.g. all-season, winter, etc.), then it is important to note that different types of tires go on sale at different times throughout the year.
For example, all-season tires tend to go on sale during the springtime while winter tires typically go on sale in late fall or early winter.Ultimately, the best month to buy tires will vary depending on what type of tire you need and how much you are willing/able to spend. If you do your research and keep an eye out for deals, you should be able to find a great deal on tires regardless of what time of year it is!
How Can I Get Free Drift Tires?
There are a few ways that you can get free drift tires. The first way is to find a drift event or competition that is happening in your area and see if they are giving away any prizes. This is a great way to get free drift tires because you will be able to compete with other drivers and show off your skills.
Another way to get free drift tires is to look for online retailers who sell them. Many times, these retailers will have special promotions where they give away free products when you purchase something from their store. Finally, you can also check with your local tire shop to see if they have any promotions going on where you can get free drift tires.
Do You Get What You Pay for With Tires?
Tires are one of the most important components of your car, and they play a big role in determining how your car performs. So, it’s important to choose the right tires for your vehicle. But, with so many different tire brands and types on the market, it can be tricky to know which ones are the best for your car.
And, when it comes to price, you might be wondering if you really do get what you pay for with tires.Well, the answer isn’t necessarily black and white. In general, higher-priced tires will offer better performance than lower-priced options.
However, there are also a number of other factors that can affect tire performance, such as tread design and material quality. So, it’s important to do your research before making a purchase.To help you out, we’ve put together a list of things to keep in mind when shopping for tires.
By taking all of these factors into consideration, you can be sure to choose the best option for your car:Tire Type: First things first, you need to make sure you’re choosing the right type of tire for your vehicle. There are three main types of tires – passenger car tires, light truck tires and heavy duty truck tires.
How Much Does a Wheel And Tire Cost?
The cost of a wheel and tire can vary greatly depending on the type of vehicle you have. For example, a basic set of tires for a sedan may start around $60, while a set of performance tires for a sports car can cost upwards of $300. The size and style of the wheels will also affect the price, with larger or more stylish wheels often costing more.
In general, you can expect to spend anywhere from $100 to $1,000 or more on a new set of wheels and tires.
How to Get Free Tires from Discount Tire
Discount Tire is one of the largest tire retailers in the United States, with over 900 locations across 28 states. They offer a wide variety of tires, from budget to premium, and their prices are very competitive. But did you know that Discount Tire also offers a free tire program?
Here’s how it works: every time you purchase four new tires from Discount Tire, you can get one free! That’s right, they will give you a voucher for a free tire when you buy four. All you need to do is return to any Discount Tire location within 60 days and redeem your voucher.
There are some restrictions on the free tire program: it is only available for passenger vehicles (cars, SUVs, vans, and light trucks) and only select sizes and brands of tires are eligible. But if you’re in the market for new tires anyway, this is a great way to save some money!
Conclusion
If you’re looking to get free tires for your car, there are a few ways to go about it. You can check with your local tire shop or dealership to see if they have any programs or promotions going on that would allow you to get free tires. You can also search online for companies that offer free tire programs.
Finally, you can contact your state’s Department of Transportation to see if they offer any programs for free tires.
How to Dispose of Tires in Toronto
The City of Toronto offers a special waste disposal program for tires. The Tire Waste Management Program is designed to reduce the number of tires that are disposed of in landfills. There are two options for disposing of tires:
1) Drop off your used tires at a designated waste management facility.2) Request a pick-up from the City of Toronto.
- Check with your local tire retailer to see if they will take back used tires for recycling
- Many retailers participate in provincial waste diversion programs and will accept used tires free of charge
- If your local tire retailer does not take back used tires, you can take them to a Tire Recycling Depot
- The City of Toronto operates two permanent Tire Recycling Depots, which are located at 400 Commissioner Street and 1339 Bloor Street West
- You can also drop off up to eight passenger car or light truck tires (with or without rims) at any of the City’s Transfer Stations, free of charge
- Tires must be clean and dry before being accepted at transfer stations – no liquids, mud or dirt please! 4
- Finally, if you have a large quantity of tires to dispose of (more than eight), you can contact the Ontario Tire Stewardship for commercial recycling options
Where to Dispose of Tires on Rims
If you’re looking to dispose of tires on rims, there are a few options available to you. You can either take them to a tire recycling center or a landfill.Tire recycling centers will accept your old tires and recycle them into new ones.
This is a great option if you want to help the environment and reduce waste. Landfills, on the other hand, will simply accept your tires and dispose of them in an environmentally-friendly way.So, which option is best for you?
It really depends on your personal preference. If you’re worried about the environmental impact of disposing of your tires, then a tire recycling center is probably the best option for you. However, if you’re not as concerned about the environment and just want to get rid of your old tires, then a landfill is probably your best bet.
How Do I Dispose of Used Tires in Ontario?
In Ontario, the best way to dispose of used tires is to take them to a tire recycling facility. There are many of these facilities across the province, and they will recycle your tires for free. The benefits of recycling tires are many; it reduces pollution, saves energy and resources, and helps to create new products from recycled materials.
How Much Does It Cost to Dispose of Tires in Ontario?
It costs $3.25 to dispose of a passenger tire in Ontario, and $25 for a commercial tire. Tires can be recycled at most Ontario Tire Stewardship (OTS) certified waste management facilities, including many landfills and transfer stations.
How Do You Dispose of Worn Tires?
Assuming you mean worn car tires:There are a few options for disposing of worn car tires. The first is to take them to a tire recycling center.
Here, the tires will be shredded and turned into mulch or other usable products.Another option is to have the tires retreaded. This process involves buffing out the wear and tear on the tire and then adding new tread.
This can extend the life of the tire by several thousand miles.Finally, some people simply choose to dispose of their old tires by taking them to a landfill. However, this is not considered the most environmentally friendly option, as tires can take up a lot of space in landfills and release harmful chemicals into the ground over time.
What Does Canada Do With Used Tires?
In Canada, used tires are recycled and reused in a variety of ways. One popular way is to shred them and use them as tire mulch in playgrounds and gardens. This helps to cushion the ground and keep weeds from growing.
Another way that used tires are being reused is by turning them into fuel. Tires are made of rubber and other synthetic materials that can be turned into a type of oil called pyrolysis oil. This oil can be used to power industrial furnaces or it can be refined further into gasoline or diesel fuel.
The recycling of used tires not only benefits the environment but it also creates jobs. In Canada, there are over 100 businesses that employ over 2,000 people in the tire recycling industry.
Conclusion
If you’re looking to get rid of some old tires, there are a few options available to you in Toronto. You can take them to a recycling facility, dispose of them at a tire disposal site, or sell them to a scrap dealer.Recycling facilities will take your tires and either shred them or melt them down to be used in other products.
Tire disposal sites will accept your tires for a fee, and then properly dispose of them according to environmental regulations. Scrap dealers will purchase your old tires from you, usually by the pound.So if you’ve got some old tires taking up space, now you know how to get rid of them!
How to Inflate Hybrid Bike Tires
If you have a hybrid bike, then you know that it’s important to keep the tires inflated. Otherwise, you risk getting a flat tire or even worse – having an accident.
- Start with the bike in an upright position and remove the cap from the valve stem on the tire you need to inflate
- If you’re using a floor pump, open the jaws of the pump and place them over the valve stem, then start pumping
- If you’re using a hand pump, unscrew the pump head and place it over the valve stem, then start pumping
- Continue pumping until the tire reaches its recommended pressure level, then replace the cap on the valve stem and check for any leaks
What Psi Should a Hybrid Bike Tire Be?
If you’re wondering what PSI your hybrid bike tires should be, here’s a quick guide. Depending on the width of your tires, as well as your weight and riding style, you’ll want to adjust your PSI accordingly. For example, if you have wider tires and are a heavier rider, you’ll likely need higher PSI in order to avoid flats.
On the other hand, if you have narrower tires and are a lighter rider, you can get away with lower PSI without sacrificing much in terms of comfort or performance.As a general rule of thumb, we recommend starting somewhere in the range of 35-45 PSI for most hybrid bikes. From there, experiment until you find the perfect pressure for your individual needs.
Just remember to check your tire pressure regularly (we recommend at least once per week) to ensure that it stays where it needs to be.
How Do You Put Air in a Bike Tire With a Presta Valve?
If you have a Presta valve on your bike tire, you’ll need to use a Presta-specific pump to put air in it. Here’s how to do it:1. Unscrew the cap at the top of the Presta valve and make sure that the valve is fully open.
2. Put the tip of the pump onto the valve and start pumping air into the tire.3. Once the tire is inflated to your desired pressure, screw the cap back onto the Presta valve to keep air from escaping.
How Do You Pump a Bike Tire With a Presta Valve Without Adapter?
Assuming you don’t have an adapter and need to use a standard pump:First, check that your pump is compatible with Presta valves. Some pumps have a switch that allows you to change between the two valve types.
If your pump doesn’t have this feature, you can buy an adapter.To start pumping, open the valve by unscrewing the small knob at the top of the valve stem. You may need to use a coin or something similar to get a good grip.
Once it’s open, place the end of the pump nozzle over the valve and push down firmly to create a seal.Now start pumping! It may take a few tries to get started, but once you’ve got air flowing into the tire, it will be much easier.
Be sure not to overinflate – stop when you reach the desired pressure (usually around 80 PSI).Finally, remove the nozzle from the valve and screw the cap back on tightly. You’re all set!
How Do You Pump a Presta Tyre?
Assuming you have a Presta-type valve:To inflate a Presta valve, you’ll need a pump with a Presta valve adapter. Most floor pumps will come with one.
If not, they’re easy to find at your local bike shop. Once you have your adapter, simply screw it onto the valve and start pumping away!Presta valves have a small nut that needs to be unscrewed before air can enter the tube.
Make sure to do this before putting your pump on, or you’ll just end up wasting time and energy. Once the nut is unscrewed, put your pump on and start inflating away! When you’re finished, screw the nut back on tight so that no air can escape.
How to Pump a Bike Tire With a Presta Valve
One of the most common questions we get asked here at Bikeberry is “How do I pump up a bike tire with a Presta valve?”It’s actually not as complicated as it may seem, and once you know how to do it, it’ll be a breeze!Here are easy steps to follow:
1. To start, unscrew the cap at the top of the Presta valve. Some caps are attached to the valve stem and cannot be removed; if this is the case, simply leave it unscrewed. If your cap is detached from the valve stem, screw it back on until it’s hand-tight.
Be careful not to over-tighten, or you may damage the threads.
2. Next, use your fingers to push down on the small metal pin in the center of the valve (this releases air from inside the tire). You may need to wiggle it a bit until you feel resistance stop – that means air is no longer escaping.
3. Once air has stopped coming out of your tire, place the end of your bike pump onto the open valve and give it a firm push so that it creates an air-tight seal.4. Now begin pumping! Depending on how low your tire was before, this could take anywhere from 30 seconds to a minute or two.
5. When your tire is inflated to its desired pressure (you can find this information either on the side of your tires or in your owner’s manual), remove pump nozzle and quickly screw on/push down firmly on Presta valve cap – this will prevent any air from leaking back out while you put away your pump.And there you have it! With these simple steps, you’ll be able to easily pump up any bike tire with a Presta valve – no problem!
Conclusion
It’s easy to inflate hybrid bike tires with a little know-how. You’ll need an air pump and a few other tools to get started.First, remove the valve cap from the tire.
Next, use the air pump to fill the tire with air. Make sure not to overinflate the tire – you should only fill it until it’s firm to the touch. Finally, replace the valve cap and enjoy your ride!

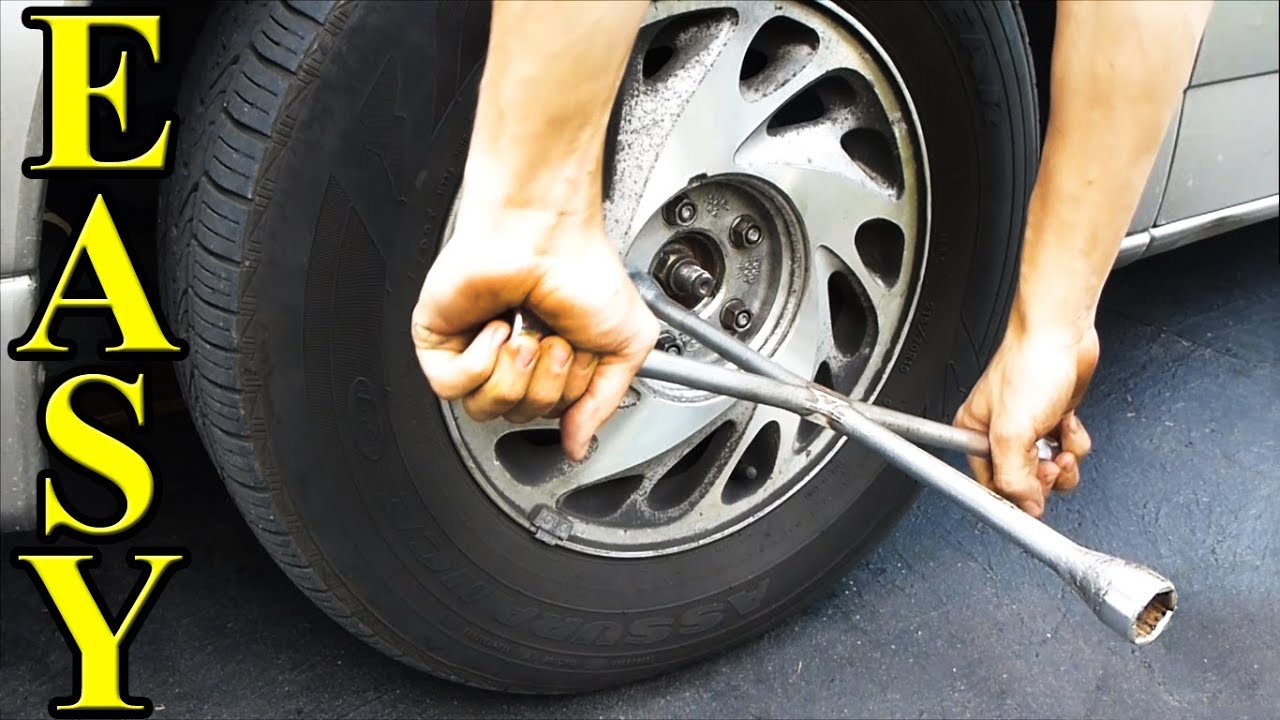
How to Switch Tires on a Car
If you’re like most people, you probably don’t think much about your tires until there’s a problem. But taking care of your tires can save you time and money in the long run. Part of taking care of your tires is knowing how to switch them when they need to be replaced.
Here’s a step-by-step guide on how to switch tires on a car.
- Park your car in a safe and level location
- Loosen the lug nuts on the front tires with a lug wrench
- Do not remove them completely
- Jack up the front of the car with a jack and place jack stands under the frame to support it
- Remove the front tires and put them in the back of the car
- Place the back tires on the front of the car where the fronts were previously located, making sure that they are facing in the correct direction according to your owner’s manual (usually with an arrow pointing forward)
- 6- Hand-tighten each lug nut until snug but don’t over-tighten at this stage as you may strip them or cross-thread them
- Lower your car off of its jack stands carefully
- 8Finish tightening each lug nut with your wrench in a star pattern until all are tight
How to Change a Tire | Change a flat car tire step by step
Can You Switch Tires Yourself?
It is possible to switch tires yourself, but it is not recommended unless you are experienced with this type of maintenance. The process is fairly simple, but it does require some special tools and knowledge. First, you will need to jack up the car and remove the lug nuts from the wheels.
Next, you will need to remove the old tires and put on the new ones. Be sure to tighten the lug nuts securely before lowering the car back down. If you are not confident in your ability to do this, it is best to take your car to a professional mechanic.
Can You Switch Tires from One Car to Another?
If you’re asking whether you can physically swap tires from one car to another, then the answer is yes. However, it’s important to know that there are a few things to consider before doing so.First, you need to make sure that the tires are compatible with both cars.
This means that they should be the same size and have the same load rating. If not, then you could end up damaging your car or having an accident.Secondly, you need to check the condition of the tires.
If they’re worn out or damaged in any way, then it’s probably not a good idea to put them on another car. In addition, if the tread depth is significantly different between the two sets of tires, it’s best to just get new ones for the second car.Finally, it’s always a good idea to consult with a professional before making any major changes to your car.
They’ll be able to tell you definitively whether or not swapping tires is a good idea in your particular situation.
How Do You Switch Tires?
Assuming you would like a blog post about how to switch tires:“How do you switch tires?”It is important to know how to switch tires, especially if you are a driver.
Tires can wear down over time and they need to be replaced periodically. You may also need to switch tires if you get a flat tire. Here is a step-by-step guide on how to switch tires:
1. Park your car in a safe location. Make sure that the area is level so that your car will not roll while you are changing the tire. Put your hazard lights on so that other drivers will be aware of your stopped vehicle.
2. Loosen the lug nuts before you jack up the car. Use a lug wrench to loosen the lug nuts by turning them counterclockwise. Do not remove the lug nuts yet!
3. Jack up the car using a jack. Place the jack under the frame of the car near the wheel that needs to be changed. Slowly lift the car until it is high enough for you to remove the tire.
4Remove the old tire by taking off the lug nuts and pulling it away from the car’s wheel hub. Be careful not to drop or damage anything when removing or installing new tires!5Installthe new tire by lining it up withthe wheel hub and puttingonthe lug nuts (turning them clockwise this time).
Again, be careful not topinchyour fingersor dropanything!6Lowerthecar backdownto groundlevel byreleasingthejack handle slowlyandcarefully!7Tightenthe lugsnuts securelyusingthelugwrenchinacross(star) patternuntiltheyare snugbutnot overtight –you should stillbeabletoturnthemwithyournakedhandsfairly easily8Packupyourtoolsandoldtireandyou’redone!
What are the Five Steps to Changing a Tire?
Assuming you don’t have roadside assistance and need to change your tire yourself, here are the five steps:1. Park in a safe location – This seems like a no brainer, but you want to make sure you’re not blocking traffic or putting yourself in danger by pulling over on the side of a busy road. Look for a flat, well-lit spot away from traffic.
2. Put on your hazard lights – Again, this is for safety. You want other drivers to be aware that you’re stopped on the side of the road so they can avoid hitting you or your car.3. Find your jack and spare tire – Most cars will have these stored in the trunk.
Consult your owner’s manual if you’re unsure where they are located in your particular vehicle.4. Loosen the lug nuts – Before you start jacking up the car, you’ll want to loosen the lug nuts that hold the wheel in place. You’ll need a wrench to do this – most likely a lug wrench that came with your jack kit.
Once they’re loose, don’t remove them completely, just turn them until they’re hand tight so you can easily remove them later when it’s time to put on the new tire.5. Jack up the car and remove the old tire – Place your jack under one of the frame rails near the flat tire (consult your owner’s manual for specific instructions). Pump the handle until the flat tire is lifted off of the ground and then spin it off by hand until it’s completely removed from the wheel studs.
Now would be a good time to inspect your spare tire to make sure it’s in good condition before proceeding.
Credit: www.youtube.com
How to Change a Tire on a Car Step by Step
If you find yourself with a flat tire, it’s important to know how to change it. While it may seem daunting, changing a tire is relatively simple if you follow these steps:1. Pull over to a safe location.
If you can, drive onto the shoulder of the road. If you’re in a parking lot, try to find a spot away from traffic. Once you’re in a safe location, turn on your hazard lights to warn other drivers.
2. Loosen the lug nuts before you jack up the car. Use a wrench to loosen them, but don’t take them all the way off just yet.3. Place the jack under the car at one of the spots designated for jacking (usually near the wheels).
Slowly pump the jack until the tire is lifted off of the ground.4. Take off the lug nuts and remove the old tire. Put them aside so you don’t lose them!
Conclusion
If you’re like most people, you probably don’t think about your tires until there’s a problem. But caring for your tires is an important part of owning a car. One of the most important things you can do for your tires is to rotate them regularly.
This helps to even out the wear and tear on all four tires, so they last longer.Most tire rotations take place every 5,000 miles or so. However, it’s always best to consult your owner’s manual or ask your mechanic to be sure.
When it’s time to rotate your tires, there are a few different ways to do it. The most common way is called the “forward cross.” This means that the front left tire moves to the back right position, the front right moves to the back left, and so on.
There are a few other ways to rotate your tires as well, but the forward cross is by far the most common. If you’re not sure how to rotate your own tires, many mechanics will do it for free when you bring your car in for an oil change or other routine maintenance.

How to Make Motorcycle Tires Sticky
Motorcycle tires are one of the most important parts of the bike. They need to be sticky to provide good traction and grip on the road. There are a few things you can do to make sure your motorcycle tires are sticky and in good condition.
- If your tires are starting to feel slippery, it’s time to make them sticky again
- There are a few different ways to do this, but the most common is to use tire treatment products
- These come in both spray and gel form, and you simply apply them to the surface of your tires
- They usually need to be reapplied every few weeks or so, depending on how often you ride
- Tire treatments will help improve your traction, making it easier to corner and brake hard without slipping
- They also help extend the life of your tires by preventing premature wear from sliding around on the pavement
- Most importantly, they make riding a lot more fun! So if your bike feels like it’s losing its grip, give your tires a treatment and enjoy the difference it makes out on the road
Headed home…. sticky tires
Why are New Motorcycle Tires Slippery?
Motorcycle tires are designed to grip the road and provide traction, but when they’re brand new, they can be quite slippery. This is because the surface of the tire is smooth and free of any debris or imperfections. Once the tire has been used a bit, it will start to develop a “grip” on the road as small pieces of rubber and dirt adhere to its surface.
Until then, however, riders should take extra care when cornering or braking on new tires.
How Do You Prepare New Motorcycle Tires?
When you get new motorcycle tires, there are a few things you need to do in order to prepare them. First, you want to clean the surface of the tire. This will help the tire last longer and perform better.
Next, you need to properly inflate the tires. This is important because it helps with traction and handling. Lastly, you want to break in the new tires by riding on them gently for the first few miles.
This will help them last longer and perform better overall.
How Long Does It Take to Break in New Motorcycle Tires?
It is important to know how long it takes to break in new motorcycle tires. This process is key to achieving the best possible performance and safety from your investment. Tires are designed to be ridden on gradually, with a specific breaking-in period.
The recommended way to break in new tires is by riding at moderate speeds for the first 200 miles. After that, you can start pushing them harder. The main goal during this time is to create an even wear pattern across the tire tread.
This will help ensure even contact with the ground, which leads to better grip and handling.If you’re patient and follow the above steps, you’ll end up with tires that perform great and last longer. So take your time, enjoy the ride, and be safe out there!
How Do You Warm Up Motorcycle Tires?
It’s important to warm up your motorcycle tires before heading out on the open road. There are a few different ways you can do this, but the most effective way is to use a tire warmer.A tire warmer is a device that uses electricity to heat up your tires.
You simply plug it in and let it do its job. This is the quickest and most effective way to warm up your tires.Another way to warm up your tires is by riding at a moderate speed for a few miles.
This will help generate some heat in the tires and get them ready for higher speeds.Finally, you can also use a hair dryer or heat gun to manually warmth motorcycle tiers earlier than journeying. However, be careful not to overdo it as this could damage the rubber compound.
Just give them a quick blast of heat and then let them cool down naturally before heading out on your ride.

Credit: lifeatlean.com
Scrub in Tyres
Most car enthusiasts are familiar with the term “scrub in tyres”. It’s a process where you drive your car around a bit to help break in the new tyres. But what does this actually mean and why is it important?
The main purpose of scrubbing in tyres is to ensure that they’re properly seated on the rim. This helps to prevent any issues with them coming off while you’re driving. Additionally, scrubbing in tyres also helps to improve their grip on the road.
When you first get new tyres, they can be quite slippery and may not provide as much traction as you’re used to. Scrubbing them in will help to rough up the surface and give you better grip.It’s generally recommended that you do at least 50 miles of easy driving when breaking in new tyres.
This gives them plenty of time to seat properly and start providing good traction. Once you’ve done this, you can then start pushing them harder and using them as normal.So if you’ve just got some new tyres, make sure to give them a good scrub before hitting the roads!
Motorcycle Track Day Tyre Pressures
Motorcycle track day tyre pressures are one of the most important aspects to consider when setting up your bike for a track day. The right tyre pressure will help you to achieve the perfect balance between grip and stability, allowing you to push your bike to its limits without fear of losing control.There are a few different schools of thought when it comes to setting motorcycle track day tyre pressures, but as a general rule of thumb, we recommend starting at around 28 psi in the front and 32 psi in the rear.
From there, you can experiment with different pressures to find what works best for your bike and riding style. Just remember that too much pressure will result in less grip, while too little pressure will increase the risk of punctures and other tyre damage.If you’re unsure about what tyre pressures to use on your next track day, be sure to ask one of our experts at the circuit – we’ll be happy to help you out!
New Tires for Motorcycle
When it comes to safety on the road, few things are as important as having good tires on your motorcycle. Whether you’re a daily commuter or an occasional weekend rider, making sure your bike is equipped with the best tires possible is crucial. But with so many different types and brands of motorcycle tires out there, how do you know which ones are right for you?
In this blog post, we’ll go over everything you need to know about choosing new tires for your motorcycle. We’ll cover the different types of motorcycle tires available, as well as some tips on how to choose the right size and style for your bike. By the end of this post, you should have a good idea of what kind of tire will best suit your needs.
So let’s get started!
Conclusion
This blog post details how to make motorcycle tires sticky. First, the author recommends using a product called Gripz to clean the tires. Next, the author suggests using a tire dressing such as Pinnacle Slicks to increase traction.
Finally, the author recommends using a tire warmers prior to riding to help maintain traction.