- Home
- Archive: August, 2023
How to Move a Car Without Tires
If your car has lost its tires, don’t panic! There are a few different ways that you can move your car without tires. The first way is to call a tow truck.
Tow trucks can usually move cars without tires, but it may be more expensive than other methods. Another way to move a car without tires is to use a dolly. You can rent or buy a dolly at most hardware stores.
Be sure to secure the car onto the dolly before you start moving it! Finally, if you have access to another vehicle, you can attach your car to the other vehicle with rope or chains and tow it. Whichever method you choose, be sure to exercise caution and take your time while moving your car without tires!
- Find a friend or family member who can help you move the car without tires
- Place the car on a flat surface, such as a driveway or parking lot
- Use jack stands to support the car while you remove the tires
- Remove the lug nuts from the wheels using a wrench and set them aside
- Carefully remove the wheels from the car and set them aside as well
- Place blocks of wood or other sturdy objects under the car’s frame to support it while you move it without tires
- Gently push or pull the car to where you want it to go, being careful not to damage the blocks of wood or other objects supporting it
- If necessary, use a come-along or similar tool to help move it along if there is no one available to assist you physically moving it
- Once you reach your desired location, carefully remove the blocks of wood or other objects supporting the car and lower it down onto its tires using a jack
How Do You Move a Car With No Wheels on It?
If you find yourself in a situation where you need to move a car with no wheels on it, there are a few things you can do. The first is to call a tow truck. This is the easiest and most likely the safest option, as they will have the proper equipment to load and transport the vehicle.
If you don’t have a tow truck available, or if you’re feeling adventurous, you can try to move the car yourself. First, see if there are any dollies or other flat surfaces that you can slide underneath the car. If so, then carefully lift the car onto these surfaces and start pushing it towards its destination.
Keep in mind though that without wheels, the car will be very difficult to steer, so make sure you have plenty of help before attempting this method.Another option is to try and roll the car on its side. This will obviously be much harder than simply pushing it along on dollies, but if done correctly it can be effective.
Start by lifting one end of the car off of the ground using jacks or whatever else you have available. Once it’s high enough, put something like lumber or concrete blocks under each tire on that side of the vehicle (on both sides if possible). Then slowly lower the jack until the entire weight of that side of the vehicle is resting on these blocks – at which point you can remove the jack entirely.
Repeat this process on the other side until both sides of your vehicle are supported only by blocks – then gently roll it over onto its side using brute force (or a come-along winch if available).
Can a Car Without Tires Be Towed?
Yes, a car without tires can be towed. However, it is not recommended as it can damage the car and make it more difficult to tow.
How Do You Move a Car With All Flat Tires?
If you have a car with all flat tires, there are a few things you can do to move it. One option is to call a tow truck and have them take care of it for you. Another option is to use a dolly or hand truck to move the car yourself.
If you have access to a flatbed trailer, that would be the best way to transport the car.
How Do You Move a Locked Car?
If your car has an automatic transmission, it should be safe to move it a short distance while locked. However, if your car has a manual transmission, it’s not recommended to move it while locked as this could damage the gears. If you absolutely need to move a manual transmission car while locked, make sure to put it in neutral and push with care.
How to Move a Car With No Front Wheels
If your car has lost its front wheels, don’t panic! While this may seem like a daunting task, it is possible to move your car without front wheels. Here’s what you need to do:
1. First, assess the situation and make sure that it is safe to move your car. If you’re on a busy road, it may be best to call a tow truck.2. Once you’ve determined it is safe to move your car, put it in neutral and engage the emergency brake.
3. Next, find something sturdy that can act as a replacement for your front wheels. This could be a piece of plywood or even strong cardboard boxes. Place the makeshift wheels under the front of your car so that they are touching the ground.
4. Finally, very slowly and carefully drive your car forwards until the back wheels are on top of the makeshift wheels. Then you can disengage the emergency brake and continue driving to safety!
Conclusion
If you need to move a car without tires, there are a few things you can do. One option is to use a dolly. You can either rent one from a moving company or purchase one from a hardware store.
Another option is to use straps and ratchet them around the car frame. Whichever method you choose, make sure you secure the car properly before attempting to move it.
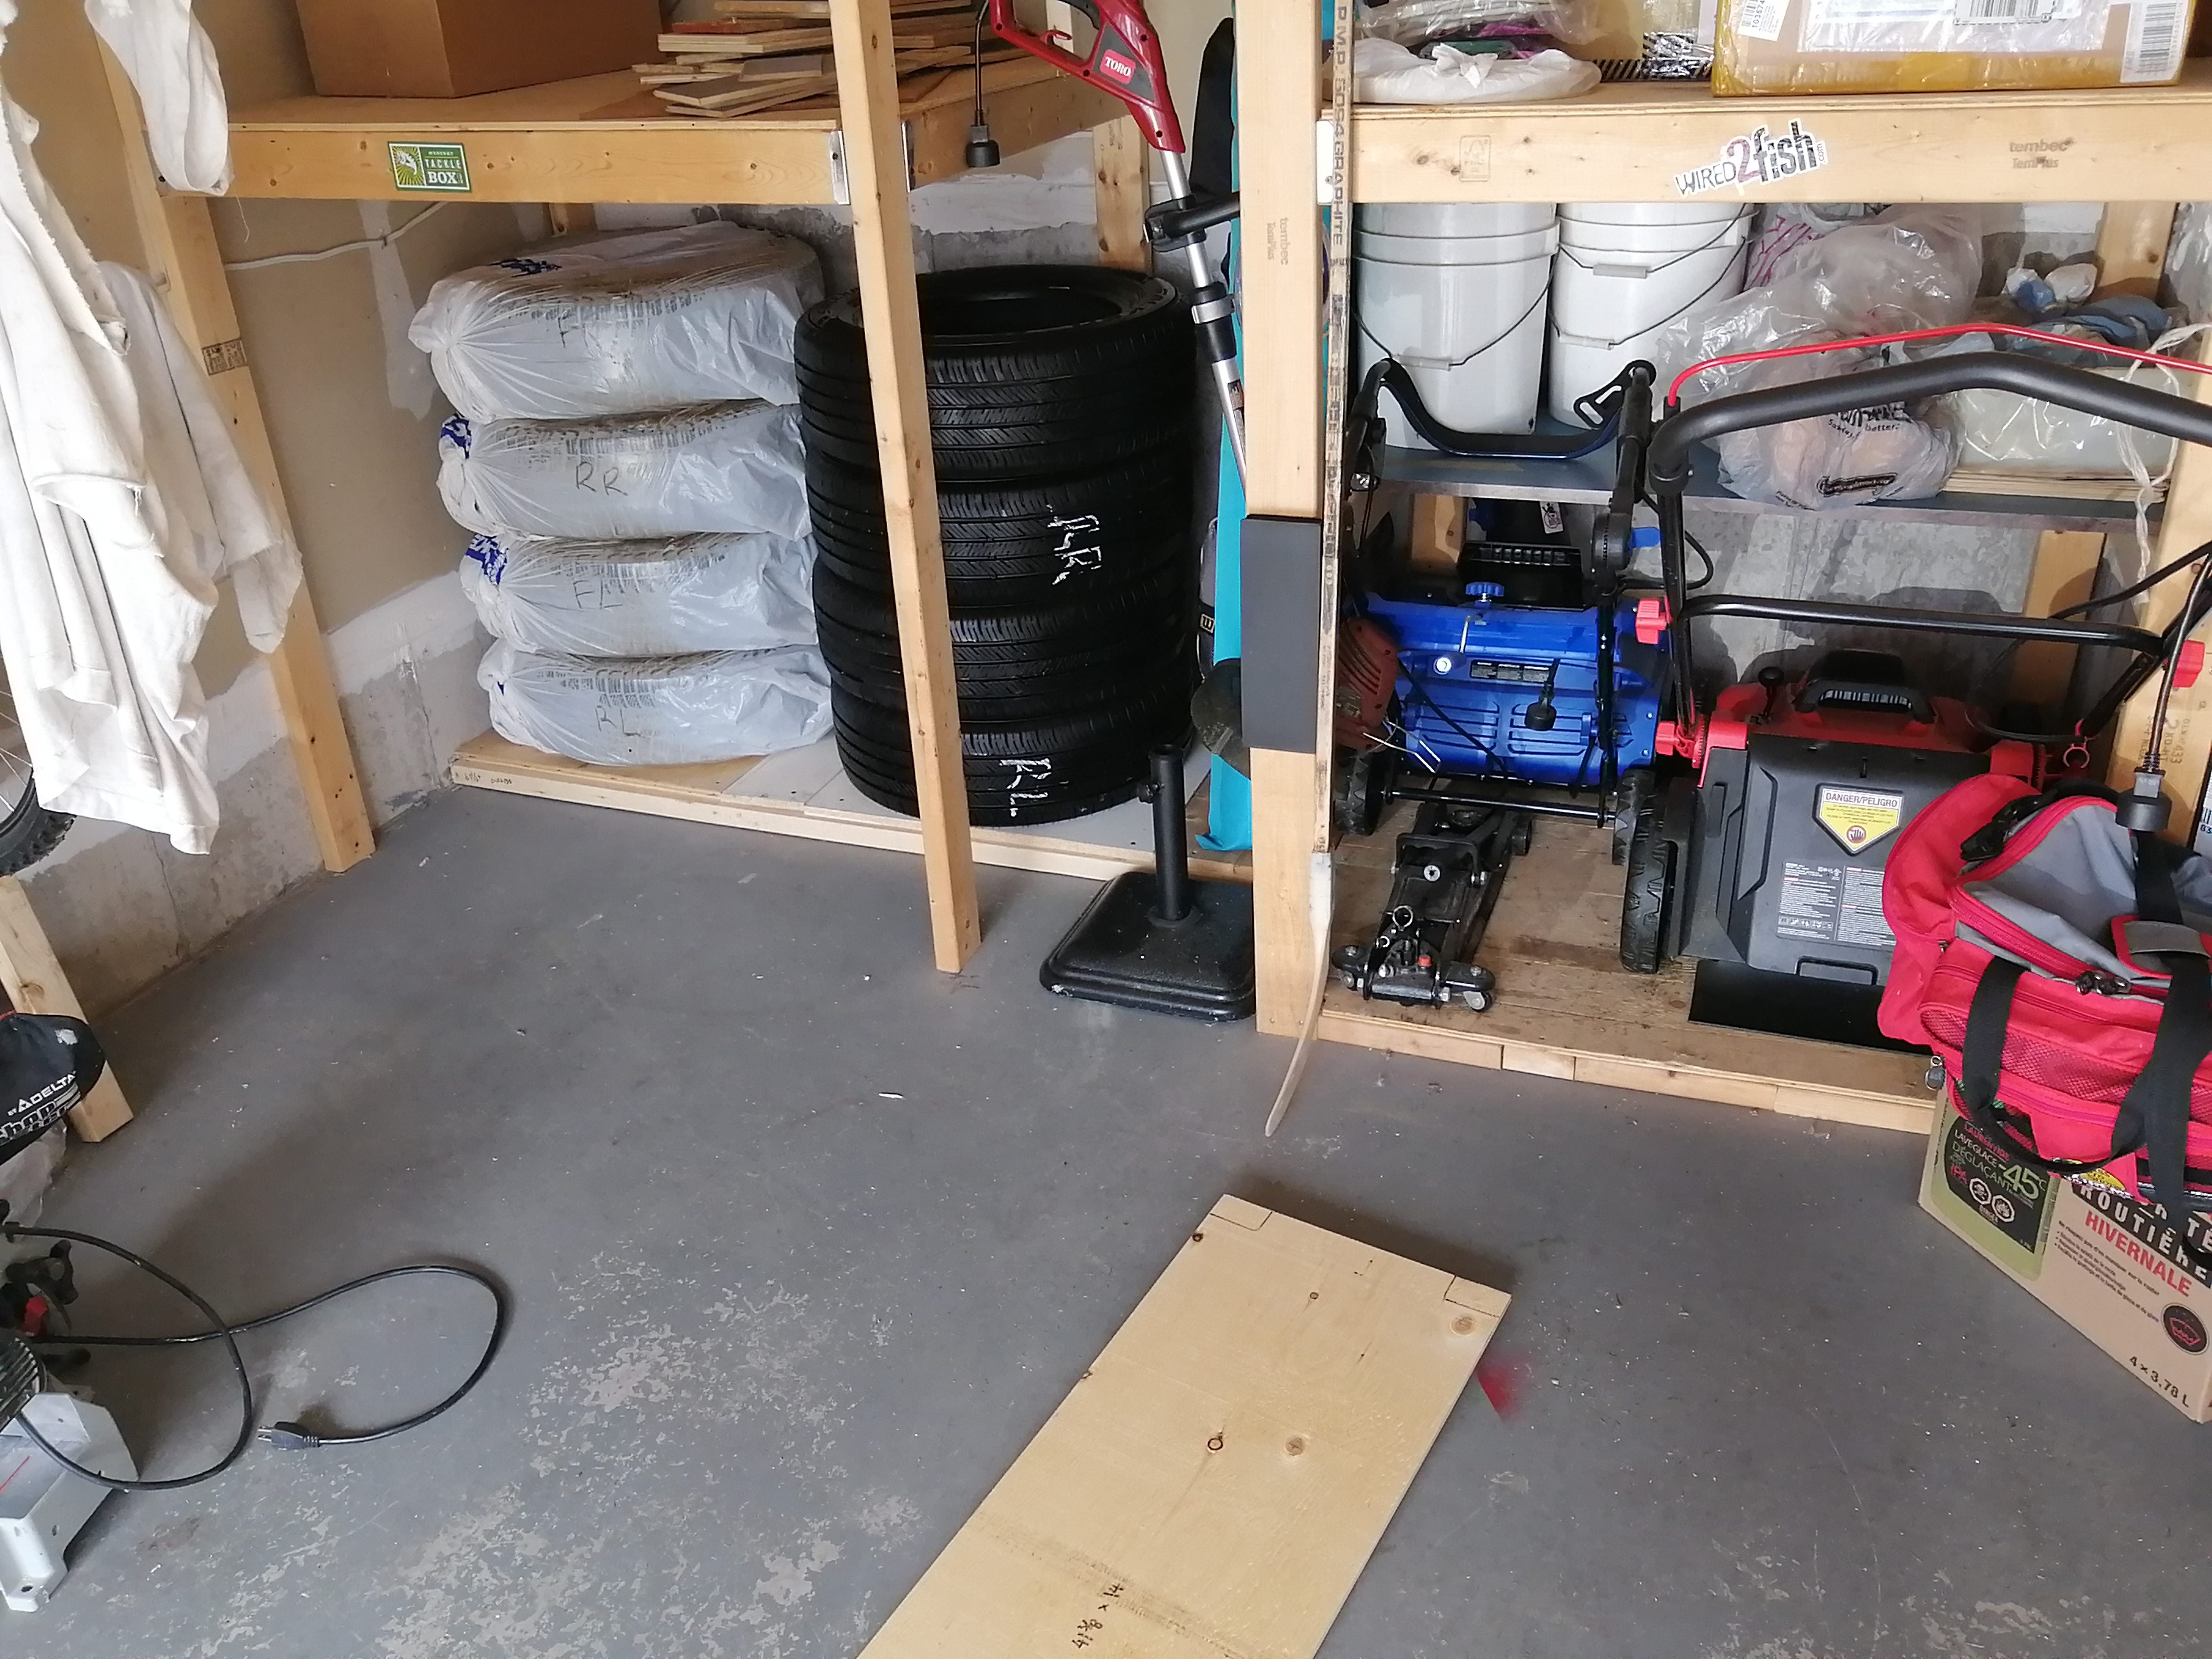
How to Store Tires Outdoors
If you’re like most people, you probably don’t think too much about how to store your tires. After all, they’re just big rubber circles, right?Wrong.
Tires are actually quite delicate and need to be stored properly to avoid damage. Here are a few tips on how to store your tires outdoors:1. Choose a shady spot: Tires are made of rubber, which is susceptible to UV damage.
To prolong the life of your tires, choose a spot that’s out of direct sunlight.
2. Keep them clean: Before storing your tires, make sure they’re clean and free of any dirt or debris. This will help prevent premature aging and cracking.
3. Inspect for cracks: Take a close look at your tires for any cracks or other signs of wear and tear. If you notice any damage, it’s best to replace the tire before storing it.
4. Use tire covers: Tire covers are an inexpensive way to protect your tires from the elements while they’re being stored outdoors.5
- Choose a location for your tires that is out of the way and not too close to your house or other buildings
- Clear the area of any debris, rocks, or other objects that could puncture your tires
- Place each tire on its side so that it is evenly balanced
- If you have more than one row of tires, stagger them so that each tire in the second row is directly behind or in front of a tire in the first row
- This will help prevent them from toppling over if someone bumps into them
- Cover the tires with a tarp or other waterproof cover to protect them from the elements
Store Tires Vertically Or Horizontally
If you have ever wondered whether it is better to store tires vertically or horizontally, wonder no more! The answer may surprise you.It turns out that the best way to store tires is actually vertically.
This allows for proper air circulation and prevents the tires from developing flat spots. Additionally, storing tires vertically makes it easier to see if there is any damage or wear on the tires.So next time you need to store your tires, be sure to do so vertically!
Your tires will thank you for it.
Credit: forums.redflagdeals.com
Can Tires Be Stored Outside?
It’s not ideal, but you can store tires outside. The main thing to watch out for is UV exposure, which can degrade the rubber. If you have to store them outside, put them on a pallet or something similar so they’re not sitting directly on the ground, and cover them with a tarp or something else to protect them from the sun.
How Do I Keep My Tires from Rotting Outside?
If you have tires that you need to store outside, there are a few things you can do to help prevent them from rotting. First, make sure the tires are clean and dry before storing them. Second, if possible, store the tires on their sides or upside down so that water can drain out of them.
Third, cover the tires with a tarp or other waterproof material to keep rain and snow from getting into them. Finally, check on the tires periodically to make sure they are still in good condition and not starting to rot.
Should Tires Be Stored Vertically Or Horizontally?
There is no definitive answer to this question as there are pros and cons to both storing tires vertically and horizontally. Here are some things to consider when making your decision:Storing Tires Vertically:
1. Takes up less space – If you’re short on storage space, then storing your tires upright might be the way to go.2. Keeps them clean – Storing your tires upright will help keep them cleaner since they won’t be in contact with the ground or other surfaces.3. Prevents flat spots – When stored horizontally, tires can develop flat spots from being in the same position for too long.
Storing them upright can help prevent this from happening.Storing Tires Horizontally:
1. Makes it easier to check for wear and tear – When stored horizontally, it’s easy to spot any uneven wear or tear on the treads of your tires.
This can be helpful in determining when it’s time to replace them.
Can You Store Wheels And Tires Outside?
You can store wheels and tires outside, but it’s not the best idea. They will be exposed to the elements and could rust or become damaged. It’s better to store them in a garage or shed where they will be protected from the weather.
Top 10 Tips For Storing Your Tires
Conclusion
If you have to store your tires outdoors, there are a few things you can do to prolong their life. First, if possible, store them on a pallet or in another way so that they’re not sitting directly on the ground. This will help prevent them from getting cracked or otherwise damaged.
Second, try to keep them out of direct sunlight as much as possible; too much sun exposure can cause the tires to deteriorate and even become unsafe. Finally, make sure they’re covered with a tarp or something similar to protect them from the elements as much as possible. With a little care, you can keep your stored tires in good condition for many years.
How to Install Solid Bike Tires
Installing solid bike tires is a process that anyone can do with the proper tools and instructions. The first thing you need to do is remove the old tires from your bike. Once the old tires are off, take a look at the new ones to see if they are the right size for your bike.
If they are, then proceed to the next step. If not, then you will need to find another set of tires that fit your bike before continuing.Next, you will need to put on the new front tire.
To do this, line up the valve stem with the hole in the rim, and then push the tire onto the rim until it pops into place. Once it is in place, use your fingers to push down on all sides of the tire so that it is seated properly on the rim. You may need to use a bit of force to get it into place, but be careful not to damage either the tire or rim in process.
- Start by removing the old tires from your bike
- You’ll need a tire lever to do this
- Once the old tires are off, clean the rims of your bike wheels
- This will help the new tires adhere better
- Next, take your new solid bike tire and place it on the rim, making sure that it’s seated correctly
- Once the tire is in place, use a hand pump or an air compressor to inflate the tire to the correct pressure
- Finally, check that the tire is inflated properly and there are no leaks before heading out on your ride!
How Do You Mount a Solid Tire?
If you’re looking to mount a solid tire, there are a few things you’ll need to keep in mind. First, make sure that the tire is properly inflated. Next, use a rim protector if you have one handy.
If not, be careful not to damage the bead of the tire when mounting it onto the wheel. Finally, once the tire is on the wheel, inflate it to the recommended pressure.
How Do You Put a Solid Rubber Rim on a Tire?
If you’re looking to put a solid rubber rim on a tire, there are a few things you’ll need to do. First, you’ll need to remove the old rim from the tire. To do this, you’ll need to use a tire iron and pry the old rim off of the tire.
Next, you’ll need to clean the area where the new rim will be placed. This can be done with a wire brush or sandpaper. Once the area is clean, you’ll need to apply a bead of adhesive around the circumference of the new rim.
Then, simply place the new rim on top of the adhesive and press it into place. Allow the adhesive to dry for 24 hours before inflating the tire.
How Do You Put Foam on a Bike Tire?
If you’re looking to add some extra cushioning to your bike ride, you may be wondering how to put foam on a bike tire. While it may seem like a daunting task, it’s actually quite simple. Here’s everything you need to know about adding foam to your bike tires.
The first step is to purchase the right type of foam for your tires. There are two main types of foam – closed cell and open cell – and each has its own benefits. Closed cell foam is more durable and will last longer, but it’s also more expensive.
Open cell foam is less durable but much cheaper, so it’s up to you which one you prefer.Once you’ve got your foam, the next step is to cut it into strips that are the same width as your tires. You can do this with a sharp knife or a pair of scissors.
Once you’ve got your strips cut, simply place them around the outside of your tires (on top of the existing tire). Make sure that the strips are evenly spaced out so that they provide even support all around the tire.That’s all there is to it!
Now just pump up your tires and enjoy the extra cushioned ride.
What are Solid Tires Called?
Solid tires are called pneumatic tires. Pneumatic tires are made of air-filled rubber and have a solid inner core. They are designed to absorb shock and provide a smooth ride.
Airless Bike Tires
Airless bike tires are becoming more popular as they offer a number of advantages over traditional pneumatic (air-filled) tires. Airless bike tires can’t go flat, so you’ll never have to worry about getting a flat tire on your ride. They’re also much lighter than pneumatic tires, so your bike will be easier to pedal.
And because they don’t rely on air pressure, they provide a smoother ride.If you’re looking for a puncture-proof tire that will never go flat, airless bike tires are worth considering. Here’s everything you need to know about this new type of tire.
Advantages of Airless Bike Tires1. You’ll Never Get a Flat Tire: One of the biggest advantages of airless bike tires is that you’ll never have to deal with flats again. That’s because these tires can’t be punctured – no matter how sharp the object is that penetrates them.
So whether you’re riding on glass-strewn roads or rocky trails, you can rest assured that your tires won’t go flat.2. They’re Lightweight: Another advantage of airless bike tires is that they’re much lighter than pneumatic (air-filled) ones. This makes sense when you think about it – after all, there’s no need for a heavy metal rim to support an inflated inner tube when there’s no air inside the tire!
This weight savings will make pedaling your bike feel easier and help you go faster on rides.3 .They Provide A Smoother Ride : Because airless bike tires don’t rely on air pressure for support, they provide a smoother ride than pneumatic ones do .
This is especially noticeable on bumpy roads or trails , where traditional tyres can feel jarring . If you want a more comfortable ride , airless tyres may be the way to go .Airless Bike Tire Brands
There are several brands currently offering airless bicycle tyres :1.Michelin : Michelin introduced its prototype Tweel tyre in 2005 and has been working on perfecting the design ever since . The French company now offers several different versions of its Tweel tyre , including one specifically designed for electric bikes .2.”Never Flat” by Continental : As the name suggests , this German brand ‘s “Never Flat” tyres promise to never leave riders stranded with a dead battery thanks to their special construction .
Conclusion
If you’re sick of getting flats, it might be time to switch to solid bike tires. Unlike traditional pneumatic tires that are filled with air, solid bike tires are made of rubber or polyurethane and don’t require any inflation. This makes them much more puncture-resistant and ideal for riding on rough terrain.
Installing solid bike tires is a pretty straightforward process that anyone can do at home with the right tools.First, you’ll need to remove your old tire and tube. To do this, loosen the bolts that secure the wheel to the frame and then use a tire lever to pry the tire off.
Once the tire is off, you can remove the tube by pulling it out through the hole in the rim. With your old tire and tube removed, it’s time to install the new solid bike tire.Start by inserting one side of the tire into the rim.
Make sure that the bead (the edge of the tire) is seated correctly in the groove around the edge of the rim. Then work your way around until both sides of the tire are in place. Once both sides are in, you can use your hands to press down on either side of The where they intersect in order To make sure that The bead Is locked Into place .
Finally , screw The retaining ring or bolt back Into place . And That’s all there Is too It ! You’ve now successfully installed Your new Solid Bike Tires !
How to Properly Dispose Old Tires
It is estimated that there are approximately one billion scrap tires in stockpiles across the United States. Many of these tires eventually find their way into our environment where they can create a variety of public health and safety hazards. Tires can serve as breeding grounds for mosquitoes and other insects, which can spread diseases like West Nile virus and Zika virus.
They can also act as fuel for fires, releasing harmful chemicals into the air.The best way to reduce the number of scrap tires in our environment is to recycle or reuse them whenever possible.
- Find a local recycling center that accepts old tires
- Remove the tires from your vehicle and take them to the recycling center
- The recycling center will then properly dispose of the tires according to local regulations
Used Tire Disposal near Me
If you’re looking for used tire disposal near me, there are a few options. You can either take them to a local recycling center or landfill, or you can dispose of them yourself.The best option is to take them to a local recycling center where they will be recycled into new tires.
This is the most environmentally-friendly option and it’s also free! If you can’t find a recycling center near you, the next best option is to take them to a local landfill.However, if you want to dispose of them yourself, there are a few things you need to know.
First, make sure that the tires are completely dry before disposing of them. Otherwise, they could create an environmental hazard. Second, cut the tires into small pieces so that they’ll fit into your trashcan.
Finally, place the tires in your trashcan with the rest of your garbage.With these tips in mind, used tire disposal near me should be easy and hassle-free!
What Can You Do With Old Tires?
If you’re like most people, you probably have a few old tires taking up space in your garage or shed. But rather than just letting them sit there and take up space, why not put them to good use? Here are a few ideas for what you can do with old tires:
1. Make a planter. Old tires make great planters for both flowers and vegetables. Just clean out the tire, fill it with soil and plant away!
2. Use them as weights. Fill an old tire with sand or water and use it as a weight when working out or doing yard work.3. Create art.
Tires can be painted and used to create all sorts of fun pieces of art. Get creative!4. Make a swing.
This is a great project for kids! Just attach rope to either side of an old tire and then hang it from a tree branch to create a homemade swing set.5 .
Build furniture .
What Must Be Done With the Old Tires at Home?
Most people don’t think about what to do with their old tires, but it’s actually a very important question. Tires are made of rubber and other synthetic materials, which means they’re not biodegradable. That means that when you throw them away in a landfill, they’ll just sit there for decades, taking up space.
There are actually many different ways to recycle or reuse old tires. One popular way is to use them as planters. You can cut the top off of an old tire and fill it with soil.
Then, you can plant flowers or vegetables inside of it. This is a great way to add some personality to your yard or garden while also being eco-friendly.Another option is to take your old tires to a recycling center.
There, the rubber can be used to make new products, like playground mats or even new tires. So if you’re not sure what to do with your old tires, don’t just throw them away – recycle them!
Where Can I Drop off Old Tires?
If you have old tires that you need to get rid of, there are a few options for tire disposal. Many garages and auto shops will accept old tires for recycling. You can also check with your local waste management company to see if they offer tire recycling services.
Finally, there are a number of private companies that specialize in tire recycling.
How Much is a Tire Disposal Fee in Texas?
The tire disposal fee in Texas is $2.00 per tire for passenger vehicles with a maximum of 10 tires. For commercial vehicles, the fee is $5.00 per tire with no maximum limit. These fees are used to cover the costs of disposing of old tires properly.
Conclusion
It is estimated that there are more than one billion waste tires in the United States. If you have old tires that you need to dispose of, it is important to do so properly. Here are some tips on how to properly dispose of old tires:
1. Check with your local municipality to see if there are any special regulations or requirements for disposing of tires in your area.2. See if your local waste management company will take tire waste. Some companies will charge a fee for this service.
3. You can also take your old tires to a tire recycling facility. Many facilities will accept tires free of charge.4. If you have a large number of old tires to dispose of, you may want to consider hiring a professional tire removal service.
How to Clean Car Tires And Rims
If your car tires and rims are looking a little dirty, it’s time to give them a good cleaning. Here’s how to clean car tires and rims in just a few simple steps.Start by spraying the tires and rims with a hose to remove any loose dirt or debris.
Next, use a brush to scrub the tires and rims clean. For tough stains, you may need to use a tire cleaner or wheel cleaner.Once the tires and rims are clean, rinse them off with water and dry them with a towel.
You can also put some protectant on the tires to help keep them looking new.
- To clean your car tires and rims, you will need: a bucket of warm water, dish soap, a sponge or cloth, tire cleaner, wheel cleaner, a soft brush (optional), and a garden hose
- First, mix some dish soap into the warm water in your bucket
- Next, use the sponge or cloth to wash the soap all over your tires and rims
- Be sure to get into all the nooks and crannies!4
- Once you’ve given them a good scrubbing with soap and water, it’s time to move on to tire cleaner and wheel cleaner
- Spray these products onto your tires and rims respectively, and let them sit for a few minutes according to their instructions
- Finally, rinse everything off with your garden hose until all the cleaners are gone and your tires and rims are sparkling clean!
What Can I Use to Clean My Rims And Tires?
There are a few household items that you can use to clean your rims and tires. Vinegar, baking soda, and dish soap are all effective at breaking down grime and dirt. Mix equal parts vinegar and water in a spray bottle, then liberally mist your rims and tires.
Let the solution sit for a few minutes before scrubbing with a brush or cloth. Rinse everything clean with water.For tougher jobs, mix together 1/2 cup baking soda and 1/4 cup dish soap in a bowl of warm water.
Dip a sponge or cloth into the mixture and scrub away at the dirt on your rims and tires. Rinse everything off with clean water when you’re finished.
What is the Best Way to Clean Rims?
There are a few different ways that you can clean your rims, and the best way for you may depend on the materials that your rims are made of. If your rims are made of aluminum, then you can use a variety of methods to clean them. You can use soap and water, or you can use a commercial cleaner specifically designed for aluminum.
If your rims are made of steel, then you will need to use a different method to clean them. One way to clean steel rims is to use a mixture of baking soda and vinegar. Another way is to use a commercial cleaner specifically designed for steel.
Whichever method you choose, be sure to follow the instructions carefully in order to avoid damaging your rims.
What’S the Best Thing to Clean Your Tires With?
There are a few things you can use to clean your tires, but the best thing to use is a tire cleaner specifically designed for the job. These cleaners will remove all the grime and build-up on your tires, leaving them looking like new.
What Do Professional Detailers Use to Clean Wheels?
When it comes to cleaning wheels, professional detailers use a variety of different products and techniques. The most important thing is to choose the right product for the type of wheel you have. For example, if you have aluminum wheels you’ll want to use a cleaner that’s specifically designed for that material.
Similarly, if you have chrome wheels you’ll want to use a cleaner that won’t damage the finish.One popular product that can be used on both aluminum and chrome wheels is Pinnacle Natural Brilliance Wheel Cleaner. This cleaner is safe for all wheel finishes and uses natural ingredients to break down dirt and grime.
To use it, simply spray it on your dirty wheels and let it sit for a few minutes before wiping it away with a clean cloth.Another option for cleaning wheels is Sonax Full Effect Wheel Cleaner Plus. This cleaner is also safe for all wheel finishes and uses an acid-free formula to remove brake dust, road grime, and other build-up from your wheels.
To use it, just spray it onto your wheels and let it sit for about 5 minutes before rinsing it off with water.No matter which product you choose, always make sure to read the instructions carefully before using it on your wheels. And always test any new cleaners or polishes in an inconspicuous area first to make sure they won’t damage your finish.
How to Clean Rims Without Scrubbing
If your car’s rims are looking a little dirty, you don’t have to break out the scrub brush. There are several ways to clean your rims without having to put in a lot of elbow grease.One way is to use boiling water.
Boil a pot of water and then pour it over the rim, using a cloth or sponge to scrub if necessary. The heat will loosen any dirt or grime that is stuck on the rim.Another way is to use vinegar.
Vinegar is a natural cleaning agent and can be used full strength or diluted with water. Apply vinegar to the rim with a cloth or sponge and scrub as necessary.There are also several commercial products available specifically for cleaning rims.
These can be found at most auto parts stores.
Conclusion
If you’re like most people, you probably don’t think much about your car tires and rims until they get dirty. But if you take the time to clean them regularly, it will not only make your car look better, but also help extend the life of your tires and rims. Here’s how to clean car tires and rims:
1. Start by using a cleaner specifically designed for tires and wheels. These cleaners are usually stronger than regular soap and will cut through the grime more easily. Apply the cleaner to a sponge or brush and scrub the tire in a circular motion.
2. Rinse off the cleaner with water and dry the tire with a soft cloth. Repeat on all four tires.3. To clean your rims, start by using a mild soap and water solution to remove any loose dirt or debris.
Next, use a wheel cleaner that is safe for your specific type of rim material (aluminum, chrome, etc.). Apply the cleaner according to directions and scrub the rim until it is clean.
How to Pump Up Tubeless Tires Mtb
Mountain biking is a great way to get outdoors and explore nature. However, one of the most frustrating things about mountain biking can be flat tires. No one wants to deal with a flat tire in the middle of a ride.
Thankfully, there is a solution- tubeless tires. Tubeless tires are becoming increasingly popular among mountain bikers because they eliminate the hassle of dealing with flats.
- Check that your tires are tubeless ready
- Some tires will have a special sealant inside them that helps to create a seal between the tire and the rim, while others will not
- If you’re unsure, consult your bike shop or the tire’s manufacturer
- Attach one end of your track pump to the valve stem on your wheel and make sure that the other end is securely attached to the pump itself
- Pump up your tire until it reaches its recommended PSI (pounds per square inch)
- For mountain bike tires, this is usually around 30-35 PSI
- Detach the pump from the valve stem and check that there is no air leaking from around the edges of the tire
- If there is, add more sealant to help fill any gaps and create a better seal
How to Inflate Tubeless Bike Tire With Hand Pump
Inflating a tubeless bike tire with a hand pump may seem like a daunting task, but it is actually quite simple. Here are the steps you need to take:1. Remove the valve cap from the tire and insert the pump nozzle into the valve.
2. Pump the tire until it is firm to the touch. You may need to pump more or less depending on the size of your tire and how much air you want in it.3. Replace the valve cap and enjoy riding!
How Do You Inflate a Tubeless Tire?
Tubeless tires are becoming increasingly popular, as they offer a number of advantages over traditional tires. They’re lighter, have fewer flats, and can be run at lower pressures without risk of pinch flats. But how do you inflate a tubeless tire?
The first step is to install the tubeless valve stem. This can be done by hand, but it’s often easier to use a drill or power drill with the appropriate bit. Once the valve stem is in place, you’ll need to add sealant to the tire.
You can do this by pouring it into the tire through the valve stem, or injecting it with a syringe.Next, you’ll need to inflate the tire using a floor pump or an air compressor. It’s important not to overinflate the tire, as this can cause damage to the rim.
Once the tire is inflated, give it a few minutes to seat properly on the rim before riding off.
Can You Pump Up a Tubeless Tire With a Hand Pump?
Yes, you can pump up a tubeless tire with a hand pump. There are two ways to do this: either by using a special adapter that fits onto the valve of the tire, or by removing the valve stem entirely and attaching the pump directly to the hole in the rim.The first method is easier and does not require any special tools, but it is important to make sure that the adapter is airtight so that no air escapes while you are pumping.
The second method is more difficult and requires a bit of extra effort to ensure that there is no air leakage, but it will ultimately give you a better seal.
How Much Should I Inflate Tubeless Mountain Bike Tires?
Tubeless mountain bike tires are becoming more and more popular, as they offer a number of advantages over traditional tube-type tires. One advantage is that you can run them at lower pressures without fear of pinch flats. But just how low should you go?
Most tire manufacturers recommend starting at about 20 psi for tubeless mountain bike tires. From there, you can experiment with lower pressures to find what works best for you and your riding style. Just be sure to check your tires frequently to make sure they’re not losing air too quickly.
One thing to keep in mind is that running your tubeless mountain bike tires at too low of a pressure can actually cause them to come off the rim. So if you start experiencing this problem, simply pump up the pressure a bit until it stops happening.In general, though, 20 psi is a good starting point for experimenting with lower tire pressures on your tubeless mountain bike tires.
Just be sure to check them often and don’t go too low or you could end up with a flat tire or worse!
Do Tubeless Tires Need to Be Pumped?
Tubeless tires do not need to be pumped as they are designed to hold air without an inner tube. There is a rim strip that goes around the inside of the tire and helps to keep the air in. Some riders prefer tubeless tires because they can ride with less air pressure, which can provide a smoother ride.
Conclusion
Whether you’re a seasoned mountain biker or just getting started, there’s a good chance you’ve heard of tubeless tires. Tubeless tires have many benefits over traditional clincher tires, including improved grip, reduced rolling resistance, and fewer flats. But one of the biggest drawbacks to tubeless tires is that they can be difficult to get on and off your bike.
If you’re having trouble getting your tubeless tires to seat properly, don’t worry—you’re not alone. In this post, we’ll share some tips on how to pump up tubeless tires so you can get back out on the trails in no time.One of the most important things to remember when pumping up tubeless tires is to use a high-volume pump.
High-volume pumps are designed specifically for tubeless applications and will help seat the tire correctly on the rim. If you don’t have a high-volume pump, you can try using a floor pump with an adapter kit. Just be sure not to overinflate the tire—you should only need about 30 psi of pressure to seat the bead correctly.
Once you have your high-volume pump or adapter kit ready, it’s time to start inflating your tire. Begin by attaching the valve stem to the valve core and screwing it tight. Next, apply some soapy water or sealant around the rim edge and insert the tire into place.
Make sure that the tire is seated evenly on both sides of the rim before proceeding.Now it’s time to start pumping! Start with just a few strokes of air to make sure everything is lined up correctly.
Once everything looks good, continue pumping until you reach your desired pressure—usually between 25 and 35 psi for mountain biking applications. And that’s it!
How to Stop Flat Spots on Tires
If you have ever driven a car with flat spots on the tires, you know how uncomfortable and dangerous it can be. The good news is that there are some things you can do to prevent flat spots from happening in the first place.
- If you notice your car has flat spots on the tires, it’s important to take care of them as soon as possible
- Flat spots can cause damage to the tire and can lead to a blowout
- Look for signs of flat spots on your tires
- You may notice that the car vibrates when driving or that the tire feels lumpy
- Take your car to a mechanic or tire specialist to have the tires inspected
- They will be able to tell you if the flat spots are caused by damaged tires or if they are just cosmetic
- If the flat spots are due to damaged tires, you will need to replace them
- This is usually covered by insurance, but it is important to check with your provider before having any work done
- If the flat spots are just cosmetic, you can try sanding them down with fine-grit sandpaper until they are level with the rest of the tire surface
Do Flat Spots in Tires Go Away?
Most flat spots in tires go away on their own after a little while. The reason for this is that, as the tire rotates, the flat spot gets rubbed against the road and starts to wear down. However, if the flat spot is severe, it may not disappear completely and you may need to have your tire repaired or replaced.
What Causes Flat Spot on Tires?
A flat spot on a tire can be caused by several things. Most commonly, it is caused by the tire being underinflated. This causes the middle of the tire to contact the ground more than the edges, and over time this can cause a flat spot.
Another common cause is leaving a trailer or other vehicle parked in one spot for too long. The weight of the vehicle can press down on one spot of the tire and cause a flat spot. Finally, running over something sharp can puncture or otherwise damage the tire and cause a flat spot.
How Do You Prevent Flat Spots on Tires in Winter Storage?
If you’re storing your car for the winter, you’ll want to take some steps to prevent flat spots on your tires. Flat spots can occur when a tire is sitting in one spot for too long, and they can make your ride uncomfortable and can cause premature wear on your tires.There are a few things you can do to prevent flat spots on your tires during winter storage:
– Move your car occasionally. If you can, try to move your car every week or two while it’s in storage. This will help keep the tires from sitting in one spot for too long and getting flat spots.
– Use tire covers. Tire covers can help protect your tires from the elements and from gettingflat spots. They’re relatively inexpensive and easy to find, so they’re worth considering if you’re worried about flat spots.
– Fill up your tires with air before storing them. Making sure your tires are properly inflated before storing them will help prevent flat spots from forming. Check the pressure regularly during storage just to be safe.
Following these tips should help you avoid flat spots on your tires during winter storage!
How Long Can a Car Sit before the Tires Get Flat Spots?
If you’re wondering how long you can leave your car before the tires get flat spots, the answer is it depends. It depends on the type of tire, the weight of the vehicle, and whether or not the vehicle is parked on an incline.Pneumatic tires are made of rubber and filled with air.
They are designed to deform and absorb shock when in contact with the ground. When a pneumatic tire is sitting stationary for too long, the air inside begins to leak out slowly through the walls of the tire. This causes the tire to lose its shape and develop flat spots.
The amount of time it takes for this to happen varies depending on factors like temperature, humidity, and sunlight exposure; but generally speaking, it can take anywhere from a few days to a couple of weeks for significant flat spotting to occur.Solid tires are made of hard rubber or plastic and don’t rely on air pressure for support. For this reason, they are less susceptible to developing flat spots from sitting stationary for extended periods of time.
However, solid tires are more prone to damage from objects like nails or glass since there’s no give in them when they come into contact with something sharp.The weight of a vehicle also plays a role in how quickly its tires will develop flat spots. Heavier vehicles put more pressure on their tires when at rest, which accelerates flattening.
Parking on an incline can help reduce this pressure and extend the life of your tires (assuming all other factors remain constant).To recap: there is no definitive answer as to how long a car can sit before its tires get flat spots. It depends on variables like tire type, weight of the vehicle, temperature/humidity/sunlight exposure, etc.
If you’re planning on leaving your car parked for an extended period of time (more than a week or two), it’s best to consult with a professional beforehand so they can advise you on what measures need to be taken in order prevent damage to your tires (and your car).
Will Flat Spot on Tire Correct Itself
If you have ever driven a car with a flat spot on the tire, you know how annoying it can be. The constant thumping noise is enough to drive anyone crazy. Luckily, there is a way to fix this problem.
First, let’s talk about what causes flat spots on tires. Flat spots typically occur when a car is parked in one spot for too long. The weight of the car presses down on the tire and causes it to flatten out in that spot.
This can also happen if you leave your car sitting in the sun for too long or if it gets too cold outside.Now that we know what causes flat spots, let’s talk about how to fix them. The best way to fix a flat spot is to simply drive the car around for awhile.
The friction from driving will help round out the tire and eventually get rid of the flat spot altogether. Just make sure you don’t drive too fast or else you could damage your tire beyond repair!If driving around doesn’t work, then you can try using a tire roller or something similar.
This will help massage the flat spot out of your tire so that it becomes round again. You can find these at most auto parts stores or online retailers.Finally, if all else fails, you can always replace your Tire entirely .
This should only be done as a last resort though because it can be quite expensive . Hopefully this article helped shed some light on how to deal with those pesky flat spots on tires!
Conclusion
It’s inevitable, your car sits in the garage for a few days (or weeks) and you come out to find that your tires have developed flat spots. It’s annoying, but it happens. The good news is that there are ways to avoid this from happening, or at least minimize the damage.
Here are a few tips:1. Get your tires rotated regularly. This will ensure that all sides of the tire get equal wear and tear and reduces the chance of flat spots developing.
2. Drive slowly for the first few miles after your car has been sitting. This allows the tires to warm up gradually and prevents them from being damaged by sudden impact.3. Don’t use parking brakes excessively.
If you must use them, make sure to release them slowly to give the tires time to adjust back to their normal position before driving off again.4. Inspect your tires regularly for any signs of uneven wear or damage.

How to Stretch Tires at Home
One of the simplest ways to prolong the life of your tires is to perform routine maintenance like regular tire rotations and keeping them inflated to the proper PSI. But another way to get more miles out of your tires is by stretching them. Stretching tires helps distribute the tread evenly, which can help prevent premature balding or cupping.
Plus, it gives you a chance to inspect the condition of your tires so you can catch any potential problems early on.
- Park your car on a level surface and set the emergency brake
- Loosen the lug nuts on your tires with a tire iron or socket wrench, but do not remove them
- Place blocks behind the back tires of your vehicle to keep it from rolling while you work
- Inflate each tire to its maximum psi rating with a air compressor or hand pump
- Using a pry bar, push out on the bead of each tire until it is separated from the wheel rim
- Insert one end of a tire iron under the bead of the tire and lever it up to separate the bead even further from the wheel rim
- Repeat step 6 around the entire circumference of the tire until it is completely separated from the wheel rim 8
- Stretch each side of the tire by pulling it away from the center of the wheel 9
- Re-insert each tire onto its respective wheel rim and inflate to its maximum psi rating 10
- Replace each lug nut and tighten with a torque wrench or socket wrench
Tire Stretch: 185/60R13 on 13×10
How Do I Stretch My Tires?
Assuming you would like tips on how to properly stretch your tires:It is important to make sure your tires are properly stretched before each ride. This will help ensure a safer, more comfortable experience while riding.
Here are some tips on how to properly stretch your tires:-Inflate your tires to the recommended pressure listed on the sidewall of the tire. Do not over or under inflate as this can cause damage to the tire.
-Using a bike pump, inflate the front tire first and then the rear.
-Once both tires are inflated, use your hands to grip the top of the tire and push down with moderate force. You should feel resistance from the air inside the tire trying to Equalize The Pressure (ETP).
If you don’t feel resistance, add more air until you do. After stretching each tire in this manner, let all of The air out and start again from step one.
Is Stretching a Tire Safe?
Most people believe that stretching a tire is safe as long as it’s done properly. However, there is always the risk of overstretching the tire, which can cause the tire to burst. It’s important to be very careful when stretching a tire, and to make sure that you don’t stretch it too much.
How Do You Stretch a Small Tire on a Bigger Rim?
If you’re looking to stretch a small tire on a bigger rim, there are a few things you’ll need to keep in mind. First, you’ll need to make sure that the new rim is significantly wider than the old one. Second, you’ll need to ensure that the new rim has a similar or slightly smaller diameter as the old one.
And finally, you should only attempt to stretch a tire if it’s made of rubber – attempting to do so with a plastic or metal tire could cause serious damage.Assuming all of those conditions are met, stretching a small tire onto a bigger rim is surprisingly simple. Just place the new rim over top of the old one and line up the bolt holes.
Then, starting at the bottom, slowly work your way around the circumference of the tire, carefully stretching it over the new rim. It’s important not to stretch too aggressively, as this could cause tearing; just take your time and be gentle.Once the entire circumference of the tire is stretched over the new rim, simply bolt everything into place and inflate according to manufacturer recommendations.
That’s all there is to it! With a little patience and care, you can easily give your vehicle an updated look by stretching small tires onto larger rims.
Can Any Tires Be Stretched?
No, not all tires can be stretched. Stretching a tire means to increase the diameter of the sidewall, which can only be done with certain types of tires. Some companies make “stretch” tires that are designed to be stretched, but these must be used with caution, as they can cause problems if not installed correctly.

Credit: www.reddit.com
Tire Stretch Calculator
If you’re looking to get the most out of your tires, you may want to consider stretching them. Tire stretching is when you increase the diameter of your tires so that they sit wider on your rims. This can give your car a more aggressive look and can also improve traction and handling.
To see if tire stretching is right for you, use our Tire Stretch Calculator. Just enter in some basic information about your car and tires and we’ll tell you what size stretched tires will fit on your rims. We’ll also provide some recommended offsets and widths to help you get started.
So why stretch your tires? There are a few benefits:Improved Traction: Stretched tires provide a larger contact patch with the ground, which can improve traction, especially in wet or icy conditions.
Improved Handling: A wider contact patch can also improve handling by providing more grip when cornering.Better Fitment: Stretching your tires can allow for better fitment of aftermarket wheels as well as certain body kits that require wider wheels. It can also give your car a more unique look.
Conclusion
If your car’s tires are looking a little low, you might be wondering if you can stretch them at home. The good news is that it is possible to stretch tires at home, but there are a few things you need to keep in mind. First, make sure that the tires are properly inflated before you start stretching them.
Second, use a tire stretcher or another similar device to slowly and evenly stretch the tire. Third, don’t overdo it – only stretch the tire as much as necessary to get the desired effect. Finally, take a look at the sidewall of the tire after stretching it to make sure there are no cracks or other damage.
If everything looks good, then you’re all set!
How to Refill Tires With Nitrogen
As the weather gets colder, it’s important to make sure your tires are properly inflated. Nitrogen is a safe and effective way to keep your tires inflated and in good condition. Here’s how to refill your tires with nitrogen:
First, you’ll need to purchase a nitrogen tank. These are available at most auto supply stores. Once you have the tank, you’ll need to attach it to your tire valve.
Next, open the valve on the tank and allow the nitrogen to flow into the tire. Fill the tire until it is at the proper pressure. Finally, close the valve on the tank and remove it from the tire valve.
- Purchase a nitrogen kit, which can be found at most auto stores
- Park your car on a level surface and remove the tire valve caps
- Attach the nitrogen kit to the tire valve and open the valve to release the air from the tire
- Close the valve when the tire is empty and then detach the nitrogen kit from the valve
- Fill up the tire with nitrogen using the hose from the kit, and then close off the hose when finished
- Re-attach the wheel’s valve cap
How to Fill Tires With Nitrogen at Home
Tire pressure is one of the most important aspects of vehicle maintenance. Not only does it affect how your car drives, but it also impacts fuel economy and tire wear. For these reasons, it’s important to keep your tires properly inflated.
One way to do this is to fill them with nitrogen instead of air. Nitrogen is a dry gas that doesn’t contain water vapor like air does. This means that it won’t cause your tires to degrade as quickly and will help maintain proper pressure for longer periods of time.
Filling your tires with nitrogen is easy to do at home with a few simple tools. All you need is a hose, an adapter, and a canister of nitrogen. Once you have these items, simply follow these steps:
1. Park your car on level ground and remove the valve stem caps from all four tires.2. Attach the hose to the adapter and screw it onto the valve stem of one tire. Make sure that the hose is pointing downwards so that the nitrogen will flow into the tire and not out into the atmosphere.
3. Open the canister of nitrogen and hold it upside down over the end of the hose opposite the valve stem connection. Slowly press down on the canister to release nitrogen into the hose until you hear air hissing out from around the connection between the valve stem and hose adapter – this indicates that all ofthe nitrogen has been transferred fromthe canister into your tire! Repeat this process for eachofyour remaining three tires until they are all filledwithnitrogen .
Can You Put Air in a Tire That’S Filled With Nitrogen?
If you have a tire that’s filled with nitrogen, you can’t put air in it. The reason is because nitrogen is an inert gas and it won’t mix with the air. So, if you try to put air in a tire that’s filled with nitrogen, all you’ll end up doing is filling up the space between the particles of nitrogen.
Can I Fill Nitrogen Tires at Home?
Yes, you can fill nitrogen tires at home. All you need is a nitrogen tank and a tire inflator. First, remove the valve stem cap from the tire.
Next, connect the tire inflator to the nitrogen tank and open the valve. Slowly fill the tire with nitrogen until it reaches the desired pressure. Finally, replace the valve stem cap and enjoy your newly filled nitrogen tires!
Can I Buy Nitrogen for My Tires?
You can buy nitrogen for your tires, but there are a few things to keep in mind. First, nitrogen is an inert gas, so it won’t mix with the air in your tires. You’ll need to fill your tires with pure nitrogen, which you can get at a welding supply store.
Second, nitrogen is slightly more expensive than air, so you’ll need to budget for that. Finally, nitrogen doesn’t absorb water like air does, so your tires will stay inflated longer in humid conditions.
How Much Does It Cost to Inflate Your Tires With Nitrogen?
The cost of inflating your tires with nitrogen will depend on a few factors, such as the size of your tire and the amount of nitrogen you need. Generally speaking, it will cost between $5 and $10 per tire to have them inflated with nitrogen.
Conclusion
If you want to keep your tires inflated longer and improve your gas mileage, consider refilling them with nitrogen. It’s easy to do yourself, and all you need is a nitrogen tank and a tire gauge. Here’s how to refill tires with nitrogen:
1. Park your car on a level surface and turn off the engine.2. Remove the cap from the tire valve stem.3. Press the nozzle of the nitrogen tank into the valve stem opening and release the gas slowly.
4. Fill the tire until it is at its recommended pressure (usually between 30 and 35 PSI). Replace the tire cap when you’re done.
How to Drive With Studded Tires
If you live in an area with lots of snow and ice, then you know how important it is to have studded tires on your car. Studded tires provide extra traction on slippery roads, making it easier to drive and stay safe. Here are some tips for driving with studded tires:
-Start by making sure your tires are properly inflated. This will help improve traction and prevent the tire from slipping.
-Drive slowly and carefully.
Sudden starts and stops can cause the tire to lose grip.
-Be aware of other vehicles around you. If another driver is not using studded tires, they may be more likely to slide or spin out on the road.
-Keep an eye out for potholes. Hitting a pothole can damage your tires, so avoid them if possible.
-In general, take your time when driving in winter conditions.
It’s better to arrive late than not at all!
- Make sure your vehicle is compatible with studded tires
- Some vehicles cannot accommodate them without special rims
- Purchase a set of studded tires from a tire retailer or auto parts store
- Mount the studded tires on your vehicle, following the instructions provided in your owner’s manual or by the tire retailer/auto parts store personnel
- Inflate the tires to the recommended pressure level indicated on the sidewall of the tire or in your owner’s manual
- Drive slowly and carefully at first to get a feel for how the studded tires affect handling, braking, and traction on snow and ice-covered roads
How Fast Can I Drive With Studded Snow Tires?
Studded tires are designed for traction on icy and snowy roads. The metal studs dig into the ice and provide extra grip, helping you to maintain control of your vehicle. In most states, studded tires are only legal from October 1st to May 1st.
There is no universally accepted speed limit for driving with studded tires, but it is generally recommended that you drive slower than normal to allow for increased stopping distance and decreased traction. Different states have different laws regarding studded tires – in some states there is no limit, while in others the maximum speed limit is 35 mph. Check the laws in your state before driving with studded tires.
How Do You Use Studded Tires?
If you live in an area with a lot of snow and ice, studded tires may be a good option for you. They provide better traction than regular tires, making it easier to get around on slippery roads. Here are a few things to keep in mind if you’re thinking about using studded tires:
1. Check your local laws before using them. Some states prohibit the use of studded tires due to the damage they can cause to roadways.2. Make sure your car can handle the extra weight of studded tires.
They are heavier than regular tires and can put additional strain on your vehicle’s suspension and brakes.3. Be prepared for a rougher ride. The metal spikes on studded tires can make for a bumpier ride than normal, so be aware of that when you’re driving.
4. Inspect your tires regularly. The spikes on studded tires can wear down over time, so it’s important to check them periodically to make sure they’re still effective.
Can You Drive Studded Snow Tires on Pavement?
If you live in a state that allows studded tires, then the answer is technically yes, you can drive them on pavement. However, there are a few things to keep in mind before hitting the road.First and foremost, studded tires are designed for icy and snowy conditions – not dry pavement.
That means that they will wear down much faster if used on asphalt or concrete. In fact, most manufacturers recommend only using them for around 100 miles before taking them off until winter weather hits again.Additionally, studded tires can damage pavement – especially when it’s warm out and the pavement is soft.
So if you do use them on dry roads, be sure to drive slowly and avoid any sharp turns or sudden stops to minimize any potential damage.All in all, while you can technically drive studded snow tires on pavement, it’s not something that we would recommend unless absolutely necessary. Stick to using them when conditions are icy and snowy to get the best performance and longevity out of your tires!
Can You Drive Studded Tires on Dry Roads?
If you live in a state that allows studded tires, you may be wondering if you can use them on dry roads. The answer is yes, but there are a few things to keep in mind.First of all, studded tires are designed for traction on icy and snowy roads.
They have metal or ceramic studs embedded in the tread that provide good grip on slippery surfaces. However, studded tires can also be used on dry roads.The main thing to keep in mind when using studded tires on dry roads is that they will wear down the pavement more quickly than regular tires.
This is because the metal or ceramic studs contact the road surface more directly than regular tire treads. As a result, it’s important to use studded tires sparingly on dry roads to minimize damage to the pavement.Another consideration when using studded tires on dry roads is noise pollution.
The metal or ceramic studs can create a significant amount of noise as they come into contact with the pavement. This can be annoying for other drivers and pedestrians nearby.
How Fast Can You Drive With Studded Tires
If you’re driving in winter conditions, studded tires can give you the traction you need to stay safe on the roads. But how fast can you drive with studded tires?The answer depends on the type of studs that are in your tires.
Some studs are designed for speed, while others are meant for traction. If you have speed-rated studs in your tires, you can drive up to speeds of 80 mph without damaging your tires. However, if you have traction-rated studs, it’s best to keep your speed below 50 mph to avoid wearing down the tread too quickly.
Of course, even with studded tires, it’s important to drive according to road conditions and always use caution when operating a vehicle in winter weather.
Conclusion
If you’re driving in snowy or icy conditions, studded tires can give you the extra traction you need to stay safe on the road. Here’s what you need to know about driving with studded tires:1. Check your state’s laws before using studded tires.
Some states have restrictions on when and where you can use them.2. Make sure your tires are properly inflated. Overinflated tires can decrease traction and cause premature tire wear.
3. Drive slowly and carefully when using studded tires. They may provide extra traction, but they can also damage the pavement if used too aggressively.4. Inspect your studded tires regularly for wear and tear.