- Home
- Archive: September, 2023

Air Pressure Gauge Not Working – How to Fix an Air Gauge?
If your air pressure gauge isn’t working, it’s important to figure out why. This can be a difficult task, as there are many potential causes. However, by troubleshooting the issue, you should be able to identify the problem and fix it.
Here’s how to do it.
If your air pressure gauge is not working, it may be due to a few different reasons. First, check to see if the batteries are dead. If they are, simply replace them and see if that does the trick.
If not, then there may be an issue with the sensor itself. To test this, you can try calibrating the sensor by following these steps:
- With the engine off, disconnect the negative battery terminal to reset the ECU.
- Reconnect the negative battery terminal and turn on the ignition (do not start the engine).
- Press and hold the trip meter reset button while turning on the headlights (low beam).
- Continue holding down the trip meter reset button until “CAL” appears in place of the odometer reading.
- Release the button and turn off all lights and accessories. The CAL message will go away after a few seconds and your air pressure gauge should now be working properly!
Why is My Pressure Gauge Not Working?
If your pressure gauge is not working, it may be due to a number of different factors. First, check to see if the gauge is properly calibrated. If it is not, then you will need to recalibrate it.
Next, check to see if there is any damage to the gauge itself. If there is, then you may need to replace the gauge. Finally, check to see if the pressure in the system is within the range that the gauge is designed to measure.
If it is not, then you will need to adjust the pressure in the system accordingly.
How Do You Fix an Air Gauge?
If you have an air gauge that is not working properly, there are a few things that you can do to try and fix it. First, check to make sure that the batteries are fresh and installed correctly. Next, check the connections to make sure they are tight and free of corrosion.
If everything looks good so far, then you may need to calibrate the gauge. To do this, you will need to find a reference point for the zero reading on the gauge. Once you have found this point, adjust the knob on the back of the gauge until the needle points to zero.
If your air gauge still isn’t working after doing all of these things, then it may be time to replace it.
Can a Tire Pressure Gauge Be Repaired?
A tire pressure gauge is a precision instrument and, like any other precision instrument, it can be repaired if it becomes damaged. The most common damage to a tire pressure gauge is the loss of calibration, which can happen if the gauge is dropped or otherwise mishandled. If your tire pressure gauge becomes damaged, you can send it back to the manufacturer for repair or calibration.
How Do I Test My Air Pressure Gauge?
If you’re unsure about the accuracy of your air pressure gauge, there are a few ways to test it.The most common way is to use a calibration cup. This is simply a cup with markings for different air pressures.
To use one, fill the cup with air and then place your gauge in the center of the cup. The needle on the gauge should line up with the corresponding marking on the cup.Another way to test your air pressure gauge is by using a known source of air pressure, such as an air compressor.
Set the compressor to a specific pressure and then attach your gauge to it. The needle on the gauge should match up with the reading on the compressor.If you don’t have access to a calibration cup or an air compressor, you can still test your air pressure gauge by using a tire inflator.
Fill up a tire to its recommended amount of psi and then attach your gauge to see if it matches that reading.No matter which method you choose, testing your air pressure gauge regularly will help ensure that you always have an accurate reading when you need it!
How to Fix a Broken Pressure Gauge
Pressure Gauge Zero Adjustment
A pressure gauge is one of the most important tools for any technician working with pressurized systems. It is essential for reading and setting the correct pressures in these systems. The zero adjustments on a pressure gauge is a critical function that must be performed correctly in order to ensure accurate readings.
There are two types of zero adjustments: static and dynamic. Static zero adjustments are made when the system is not pressurized, while dynamic zero adjustments are made when the system is under pressure. The type of adjustment needed will depend on the application and the specific pressure gauge being used.
Static Zero Adjustment: The first step is to identify where the zero mark on the dial face of the pressure gauge is located. This can be done by looking at the graduation marks around the perimeter of the dial or by using a magnifying glass to find the small line that indicates 0 psi (pounds per square inch) or 0 kPa (kilopascals).
Once you have found this point, use a fine-tipped marker to make a dot on the dial just above this point so that it can easily be seen. Now, slowly open up the valve on your test fitting until you see fluid start to flow into it. As soon as fluid starts flowing, stop opening the valve and wait for all air bubbles to clear from the line before continuing.
With all air bubbles cleared, watch closely as fluid flows into your test fitting and note when exactly the needle on your pressure gauge reaches halfway between 0 psi and its full-scale value (100 psi for example). Make another mark on your dial at this point directly opposite your first mark – this will now represent 50% of the full scale on your pressure gauge.
Pencil Tire Pressure Gauge Not Working
If your pencil tire pressure gauge isn’t working, there are a few things you can check. First, make sure the gauge is properly calibrated. You can do this by checking the manufacturer’s instructions or taking it to a professional to have it checked.
If the gauge is still not working, try changing the batteries. If that doesn’t work, it may be time to buy a new one.
How to Fix a Tire Pressure Gauge
If your tire pressure gauge isn’t working properly, it can be frustrating trying to keep your tires inflated to the correct level. Fortunately, there are some simple things you can do to fix a tire pressure gauge. First, check the battery.
If the battery is dead, the gauge won’t work. Replace the batteries and see if that fixes the problem. Next, check to see if the connection between the gauge and the Schrader valve is secure.
If it’s not, air will leak out and give you an inaccurate reading. Finally, if your tire pressure gauge still isn’t working properly, try calibrating it. You can do this by inflating a tire to a known level (using another gauge or an air compressor) and then adjusting the knob on the back of the gauge until it reads correctly.
How to Calibrate Tire Pressure Gauge
When it comes to making sure your car is running properly, one of the most important things you can do is calibrate your tire pressure gauge. This will ensure that you are getting accurate readings when checking your tires, and can help prevent problems down the road. Here’s how to calibrate your tire pressure gauge:
- First, you’ll need to find a flat surface on which to place your gauge. Make sure that the surface is level so that the readings will be accurate.
- Once you’ve found a level surface, place the tip of the tire pressure gauge on the ground and press down firmly. The pointer on the gauge should rest at 0 psi when it’s correctly calibrated.
- If the pointer does not rest at 0 psi, then you’ll need to adjust the calibration screw until it does. Once you’ve done this, your tire pressure gauge should be accurately calibrated and ready to use!
Conclusion
If your air pressure gauge is not working, it may be because the batteries are dead or there is a problem with the wiring. You can try replacing the batteries or checking the wiring to see if that fixes the problem. If not, you may need to buy a new air pressure gauge.

How to Know Car Tire Pressure
One of the most important things to ensure when driving is that your car tires are properly inflated. Under-inflated or over-inflated tires can cause a blowout, which can be extremely dangerous. It’s important to check your tire pressure regularly, and it’s easy to do with a digital tire gauge.
- Check your car’s owner’s manual to find the recommended tire pressure for your specific vehicle make and model
- Locate the tire pressure gauge on your air compressor
- Remove the cap from the valve stem on one of your tires
- Press the tip of the tire pressure gauge onto the valve stem and hold it in place until you hear a hissing sound, indicating that air is escaping from the tire
- Read the pressure gauge to determine how much air is in your tire, then compare it to what is listed in your car’s owner’s manual as being the optimal amount of air for your tires
- 6 If necessary, add or release air from your tires using the air compressor until you reach the desired amount of tire pressure listed in your car’s owner’s manual
Credit: evanstire.com
What are the Ideal Tire Pressures for My Car
It is difficult to give a definitive answer to the question of what are the ideal tire pressures for your car as there are many variables that can affect this including the type of vehicle, driving habits and conditions, and even tire type. However, there are some general guidelines that can be followed in order to ensure that your tires are properly inflated.One thing to keep in mind is that tire pressure varies with temperature, so it is important to check your tires when they are cold in order to get an accurate reading.
The ideal tire pressure for your car will usually be listed on a sticker inside the driver’s door or in the owner’s manual. If you cannot find this information, a good rule of thumb is to inflate your tires to about 35 psi (pounds per square inch).Another important factor to consider is loading.
If you regularly carry heavy loads in your car, you may need to increase the tire pressure accordingly. Similarly, if you do a lot of highway driving, you may want to slightly inflate your tires above the recommended level in order to reduce wear and tear.As long as you stay within these general guidelines, you should be able to maintain proper tire pressure for your car without any problems.
Remember to check your tires regularly and adjust the pressure as needed in order to keep them performing at their best.
How Can I Tell If My Tires are Properly Inflated
If you’re unsure about how to check your tire pressure, you’re not alone. It’s a common question, and an important one. Here are a few tips on how to tell if your tires are properly inflated.
First, it’s important to know what the proper tire pressure is for your vehicle. This can be found in your owner’s manual or on a sticker inside the driver’s doorjamb. Once you know the proper pressure, use a tire gauge to check each tire.
It’s best to check your tires when they’re cold, so if possible, do it first thing in the morning before you’ve driven anywhere. If you have been driving, then give your tires at least three hours to cool down before checking the pressure.When using a tire gauge, press it firmly onto the valve stem and get a reading.
If the needle doesn’t move at all or falls back into place after removing the gauge, then there may be something wrong with the valve stem and you’ll need to have it checked by a professional.If the reading is below the recommended amount, then use an air compressor or hand pump to add air until it reaches the proper level. If it’s above the recommended amount, let some air out until it reaches that level.
Be sure not to overinflate as this can cause problems too.
Why is It Important to Maintain Proper Tire Pressure
It is important to maintain proper tire pressure for several reasons. First, it helps to improve fuel economy. Second, it helps to prolong the life of your tires.
Third, it provides better handling and stability on the road. Fourth, it helps to improve traction in both wet and dry conditions. Fifth, it can help to prevent flats.
Sixth, it can help reduce road noise. Finally, maintaining proper tire pressure can help increase the overall safety of your vehicle.
What Happens If I Don’T Inflate My Tires Properly
If you don’t inflate your tires properly, it can lead to a number of problems. The most serious problem is that it can cause a blowout, which can be very dangerous. It can also cause premature wear on your tires, and make it more difficult to handle your vehicle.
How To: Check Tire Pressure and Inflate Tires
What Should My Tire Pressure Be
We all know that maintaining proper tire pressure is important for our safety on the road. But what many of us don’t know is what the correct tire pressure should be. Depending on the make and model of your vehicle, as well as the type of tires you have, the correct tire pressure can vary.
Most passenger cars will have a recommended tire pressure between 30 and 35 PSI (pounds per square inch). If you’re unsure of what the right tire pressure is for your car, consult your owner’s manual or look for a sticker inside your driver’s side door panel. This sticker will list both the recommended tire size and inflation pressure for your specific vehicle.
Once you know what the ideal tire pressure is for your car, it’s time to check your tires to see if they need to be inflated. The best way to do this is with a digital air gauge, which can be found at most auto parts stores. Simply attach the gauge to each tire in turn and note the reading.
If it falls below the recommended level, add air until it reaches that level. It’s important not to overinflate your tires, so don’t exceed the maximum psi listed on either your tires or in your owner’s manual.By keeping an eye on your tires’ inflation levels, you can help ensure a smooth ride and prolong the life of your tires.
How to Check Tire Pressure Without Gauge
If you’re like most people, you probably don’t think about your tires until there’s a problem. But proper tire maintenance is important for both safety and efficiency. One of the most important things you can do is check your tire pressure regularly.
Most vehicles have a tire pressure sensor that will warn you when the pressure in one or more tires is low. However, it’s always a good idea to know how to check your tires without a gauge. Here are a few tips:
1. Use your vehicle owner’s manual to locate the recommended tire pressure for your specific make and model.2. Use a reliable digital tire pressure gauge . These can be found at most auto parts stores.
3. Remove the valve cap from each tire and press the gauge firmly onto the valve stem. Make sure not to touch any of the moving parts on the gauge while doing this. The reading should be stable before taking note of it .
If it isn’t, add or release air until it is .
4 Check all four tires and compare the readings to each other and to what’s listed in your owner’s manual . If any of them are significantly different , there may be a problem with that tire .
Is 40 Psi Good Tire Pressure
Maintaining proper tire pressure is one of the most important things you can do to prolong the life of your tires. So, what is the ideal tire pressure for your car?Most passenger cars will have a recommended tire pressure of around 32 psi to 35 psi in the front tires and around 30 psi to 33 psi in the rear tires.
However, it’s always best to consult your owner’s manual or the placard on your doorjamb for the specific numbers for your vehicle.Now, some people like to keep their tires inflated to the maximum rating on the sidewall. For instance, if a tire has a maximum inflation pressure of 44 psi, they will inflate it to 44 psi.
However, this is not necessary and can actually lead to a rougher ride and decreased fuel economy. In general, it’s best to stick with the manufacturer’s recommendations.So, what happens if you have too much air in your tires?
Well, overinflated tires can lead to premature wear on the center of the tread. This is because there is less contact between the tire and road when there is too much air in the tire. Additionally, overinflated tires are more susceptible to punctures and blowouts since they don’t have as much give.
On the other hand, if you have too little air in your tires, you may notice that your car starts handling poorly. This is because underinflated tires can cause increased rolling resistance which makes steering and braking more difficult. Additionally, underinflated tires put extra stress on suspension components leading to premature wear.
Not only that but driving on underinflated tires can decrease fuel economy by up to 3%.
Tire Pressure Calculator
If you’re like most people, you probably don’t think much about your car’s tires. But they play a vital role in keeping you safe on the road. That’s why it’s important to check your tire pressure regularly and keep them inflated to the proper level.
There are a few different ways to do this, but the easiest is to use a tire pressure calculator. There are many different websites that offer these calculators for free.When you use a tire pressure calculator, you’ll just need to enter some basic information about your vehicle and its tires.
This includes the make and model of your car, as well as the size of your tires. Once you have this information entered, the calculator will do the rest and tell you what your ideal tire pressure should be.It’s important to check your tires regularly and keep them inflated to the proper level for two main reasons.
First, it helps improve fuel economy. Second, it reduces wear and tear on your tires, which means they’ll last longer. So not only will using a tire pressure calculator save you money at the pump, it’ll also save you money in the long run!
Conclusion
Tire pressure is something that every driver should know about. It’s important to keep your tires inflated to the proper level so that they can perform properly and last longer. Here are a few tips on how to check your car’s tire pressure:
1. Use a tire pressure gauge to check the air pressure in each of your tires. You can find these gauges at most auto parts stores.2. Compare the reading on the gauge with the recommended tire pressure for your vehicle, which can be found in your owner’s manual or on a sticker inside the driver’s door frame.
3. If the readings are different, use an air compressor or hand pump to add or remove air from your tires until they reach the proper level.4. Check your tire pressure at least once a month, and before long road trips for best results.

How to Adjust Tire Alignment
One of the most important aspects of keeping your car in good condition is making sure that the tires are properly aligned. This helps to ensure that your car will handle correctly and also extends the life of your tires. If you notice that your car is pulling to one side or the other, it’s likely that the tire alignment is off.
Here’s how to adjust tire alignment so that your car drives straight again.
How to Perform Wheel Alignment by Yourself
- Park your vehicle on a level surface and turn the engine off
- Loosen the lug nuts on your front tires with a lug wrench
- Do not remove them completely
- Place jack stands under your vehicle’s frame on each side of the front tires
- Raise your vehicle with a jack until the front tires are off the ground
- Spin each tire to check for any wobbling or shaking
- If they are visibly damaged, have them replaced immediately before continuing with the alignment process
- 6) Turn the steering wheel all the way to one side so that the other wheel is pointing straight ahead, then tighten the lock nut in place with pliers or an adjustable wrench to prevent it from moving8 7) Repeat this step for the opposite side
How to Adjust Toe-In of Wheel Alignment
If you’re like most people, the toe-in of your wheel alignment is probably something that you don’t think about very often. But if your car isn’t driving straight, or if you’re experiencing unusual tire wear, it could be time to adjust the toe-in of your wheels.The first thing you’ll need to do is find a level spot to park your car.
Once your car is in park, turn off the engine and set the parking brake. You’ll also want to chock the front wheels so that they can’t roll while you’re working.Next, measure the distance from the center of the front tire to the fender on both sides of the car.
If these measurements are different, then your toe-in is out of adjustment. To adjust it, simply loosen the tie rod nuts and turn them until both measurements are equal. Then tighten down the nuts and recheck your work.
If you don’t feel comfortable adjusting your own alignment, take your car to a professional mechanic or service center and they can do it for you quickly and easily.
How to Do a Wheel Alignment With a Tape Measure
If your vehicle is pulling to one side or the other, or if you notice that your steering wheel isn’t centered when you’re driving down the road, it’s likely that your wheels are out of alignment. Wheel alignment is something that should be done periodically to ensure optimal performance and fuel efficiency from your vehicle, and it’s actually not as difficult or expensive as you might think.One way to check your wheel alignment at home is with a tape measure.
First, park your vehicle on a level surface and put it in neutral. Next, measure the distance from the ground to the center of each tire at the front and back of the vehicle. If these measurements are different, then your wheels are out of alignment.
To fix this, simply adjust the position of your tires until all four measurements match. You can do this by loosening the lug nuts on each tire and moving them slightly until they reach the desired position. Once they’re in place, tighten up the lug nuts and take it for a test drive!
Step by Step Wheel Alignment Procedure Pdf
If you’re a car owner, it’s important to know how to properly align your wheels. Wheel alignment is the process of making sure your car’s wheels are perpendicular to the ground and pointing in the right direction. This is important for several reasons:
1. Proper wheel alignment helps improve your gas mileage. When your wheels are out of alignment, your car has to work harder to move forward, which means you’ll use more fuel.2. Wheel alignment can help prolong the life of your tires.
If your tires are constantly misaligned, they will wear down unevenly and need to be replaced sooner than if they were properly aligned.3. Proper wheel alignment improves the handling of your car. If your wheels are out of alignment, it can make driving difficult and uncomfortable as well as increase wear and tear on suspension components.
Luckily, wheel alignment is something you can easily do at home with just a few tools and some patience! Here’s a step-by-step guide on how to align your own wheels:1) Park your car on a level surface and set the parking brake so it doesn’t roll around while you’re working on it.
2) Remove any hubcaps or wheel covers so you have clear access to the lug nuts/bolts holding each wheel in place.3) Measure the distance from the ground to each tire at the point where it meets the sidewall (this is called the “tread depth”). Write down these numbers so you can reference them later.
You want all four numbers to be within 1/4″ of each other – if they’re not, then proceed with adjusting your wheel alignment accordingly (we’ll get into that soon). 4) Next, measure the distance between each tire and its corresponding fender at both the top and bottom of the tire (you may need someone to help hold one end of the measuring tape while you measure). These numbers should also be within 1/4″ of each other – if they’re not, then something is definitely off with your wheel alignment and needs adjusted! 5) Now that you have all these measurements, it’s time to adjust accordingly! For most cars, adjusting toe (the angle at which each tire points inward or outward from center) is done by loosening or tightening certain bolts on either side near where each tire meets its corresponding control arm .
Front Wheel Alignment – Do It Yourself
If your car is veering to the left or right when you’re driving down the road, it might be time for a front wheel alignment. Many people think that this is something that can only be done at a mechanic, but it’s actually something you can do yourself with just a few tools.The first thing you need to do is park your car on a level surface and put on the parking brake.
Then, loosen the lug nuts on your front wheels so that you can remove them later. Next, jack up your car and support it with jack stands. Once your car is lifted off the ground, remove the front wheels.
Now it’s time to start adjusting the alignment. The first thing you need to adjust is the toe. To do this, measure the distance between the tires at both the front and back of each tire using a tape measure.
If they’re not equal, then you need to adjust the toe by turning either the tie rod or adjustment sleeve until they are equal.The next thing to adjust is camber . This is done by measuring how far off perpendicular each tire sits from vertical when looking at it from directly in front or behind of the car .
It should be as close to perpendicular as possible , but if not , use cam bolts to make adjustments . Finally , check and adjust caster by looking at where an imaginary line drawn through each upper ball joint intersects with an imaginary line drawn through each lower ball joint . Caster affects steering returnability , so make sure it ‘s within specification given in your vehicle ‘ s service manual before moving on .
To finish up , reinstall your wheels ( making sure to tighten those lug nuts ! ) and take it for a spin !
How to Do an Alignment Without a Machine
If your car is out of alignment, it can cause all sorts of problems. The most obvious symptom is that your car will pull to one side or the other while driving. This can make it very difficult to drive straight, and can also lead to premature tire wear.
Luckily, you don’t always need a machine to realign your car. There are a few things you can do at home to get your car back in alignment.First, check your tires.
If they’re unevenly worn, that’s a good indication that your car is out of alignment. You’ll want to adjust the front wheels first, since they have the biggest impact on how your car drives.To adjust the front wheels, turn the steering wheel all the way to one side until it stops.
Then, measure from the center of the tire to the ground (or use a level). Adjust each wheel until it’s even with the other one.Once both front wheels are level, move on to the rear ones.
Again, turn the steering wheel all the way to one side and measure from tire center to ground (or use a level). Adjust each rear wheel until it matches up with its corresponding front wheel.If you don’t have access to a measuring device or level, you can still roughly align your car by eye.

Credit: www.wikihow.com
Can You Adjust Your Own Alignment?
No, you cannot adjust your own alignment. Alignment is determined by the position of your spine in relation to your hips and pelvis. If your spine is not properly aligned, it can cause pain or other problems.
A chiropractor or other health care professional can help you determine if you need to adjust your alignment and how to do so.
How Do You Adjust Your Alignment?
There are a few different ways that you can adjust your alignment. The first way is to use the adjustment screws on the side of the headstock. These screws will move the whole neck in either direction, so you’ll need to make small adjustments and then check the intonation again until it’s perfect.
The second way to adjust alignment is by using shims. Shims go between the neck and body of the guitar at either the nut or bridge end, and they can be used to fine-tune the angle of the neck. This is a more advanced technique and requires some trial and error to get right, but it can be very effective.
Finally, if your guitar has a truss rod, this can also be used to adjust the neck angle. The truss rod runs inside the neck and adjusts tension on the wood, which changes its shape slightly and therefore affects the angle of the neck. Again, this is an advanced technique and should only be attempted by someone who knows what they’re doing!
Whichever method you use, remember to take your time and make small adjustments until you get it just right – a fraction of a millimetre can make all the difference!
How Do I Know If My Wheel Alignment is Correct?
Assuming you’re asking how to tell if your car’s wheel alignment is off, there are a few things you can look for.One way is to check your tire wear. If your alignment is off, your tires will show uneven wear patterns.
This can manifest as one side of the tread wearing down more quickly than the other, or the tread in the center wearing down before the edges.Another way to tell if your alignment is off is by paying attention to how your car drives. If it seems like your car is pulling to one side or the other when you’re driving straight, that’s a good indication that something is off with your alignment.
You might also notice that your steering wheel isn’t centered when you’re driving down the road; this too indicates that your alignment needs to be adjusted.If you suspect that your alignment might be off, the best thing to do is take it to a professional mechanic and have them take a look. They’ll be able to give you a definitive answer as to whether or not your alignment needs to be adjusted, and they can do it for you if necessary.
Conclusion
If your vehicle is displaying any of the following symptoms, it may be time for a tire alignment:1. Your vehicle is pulling to one side when driving
2. You notice that your steering wheel isn’t centered when driving straight
3. You see uneven or rapid tire wear
4. Your vehicle feels like it’s shaking or vibrating excessivelyFortunately, adjusting your tire alignment is a relatively simple process that you can do at home with the help of a few tools.
Here’s how to adjust tire alignment in four easy steps:1. Park your vehicle on a level surface and engage the parking brake.
2. Locate the adjustment bolts on your suspension system.
These will be located near the bottom of your car’s front wheels.
3. Using a wrench, turn the adjustment bolts until the front wheels are aligned with each other and perpendicular to the ground.

How Tire Pressure Gauge Works
A tire pressure gauge is a tool that helps you check the air pressure in your tires. It is important to keep your tires properly inflated because it can help improve your gas mileage and extend the life of your tires. There are different types of tire pressure gauges, but they all work in basically the same way.
To use a tire pressure gauge, you simply attach it to the valve stem on your tire and press down on the trigger or button. This will allow air to flow into the gauge so that it can measure the pressure.
If you’ve ever wondered how those little tire pressure gauges work, wonder no more! Here’s a quick rundown of how they function.Tire pressure gauges use a simple principle to measure the air pressure in a tire.
They have a small, metal tube that goes into the tire valve. The end of the tube has a diaphragm that is connected to a pointer.When you press the gauge onto the valve, the air in the tire pushes against the diaphragm.
This makes the pointer move and indicates what the pressure is on the gauge’s dial. Most gauges have markings for different types of tires, so you can easily check if your tires are properly inflated.Now that you know how they work, be sure to keep an eye on your tire pressure and top off your tires as needed!

Credit: en.wikipedia.org
How Does a Tire Pressure Guage Work?
Tire pressure gauges are used to measure the air pressure in a tire. There are two types of tire pressure gauges: digital and analog.Digital tire pressure gauges use an electronic sensor to measure the air pressure in a tire.
The sensor is located in the tip of the gauge and is connected to a display screen. The digital reading is displayed on the screen.Analog tire pressure gauges use a mechanical system to measure the air pressure in a tire.
The gauge has a pointer that moves up or down depending on the amount of airpressure in the tire.
How Accurate is a Tire Pressure Gauge?
A tire pressure gauge is a very important tool for keeping your tires properly inflated. Without it, you could end up driving on under-inflated tires, which can lead to a blowout or other serious problems. So, how accurate are tire pressure gauges?
Generally speaking, most tire pressure gauges are quite accurate. However, there can be some variation from one gauge to the next. And, of course, if the gauge is not properly calibrated, it may not give accurate readings.
If you’re concerned about the accuracy of your tire pressure gauge, the best thing to do is to check it against another gauge (or against a digital inflator/pressure sensor). That way, you can be sure that you’re getting an accurate reading.
How Does it Work? Tire Pressure Gauge
How to Use a Tire Pressure Gauge
A tire pressure gauge is a helpful tool that every driver should have. Knowing how to use one can help you keep your tires in good condition and avoid getting stranded on the side of the road. Here’s a step-by-step guide on how to use a tire pressure gauge:
1. Find an appropriate location. You’ll want to find a spot that’s level and firm, like a parking lot or garage floor. Avoid checking your tire pressure on concrete, as this can give you an inaccurate reading.
2. Remove the cap from your tire’s valve stem. This is located on the side of your tire. Use your fingers to unscrew it until it comes off completely.
3. Place the end of the tire pressure gauge onto the valve stem and press down firmly. You should hear a hissing sound as air escapes from your tire. Keep pressing until the needle on the gauge stops moving, which indicates that you have a reading.
4 . Compare your reading to what’s recommended for your vehicle . Most cars will have this information listed in their owner’s manual or on a sticker inside the driver’s doorjamb .
If your reading is lower than what’s recommended , add air to your tires using an air compressor or hand pump . If it’s higher , let some air out by pressing down on the valve stem with your thumb .5 .
Replace the cap on your valve stem when you finish adding or releasing air from your tires .
36. Explain How to Use a Tyre Pressure Gauge?
If you own a car, it’s important to know how to use a tyre pressure gauge. Here’s a step-by-step guide:1. Find the recommended tyre pressure for your car in the owner’s manual or on the placard located on the driver’s doorjamb.
2. Remove the cap from the valve stem on one of your tyres.3. Press the metal tip of the tyre pressure gauge onto the valve stem and hold it there until you hear a hissing sound, which indicates that air is escaping from the tyre.4. Look at the reading on the tyre pressure gauge to see what your current tyre pressure is.
If it matches the recommended pressure, put the cap back on and move onto another tyre. If not, proceed to step 5.
How to Read Tire Pressure Gauge at Gas Station
If you’re like most people, you probably don’t think about your car’s tires until there’s a problem. But keeping an eye on your tire pressure is an important part of preventive maintenance. And it’s easy to do if you know how to read a tire pressure gauge at the gas station.
Here’s what you need to know:First, find the recommended tire pressure for your vehicle in the owner’s manual or on the placard inside the driver’s door. This is the number of pounds per square inch (PSI) that your tires should be inflated to.
Next, locate the air hose at the gas station and insert the metal nozzle into the valve stem on your tire. Press down on the handle to inflate the tire.Now, take a look at the tire pressure gauge.
Most have a red zone that indicates when a tire is significantly over-inflated. If the needle is in this zone, stop inflating and remove the nozzle from the valve stem. Let some air out until the needle falls into the normal range.
It’s also important to check for under-inflation. Ifthe needle falls belowthe empty line onthe gauge, add more air until it reachesthe recommended PSI foryour vehicle.
Pencil Tire Pressure Gauge
If you’re a driver, then you know how important it is to keep your tires properly inflated. Not only does this help with fuel economy, but it also helps to extend the life of your tires. One way to ensure that your tires are always properly inflated is to use a pencil tire pressure gauge.
A pencil tire pressure gauge is a small, handheld device that you can use to measure the air pressure in your tires. To use one, simply insert the metal probe into the valve stem on your tire and press down on the gauge. This will cause a small amount of air to escape from your tire and will give you an accurate reading of the current air pressure.
Pencil tire pressure gauges are inexpensive and easy to use, making them a great tool for any driver. If you’re not sure what kind of gauge to buy, look for one that is easy to read and has a durable construction.
Conclusion
A tire pressure gauge is a device that measures the air pressure in a vehicle’s tires. Tire pressure is important because it affects the car’s handling, fuel economy, and safety. Underinflated tires can lead to blowouts, while overinflated tires can make the car harder to control.
Most tire pressure gauges use a simple mechanical design to measure air pressure. The gauge has a small chamber that holds air from the tire being tested. A piston in the chamber pushes against the air, and a pointer on the outside of the chamber indicates how much pressure is in the tire.
Some digital tire pressure gauges use sensors to measure air pressure. These gauges are more accurate than mechanical ones, but they’re also more expensive.

Pneumatic Air Pressure Gauge
A pneumatic air pressure gauge is an instrument that measures the pressure of air or other gases. It is often used in pneumatics, which is the study of how gases move and interact with solid objects. The pneumatic air pressure gauge consists of a sensing element, such as a Bourdon tube, and a display element, such as a needle or digital readout.
The sensing element responds to changes in air pressure by moving the display element accordingly. Pneumatic air pressure gauges are available in many different sizes and styles, depending on their intended use.
If you’re like most people, you probably don’t know a whole lot about pneumatic air pressure gauges. That’s OK – we’re here to help! A pneumatic air pressure gauge is a device that measures the pressure of air or gas in a system.
There are many different types of pneumatic air pressure gauges on the market, but they all serve the same basic purpose.Pneumatic air pressure gauges are used in a variety of industries, including automotive manufacturing, aerospace engineering, and even medicine. They’re an essential tool for anyone who needs to measure the pressure of air or gas in a system.
There are several factors to consider when choosing a pneumatic air pressure gauge. The first is accuracy. Choose a gauge that is accurate to within plus or minus 2 percent of full scale.
This will ensure that you get reliable readings every time.Next, consider the size of the unit. Pneumatic air pressure gauges come in both handheld and panel-mount models.
Handheld models are great for portability, while panel-mount models tend to be more accurate. Choose the size that best suits your needs.Finally, think about price.
Pneumatic air pressure gauges range in price from around $50 to over $1,000 depending on features and accuracy. Choose the model that fits your budget and your needs.
Credit: www.controlair.com
What is Pneumatic Pressure Gauge?
A pneumatic pressure gauge is a type of pressure gauge that uses compressed air to measure the pressure of a gas or liquid. The gauge consists of a chamber with a movable piston, connected to a needle that indicates the pressure on a scale.Pneumatic pressure gauges are used in many industries, including automotive manufacturing, aerospace engineering, and chemical processing.
They are accurate and durable, making them ideal for use in hostile environments.
What is the Best Tire Air Pressure Gauge?
The best tire air pressure gauge is the one that is most accurate and easy to use. There are many different types and brands of tire gauges on the market, so it is important to do some research to find the best one for your needs.Most digital tire gauges are very accurate, and some even have a built-in light so you can see the readings in low-light conditions.
Many analog (dial) tire gauges are also quite accurate, but they can be more difficult to read accurately. If you choose an analog gauge, make sure it has a large, easy-to-read dial.Some factors to consider when choosing a tire air pressure gauge include: accuracy, ease of use, durability, and price.
It is important to find a gauge that is durable enough to withstand being dropped or otherwise abused, as well as one that is affordable. With so many different types and brands of gauges on the market, there is sure to be one that meets your needs perfectly!
What are the Four 4 Types of Pressure Gauge?
Different types of pressure gauges are designed to measure different kinds of pressure. The four main types of pressure gauges are:1. Bourdon tube pressure gauges: These are the most common type of pressure gauge and can be used to measure both vacuum and pressures up to 15,000 psi.
The bourdon tube is a coiled metal tube that uncoils when pressurized, which moves the pointer on the dial.2. Diaphragm pressure gauges: These can be used to measure pressures up to 10,000 psi and work by using a flexible diaphragm that deflects when pressurized. This movement is transmitted through a linkage to the pointer on the dial.
3. Bellows pressure gauges: These work similarly to diaphragm gauges but use a bellows instead of a diaphragm. They can be used for measuring both vacuum and pressures up to 5,000 psi.4. Piston pressure gauges: Also known as deadweight testers, these are used to calibrate other types of pressure gauges as they are very accurate.
They work by using weights placed on top of a piston that is inserted into the device being tested; the higher the weight, the greater the force exerted on the piston and so the more accurate the reading will be.
What are the Two Types of Air Pressure Gauges?
An air pressure gauge is a tool that measures the pressure of air in a given environment. There are two types of air pressure gauges: an aneroid barometer and a manometer.The aneroid barometer uses a sealed, partially evacuated metal chamber that is free to expand and contract with changes in atmospheric pressure.
A needle attached to the chamber indicates the changing pressure on a calibrated dial. The advantage of this type of gauge is that it is portable and relatively easy to use.A manometer consists of a U-shaped tube filled with liquid (usually mercury or water).
One end of the tube is open to the atmosphere, while the other end is connected to the system being tested. As atmospheric pressure changes, the level of liquid in the tube rises or falls, which can be read from a scale marked on the tube. Manometers are more accurate than aneroid barometers, but they are also more difficult to use and less portable.
Is your Air Pressure Gauge Accurate?
Truck Air Pressure Gauge
Truck air pressure gauges are one of the most important tools for keeping your truck in good condition. They help you check the pressure in your tires, which is important for both safety and performance.There are a few different types of truck air pressure gauges on the market, but they all serve the same basic purpose.
The most important thing to look for in a good gauge is accuracy. You don’t want to end up with under-inflated or over-inflated tires, so it’s crucial that your gauge is accurate.Another important consideration is ease of use.
Some gauges can be difficult to read, especially if you’re trying to do it while driving. Look for a gauge that has a large, easy-to-read display.Finally, consider price when choosing a truck air pressure gauge.
There are some very affordable options on the market, so you don’t need to spend a lot of money to get a good quality gauge. Just make sure that you choose one from a reputable brand and that it comes with a warranty.
Air Pressure Gauge Digital
An air pressure gauge is a digital device that measures the pressure of air in a tire or other closed chamber. The reading on the gauge is displayed in psi (pounds per square inch) or kPa (kilopascals). Most air pressure gauges also have a temperature sensor built into them so that the readings are automatically compensated for temperature changes.
There are many different types and brands of air pressure gauges on the market, but they all work on the same basic principle. A small sensing element, usually a diaphragm or capacitive sensor, is placed inside the chamber being monitored. As the pressure in the chamber increases or decreases, so does the deflection of the sensor.
This change in deflection is converted into an electrical signal by a transducer inside the gauge, which is then displayed on the digital readout.Gauges can be either hand-held or permanently mounted, and can be connected to a tire via Schrader valve or Presta valve. Some models even come with wireless connectivity so that they can be used with smartphones and other devices.
Air Compressor Gauge Kit
An air compressor gauge kit is a great way to keep your air tools properly inflated. By attaching the gauges to your compressor, you can easily monitor the pressure in real-time, ensuring that your tools are always operating at peak efficiency. The kit includes two different types of gauges: a standard analog pressure gauge and a digital pressure gauge.
The analog gauge is the more traditional type of pressure gauge, and it uses a simple needle to indicate the current air pressure. This type of gauge is easy to read and interpret, making it a good choice for those who are new to using air compressors. The digital pressure gauge is more sophisticated, and it uses an LCD display to show the current air pressure.
This type of gauge is more accurate than the analog version, making it ideal for those who need precise readings.In addition to the two different types of gauges, the kit also includes an adapter that allows you to attach the gauges to your compressor. The adapter makes it easy to switch between different types of compressors, so you can use the same kit regardless of which brand or model you have.
Air Gauge Inflator
An air gauge inflator is a device that is used to measure the pressure of air in tires. It is a very important tool for those who drive on roads with a lot of potholes or other obstacles. By having an accurate reading of the air pressure in your tires, you can adjust accordingly and avoid flats or other problems.
There are many different types and brands of air gauge inflators on the market, so it is important to do some research before purchasing one.
Conclusion
A pneumatic air pressure gauge is a type of pressure gauge that uses compressed air to measure the pressure of a system. This type of gauge is often used in situations where it is not possible to use a mechanical or electronic pressure gauge. Pneumatic air pressure gauges are relatively simple devices that consist of a Bourdon tube, a diaphragm, and a pointer.
The Bourdon tube is filled with air and connected to the system being measured. As the system’s pressure increases, the air inside the tube expands, causing the tube to bend. This movement is transferred to the diaphragm, which moves the pointer on the face of the gauge.

How to Condition Old Tires
Tires are an essential component to any vehicle, and over time they will inevitably need to be replaced. However, if you find yourself in a situation where you need to condition old tires, there are a few things you can do to extend their life. First, start by cleaning the tires with soap and water to remove any dirt or debris that may be on them.
Next, use a tire shine product to give the tires a new coat of shine. Finally, apply a protectant to the tires to help keep them from drying out and cracking.
Restoration Of Use Old Tyre || Restore Old tyre Making New |
- Start by cleaning the tires with soap and water to remove any dirt or debris
- Next, apply a tire conditioner to the tires using a clean cloth
- Allow the conditioner to penetrate the tire for 10-15 minutes before wiping it off
- Finally, apply a coat of tire protectant to help keep the tires conditioned and looking new
Tire Restoration Gel
Tire restoration gel is a product that can be used to restore the look of your car’s tires. It is a clear gel that you apply to the tires and then buff off. The gel will fill in any cracks or missing pieces on the surface of the tire and make it look new again.

Credit: www.youtube.com
How Do You Make Old Tires Look New Again?
If your tires are looking a little worse for wear, there are a few things you can do to make them look new again. First, start by giving them a good wash. Use a mild soap and water solution and scrub the tires with a brush to remove any built-up dirt and grime.
Once they’re clean, dry them off completely.Next, inspect the tires for any cracks or damage. If you find any, it’s best to replace the tire rather than try to fix it.
However, if the damage is minor, you can try using a tire repair kit to patch up the hole.Once the tires are in good condition, you can make them look new again by applying a coat of tire shine. This will give them a deep shine and make them look like new.
Apply the tire shine according to the directions on the bottle and let it dry before driving your car.
How Can I Make My Hard Tires Softer?
One way to make hard tires softer is to add tire softener. This can be done by adding a few drops of baby oil or cooking oil to the center of each tire. Another way to soften hard tires is to heat them up.
This can be done by using a hair dryer or by placing the tires in hot water. Once the tires are soft, they will be able to conform to the ground better and provide a smoother ride.
Can I Fix Dry Rot Tires?
There’s no easy answer when it comes to fixing dry rot tires. The best course of action depends on the severity of the damage and how many tires are affected. If only a few tires are starting to show signs of dry rot, you may be able to extend their life by regularly cleaning and treating them with a tire protectant.
However, if the damage is severe or widespread, it’s likely time to start shopping for new tires.Dry rot is caused by UV exposure and age, both of which can cause cracks and splits in the rubber. These cracks allow moisture to seep in, which accelerates the deterioration process.
Over time, this can lead to structural problems that make the tire unsafe to use.If you’re unsure whether your tires have dry rot, there are a few telltale signs to look for:-Cracks or splits in the sidewall or tread
-Brittle or crumbling rubber
-Excessive vibration while driving
-Uneven wear patterns
If you notice any of these issues, it’s important to have your tires inspected by a professional as soon as possible. They’ll be able to assess the damage and give you an idea of what needs to be done next. In some cases, they may be able to repair small cracks or replace individual components like the treads.
However, if the damage is too severe, they’ll likely recommend replacing the entire tire.
How Do You Restore Faded Tires?
Tires can fade over time from ultraviolet light exposure, road debris, and other environmental factors. You can usually tell if your tires are faded if they have a chalky or dull appearance. Faded tires can be restored with a tire shine product, but it’s important to choose the right one.
Some tire shine products can actually damage your tires, so it’s important to read the label before you buy. When applying tire shine, always follow the directions on the product label.
Conclusion
Old tires can be refurbished and used as planters or other decorative objects. The process is simple and only requires a few supplies. First, the tires must be cleaned with soap and water.
Next, they should be sanded down to remove any dirt or debris. Once the tires are clean and smooth, they can be painted with any color of paint. Finally, the tires should be sealed with a clear sealant to protect them from weathering.

Pressure Gauge before Or After Valve
If you’re wondering whether a pressure gauge should be installed before or after a valve, the answer is that it depends on the application. For example, if you’re trying to measure the pressure of a gas or liquid in a closed system, the gauge should be installed after the valve. This is because installing the gauge before the valve would allow for leaks and inaccuracies in the reading.
If you’re wondering whether a pressure gauge should be installed before or after a valve, the answer is that it depends on the application. For example, if you’re trying to measure the pressure of a closed system, the gauge should be installed after the valve so that it isn’t affected by any changes in pressure downstream. However, if you’re trying to measure the pressure drop across a valve, the gauge should be installed before the valve so that it can accurately register any changes.
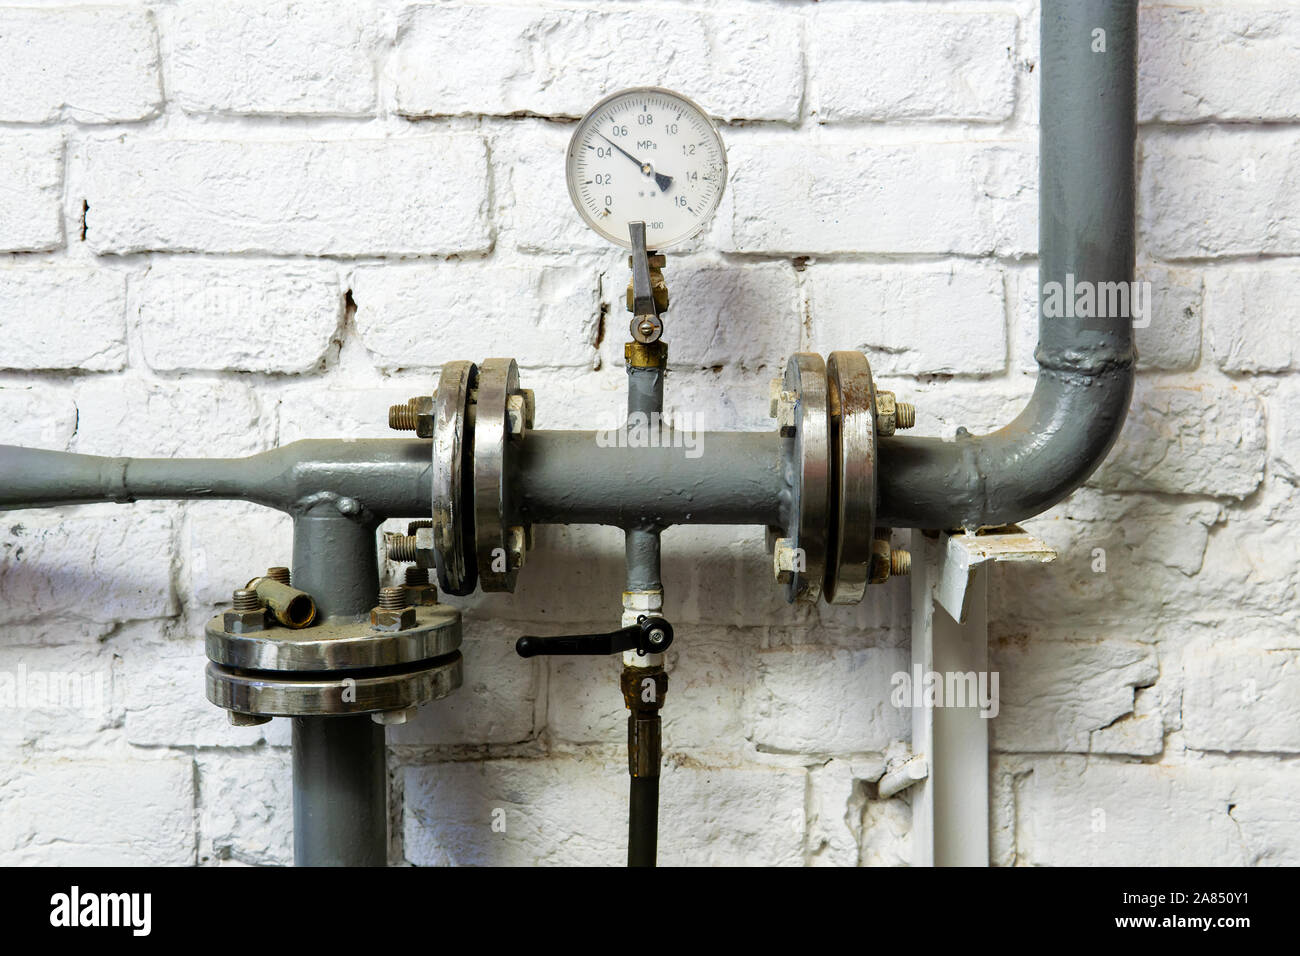
Credit: www.alamy.com
Where Should a Water Pressure Gauge Be Installed?
A water pressure gauge should be installed at the point where water enters the home. This is typically done at the main shut-off valve for the house.
Where is a Pressure Gauge Located?
A pressure gauge is a device that measures the pressure of a gas or liquid. The most common type of pressure gauge is the Bourdon tube, which uses a curved tube to measure pressure. The ends of the tube are sealed, and the middle is connected to a pointer that moves along a scale.
The amount of movement depends on the amount of pressure inside the tube.Bourdon tubes are used in many different types of Pressure gauges, including tire gauges, blood pressure monitors, and fuel gauges. They are also used in some scientific instruments, such as manometers and barometers.
How Do You Mount a Pressure Gauge?
One of the most important pieces of equipment in any workshop is a pressure gauge. Pressure gauges are used to measure the amount of force that is exerted on an object, and can be used to monitor the performance of pumps, compressors, and other machinery. While there are many different types of pressure gauges available on the market, they all share one common goal: to provide accurate readings that can be used to make informed decisions about the machines they are monitoring.
So, how do you mount a pressure gauge? The first step is to determine where you want to mount the gauge. It is important to choose a location that will allow for easy reading and that will not be subject to excessive vibration or movement.
Once you have chosen a location, use a drill bit that is slightly smaller than the base of the pressure gauge to create a pilot hole. Next, insert a mounting screw into the pilot hole and tighten it until it is snug against the body of the gauge. Finally, attach your pressure gauge to the mounting screw using either a nut or a washer (depending on what type of mounting hardware came with your particular model).
Now that you know how to mount a pressure gauge, it’s time to start using this essential piece of equipment in your workshop!
Do I Need to Vent Pressure Gauge?
If you have an air compressor, it’s important to know how and when to use a pressure gauge. Here’s what you need to know about using a pressure gauge on your air compressor.Do I need to vent pressure gauge?
No, you don’t need to vent pressure gauge.
The pressure gauge vent valve | This is what you have to look out for!
Pressure Gauge Installation Position
When installing a pressure gauge, it is important to take into account the position of the gauge in relation to the process piping. The most common way to install a pressure gauge is with the connection pointing downwards. This installation position prevents process liquids from entering the gauge and causing damage.
It also allows any condensation that forms inside the gauge to drain out, preventing it from affecting accuracy. In some cases, such as when measuring corrosive fluids, it may be necessary to install the pressure gauge with the connection pointing upwards. This installation position helps prevent corrosion by keeping process liquids away from the internal parts of the gauge.
Can Pressure Gauge Be Mounted Horizontally
A pressure gauge is a measuring instrument that measures the pressure of a gas or liquid inside a container. The pressure can be either absolute or relative. The most common type of pressure gauge is the Bourdon tube, which uses a curved tube to measure pressure.
Pressure gauges are usually mounted horizontally, with the dial pointing up. This makes it easy to read the pressure at a glance. However, there are some situations where it may be necessary to mount the gauge vertically.
For example, if you’re measuring the pressure of a fluid in a tall container, it may be easier to read the gauge if it’s mounted vertically.There are some things to keep in mind if you need to mount your pressure gauge vertically. First, make sure that the dial is pointing up so that you can easily read it.
Second, check that the tubing isn’t kinked or bent, as this could affect accuracy. Finally, make sure that any valves or fittings are tight so that there aren’t any leaks.If you’re not sure whether mounting your pressure gauge horizontally or vertically is best for your situation, consult with an expert before making any changes.
How to Replace Pressure Gauge on Well Pump
If you have a well pump, it’s important to keep an eye on the pressure gauge. If the pressure gets too low, it can cause problems with your water supply. You may need to replace the pressure gauge on your well pump from time to time.
Here’s how to do it:1. Turn off the power to your well pump. This is usually done at the breaker box.
2. Remove the cover of the pressure switch. This will give you access to the wires that connect to the pressure gauge.3. Disconnect the wires from the old pressure gauge and remove it from the switch housing.
4. Install the new pressure gauge in the switch housing and reconnect the wires.
How to Hook Up a Water Pressure Gauge
If your home has a water pressure problem, you may need to install a water pressure gauge. This is a relatively simply task that anyone with basic plumbing knowledge can do. Here’s how:
1. Begin by shutting off the main water supply to your home.2. Find an unused threaded port on one of your home’s water lines. You may need to install a T-fitting in order to create an unused port.
3. Connect one end of a lengths of flexible tubing to the port you just created.4. Screw the other end of the tubing onto the threads of the pressure gauge . Make sure that you screw it on tightly so that there are no leaks .
Conclusion
If you’re wondering whether a pressure gauge should be installed before or after a valve, the answer is that it depends on the application. If you’re trying to measure the pressure in a closed system, then the gauge should be installed before the valve. However, if you’re trying to measure the pressure drop across a valve, then the gauge should be installed after the valve.

How to Read Tire for Air Pressure
When it comes to maintaining your vehicle, one of the most important things you can do is check your tire pressure. This can be done easily at home with a tire pressure gauge. You should check your tires at least once a month and before long trips.
Incorrect tire pressure can lead to decreased fuel efficiency, bad handling, and premature wear. Here’s how to properly read tire pressure.
- Look at the sidewall of your tire and find the recommended air pressure
- Use a tire gauge to check the air pressure in your tires
- Add or release air from your tires as needed to reach the recommended pressure levels

Credit: www.pirelli.com
What is the Recommended Air Pressure for My Tires
The recommended air pressure for your tires will depend on the make and model of your vehicle. You can usually find this information in your owner’s manual or on a sticker inside the driver’s door. If you can’t find it there, you can also look up the recommended pressure for your specific tires online.
Generally speaking, most passenger cars will have a recommended tire pressure of around 32 psi (pounds per square inch). However, some vehicles may have a higher or lower recommendation depending on their design. For example, SUVs and trucks often require a bit more pressure than regular cars because of their extra weight.
Similarly, performance cars may need less pressure to achieve optimal grip on the road.It’s important to note that the recommended tire pressure is not necessarily the same as the maximum tire pressure. The max pressure is usually stamped on the sidewall of your tires and should never be exceeded.
Running your tires at too high of a pressure can cause them to overheat and fail prematurely.So, what happens if you don’t inflate your tires to the recommended level? Well, underinflated tires will result in poorer fuel economy and handling, as well as increased wear and tear.
They’re also more susceptible to punctures and blowouts since they flex more when driving. On the other hand, overinflating your tires can lead to a bouncy ride and decreased traction while cornering. It can also cause premature wear on certain parts of the tire tread.
Ultimately, it’s best to keep your tires inflated to the manufacturer’s recommendation in order to get the best performance out of your vehicle while also extending its lifespan!
How to check your tire pressure
Conclusion
It’s important to check your tire air pressure regularly. The proper tire pressure for your car is usually listed on a sticker inside the driver’s door. You can also find the information in your car’s owner’s manual.
To check the air pressure in your tires, you’ll need a tire gauge. You can find these at most gas stations or auto parts stores. Simply insert the tire gauge into the valve stem on your tire and press down to get a reading.
If the reading is below the recommended level, use a portable air compressor or pump to add more air to the tire. If it’s above the recommended level, let some air out of the tire until it reaches the proper level.

How to Check Tread Depth on Car Tires
It’s important to regularly check the tread depth on your car tires. Here’s a quick and easy way to do it:1. Park your car on a level surface and set the emergency brake.
2. Place a penny headfirst into several different tread grooves across the tire. If you can see all of Lincoln’s head, your tread depth is less than 2/32 inch and it’s time to replace your tires. If part of Lincoln’s head is always covered by tread, your tires are fine.
- Park your car on a level surface and set the emergency brake
- Locate the tread wear indicator, which is a raised section of rubber running around the tire’s circumference
- Use a tread depth gauge to measure the distance from the top of the tread wear indicator to the bottom of the tire’s tread
- Most passenger car tires have a tread depth of 10/32 inch or 11/32 inch
- Compare your measurement to the minimum acceptable tread depth for your type of vehicle, as specified by its manufacturer
How to Measure Tread Depth Without a Gauge
If you want to know how much tread is left on your tires, there are a few ways to measure it without using a tire tread depth gauge.One way is to use a ruler or tape measure. Place the ruler perpendicular to the tire’s surface and insert it into the space between the treads.
If the bottom of the ruler isn’t visible, that means the tread depth is less than 1/16th of an inch and you should replace your tires.Another way to measure tread depth is by using a penny. Insert the penny into the tire’s tread groove with Lincoln’s head facing down.
If you can see all of Lincoln’s head, then your tread depth is less than 2/32nds of an inch and it’s time for new tires.You can also use a quarter in place of a penny if you prefer. Just like with the penny test, insert the quarter into the tire’s tread groove with Washington’s head facing down.
If you can see all of Washington’s head, then your tread depth is less than 4/32nds of an inch and it means you need new tires soon.Tire experts generally recommend replacing tires when they get down to 4/32ndsand some states require 3/32ndstread depth for safe driving conditions so it’s best not to wait until your tires are completely bald before getting new ones..

Credit: www.youtube.com
How Do I Check My Tire Tread Count?
It’s important to check your tire tread count regularly. Here’s how:First, find a penny and insert it into the tread groove of your tire.
If you can see the top of Lincoln’s head, your tread is shallow and you should replace your tires. If his entire head is visible, you have less than 2/32″ of tread remaining and should replace your tires immediately.Another way to check is to measure the depth of the tread with a tire gauge.
Most new tires have 10/32″ or 11/32″ of tread. If yours measures less than that, it’s time for new tires.You can also do the “penny test” on your own by wetting the penny and inserting it into the tread upside down.
If you can see above Abe Lincoln’s head, you have less than 2/32″ of tread left on your tires.
Is the Penny Test for Tires Accurate?
If you’re like most drivers, you probably check your tire pressure regularly using the penny test. But is this method really accurate?It turns out that the penny test is not as accurate as it could be.
Here’s why:First, the width of a penny has changed over time. In 1982, the width of a penny was 0.75 inches (19 mm).
Today, it is only 0.06 inches (1.52 mm) narrower at 0.69 inches (17.53 mm). This means that the coin is not as wide as it used to be and doesn’t provide an accurate measurement of your tire’s width.Second, the thickness of a penny has also changed over time.
In 1982, a penny was 0.0596 inches (1.52 mm) thick. Today, it is only 0.049 inches (1.24 mm) thick due to manufacturing changes by the U.S Mint . This decrease in thickness means that a modern day penny can’t provide an accurate measure of your tire’s thickness either .
So what should you do if you want to check your tire pressure accurately? The best way to get an accurate reading is to use a digital tire pressure gauge . These devices are designed specifically for measuring tire pressure and will give you a much more precise reading than the old-fashioned Penny Test .
How Do You Check Tyre Tread Depth at Home?
It’s important to check your tyre tread depth regularly. A simple way to do this is to use a 20p coin. Insert the coin into the main tread grooves of your tyre at several points around the circumference.
If you can see the outer band of the coin at any point, then your tread depth is below the legal limit and you’ll need to replace your tyres.
What Does a Tire Tread Depth Gauge Look Like?
A tire tread depth gauge is a small, handheld tool that is used to measure the depth of the tread on a tire. The gauge has a small metal probe on one end that is inserted into the tread groove of the tire. The depth of the tread is then read off of a scale on the side of the gauge.
Tire tread depth gauges are important tools for measuring tire wear. As tires are driven, their treads gradually wear down. This wear can eventually lead to problems such as reduced traction and increased risk of blowouts.
By regularly checking tread depth with a gauge, drivers can know when it’s time to replace their tires.There are different types of tire tread depth gauges available, but they all work in essentially the same way. Some gauges may be more accurate than others, but any good quality gauge will provide an accurate reading.
LEARN How to MEASURE Tire Life
Conclusion
It’s important to know how to check tread depth on your car tires. Here’s a quick and easy guide:1. Use a tire gauge to measure the depth of the tread.
The minimum depth is 4/32 of an inch.2. You can also use a penny to check the tread depth. Place the penny in the tread with Lincoln’s head facing down.
If you can see all of Lincoln’s head, then the tread is less than 2/32 of an inch and it’s time to replace your tires.3. Another way to check tread depth is to do the “finger test.” Simply insert your finger into the tread and see how far it goes in.
If it goes in more than 1/4 of an inch, then the tread is too shallow and needs to be replaced.

How to Fill Air in Tires Without Pump
If you’re like most people, you probably don’t know how to fill air in your tires without a pump. It’s actually pretty easy, and it only takes a few minutes. Here’s what you need to do:
First, find a can of compressed air. You can usually find these at hardware stores or auto parts stores. Next, remove the cap from the valve stem on your tire.
Place the nozzle of the can of compressed air into the valve stem and hold it there for a few seconds.
- If you have a bicycle or car with low tires, you can fill them up without using a pump
- All you need is a can of compressed air, which you can buy at most hardware stores
- Remove the cap from the tire valve
- Attach the nozzle of the compressed air can to the valve
- Press down on the can to release the air into the tire
- Continue until the tire is full
- Then replace the cap on the valve and you’re done!
How to Put Air in Bike Tires Without a Pump
Assuming you don’t have a bike pump and need to put air in your bike tires, there are still a few options. One is to use a foot pump. If you don’t have one of those either, then you can try using a compressor or even just blowing into the tire with your mouth.
To use a foot pump, start by attaching the hose to the valve on your tire. Once it’s secure, put your foot on the pedal and start pumping. It might take a few minutes to get the desired amount of air pressure, so be patient.
If you’re using a compressor, attach the hose to the valve and turn on the compressor. It should only take a minute or two to get enough air in the tire. Just be careful not to overinflate it.
Finally, if you’re resorting to blowing into the tire with your mouth, remove the cap from the valve first. Then, put your lips around the valve and blow hard until you feel resistance. This method will obviously take longer than either of the other two, but it will work in a pinch.

Credit: www.bikehacks.com
How Can I Pump My Tires at Home?
Assuming you don’t have an air compressor at home, and need to use a manual pump:First, you’ll need to find the valve on your tire. It’s important to know whether you have a Presta or Schrader valve, as they require different adapters.
If the valve has a small metal cap that unscrews, it’s a Presta valve. If the valve looks like a small rubber stopper, it’s a Schrader.Once you’ve identified the type of valve you have, screw on the appropriate adapter (if necessary).
Many pumps will come with both adapters.Next, place the barrel of the pump over the valve and start pumping! As you pump, keep an eye on the pressure gauge to see how much air is going into your tire.
You’ll want to stop when your tire is at its recommended maximum PSI (pounds per square inch).That’s it! You’ve successfully pumped up your own tires at home.
How Do You Manually Pump Air into Your Tires?
Assuming you don’t have an air compressor or CO2 cartridges handy, you can use a hand pump to inflate your tires. Here’s how:First, find the valve stem on your tire.
It’s the little metal nozzle sticking out of the side of the tire. If you’re having trouble finding it, consult your bike’s owner’s manual.Next, check that the valve is open by unscrewing the cap (counterclockwise).
You should hear a hissing noise as air escapes from the tire. If you don’t hear anything, double-check that the valve is open and try again.Now it’s time to start pumping!
Place the barrel of the pump over the valve stem and push down firmly to create a seal. Then start pumping away! Keep going until you reach your desired pressure (usually between 60-100 PSI for road bikes).
Finally, replace the cap on the valve stem to keep dirt and debris out. And that’s it – you’re ready to ride!
How Do I Fill My Tire Pressure Without a Gas Station?
If you don’t have access to a gas station with an air pump, there are a few ways that you can fill your tire pressure.One way is to use a portable air compressor. These can be found at most auto parts stores and some general merchandise stores.
Make sure to get one that is rated for the size tires on your vehicle. To use it, connect the compressor to your tire’s valve stem and turn it on. It will automatically shut off when the desired pressure is reached.
Another option is to take your car to a service station that offers free air for tires. Many of these also have a machine that can check your tire’s pressure and let you know if it’s low.You could also borrow or rent an air compressor from a friend or neighbor.
Just make sure to return it in good condition and with enough air in the tank so they can use it too!
How Do I Put Air in My Tire Without Air Chuck?
It is actually quite easy to put air in your tire without an air chuck. All you need is a bicycle pump with a needle attached.First, unscrew the cap on the valve stem of your tire.
Next, insert the needle into the valve stem and pump air into the tire until it reaches the desired pressure. Finally, screw the cap back onto the valve stem to prevent any air from escaping.
4 Ways to Inflate Your Tire Without a Pump
Conclusion
If you’re wondering how to fill air in tires without a pump, there are a few different methods you can try. One is to use a can of compressed air, which you can find at most hardware stores. Another option is to use a bike pump, or even just your mouth.
If you don’t have any of these tools available, you can always fill your tires with water and then let the sun evaporate it.