- Home
- Archive: September, 2023

How to Select Winter Tires
Your vehicle’s tires are the only contact point between your car and the road, so it’s important to choose the right ones. Winter tires are designed to provide better traction in snow and ice, and they can make a big difference in your safety. Here’s what you need to know about selecting winter tires.
How to Choose Winter Tires (4 Steps)
- Decide whether you need winter tires
- In general, if you live in an area where snow and ice are common during the winter months, winter tires are a good idea
- Choose the right type of winter tire
- There are three main types of winter tires: studded, studless, and all-season tires with enhanced snow traction
- Consider other factors beyond just the type of tire
- When selecting winter tires, also take into account such things as tire size, speed rating, and warranty coverage
- Compare prices from different retailers before making your purchase
- Winter tires can be expensive, so it pays to shop around for the best deal
Best Winter Tires
If you live in an area with cold winters, you know how important it is to have good winter tires. Winter tires are designed to provide better traction and handle icy conditions better than regular tires. But with so many different types and brands of winter tires on the market, how do you know which ones are the best?
Here are a few things to keep in mind when shopping for winter tires:1. Make sure the tire is rated for winter driving. Some tires are specifically designed for winter weather and will have a special symbol on the sidewall that indicates this (such as the “snowflake” symbol).
These tires will typically have a deeper tread depth and special compound that helps them grip icy roads better.2. Consider your driving needs. Not allwinter tiresare created equal.
If you do a lot of highway driving in snowy conditions, you’ll want a tire that’s designed for those conditions (like an all-season or studless ice & snow tire). If you mostly drive around town in relatively mild winters, then a less expensive Studdable Winter / Snow tire may be a better option for you.3. Compare prices and reviews.
Once you’ve narrowed down your choices, it’s time to start comparing prices and reading reviews from other drivers who have used the same tires.

Credit: www.goodyear.com
How Do I Know What Winter Tires to Get?
When it comes to choosing the right winter tires for your vehicle, there are a few things you need to take into account. The first is the type of vehicle you have. Four-wheel drive and all-wheel drive vehicles will require different tires than front- or rear-wheel drive vehicles.
The second is the climate you live in. If you live in an area with a lot of snow and ice, you’ll need tires that can handle those conditions. Third, you need to decide what kind of traction you want.
Tires with studs provide the best traction on icy roads, but they can damage pavement, so they’re not allowed in some states. Finally, you need to think about tire size. Winter tires are available in a variety of sizes to fit most vehicles.
Once you’ve taken all of these factors into account, you can start shopping for winter tires. You can find them at most auto parts stores or tire dealerships. When shopping for winter tires, be sure to get ones that match the size and load rating of the original equipment tires on your vehicle.
Is It Better to Go down a Size for Winter Tires?
No definitive answer exists to this question, as it largely depends on personal preference. Some individuals prefer to go down a size for winter tires, as it can provide better handling and grip on icy or snow-covered roads. Others find that staying with the same tire size offers adequate traction and control during winter driving conditions.
Ultimately, it is important to consult with a trusted automotive specialist to determine which option would be best for your particular vehicle and needs.
Should Winter Tires Be the Same Size As All Seasons?
Most people believe that winter tires should be the same size as all seasons. However, there are a few reasons why this might not be the best idea.First, winter tires are designed to provide better traction in snow and ice.
They typically have a deeper tread than all season tires, which helps them grip the road better. In addition, winter tires often have special features like studs or siping (tiny slits in the tire tread) that further improve traction.Second, winter tires are made from a different type of rubber compound than all season tires.
This compound is designed to stay pliable in colder temperatures, which helps the tire maintain good contact with the road surface and prevents it from hardening and losing traction.Finally, because they are made for different conditions, winter tires and all season tires tend to wear differently. All season tires can last for 40,000 miles or more before needing to be replaced, but winter tires will only last for about 15-20,000 miles.
So if you live in an area with cold winters and lots of snow and ice, it’s probably best to invest in a set of dedicated winter tires. Your car will handle better and you’ll get more mileage out of your tires overall.
How Many Mm is Good for Winter Tires?
There is no definitive answer to this question as it depends on a number of factors, including the type of vehicle you drive, the conditions you typically encounter during winter months, and your personal driving preferences. That said, many experts recommend using tires with a minimum tread depth of 6/32-inch (4.8mm) for winter driving. Deeper tread depths (8/32-inch or greater) may be better in some situations, such as if you frequently drive on unpaved roads or in deep snow.
Ultimately, it’s important to choose tires that will provide adequate traction and grip for your needs.
Conclusion
When it comes to winter driving, having the right tires can make all the difference. Here are a few things to keep in mind when selecting winter tires:First, consider the type of vehicle you’ll be using.
If you have a light car or truck, you may not need as much traction as someone with a heavier vehicle. Second, think about the kinds of roads you’ll be driving on. If you live in an area with lots of snow and ice, you’ll need tires that can handle those conditions.
Third, take into account your budget. Winter tires can be expensive, so make sure you choose ones that fit your price range.Once you’ve considered all of these factors, it’s time to start shopping around!
Check out different tire brands and read reviews to see what others are saying about them. Once you’ve found a few options that seem promising, head to your local tire shop and talk to an expert about which ones would work best for your needs. With their help, you’ll be able to find the perfect set of winter tires for your car or truck!

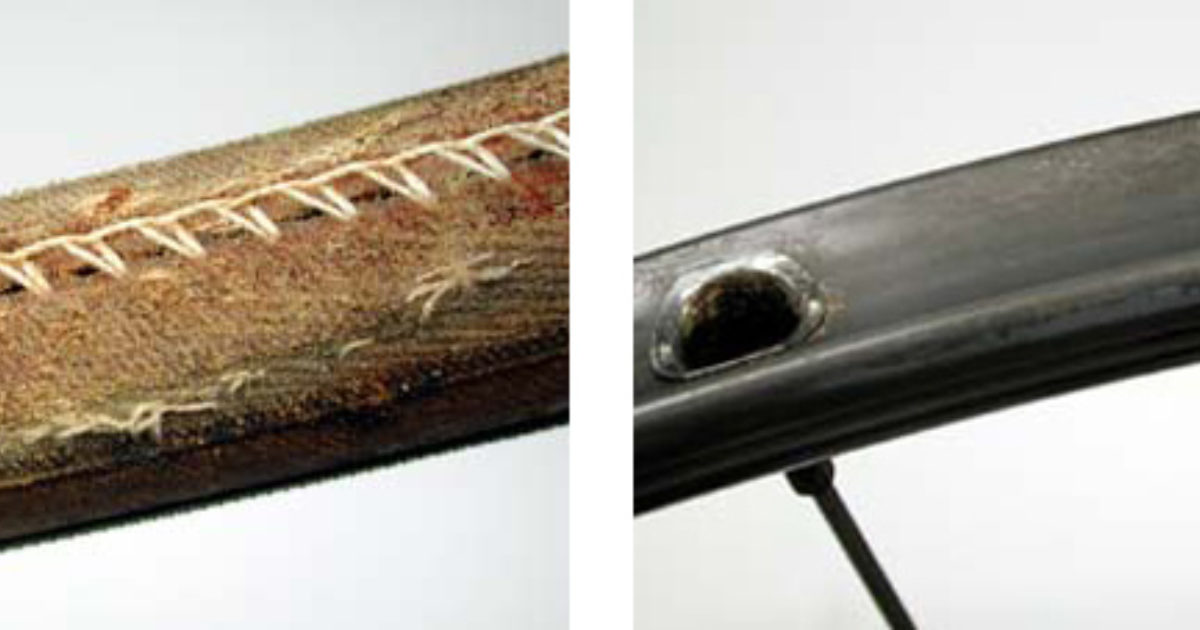
How to Fix Tubular Tires
If you’ve ever had a flat tire while out on a ride, you know how frustrating it can be. Whether you’re miles from home or just around the block, a flat tire can ruin your day. But flats don’t have to be a part of cycling.
With a little bit of prevention and some basic know-how, you can avoid flats altogether. Here’s how to fix tubular tires.
- Inspect your tires for any signs of wear and tear, such as cracks or holes in the sidewall
- If you find any damage, replace the tire
- Use a tire lever to pry the old tire off the rim
- Be careful not to damage the rim while doing this
- Clean the rim of any debris or residue left behind by the old tire
- Apply a generous amount of fresh tubeless sealant to the new tire before mounting it on the rim
- Inflate the tire using a track pump or similar high-pressure air source until it seats properly on the rim bead
How to Fix a Flat Tubular on the Road
If you’re out on a ride and get a flat, don’t panic! You can fix it. Here’s how to change a tubular tire on the road.
1. Remove the wheel from the bike and flip it over so the flat tire is facing up.2. Use a tire lever to pry off one side of the tire bead from the rim. Work your way around the circumference of the tire until one side is completely off.
3. Take out the inner tube and inspect it for punctures or other damage. If there are multiple punctures, you may need to replace the tube entirely. Otherwise, patch any holes with vulcanizing patches (following the instructions on the patch kit) or use a plug kit to insert plugs into larger holes.
4. Put some fresh air in the new or patched tube and inflate it just enough that it holds its shape but isn’t fully inflated yet – this will make it easier to put back onto the tire bead later on.5 . Line up one side of the tire bead with the rim and start working your way around, using your hands to push/roll it into place if necessary (don’t use levers at this stage).
Once one side is back on , do t he same for t he other side . Make sure that there aren ‘t any twists or kinks in t he ti re before proceeding .
Credit: www.parktool.com
Can Tubular Tires Be Repaired?
Tubular tires can be repaired, but it is not a common practice. The reason for this is that tubular tires are made with an inner tube that is vulcanized to the tire casing. This makes for a very strong bond between the two components, which makes it difficult to separate the inner tube from the tire casing without damaging either component.
If you do need to repair a tubular tire, you will first need to remove the inner tube from the tire casing. This can be done by carefully cutting through the bond between the two components with a sharp knife. Once the inner tube has been removed, it can be patched in the same way as a regular bicycle inner tube.
The patch should be placed over the hole in the inner tube and then inflated so that it forms a tight seal around the hole.Once the patch has been applied, you can re-install the inner tube into the tire casing and inflate it to its proper pressure. Keep in mind that because of the nature of tubular tires, there will always be some risk of flats occurring, even if your tires are properly inflated and free of holes or other damage.
Can You Use Tubular Tires Without Glue?
The short answer is no, you cannot. Tubular tires require glue in order to stay affixed to the rim. Without glue, the tire will simply come off the rim when you start riding.
Tubular tires are different than clincher tires in that they do not have a bead that hooks onto the rim. Instead, they have a sewn seam that holds the tube in place inside the tire. To keep the tubular tire from slipping on the rim, you need to use some type of adhesive.
The most common adhesive used is called “tubular tire cement.”Tubular tire cement is a thick, gooey substance that dries hard and bonds both rubber and fabric together very well. It’s important to note that regular bicycle inner tube patch kits will not work for tubular tires – you need to use actual tubular tire cement (or something similar).
Applying tubular tire cement is pretty straightforward: first, clean both the inside of the tire and the outside of the rim with alcohol wipes to remove any dirt or grime. Next, apply a generous amount of cement to both surfaces – don’t be shy, you want there to be enough so that it squishes out when you press the two surfaces together. Once you’ve got a good layer of cement on both surfaces, quickly line up the valve hole on the tire withthe valve stem hole ontherimandpress themtogetherfirmly all aroundthe circumferenceofthe wheel untilyou can’t see any morecement oozing out frombetween therubberandtherim.
At this point, setthewheelasideandletitheal overnightbeforeridingonit(24 hoursis even better). This gives time forthecementtofullycurebeforeyou putanystressonitwhenyouturnther pedals – ifyou trytoridetoomsoon afterapplyingthecement,you runtheriskofpeelingittoofftherim prematurely!
How Do You Seal a Tubular Tire?
Tubular tires are often used by road cyclists because they offer a smoother ride and fewer flats. To seal a tubular tire, you’ll need to use a special adhesive called rim cement. First, clean the inside of the tire and the rim with alcohol to remove any grease or dirt.
Next, apply a bead of rim cement around the edge of the tire. Be sure to avoid getting any on the brake track or spokes. Then, insert the tube into the tire and inflate it to about half its normal pressure.
Once everything is in place, finish inflating the tire to its proper pressure. The adhesive will keep the tube from moving around inside the tire and prevent flats.
How Do You Pump a Tubular Tire?
There are a few different ways to pump a tubular tire, but the most common and effective method is to use a floor pump. First, you’ll need to remove the wheel from the bike and then take the tire off of the rim. Once the tire is off, you’ll need to insert one end of the pump into the valve stem on the tire and then start pumping.
It’s important to pump slowly and evenly in order to avoid damaging the tire or creating an uneven seal. Once the tire is inflated to your desired pressure, you can re-attach it to the rim and then put the wheel back on your bike.
Mounting and Gluing Tubular Tires
Conclusion
If you’ve ever had a flat tire, you know how frustrating it can be. But what do you do if you have a tubular tire? Tubular tires are different from regular tires in that they don’t have inner tubes.
This means that if you get a flat, you can’t just put in a new tube and be on your way. So how do you fix a tubular tire?The first thing you need to do is remove the wheel from the bike.
Then, take off the tire and deflate it completely. Next, find the hole in the tire and patch it up with a vulcanizing kit or tape. Once the hole is patched, inflate the tire and put it back on the wheel.
Finally, reattach the wheel to the bike and you’re good to go!Tubular tires may seem daunting at first, but with this simple guide, you’ll be able to fix them like a pro!

How to Choose Trailer Tires
There are a few things to consider when choosing trailer tires. First, you need to know the weight of your trailer. This will determine the load rating you need.
Second, you need to decide on the type of tire. There are bias ply and radial ply tires. Bias ply tires are less expensive but don’t last as long as radial ply tires.
Finally, you need to choose a size that will fit your rims and provide the correct amount of clearance.
- The first step is to determine the size of trailer tires that you need
- The second step is to decide on the type of trailer tires that you want
- The third step is to select a brand of trailer tires that you trust
- The fourth step is to compare prices and find the best deal on trailer tires

Credit: www.lesschwab.com
How Do I Know What Trailer Tire to Get?
There are a few things you need to take into account when purchasing trailer tires. The first is the weight of your trailer. This will determine the load rating you need.
The second is the type of terrain you’ll be traveling on. If you’ll be going off-road, you’ll need a tire with a tougher tread. Finally, consider how many miles you’ll be putting on the tires.
If you plan on doing a lot of traveling, get a tire with a higher speed rating.Once you’ve considered all of these factors, consult with a tire specialist to find the perfect tire for your needs.
Is D Or R Better for Trailer Tires?
There is no definitive answer to this question as it depends on a number of factors, such as the type of trailer, the weight of the trailer, and the terrain. That said, generally speaking, D-rated tires are designed for light-duty trailers (up to 3,000 lbs) while R-rated tires are designed for heavy-duty trailers (over 3,000 lbs). If you’re not sure which type of tire is best for your trailer, it’s always best to consult with a qualified technician.
What is the Difference between 5.30 And 4.80 in a Trailer Tire?
The difference between 5.30 and 4.80 in a trailer tire is the width of the tire. The 5.30 is wider than the 4.80, so it will provide more stability for your trailer. The extra width also gives you a larger contact patch with the ground, which can help improve traction.
If you frequently tow heavy loads or travel on rough roads, the extra width of the 5.30 may be worth the investment.
Are Bias Ply Or Radial Tires Better on a Trailer?
There are a few things to consider when deciding if bias ply or radial tires are better for your trailer. The first is load capacity. Bias ply tires typically have a higher load capacity than radial tires.
This is because the construction of bias ply tires allows for more rubber to be used in the tread and sidewall, which makes them stronger and able to carry more weight.Another thing to consider is speed rating. Radial tires typically have a higher speed rating than bias ply tires.
This means that they can handle higher speeds without overheating or becoming damaged.Finally, you should also consider what type of terrain you’ll be driving on. If you’ll be mostly driving on paved roads, then either type of tire will work fine.
However, if you’ll be doing any off-roading, then you’ll want to choose bias ply tires. This is because they’re designed to perform well on uneven surfaces like dirt or gravel roads.So, which type of tire is best for your trailer?
That depends on your specific needs and preferences. If you need a tire with a high load capacity, then go with a bias ply tire. If you need a tire with a high speed rating, then go with a radial tire.
And if you’ll be doing any off-roading, then choose a bias ply tire for its better performance on rough terrain.
How To Choose Trailer Tires – Radial or Bias
Trailer Tire Ratings
The first thing you need to know when shopping for new trailer tires is the load range. The load range is the amount of weight the tire can support. The higher the load range, the more weight the tire can hold.
The most common load ranges for trailer tires are C and D.The next thing to consider is tread life. Tread life is how long the tire will last before it needs to be replaced.
A good rule of thumb is that a tire with a tread life of 10,000 miles will last about 5 years with normal use.Finally, you need to think about traction. Trailer tires with good traction will help keep your trailer stable on the road, even in wet or icy conditions.
Look for tires that are rated for both mud and snow if you’ll be doing a lot of driving in different weather conditions.
Conclusion
Trailer tires are an important part of towing a trailer. They need to be able to withstand the weight of the trailer and the contents inside. Here are some things to keep in mind when choosing trailer tires:
-The size of the tire should match the size of the wheel.-The load rating should be appropriate for the weight of the trailer.-The speed rating should be appropriate for how fast you’ll be going while towing.
-You may also want to consider special features like anti-skid or self-sealing tires.

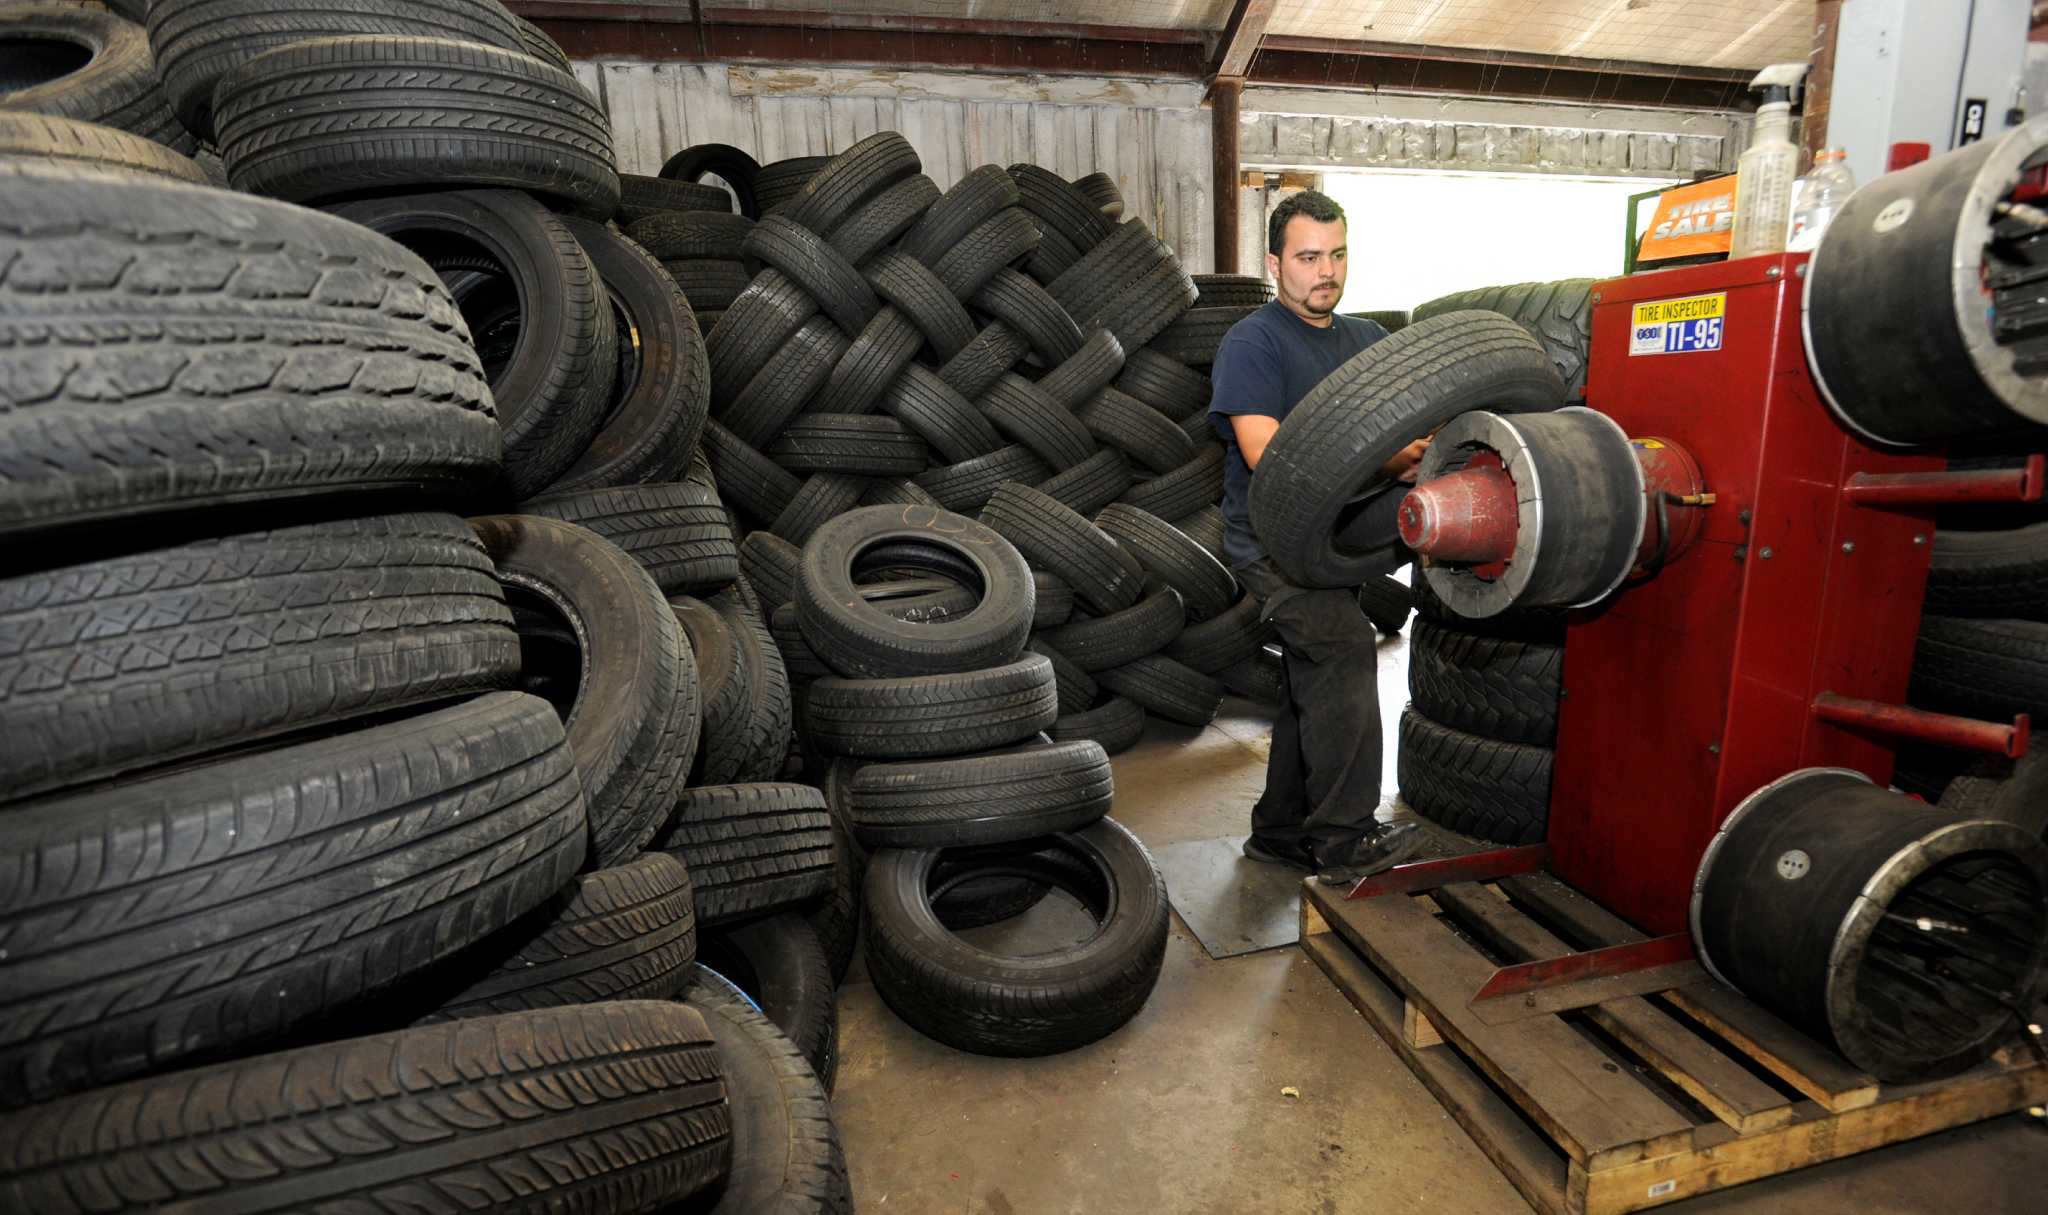
How to Shop for Used Tires
If you are in the market for used tires, there are a few things you should keep in mind. First, you will want to make sure that the tires you are considering are the right size for your vehicle. Second, you will want to inspect the treads on the tires to ensure that they have plenty of life left.
Finally, you will want to compare prices between different sellers to get the best deal.
- Decide what type of tire you need
- There are three main types of tires-summer, winter, and all-season
- Summer tires are designed for warm weather and provide good grip on dry roads
- Winter tires are made for cold weather and have deeper treads to provide better traction in snow and ice
- All-season tires can be used year-round but don’t perform as well as summer or winter tires in extreme temperatures
- Choose the right size tire
- Used tires should match the size of the ones being replaced
- Check your car’s owner’s manual or look inside the driver’s side door to find out what size tires your car needs
- Consider tire condition when shopping for used tires
- It’s important to inspect a used tire before purchasing it to make sure it is in good condition with plenty of tread left
- A quick way to check tread depth is to insert a penny headfirst into the tread groove; if you can see Abraham Lincoln’s entire head, the tire has less than 2/32″ of tread remaining and should be replaced
- 4 4 Look for any visible damage on the sidewall or tread of the tire that could indicate it is worn out or not safe to use
Credit: www.newstimes.com
How Much Should I Spend on Used Tires?
When it comes to purchasing used tires, there is no definitive answer as to how much you should spend. Ultimately, the amount you spend will depend on a variety of factors, including the condition of the tires and your personal budget.That being said, there are a few general tips that can help you make a decision about how much to spend on used tires.
First, it’s important to inspect the tires thoroughly before making a purchase. This means looking for any signs of wear and tear, such as cracks or bald spots. If the tires appear to be in good condition, then you can feel more confident about spending more money on them.
Another factor to consider is the price of new tires. If new tires are relatively expensive, then spending less on used ones may make more sense financially. However, if new tires are reasonably priced, then you may want to invest in higher-quality used tires so that they last longer.
Ultimately, how much you spend on used tires is up to you. Just be sure to inspect them carefully and compare prices with new tires before making your final decision.
What is a Good Tread Depth for Used Tires?
When it comes to tread depth, there is no definitive answer for how deep your tires’ tread should be. However, most experts agree that a good rule of thumb is to have at least 4/32″ of tread remaining on your tires. This means that if you were to take a measurement from the top of the tire’s tread down to the bottom of the tire’s groove, you would want there to be at least 4/32″ of distance.Of course, this is just a general guideline and your actual needs may vary depending on factors such as the type of vehicle you drive and your driving habits.
If you do a lot of highway driving, for example, you may want to err on the side of having deeper tread depths since this will help protect against premature wear. Ultimately, it’s important to consult with a professional to get their specific recommendation for your situation.
How Do You Inspect Old Tires?
It is important to inspect your tires regularly to ensure they are in good condition and safe to use. You should especially check your tires if you notice any changes in the way your vehicle handles, or if you see any cracks, cuts, or bald spots on the tread.To inspect old tires, start by looking at the sidewalls for cracks, splits, or other damage.
Next, check the tread for wear and tear. If the tread is worn down too low, it could cause a blowout while driving. Finally, take a look at the inner portion of the tire for any leaks or punctures.
If you notice any damage to your tires, it is best to replace them as soon as possible. Driving on damaged tires can be dangerous and may lead to an accident.
Is It Cheaper to Buy New Or Used Tires?
There is no definitive answer to this question as it depends on a number of factors. Generally speaking, new tires are more expensive than used tires. However, there are a few things to keep in mind that could make buying new tires the more economical choice in the long run.
One factor to consider is the warranty. Many tire manufacturers offer warranties on their products, which can be beneficial if you experience any problems down the road. Additionally, new tires typically come with a higher tread depth than used tires, which means they will last longer and provide better traction and handling.
Of course, the price of new and used tires can vary depending on where you purchase them and what type or brand of tire you’re looking for. In general, though, if you’re weighing your options between new and used tires, it’s important to consider all aspects before making a decision.
Used Tire Buying Guide
How to Shop for Used Tires near Round Rock, Tx
If you are in the market for used tires near Round Rock, TX, there are a few things to keep in mind. First, it is important to know what size and type of tire you need. Second, be sure to inspect the tires thoroughly before making a purchase.
Here are a few tips on how to shop for used tires near Round Rock, TX:1. Know the size and type of tire you need: The first step is to know the size and type of tire you need. You can find this information on the doorjamb or inside the glove compartment of your vehicle.
Once you know what size and type of tire you need, it will be easier to narrow down your options.2. Inspect the tires thoroughly: Before making a purchase, inspect the tires thoroughly. Look for any signs of wear or damage such as cracks, bald spots, or punctures.
If possible, test drive the vehicle on different types of terrain to see how the tires perform.3. Compare prices: Once you have inspected the tires and decided which ones you want to buy, compare prices from different sellers. Be sure to factor in shipping costs if applicable.
Used tires can be a great deal if you take the time to shop around!
Conclusion
If you are in the market for used tires, there are a few things you should keep in mind. First, you will want to make sure that the tires you are considering are the right size for your vehicle. Second, you will want to check the tread depth and overall condition of the tire.
Finally, you will want to make sure that the price is fair. With these tips in mind, shopping for used tires can be a breeze!

How to Store Bicycle Tires
Bicycle tires are one of the most important parts of your bike, and proper storage can help extend their life. Tires should be stored in a cool, dry place out of direct sunlight. If you have more than one set of tires, rotate them so that they all get equal use.
Check your tires periodically for signs of wear and tear, and don’t forget to inflate them to the correct pressure before each ride!
- Inspect your tires regularly for signs of wear and tear, and replace them as needed
- When storing your bicycle, be sure to keep the tires inflated to help prevent flat spots from forming
- If you’ll be storing your bike for an extended period of time, consider removing the tires and placing them in a cool, dry place to prevent them from deteriorating

Credit: www.velonews.com
Should Bike Tires Be Stored off the Ground?
Many cyclists believe that storing bike tires off the ground will prolong their life. However, there is no scientific evidence to support this claim. In fact, storing bike tires off the ground may actually shorten their lifespan.
Here’s why:When bike tires are stored on the ground, they are in contact with dirt and other debris. This can cause the tire to become worn down over time.
Additionally, if the ground is wet, it can cause the tire to rot or mildew.Storing bike tires off the ground also exposes them to sunlight and UV rays. These can degrade the rubber compound of the tire, making it more brittle and prone to punctures.
The best way to store bike tires is in a cool, dark place where they will be protected from both sunlight and moisture. If you must store them outside, cover them with a tarp or similar material to protect them from the elements.
How Long Can Bicycle Tires Be Stored?
Assuming you are talking about storing bicycle tires that are not on a bike, there is no definitive answer. It depends on how you store them and what type of tire it is. For example, if you have a steel-belted radial tire and store it in a cool, dry place with no direct sunlight, it could last indefinitely.
However, if you have an all-weather tire and store it outside exposed to the elements, it might only last for a few years before cracking and drying out.The best way to prolong the life of your tires, regardless of type, is to store them indoors in a cool, dry place out of direct sunlight. This will help prevent cracking and drying out.
If you must store them outside, try to keep them covered or in a shed or garage to protect them from the elements as much as possible.
How Do I Keep My Bike Tires from Dry Rotting?
Assuming you would like tips on how to prevent your bike tires from drying out and eventually rotting, here are a few things you can do:1. Keep them clean – dirt and debris can contribute to the breakdown of your tires, so make sure to give them a good cleaning regularly. You can use soap and water, or a specialized bike cleaner.
2. Store them properly – when you’re not using your bike, be sure to store it in a cool, dry place. Heat and sunlight can cause the rubber in your tires to break down prematurely.3. Inspect them often – take a close look at your tires every now and then to check for any cracks or damage.
If you catch any problems early on, you’ll be able to fix them before they get worse.4. Don’t overinflate them – having too much air in your tires can actually make them more susceptible to punctures and other damage. Check the manufacturer’s recommendations for the ideal tire pressure for your particular model of bike.
5. Consider using tire liners – these are an extra layer of protection that can help shield your tires from flats and other issues caused by sharp objects on the road (or trail).
How Should I Store My Bike Tires And Rims?
Assuming you would like tips on how to store your bike tires and rims:It is important to store your bike tires and rims properly to ensure they have a long lifespan. Here are some tips on how to store them:
1. Store them in a cool, dry place. This will help prevent the rubber from deteriorating and the metal from rusting.
2. If possible, avoid storing them in direct sunlight.
3. Inspect your tires and rims regularly for any signs of wear and tear, and replace them if necessary.
4. If you’re not using your bike for an extended period of time, it’s best to remove the tires and rims and store them separately.
DIY Bicycle Tire Storage
How to Fold a Bike Tire for Storage
If you’re short on space or simply want to keep your bike tire in good shape, you can fold it for storage. Here’s how:Start by taking the valve stem off the wheel.
You’ll need a bicycle pump to do this. Once the valve stem is removed, use your fingers to push the tire flat.Next, take one side of the tire and fold it over the center of the tire.
Then, take the other side and do the same thing. You should now have a long, narrow strip of tire.To finish, roll up the strip of tire until it’s about half an inch thick.
Make sure that the inner tube is completely rolled up inside the tire so that it doesn’t get damaged during storage.
Conclusion
If you’ve ever had a flat tire while out on a bike ride, you know how frustrating it can be. Not only do you have to walk your bike home, but you also have to replace the tire. If you don’t know how to store bicycle tires properly, they can go flat and become damaged.
Here are some tips on how to store bicycle tires so that they stay in good condition:1. Keep them clean and dry. Dirt and moisture can cause bicycle tires to deteriorate and go flat.
Wipe them down after each ride and store them in a dry place.2. Inspect them regularly. Check for any signs of wear or damage, such as cracks or bulges in the sidewalls.
If you see anything suspicious, replace the tire immediately.3. Store them away from sunlight and heat. Exposure to sunlight and heat can cause bicycle tires to degrade over time.

How to Read Yokohama Tires
Yokohama tires are some of the most popular on the market, and for good reason. They offer a great ride, excellent handling, and are very durable. But how do you know if a Yokohama tire is right for your vehicle?
Here’s a quick guide to help you choose the best Yokohama tire for your needs.
- Look for the Yokohama logo on the tire
- Find the size information on the sidewall of the tire
- Determine the type of tread pattern that is best suited for your driving needs
- Choose a Yokohama tire that has a load index and speed rating that meets or exceeds the requirements of your vehicle
- Install the Yokohama tires on your vehicle according to the manufacturer’s recommendations

Credit: www.youtube.com
How Do You Read the Code on Tires?
You can read the code on a tire by looking at the sidewall of the tire. The code will be in a series of numbers and letters, and it will tell you information about the tire such as the width, height, diameter, load rating, and speed rating.
Where is the Date on a Yokohama Tire?
The date on a Yokohama Tire can be found on the sidewall of the tire. It is located near the bottom of the sidewall, in between the tread and shoulder. The date is stamped into the sidewall and is typically 10 or 11 digits long.
The first two digits represent the week of production, while the last two digits represent the year. For example, a tire with a date code of “1219” was produced in December 2019.
What Do the Numbers on a Tire Mean?
The numbers on a tire represent the tire’s size, load capacity and speed rating. The first number is the width of the tire in millimeters. The second number is the aspect ratio, or height of the sidewall as a percentage of width.
The third number is the diameter of the wheel in inches. The fourth number is the load index, which corresponds to how much weight each tire can support. The fifth and final letter is the speed rating, which tells you how fast your vehicle can go without damaging the tires.
What Do the 3 Numbers Mean on Tire Size?
When you’re looking at the numbers on a tire, the first number is the width of the tire in millimeters. The second number is the height, or aspect ratio, of the sidewall as a percentage of the width. The third number is the diameter of the wheel in inches.
For example, if you see a tire size that looks like this: 225/50R17 91HThe first number, 225, tells us that this is a tire with a width of 225 millimeters. The second number, 50, tells us that this tire has an aspect ratio of 50%.
This means that the sidewall height is 50% of 225 millimeters, or 113 millimeters. The “R” after the second number indicates that this is a radial tire. The third number, 17, tells us that this is a tire for a 17-inch wheel.
The final letter code on this particular tire is “91H.” This code indicates how much load this tires can carry and its speed rating. In this case “91” means 1,984 pounds and “H” means 130 mph maximum speed rating.
Different letters indicate different speed ratings:Q = 99 mph
R = 106 mph
S = 112 mph
T = 118 mph
U = 124 mph
H = 130 mph
V = 149 mph (up to 149 miles per hour)
Yokohama Tire Tips #2 – How to Read a Tire Sidewall
Yokohama Tire Dot Code
Yokohama Tire Corporation has a long history of manufacturing quality tires. The company was founded in 1917 and is headquartered in Tokyo, Japan. Yokohama is the world’s fourth largest tire manufacturer.
One of the things that sets Yokohama apart from other tire manufacturers is their use of a DOT code. This code can be found on the sidewall of every Yokohama tire. It provides information about the tire, such as when it was manufactured and where it was made.
The DOT code consists of 10 characters, which are divided into three sections. The first section is the week of manufacture, followed by the last two digits of the year. The second section is the factory code, which indicates where the tire was made.
The third section is the Plant Code, which tells you what line at the factory assembled your particular tire.This information can be useful if you have a problem with your tires. You can call Yokohama customer service and give them your DOT code so they can help you troubleshoot the issue.
You can also use the DOT code to register your tires for warranty purposes.If you’re in the market for new tires, make sure to look for those with a DOT code on their sidewall.
Conclusion
Yokohama Tires are one of the most popular brands of tires on the market. They are known for their quality and durability. When you buy a set of Yokohama Tires, you can be sure that they will last for many miles.
However, like all tires, they will eventually need to be replaced. When you go to replace your Yokohama Tires, it is important to know how to read the sidewall of the tire so that you can get the correct size and type of tire for your vehicle.The sidewall of a Yokohama Tire has a lot of information on it.
The first thing you will see is the width of the tire. This is followed by the aspect ratio, which is the height of the sidewall compared to the width. The next number is the diameter of the wheel that the tire will fit onto.
Finally, there will be a letter code that indicates what type of load capacitythe tire has.Knowing how to read this information is important because it will help you getthe right size and typeof Yokohama Tire for your vehicle. If you do not know howto read this information correctly,you could end up with a tire that does not fit your car or truck properlyor does not have enough load capacityfor your vehicle’s weight .
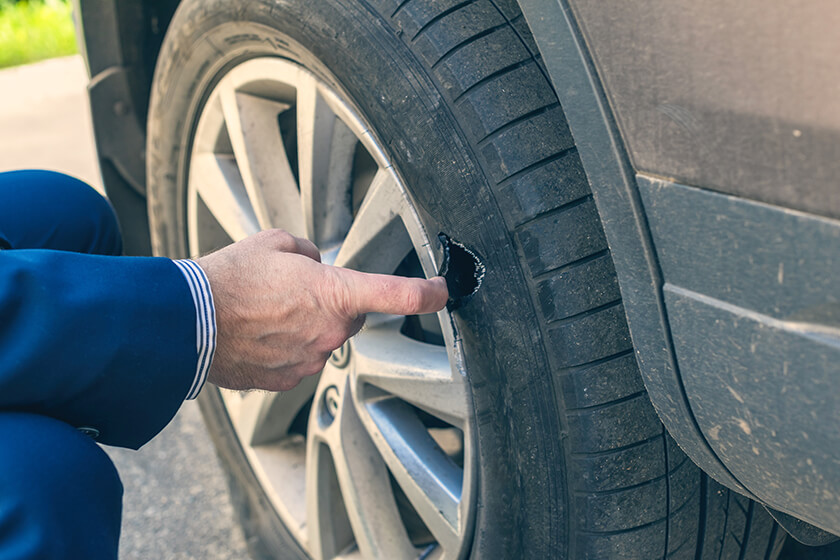
How to Safely Slash Tires
It is important to know how to safely slash tires. This can be a useful skill in many situations, such as when you are trying to prevent a car from being driven away by someone who has stolen it. There are a few different ways that you can go about slashing tires, but the most important thing is to make sure that you do not injure yourself in the process.
- Park your car on a level surface and set the emergency brake
- Place a block under the front or rear of the tire you want to slash to prevent the car from moving
- Use a utility knife or box cutter to puncture the sidewall of the tire
- Be sure not to cut too deeply, as you don’t want to damage the rim
- Move around the tire and make 2-3 more punctures so that air will escape quickly when you remove the block in step 2
- Remove the block and allow the tire to deflate completely before driving your car
Credit: www.flyfisherman.com
How Do You Slash a Tire Successfully?
When most people think of slashing a tire, they imagine doing so with a knife or some other sharp object. However, it is possible to slash a tire without any sharp tools at all. All you need is something that can create friction and heat up the rubber.
One popular method is to use a piece of metal like a screwdriver or a tire iron. Simply press the metal against the rubber and twist it back and forth. The friction will eventually cause the rubber to heat up and weaken, allowing you to puncture it easily.
Another option is to use a household item like a hair dryer or lighter. Hold the heat source against the tire for several minutes until the rubber starts to soften. Once it’s soft enough, you should be able to poke through it with your finger or another object.
Of course, there are risks associated with both of these methods. If you use too much force when pressing the metal against the tire, you could end up puncturing your own hand in the process. And if you get careless with the heat source, you could start a fire.
So always take precautions and use common sense when attempting either of these methods.
Can You Get Away With Slashing Tires?
It is a crime to slash someone’s tires. The act of tire slashing is considered vandalism and can result in fines and jail time. If you are caught slashing someone’s tires, you will likely be charged with a misdemeanor or felony, depending on the value of the property damaged.
How Do You Puncture Someone’S Tire?
Most people know how to puncture a tire using a sharp object like a nail or screw, but not everyone knows how to do it properly. Here are a few tips on how to puncture someone’s tire:1. First, you need to find the right spot on the tire.
The best place to puncture a tire is in the sidewall, near the edge of the tread. This will cause the most damage and make it harder for the person to repair their tire.2. Once you’ve found the right spot, take your sharp object and insert it into the tire at a 45-degree angle.
Apply some pressure and twist the object slightly to make sure it penetrates deep enough into the tire.3. Remove the object and check that there is a hole in the tire. If there isn’t, repeat steps 2 and 3 until you’ve made a hole that’s big enough to let air out of the tire.
4. Congratulations! You’ve successfully punctured someone’s tire!
How to slice tires safe and smart
How to Slash Tires Without Making Noise
If you’re looking to slash someone’s tires without making any noise, there are a few things you can do. First, if you have a sharp knife or box cutter, you can simply run the blade along the side of the tire. This will puncture the tire and cause it to go flat quickly and quietly.
Another option is to use a screwdriver. Simply shove the screwdriver into the side of the tire and twist it around. This will also puncture the tire and cause it to go flat.
Finally, if you have a can of compressed air, you can puncture the tire by shooting the air into it. This method is quick and quiet, but does require that you have access to a compressed air source.Whichever method you choose, be sure to act quickly and quietly so as not to alert anyone nearby to what you’re doing.
Conclusion
If you’re ever in a situation where you need to slash someone’s tires, there are a few things you should keep in mind to stay safe. First, make sure you have a sharp knife – dull knives can be dangerous. Second, be careful not to cut yourself – tire slashing is a messy business.
Finally, watch out for cars coming down the road – you don’t want to get hit by a car while you’re slashing tires!

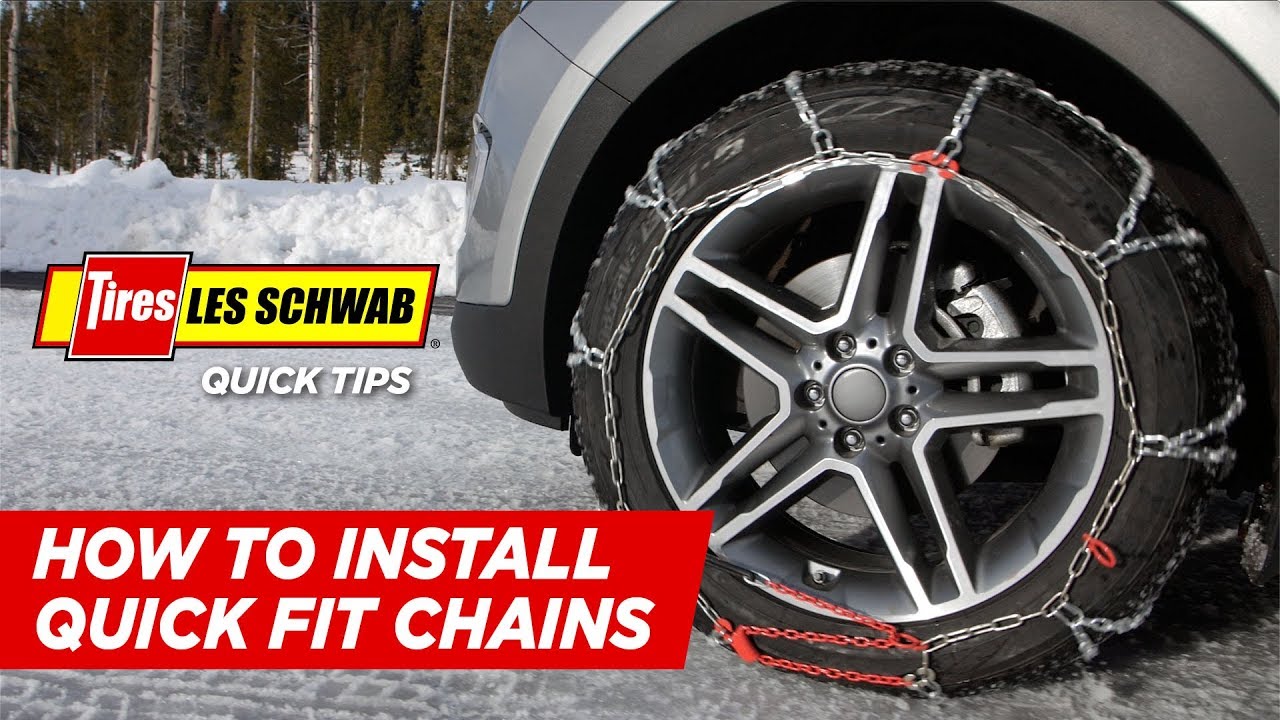
How to Fit Chains on Tires
If you live in an area with a lot of snow, you know how important it is to have chains on your tires. But if you’ve never put them on before, it can seem like a daunting task. Here’s a step-by-step guide to help you get the job done quickly and easily.
- Park the vehicle on a flat surface and set the emergency brake
- Loosen the lug nuts on the wheel with the tire you plan to put chains on
- Do not remove them completely
- Lift up the affected wheel with a floor jack and secure it with jack stands
- Take off the tire by removing the lug nuts and setting the tire aside
- Place one end of each chain around the circumference of the tire, making sure that any crossbars are facing inwards so they don’t damage your vehicle’s paint job or get caught on anything while driving
- Join both ends of each chain together at the bottom of the tire using either a hook-and-link system or twist links, depending on what type of chains you have purchased
- Make sure they are tight enough that there is no slack but not so tight that they might break when driving over bumps or potholes
- 7 Put your tire back on and screw on your lug nuts, hand-tightening them as much as possible before using a wrench to finish tightening them
Credit: www.youtube.com
Do Tire Chains Need to Fit Exactly?
No, tire chains do not need to fit exactly. In fact, it is often better if they are a little bit loose. This way, they will have more room to move around and will not be as likely to rub up against the sides of your tires.
Are Tire Chains Easy to Install?
If you’ve never installed tire chains before, the process can seem a bit daunting. However, it’s actually not that difficult – as long as you have the right tools and know-how. In this blog post, we’ll walk you through everything you need to know about installing tire chains, so you can get back on the road safely in no time.
First things first: make sure you have the right size chains for your tires. You don’t want them to be too big or too small – otherwise they won’t work properly. Once you have the right size, it’s time to get started.
The first step is to put the chains around your tires. This can be a little tricky, so it’s important to take your time and do it carefully. If they’re not positioned correctly, they won’t work properly (and could even damage your tires).
Once the chains are in place, it’s time to tighten them up. Again, this is something that takes a bit of practice – but once you get the hang of it, it’s actually pretty easy. Just make sure they’re nice and snug so they don’t come loose while you’re driving.
And that’s all there is to it! Installing tire chains may seem like a daunting task at first, but with a little patience and practice, anyone can do it.
Which Way Should Tire Chains Face?
If you’re using tire chains in snowy or icy conditions, it’s important to make sure they’re installed correctly. That means putting them on the tires with the right orientation. So, which way should tire chains face?
The short answer is that the chains should face inward, toward the center of the vehicle. This will give you the best traction and prevent the chains from coming off while you’re driving.Here’s a more detailed explanation of why this orientation is best:
When installed correctly, tire chains will provide extra traction for your tires on snow and ice. That’s because the links of the chain dig into those surfaces, providing a biting edge that gives your tires more grip.If the chains are facing outward (away from the center of the vehicle), they can actually act as a brake, making it harder for your tires to turn and slowing you down.
In addition, there’s a risk that they could come off entirely if they catch on something while you’re driving. That’s why it’s important to make sure they’re facing inward.It can be tricky to install tire chains properly, so it’s always best to consult your owner’s manual or ask a professional at a nearby service station before attempting it yourself.
But once you get them installed correctly, you’ll be able to enjoy better traction and peace of mind knowing that your tires are much less likely to slip or come off while you’re driving in winter weather conditions.
Should You Put Chains on All 4 Tires?
If you live in an area where it snows frequently, you’ve probably wondered if you should put chains on all 4 tires. The answer is: it depends. If you have a front-wheel drive car, putting chains on the front tires will be sufficient most of the time.
However, if conditions are extremely icy or snowy, putting chains on all 4 tires will give you the best traction and control. For rear-wheel drive cars, it’s generally recommended to put chains on all 4 tires for optimal traction.If you’re not sure whether or not to put chains on all 4 tires, err on the side of caution and do it.
It’s always better to have too much traction than not enough!
How to fit Snow Chains – Quick-Grip
How to Put Chains on All-Wheel Drive
All-wheel drive vehicles are great for those who live in areas with lots of snow and ice. But, just because a vehicle has all-wheel drive, doesn’t mean it can’t get stuck. That’s where chains come in.
Chains provide extra traction and grip, making it easier to get out of tough spots. Here’s how to put chains on all-wheel drive:1. Park the vehicle on a level surface and set the parking brake.
2. Locate the chains for the front wheels and put them on according to the manufacturer’s instructions.3. Do the same for the rear wheels.4. Once the chains are in place, tighten them up according to the manufacturer’s instructions.
Be sure not to over-tighten, as this could damage the chain or tire.
Conclusion
Chains are a great way to get traction in the snow, but they can be a pain to put on. Here are some tips on how to fit chains on tires:– Make sure your chains are the right size for your tires.
There should be no slack when they’re properly fitted.
– Put the chains on before you need them. It’s much easier to do it in dry conditions than in the middle of a storm.
– Loosen the tensioners before you try to put the chains on. This will make it easier to get them around the tire.
– Be careful not to damage your tires when putting on the chains.
They’re expensive and difficult to replace.

How Much to Replace Rv Tires
When it comes to replacing the tires on your RV, there are a few things to take into consideration. The first is how often you use your RV. If you only take it out a few times a year, you may be able to get by with replacing just one tire at a time.
However, if you use your RV frequently, you’ll want to replace all four tires at once. This will ensure that all of your tires are the same size and age, which will help prevent any issues down the road. The second thing to consider is what type of terrain you typically travel on.
If you stick to paved roads, you won’t need as heavy-duty of tires as someone who likes to take their RV off-roading.
If you own an RV, sooner or later you will have to replace the tires. But how do you know how many tires to replace and when? Here are some tips to help you make the best decision for your RV.
The first thing to consider is the size of your RV. If you have a smaller RV, you may only need to replace two tires at a time. However, if you have a larger RV, you may need to replace all four tires at once.
Another thing to consider is the condition of your current tires. If they are starting to show signs of wear and tear, it’s probably time to start shopping for new ones. You don’t want to wait until they are completely worn out before replacing them because that could be dangerous.
Finally, think about how often you use your RV and where you typically take it. If you only use it occasionally for short trips, then you might not need to replace your tires as often as someone who uses their RV more frequently or takes it on long road trips.Ultimately, there is no right or wrong answer when it comes to deciding how many RV tires to replace at once.
It really depends on your individual circumstances and what will work best for your needs.

Credit: crowsurvival.com
How Much Do New Tires for an Rv Cost?
The cost of new tires for an RV can vary depending on the size and type of RV you have. The average cost for a set of four new tires for a small RV, such as a pop-up camper, is around $600. For a larger RV, such as a travel trailer or fifth wheel, the average cost is around $1,200.
How Often Should You Replace Rv Tires?
How often should you replace RV tires?This is a great question and one that every RVer should ask themselves. There are a few things to consider when thinking about how often to replace your RV tires.
The first thing to think about is the age of your RV. If your RV is new, you may not need to replace the tires for several years. However, if your RV is older, you may need to replace the tires more frequently.
The second thing to consider is how often you use your RV. If you only take it out on occasional weekends, you probably won’t need to replace the tires as often as someone who uses their RV full-time. The more miles you put on your RV, the more wear and tear there will be on the tires.
Finally, think about where you typically take your RV camping. If you stick to paved roads and campgrounds, your tires will last longer than if you’re always off-roading and driving on rough terrain.So how often should YOU replace your RV’s tires?
It really depends on a number of factors. We recommend that you check your tires regularly for signs of wear and tear, such as cracks or bald spots. If they look like they need to be replaced, don’t wait!
It’s better to be safe than sorry when it comes to tire safety.
How Much are Tires for a Class C Rv?
The cost of tires for a Class C RV will vary depending on the size and type of RV you have. The most common sizes for Class C RVs are 22.5 inches and 24.5 inches. Tires for a 22.5 inch RV will typically cost between $600 and $1,200, while tires for a 24.5 inch RV will usually run between $800 and $1,400.
The type of tire you choose will also affect the price, with all-terrain tires generally costing more than regular passenger or light truck tires.
Why are Rv Tires So Expensive?
RV tires are so expensive for a variety of reasons. First, they must be able to support a lot of weight. RVs are significantly heavier than passenger vehicles, so the tires must be designed to accommodate that extra weight.
Second, RV tires are exposed to a lot of wear and tear. They travel over rough roads and endure harsh weather conditions, so they need to be made from durable materials. Finally, RV tires must be replaced more often than car tires.
Because of all these factors, RV tire manufacturers charge more for their products.
RV Tires [Know When to Replace]
Rv Tire Replacement near Me
If you are in need of RV tire replacement, there are many places that you can go to get the job done. However, finding a reputable and trustworthy place to get your tires replaced can be tricky. Here are a few tips to help you find a good RV tire replacement shop near you:
1. Ask around – Talk to your friends, family, and neighbors who have RVs and see if they have any recommendations for where to get your tires replaced. Chances are, someone you know has had to replace their RV tires before and can point you in the right direction.2. Do some research – Once you have a few potential shops in mind, take some time to do some research on each one.
Read online reviews, check out their website, and give them a call to ask any questions you may have. This will help you narrow down your choices and find the best shop for your needs.3. Get quotes – When you’ve finally found a few shops that seem like they would be a good fit, get quotes from each one so that you can compare prices and services offered.
This way, you can make sure you’re getting the best deal possible on your RV tire replacement.4. Make your decision – After considering all of the factors above, it’s time to make your final decision on which shop to use for your RV tire replacement needs. Be sure to keep all of this information in mind so that you can choose the best option for yourself!
Conclusion
If you have an RV, chances are you’ll need to replace the tires at some point. But how do you know how much to spend on new tires? The experts at Goodyear Tires say that you should budget for about $1,000 per tire.
That may seem like a lot, but when you consider the weight of an RV and the amount of wear and tear it endures, it’s actually not that surprising. Plus, new tires can help improve your gas mileage and make your RV safer to drive. So if you’re in need of new tires, be sure to set aside enough money to get the best possible ones for your vehicle.

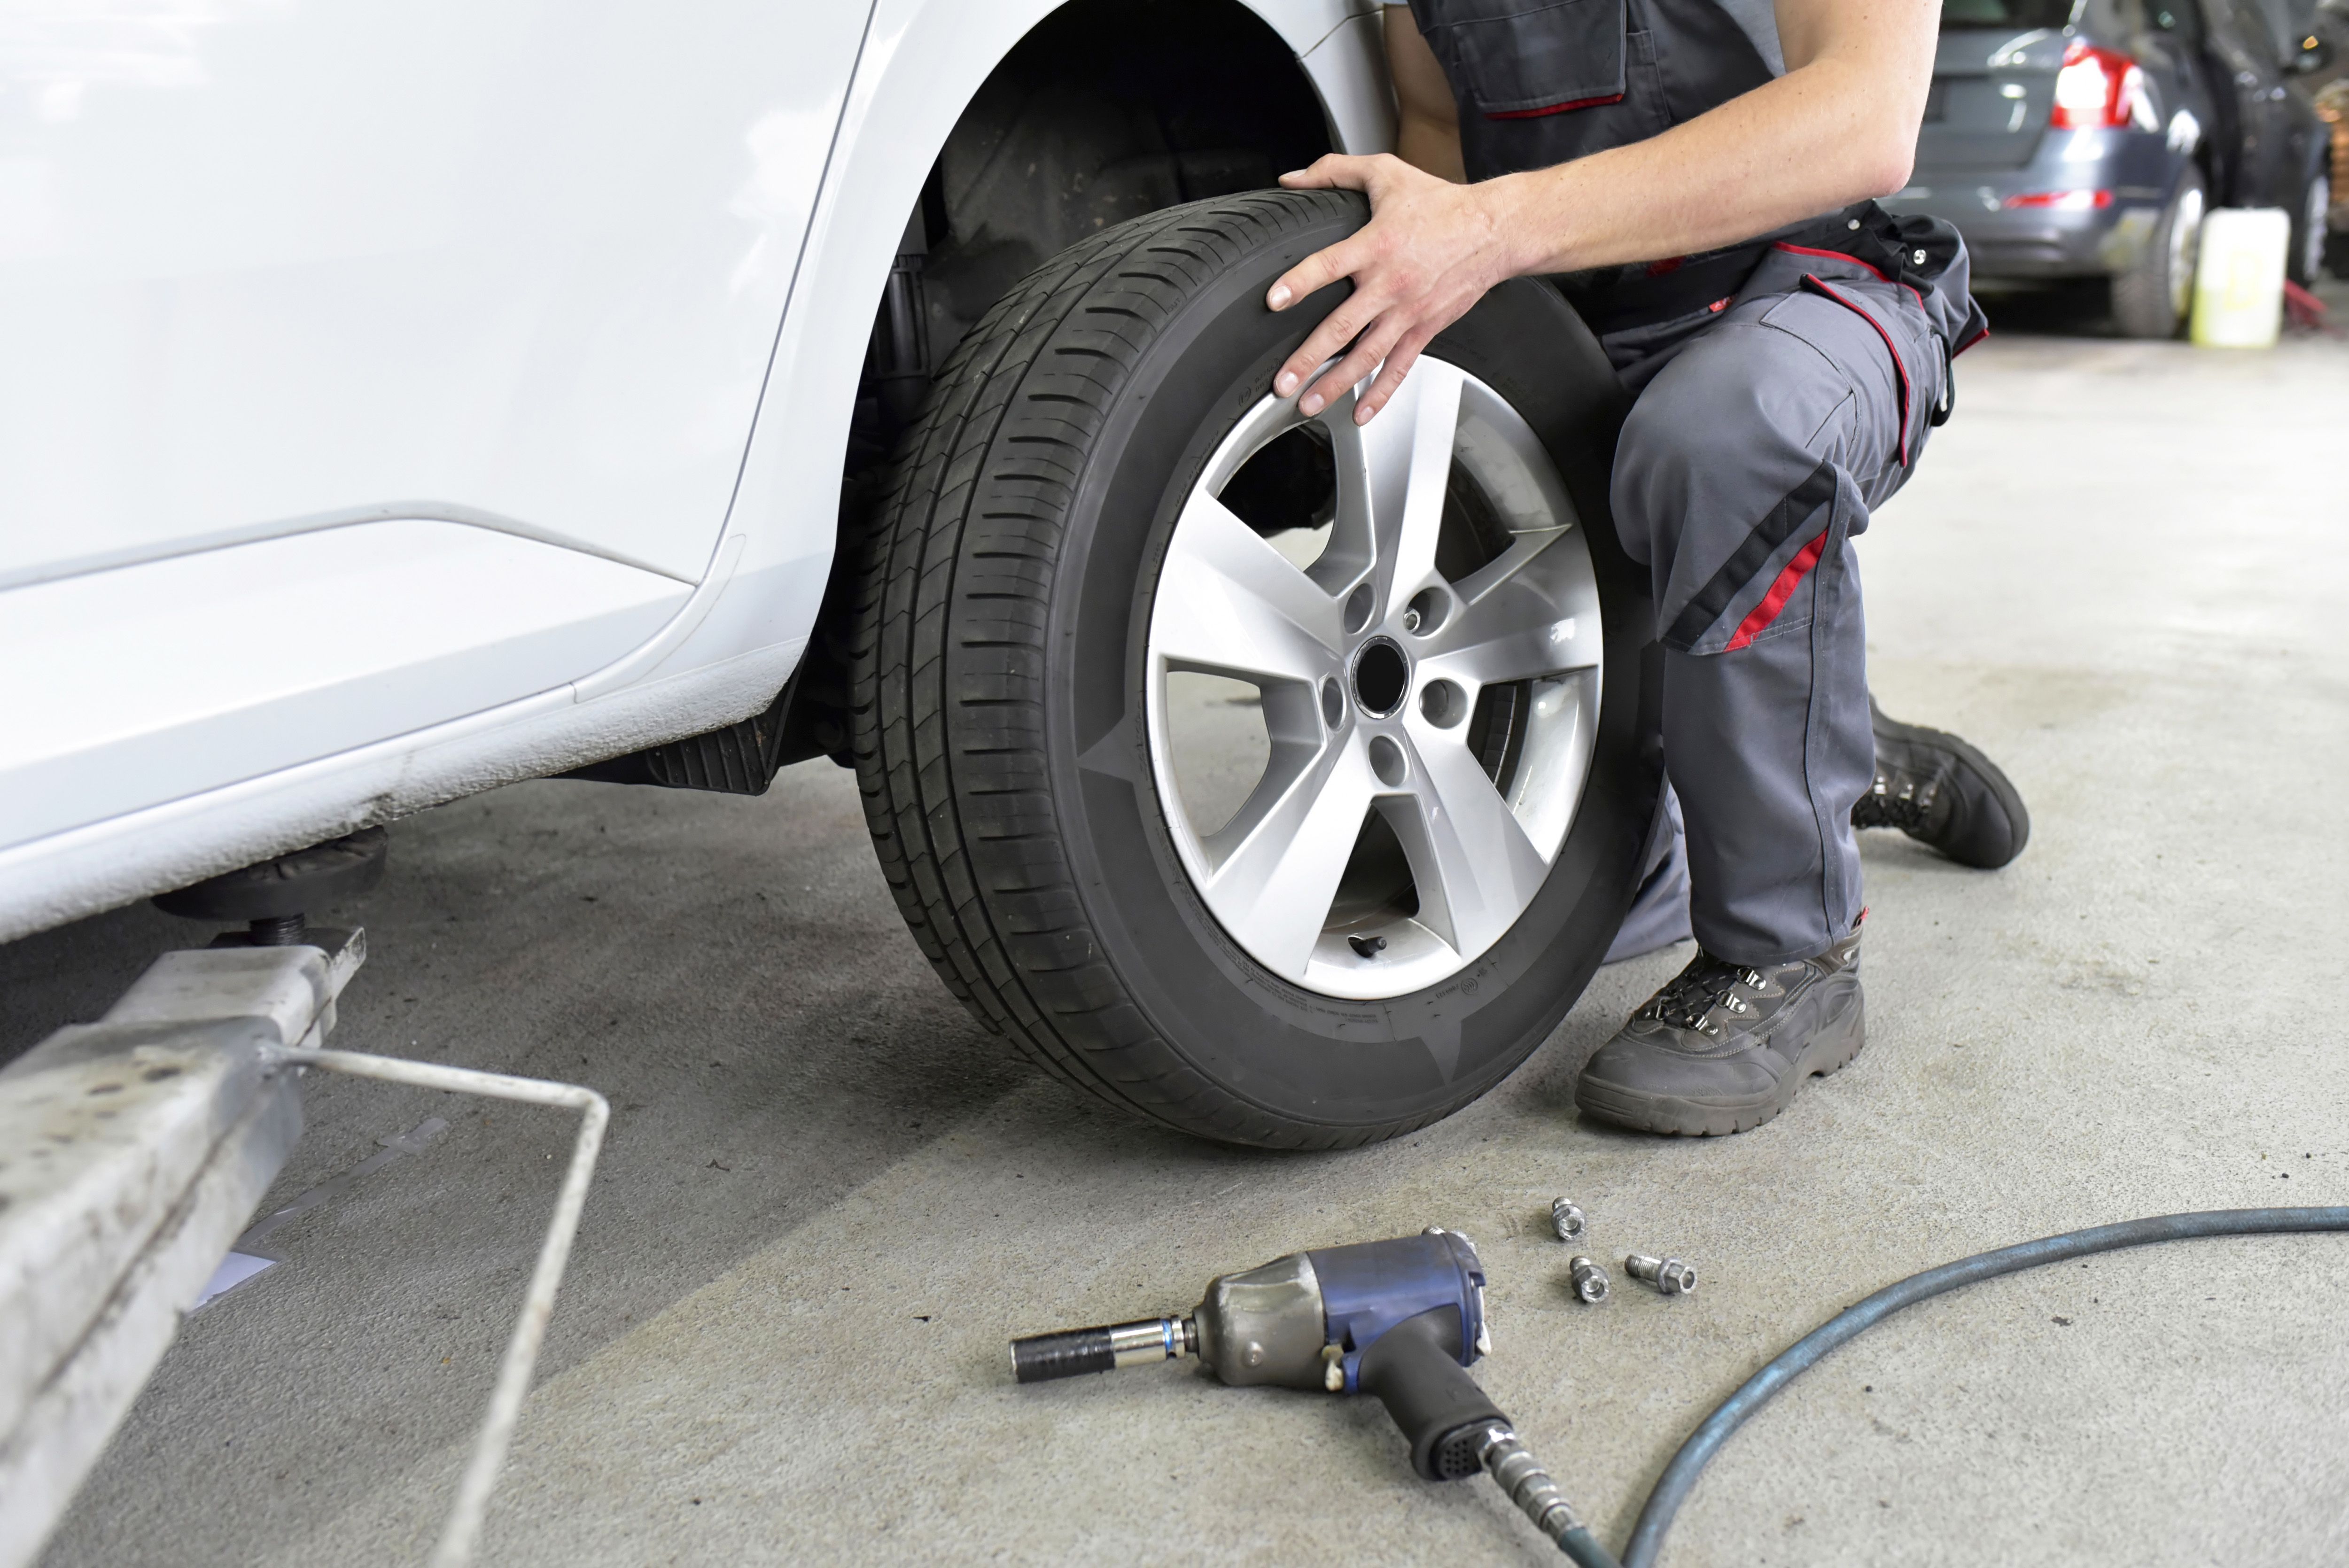
How to Rotate Vehicle Tires
Most car maintenance schedules will recommend that you rotate your tires every 5,000 to 8,000 miles. Tire rotation is important because it helps to evenly distribute the wear and tear on your tires. This can help to prolong the life of your tires and save you money in the long run.
There are a few different ways that you can rotate your tires, but the most common method is to simply swap the front tires with the back ones.
- Park your vehicle on a level surface and set the parking brake
- Place chocks in front of and behind the rear tires
- Loosen the lug nuts on each wheel using a lug wrench, but do not remove them completely
- Lift one side of the vehicle off the ground using a jack, and support it with jack stands placed under the frame rails
- Remove the tire and wheel from that side of the vehicle, and then reverse it before putting it back on so that it faces the opposite direction
- Securely tighten down the lug nuts, lower the vehicle to the ground, and then repeat this process for each remaining tire until they have all been rotated
Credit: www.caranddriver.com
What is the Proper Way to Rotate Vehicle Tires?
It’s important to rotate your vehicle’s tires regularly. By doing so, you’ll extend the life of your tires and ensure that they wear evenly. The best way to rotate your tires is to take them to a professional who can do it for you.
However, if you choose to do it yourself, there are a few things you need to keep in mind.First, consult your vehicle’s owner’s manual. It will have specific instructions on how to rotate your particular model’s tires.
Once you know the correct order in which to rotate your tires, follow these steps:1. Loosen the lug nuts on all four wheels with a wrench before lifting the car off the ground.2. Raise the car up using a jack and support it on jack stands placed under the frame rails or pinch welds (the metal reinforcements found along the bottom edge of many cars).
Never work under a car supported only by a jack!3. Remove one wheel at a time, starting with either the front passenger side or rear driver’s side tire (depending on whether you have front-wheel drive or rear-wheel drive). Set the wheel aside in a safe place where it won’t roll away and become damaged.
4. Repeat this process for each wheel until all four have been removed from the car. At this point, you can inspect each tire for signs of wear and tear, such as uneven tread wear or cracks in the sidewall. If any tire needs to be replaced, now is the time to do it!
5 . To install the new tires (or rotated ones), simply reverse this process: Place each tire back onto its corresponding wheel hub and hand-tighten the lug nuts before lowering the car down off of its jack stands with the jack . Then finish tightening each lug nut with a torque wrench set to 80 ft.-lbs.
, starting with whichever diagonal set of lug nuts is farthest away from where you’re standing .
Is There a Wrong Way to Rotate Tires?
Most people believe that there is a “wrong” way to rotate tires, when in reality, there is no wrong way. The only thing that matters when rotating tires is that the rotation is done correctly. There are many different ways to rotate tires, but the most common way is to simply swap the front and rear tires.
This can be done by either taking the car to a mechanic or by doing it yourself. If you choose to do it yourself, all you need to do is loosen the lug nuts on each tire, jack up the car, remove the wheels, and then swap them around. It’s really that simple!
The reason why it’s important to rotate your tires regularly is because it helps evenly distribute wear and tear. Over time, certain areas of your tires will start to wear down more quickly than others. By rotating them regularly, you can help extend their lifespan and ensure that they last as long as possible.
So if you’re not sure how often you should be rotating your own tires, just ask your local mechanic – they’ll be able to advise you based on your specific vehicle and driving habits.
Can I Rotate My Own Car Tires?
Yes, you can rotate your own car tires. The process is actually quite simple and does not require any special tools or equipment. Just be sure to follow the steps outlined below carefully and you’ll have no problem doing it yourself.
Before we get started, let’s go over what tire rotation is and why it’s important. Tire rotation is the process of moving your tires from their current position on your vehicle to different positions. This helps evenly distribute wear and tear on all four tires, which in turn helps them last longer.
Most manufacturers recommend that you rotate your tires every 5,000 miles or so.Now that we’ve got that out of the way, let’s get down to business. The first thing you’ll need to do is jack up your car and remove the lug nuts from all four tires (be sure to place them somewhere safe where they won’t roll away).
Next, remove the tires one at a time and set them aside in the order that they came off (i.e., front left, front right, rear left, rear right).Now it’s time to install the tires in their new positions. For most cars, this will mean putting the front tires on the rear and vice versa.
However, consult your owner’s manual or a professional if you’re unsure which specific pattern is best for your vehicle. Once the new tires are in place, simply put the lug nuts back on and lower your car back down to the ground. That’s it – you’re done!
How to PROPERLY Rotate Your Tires
How to Rotate Tires on 4X4
If you own a four-wheel drive (4WD) vehicle, then you know that rotating your tires is important in order to maintain even tire wear. But did you know that the process of rotation is different for 4WD vehicles? Here’s a quick guide on how to rotate tires on 4WD vehicles:
First, start by placing your vehicle in park on a level surface. Next, engage your parking brake and chock the wheels so that the vehicle doesn’t move. Now it’s time to loosen the lug nuts on all four tires – but don’t remove them just yet!
Next, place your jack under the frame of the vehicle and raise it until the tire is just off the ground. Once all four tires are raised, remove the lug nuts and set them aside. You can now begin to swap out each tire, starting with the front passenger side tire and moving clockwise around the vehicle.
So, the front passenger side tire will go to where the rear driver’s side was, and so forth.After all four tires have been moved to their new positions, put the lug nuts back on (but don’t tighten them just yet) and lower your car back down to the ground. Once all four tires are touching pavement again, go ahead and tighten each lug nut until they are snug – but be careful not to overdo it!
And there you have it – that’s all there is to rotating your 4WD vehicle’s tires! Just remember to perform this task every 5,000 miles or so in order keep those treads nice and even.
Conclusion
It’s important to rotate your vehicle’s tires every 5,000 miles or so in order to evenly distribute wear and tear. Doing so will prolong the life of your tires and save you money in the long run. The process is fairly simple: just jack up your car, remove the wheels, and swap their positions.
You can find more detailed instructions online or in your car’s owner manual.