- Home
- Blog

How to Remove Rust from Tires
If you have a car, then you know that one of the most difficult things to keep clean are the tires. They’re constantly getting dirty and full of grime, and if you live in an area with a lot of rain or snow, they can start to rust. Rust not only looks bad, but it can also damage your tires and make them less effective.
Luckily, there are a few ways that you can remove rust from your tires and keep them looking like new.
- If you have rust on your tires, there are a few ways you can remove it
- One way is to use a wire brush to scrub the rust off
- Another way is to use a chemical Rust Remover, which you can find at most hardware stores
- Be sure to follow the instructions on the Rust Remover, as some of them are corrosive and can damage your tires if not used properly

Credit: www.drbeasleys.com
Can Rust Be Removed from Wheels?
If your wheels have started to show signs of rust, don’t panic! While it may seem like the end of the world, there are actually ways that you can remove rust from your wheels and get them looking shiny and new again.One way to remove rust is by using a wire brush.
This will help to loosen any rust that has formed on the surface of the wheel. You can then use a cloth or sponge to wipe away the loosened rust. If there are still some stubborn spots remaining, you can try using sandpaper to buff them away.
Another option for removing rust is through the use of chemicals. There are many different products on the market that are specifically designed for removing rust. Be sure to follow the directions on the packaging carefully so that you don’t cause any damage to your wheels in the process.
Once you’ve removed all of the Rust from your wheels, be sure to take steps to prevent it from coming back. This includes regularly washing and waxing your wheels, as well as storing them in a cool, dry place when they’re not in use. By taking these simple precautions, you can keep your wheels looking like new for years to come!
Will Straight Vinegar Remove Rust?
Rust is one of the most difficult stains to remove from any surface. Even with powerful cleaners, rust can be stubborn and refuse to come off. This is where vinegar comes in.
Vinegar is a natural rust remover that can be used on a variety of surfaces. It’s also inexpensive and easy to find at most supermarkets.To remove rust with vinegar, start by applying the vinegar to the rusted area.
Let it sit for several minutes before scrubbing with a brush or cloth. If the rust is still present, you can try using a stronger concentration of vinegar or leaving it on for longer periods of time. When you’re finished, rinse the area with water and dry it off completely.
How Do You Fix a Rusted Tire Rim?
If you have a rusted tire rim, there are a few things you can do to fix it. First, you will need to remove the rust. You can do this by sanding the area with sandpaper or using a chemical rust remover.
Once the rust is gone, you will need to apply a primer and paint the area to protect it from further corrosion.
Why are My Tires Rusting?
If you notice your tires are beginning to rust, there are a few things that could be the cause. Here are some of the most common reasons for why tires might rust:1. Moisture or water getting trapped in between the tire and wheel
2. A build-up of brake dust on the surface of the tire
3. The presence of salt on the road (this is especially common in winter)
4. Not cleaning your tires regularly
If you live in an area where winters are snowy and salty, it’s especially important to take care of your tires to prevent them from rusting. Be sure to regularly clean your tires (you can use a simple soap and water solution), and if possible, try to avoid driving through puddles or standing water on the road. If you do get salt on your tires, be sure to rinse them off as soon as possible.
Super Rusty Spare Wheel Restoration
Rust on Tire Rims
If you’re like most people, you probably don’t give much thought to the condition of your car’s tires – until something goes wrong. Unfortunately, one of the most common problems that can occur is rusting on the tire rims. This can be a cosmetic issue, or it can actually affect the performance of your tires.
Either way, it’s important to understand what causes this problem and how to prevent it.The first thing to know is that rust doesn’t just happen overnight. It’s a gradual process that occurs over time as moisture and oxygen interact with the metal in your rims.
This interaction causes a chemical reaction that results in oxidation, or rusting.There are a few different ways that moisture can get onto your rims in the first place. If you live in an area with high humidity, that air itself can contain enough moisture to cause problems.
Rain, snow, and even road spray from passing vehicles can also contribute. And if you wash your car regularly (which you should!), water from the hose can also seep into small cracks or crevices in your rims and start the rusting process.Once rust starts to form, it will continue to spread unless you take action to stop it.
The best way to do this is by preventing moisture from coming into contact with your rims in the first place.
Conclusion
If your car’s tires have developed a layer of rust, there are a few ways you can remove it. You can use a commercial rust remover, sandpaper, or a wire brush. If the rust is only on the surface of the tire, you may be able to remove it with soap and water.
However, if the rust has penetrated the tire’s surface, you’ll need to replace the tire.

How to Sell Used Winter Tires
When the winter season comes to an end, many people are left with used winter tires that they no longer need. If you find yourself in this situation, you may be wondering how to sell used winter tires. There are a few different options that you can consider.
One option is to sell them online. You can list them on classified ads websites or auction sites. Another option is to take them to a local tire shop or car dealership.
They may be interested in purchasing your used tires. Finally, you could also try selling them privately to individuals who are in need of winter tires. Whichever option you choose, there are a few things that you should keep in mind.
First, make sure that the tires are in good condition and have plenty of tread left on them. Second, clearly state the asking price and be willing to negotiate if necessary. Third, be prepared to answer any questions potential buyers may have about the condition of the tires.
- Research the value of your used winter tires
- Look up the brand and model online, and check tire retailers to get an idea of how much your tires are worth
- Find a buyer for your used winter tires
- You can sell them to a tire retailer, or list them for sale online or in a classified ad
- Negotiate with the buyer on the price of the tires
- Be prepared to haggle until you reach a fair price that both you and the buyer are happy with
- Make arrangements with the buyer for payment and tire pick-up or delivery
- Once everything is agreed upon, confirm the sale by sending an invoice or receipt to the buyer

Credit: www.surplex.com
Is Selling Used Tires Profitable?
There are a few different ways to make money from selling used tires. One way is to simply sell the tires outright to individuals or businesses. This can be done through online classifieds, at a garage sale, or even at a flea market.
You can also sell the tires to a scrapyard or recycling center. They will usually pay you by the pound for the tires. Finally, you could also start your own used tire business.
This would involve collecting used tires from individuals and businesses, and then either reselling them or recycle them into new products.
How Do I Sell My Set of Tires?
When it comes to selling a set of tires, there are a few things you need to keep in mind. First and foremost, you need to make sure that the tires are in good condition. This means they should have plenty of tread left and be free of any major damage.
If the tires are in poor condition, it will be hard to find a buyer willing to pay a fair price for them.Once you’ve determined that the tires are in good condition, the next step is to find a buyer. You can do this by posting an ad online or in your local classifieds section.
Be sure to include all pertinent information about the tires such as size, brand, and asking price. You may also want to include a photo of the tires so potential buyers can see what they’re getting.If you don’t have any luck finding a buyer locally, you can always try selling the tires online.
There are many websites dedicated to buying and selling used auto parts, so this is definitely worth considering. Just be sure to do your research beforehand so you know you’re getting a fair price for your tires.
How Can I Make Money With Used Tires?
If you’re looking to make some extra money, one option is to recycle used tires. Tires can be recycled into a variety of products, from rubber mulch to playground surfaces. Here are a few ideas on how you can make money recycling used tires:
1. Sell them to a scrapyard or tire recycling facility.2. Make rubber mulch for landscaping or gardening applications.3. Create an art project using recycled tires (e.g., a tire swing or planter).
4. Use them as filler in construction projects (e.g., backfill for retaining walls).
How Much is a Used Set of Tires Worth?
A used set of tires is worth about $30.
Quick Guide – HOW TO FLIP / SELL OLD USED TIRES AND PROFIT AT LEAST $100
Who Buys Used Tires near Me
If you’re in the market for used tires, there are a few things to keep in mind. First, you’ll want to find a reputable seller. There are a few ways to do this, including asking friends or family for recommendations, or searching online for reviews.
Once you’ve found a few potential sellers, it’s important to compare prices. Used tires can vary widely in price, so it’s worth taking the time to shop around. You may also want to consider buying in bulk if you plan on purchasing multiple tires.
Finally, make sure to inspect the condition of the tires before making your purchase. While most sellers will be honest about the condition of their products, it’s always best to err on the side of caution and inspect the tires yourself. Once you’ve found the perfect set of used tires at a great price, enjoy your new-to-you wheels!
Conclusion
Looking to get rid of your used winter tires? Here are a few tips to help you sell them quickly and for a good price.First, take some pictures of the tires and list them online on websites like Craigslist or eBay.
Be sure to include all pertinent information in the listing, such as the size, make, and model of the tires.Next, Spread the word to your friends and family that you’re selling the tires – you never know who might be in the market for a good deal on winter tires! Finally, be patient and wait for the right buyer to come along.
With a little bit of effort, you should have no trouble selling your used winter tires.

How to Mount Small Tires
One of the most difficult things to do when it comes to mounting small tires is getting the right tools. You need a few basic things in order to get started, including a lug wrench, socket set, and an impact gun. Once you have these items, you can begin by jacking up your vehicle.
Place the jack under the frame of the car and raise it until the tire is off the ground. Next, remove the wheel cover or hubcap (if present) and loosen the lug nuts with your wrench.
- Park the car on a level surface and engage the emergency brake
- Jack up the car and place jack stands under the frame for support
- Remove the wheel covers, if present, and loosen the lug nuts with a wrench
- Lift the tire and wheel off of the ground and set aside in a safe location
- Clean any debris from around the mounting area on the car with a brush or rag to avoid damaging the paint when installing the new tire
- Line up the new tire with the opening on the car and push it into place until it is seated against the lip of
Small Tire Mounting Tool
If you’ve ever had to change a tire, you know that it can be a real pain in the neck. Even if you have all the right tools, it’s still a challenge to get the job done quickly and efficiently. That’s where the Small Tire Mounting Tool comes in handy.
This tool is designed to help you mount small tires quickly and easily. It’s compact and lightweight, so it’s easy to take with you on the go. And it comes with everything you need to get the job done – from mounting brackets to an air compressor hose.
The best part about this tool is that it makes changing tires a breeze. No more struggling with lug nuts or wrestling with heavy tires. With this tool, you can get the job done in no time flat.
So next time you’re stuck on the side of the road with a flat tire, don’t despair – just reach for your Small Tire Mounting Tool and get back on your way in no time!
Credit: pitpal.com
How Do I Put a Small Tyre Back on the Rim?
Assuming you are referring to a bicycle tire, the process is as follows:1. First, use a tire lever to pry off the old tire from the wheel. If the tire is particularly stubborn, you may need to use two levers.
Work your way around the entire circumference of the tire until it is completely removed.2. Once the old tire is off, take a look at the new one and make sure it is oriented correctly on the wheel. The “bead” (the edge of the tire) should be seated in the well of the rim all the way around.
If not, rotate it so that it is before proceeding to step 3.3. Now begin working one side of the new tire onto the rim, using your hands to stretch it over bit by bit until eventually it pops into place. It can be helpful here to use a little saliva or water on your fingers to lubricate things and get things moving more easily.
Do not worry if things seem really tight at first – just keep working slowly and evenly until you get about halfway around before moving onto step 4.4. Flip Tire & Repeat Step 3: Now that one side is seated properly, flip over the wheel so that you can work on mountingthe other side of the new tire in exactly same manner as before – remember to go slowly and carefully!
Once both sides are equally mounted on rim…congratulations, you’ve changed your first bicycle tire!
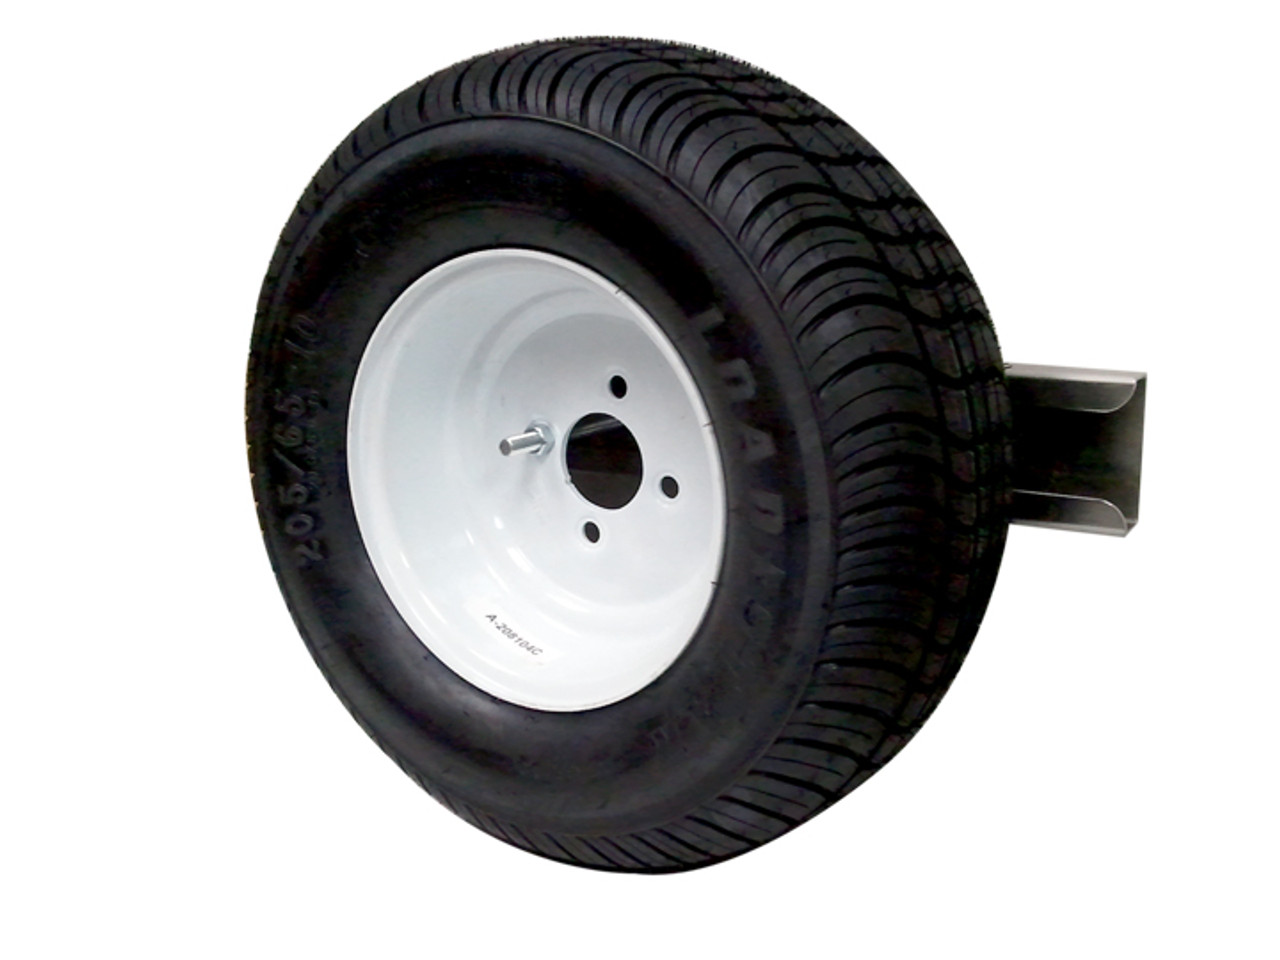
How Do You Mount a Small Trailer Tire?
If you have a small trailer tire that needs to be mounted, there are a few things you need to do. First, you need to find the right size tire for your trailer. Next, you need to get the tire inflated to the proper pressure.
Finally, you need to mount the tire on the wheel.To find the right size tire for your trailer, consult the owner’s manual or look for a placard on the trailer itself that will list the correct size. Once you have the correct size tire, inflate it to the proper pressure using a air compressor or air pump.
To mount the tire on the wheel, first put some soapy water on both the bead of the tire and inside lip ofthe wheel rim. This will help lubricate them and make it easier to seatthe bead ofthe tire onto the wheel rim edge. Onceyou’ve done that, use your handsto work aroundthe circumferenceof the tir untilit is fully seatedon therim all around .
You mayneedtousea pry bartogetit started butdon’t usethat asyour only methodofseating itasyou can damageboth therubberandthelipofthewheelrim .
How Do You Put a Small Tire on a Lawn Mower Rim?
If you have a small tire that needs to be put on a lawn mower rim, the process is actually not that difficult. You will need to gather a few supplies first, including a socket wrench and an air compressor. Once you have those items, follow these steps:
1. Begin by loosening the bolts on the rim of the lawn mower with the socket wrench. Be sure to do this carefully so you don’t strip the bolts.2. Next, use the air compressor to inflate the tire.
Make sure that it is inflated to the correct pressure before proceeding.3. Now it’s time to line up the tire with the opening on the rim. It may take some trial and error to get it lined up perfectly, but once it’s in place, start threading in the bolts by hand.
4. Once all of the bolts are started, use the socket wrench to tighten them down evenly until they’re snug against the tire. Don’t over-tighten them or you could damage both the tire and rim.5 That’s it!
You’ve now successfully put a small tire on a lawn mower rim.
Can You Mount Tires Without a Machine?
It is possible to mount tires without a machine, but it is not recommended. The process is very difficult and time-consuming, and it can be dangerous if not done correctly. Without a machine, you will need to use tire irons to pry the tire off the rim.
This can be tricky and dangerous, as you could easily pinch your fingers or slip and fall. Additionally, mounting the tire back on the rim without a machine can be equally as challenging. It is important to make sure that the bead of the tire is properly seated in the rim before inflating, or else you risk damaging the tire or having it come off the rim while driving.
For these reasons, we recommend taking your tires to a professional to have them mounted on a machine.
How to Mount a Small Tire on Wheel
Conclusion
It’s not difficult to mount small tires, but there are a few things you need to know before you get started. First, you’ll need a tire mounting machine. These can be found at most auto parts stores.
Second, make sure the tires are clean and dry before you start. Third, when mounting the tire, be sure to use a bead lubricant on the rim. This will help the tire seat properly and prevent it from coming off later.
Finally, inflate the tires to the proper pressure before driving away.

How to Tell How Big Tires are
Most people don’t know how to tell how big tires are. There are a few ways to measure tires, but the most common way is by looking at the sidewall of the tire. The sidewall of the tire will have a series of numbers that look like this: P215/65R15.
The first number, 215, is the width of the tire in millimeters. The second number, 65, is the height of the tire sidewall as a percentage of the width. The third number, 15, is the diameter of the wheel in inches.
- Look at the sidewall of the tire to find the size
- The size is listed as a series of numbers and letters
- The first number is the width of the tire in millimeters
- The second number is the aspect ratio, which is the height of the sidewall as a percentage of the width
- The third number is the wheel diameter in inches

Credit: www.wikihow.com
How Do I Tell the Size of My Tires?
If you’re not sure of your tire size, there are a few ways to figure it out. The easiest way is to look on the sidewall of your tires. There should be a series of numbers and letters that looks something like this: 225/50R17 91H.
The first number is the width of your tire in millimeters (mm), while the second number is the aspect ratio. The “R” stands for radial construction, and the 17 indicates the diameter of your wheel in inches. Finally, 91 is the load index and H is the speed rating.
Another way to determine your tire size is by using a tape measure. First, measure the width of your tire from one sidewall to the other at its widest point. Then, measure the height of your tire from where it sits on the ground to its top edge.
To get your aspect ratio, simply divide the height by the width. For example, if your tire has a width of 215 mm and a height of 55 mm, then its aspect ratio would be 55 ÷ 215 = 0.255 or 25%.If you don’t have access to a tape measure, you can also use a ruler or even just an object like a pencil or pen.
Simply place it against one sidewall and make a mark at both ends; then do the same on the other sidewall. Once you have two marks that are exactly opposite each other across your tire’s width, measure between them with whatever you’re using – this will give you an accurate measurement of how wide your tires are!
What Does a 33 Inch Tire Mean?
When it comes to vehicle tires, the numbers can be confusing. But decoding them is actually pretty simple once you know what you’re looking for. The “33” in a 33-inch tire refers to the tire’s width in millimeters.
This measurement corresponds to the width of the tread on the tire. That is, it’s the distance from one sidewall of the tire to the other. The wider the tread, the better traction and stability your vehicle will have – especially important in off-road driving or when weather conditions are less than ideal.
The second number in a tire size (such as “33”) is called the aspect ratio. This figure expresses the height of the sidewall as a percentage of width. In our example, 33% of 225 mm (the width) equals 74 mm (the height).
So, a 33-inch tall tire would have a sidewall that’s about 74 inches tall – give or take a few millimeters depending on manufacturer tolerance levels.The last number in a tire size designation is known as the wheel diameter and simply measures how big around your wheel is – nothing more, nothing less. Our example features a 17-inch wheel diameter; so this particular 33-inch tall tire would fit onto any 17-inch wheel without issue (provided that there’s enough clearance inside your vehicle’s fender well).
Understanding how to pick out the right size Tires, Rims and wheels
How to Read Tire Sizes in Inches
If you’re not sure how to read tire sizes in inches, don’t worry – it’s actually pretty simple! The first number is the width of the tire, and the second number is the height. For example, a tire that is listed as “205/70R15” would be 205mm wide and 70mm tall.
The “R” indicates that it’s a radial tire, and the “15” indicates that it’s 15 inches in diameter.
Conclusion
It’s easy to tell how big tires are. Just look at the sidewall of the tire and find the number that comes after the “R.” That number is the diameter of the tire in inches.
For example, if the number is 17, then the diameter of the tire is 17 inches.

How to Install Run Flat Tires
If you’ve ever had a flat tire, you know how frustrating it can be. You’re stranded on the side of the road, waiting for a tow truck or trying to change the tire yourself. But what if there was a way to prevent flat tires altogether?
That’s where run flat tires come in. Run flat tires are designed to keep driving even after they’ve lost all their air pressure. In this blog post, we’ll show you how to install run flat tires so you can be prepared for anything.
- Purchase run flat tires from a tire retailer or auto dealership
- Inspect the condition of your car’s current tires and note any wear and tear
- If your car’s current tires are in good condition, you can install the new run flats without having to replace them
- Jack up your car and remove the hubcaps, if necessary
- Loosen the lug nuts on each wheel before jacking up the car so that they can be easily removed later
- Place the jack under the frame of the car at a designated jack point
- Slowly lift the car until the tire is off the ground
- Do not place the jack directly under the axle as this could damage it
- Remove each lug nut and old tire from the wheel, being careful not to scratch or damage the wheel in any way
- 6a) For traditional run flat tires: Line up each new tire with its corresponding wheel opening and carefully lower it onto The bead ofthe tire should fit snugly into The groove aroundthe edgeof The wheel opening Once all fourtires arein position, hand-tighten eachlugnut onto itscorrespondingwheel stud justenoughso thatThetire doesn’t falloff while you’re tighteningit fully withThe wrench6b) For newer “self-supporting”run flat tires: Position thenewtire nextto Thewheeland loweritontoThewheel untilTherim flange is seatedagainstThWheel lip Self-supportingrunflatstireshavean internal support ringthatfittightlyinto an annular grooveonThWheel Onceallfourtiresarein position, hand-tighteneachlugnut onto its correspondingwheelstudjustenoughsothatthetiredoesn’tfalloffwhileyou’retighteningitfullywiththwrench7) Using Thwrench, tighteneachlugnut inturnuntil it’s snug against Thewheel stud Be sure not to overtightenthem as This could strip out The threads or breakThe lugs 8 LowerThecar backdown to Thgroundand finish tighteningEachlugnut with Thwrench in athree-step pattern(e g , left front/right rear/left rear/right front) until Each one is tightenedto specifications 9 PutThHubcapsback on

Credit: www.bulldogdirect.com
Are Run-Flat Tires Harder to Install?
No, run-flat tires are not harder to install. In fact, they can be easier to install because you don’t have to worry about air pressure. Run-flat tires are designed to keep their shape and structure even when they lose all their air pressure.
This means that you can continue driving on them until you can get to a safe place to change the tire.
Can You Put Run-Flat Tires on Any Rim?
No, you cannot put run-flat tires on any rim. Run-flat tires must be used with specific rims that have been designed to accommodate them. These rims typically have a reinforced bead area to support the weight of the vehicle even when the tire is deflated.
Using a run-flat tire on an incompatible rim can cause problems such as wheel deformation or uneven wear.
Can You Put Run-Flat Tires on Any Car?
No, you cannot put run-flat tires on any car. Run-flat tires are designed for a specific type of vehicle and may not be compatible with other types of vehicles. Additionally, run-flat tires require special rims and wheels that can accommodate the extra weight and size of the tire.
Do You Have to Install Run-Flat Tires?
No, you don’t have to install run-flat tires, but doing so may provide some benefits. Run-flat tires are designed to continue running even after sustaining a puncture or other damage that would normally cause a tire to go flat. This can be helpful if you find yourself stranded on the side of the road with a flat tire.
However, run-flat tires typically cost more than regular tires and may not provide as much comfort or grip.
Changing a run flat tyre with an assist arm
Run Flat Tyre Changing Machine
If you’ve ever had a flat tire, you know the feeling of frustration and inconvenience that comes with it. You have to change your tire, and then you have to take it to get repaired. But what if there was a machine that could do all of that for you?
Run flat tyre changing machines are designed to make changing your tires quick and easy. They can also repair your tires so that you don’t have to take them to a shop. This means that you can save time and money by using a run flat tyre changing machine.
There are many different brands and models of run flat tyre changing machines, so it’s important to do your research before buying one. You’ll want to consider the size of the machine, the features it offers, and the price. With so many options on the market, you’re sure to find one that meets your needs.
Conclusion
If you’re looking to install run flat tires, there are a few things you need to keep in mind. First, make sure that your car is compatible with run flat tires. Not all cars are able to accommodate them.
Secondly, be prepared to pay more for run flats than traditional tires – they typically cost about 20-30% more. Finally, when installing run flats, it’s important to use the proper tools and techniques so that they seat correctly on the rim. With these things in mind, installing run flats is a relatively simple process.
How to Switch to Winter Tires
When the temperatures start to drop and the snow starts to fall, it’s time to switch your tires. Winter tires are specifically designed for cold weather and provide better traction and handling in snow and ice. If you’re not sure how to switch to winter tires, here’s a quick guide.
First, you’ll need to purchase winter tires. You can either buy a new set of tires or use studded tires that you already have. Once you have your winter tires, it’s time to install them.
If you’re installing new tires, take your old ones off first and then install the new ones. Make sure that the new tires are properly inflated before putting them on your car.If you’re using studded tires, simply put them on over your existing tires.
Once the studded tire is in place, inflate it according to the manufacturer’s instructions.Once you have your winter tire installed, be sure to drive cautiously until you get used to the way they feel. Winter driving can be tricky, so take your time getting used to the different feel of your car with winter tires.
- Before the winter season begins, it is important to switch your tires to winter ones
- This will give you better traction and grip on icy and snowy roads
- Here are a few steps on how to switch to winter tires:1) Firstly, consult your car owner’s manual to see what size of tire is recommended for your vehicle
- 2) Once you have the right sized tires, check the tread depth of your current tires
- If they are below 3/16 of an inch, then it’s time for new tires
- 3) It’s important to have all four winter tires installed at the same time so that your car handles evenly
- 4) When putting on the new winter tires, be sure to put them on the front wheels first
- The front wheels do most of the steering and braking, so they need traction more than the back wheels
- 5) After the front wheels are taken care of, put the new winter tires on the back ones and tighten each lug nut with a torque wrench according to your car owner’s manual

Credit: www.autoguide.com
How Do I Switch to Winter Tires?
If you live in an area with cold winters and snow, then you know how important it is to have good winter tires. Winter tires are made of a different type of rubber that stays pliable in cold temperatures, so they provide better traction than regular tires. They also have deeper treads to help with traction on icy roads.
If you’ve never used winter tires before, or if you’re not sure how to switch them out, here’s a quick guide.
What Month is Best to Change to Winter Tires?
If you live in an area with cold, snowy winters, then changing to winter tires is a must. But what month is the best time to make the switch?Most experts agree that the best time to change over to winter tires is when the temperature consistently starts dipping below 7°C.
This typically happens in late October or early November in most parts of Canada.Of course, this can vary depending on where you live. If you’re in a more southern region like Ontario, you might not need to switch until December.
But if you’re up north in Alberta or Saskatchewan, you might need to switch as early as October.Either way, it’s important to keep an eye on the weather and temperatures in your area so that you know when the right time is for changing to winter tires. Waiting too long could put you at risk of slipping and sliding on icy roads!
Can I Put My Winter Tires on Myself?
If you’re like most people, you probably don’t think about your tires until there’s a problem. But if you live in an area with cold winters, it’s important to switch to winter tires as soon as the temperature starts to drop. Winter tires are specifically designed to provide better traction and handling in snow and ice.
They’re made from a different type of rubber compound that stays pliable in cold weather, and they have deeper treads than summer or all-season tires.You might be tempted to put your winter tires on yourself to save money, but it’s best to leave this job to a professional. Most tire dealers offer free installation with the purchase of new winter tires.
And even if you know how to change your own tires, it can be difficult to remove lug nuts that are frozen solid. It’s also important to make sure the new tires are properly balanced and inflated before hitting the road.
Do You Need Alignment When Switching to Winter Tires?
It’s generally a good idea to get your vehicle’s alignment checked when you install winter tires. With the different tread patterns and compounds of winter tires, they can cause your vehicle to handle differently than all-season or summer tires. This can lead to premature tire wear and potentially decreased fuel economy.
While it’s not required that you get an alignment when switching to winter tires, we recommend it if you’re looking to get the most out of your investment. A wheel alignment will help ensure that your vehicle is driving straight and true, which can help extend the life of your winter tires.
How to swap your winter tires – 2020 (step by step)
Winter Tire Changeover near Me
If you live in a cold climate, it’s important to change your tires over to winter tires as soon as the weather starts to turn. But if you’re not sure how to do it yourself, or don’t have the time, there are plenty of places that will do it for you.Just do a search for “winter tire changeover near me” and you’ll find plenty of options.
Most tire shops will offer this service, and some even have special deals if you buy your winter tires from them.There are also a few national chains that specialize in tire changes. Tire Rack offers a mobile installation service that will come to you and change your tires at your home or office.
And Discount Tire has over 1,000 locations across the US where you can get your winter tires installed.So whatever your situation, there’s no excuse for driving on bald summer tires when the snow starts flying! Get your winter tires installed early and be prepared for whatever Mother Nature throws our way.
Conclusion
If you live in an area where winters are snowy and icy, it’s important to switch your tires to winter ones. Winter tires are designed to grip the road better in these conditions. Here’s how to make the switch:
1. Buy winter tires. You can buy them at most tire stores or online. Be sure to get the right size for your vehicle.
2. Put the winter tires on all four wheels of your vehicle.
3. Adjust the pressure in each tire according to the manufacturer’s recommendations.
4. Have your alignment checked.
This is important because improper alignment can cause your tires to wear unevenly .

How to Put Air in Truck Tires
Assuming you don’t have an air compressor, the best way to add air to your truck’s tires is by visiting a gas station. Most gas stations will have an air pump that you can use for free or for a small fee. Simply remove the cap from your tire’s valve stem and attach the air pump nozzle.
Pump air into the tire until it reaches the desired pressure.
- Park your truck on a level surface and set the parking brake
- Locate the valve stem on each tire
- It is usually on the side of the tire near the rim
- Unscrew the cap from the valve stem and press a tire gauge onto the end of the stem to get a reading of the current air pressure in each tire
- Add air to each tire, using an air compressor or hand pump, until you reach the recommended pressure for your truck’s tires as specified in your owner’s manual or on a sticker inside the driver’s door frame
- Replace each cap securely onto its valve stem and lower your truck back to the ground

Credit: michelinmedia.com
How Much Air Should I Put in My Tires for Truck?
If you have a truck, it is important to know how much air to put in your tires. The amount of air that you should put in your tires will depend on the make and model of your truck, as well as the type of tires that you have. You can usually find this information in the owner’s manual for your truck.
If you have all-terrain tires, you will likely need more air than if you have regular passenger car tires. This is because all-terrain tires are designed to be driven on rough surfaces, such as dirt roads or gravel paths. They need to be able to grip the road surface well in order to provide traction and prevent slipping.
In general, most trucks will require between 32 and 35 PSI (pounds per square inch) of air pressure in their tires. However, it is always best to check your owner’s manual to be sure. Overinflating or underinflating your tires can lead to problems while driving, such as decreased fuel efficiency or handling issues.
Where Can I Inflate My Truck Tires?
There are a few different ways that you can inflate your truck tires. You can take it to a gas station and have them do it for you, or you can buy your own air compressor and do it yourself. If you choose to do it yourself, make sure that you get an air compressor that is powerful enough to handle the job.
You don’t want to end up with flat tires because your air compressor wasn’t up to the task!
How Do I Put Air in My Tire at the Gas Station Pump?
If you need to add air to your tires, you can do so at most gas stations. All you need is a quarter to operate the air pump.First, locate the air pump.
It will either be near the gas pumps or close to the entrance of the station. If you can’t find it, ask an employee for help.Next, insert your quarter into the slot on the air pump.
This will start the machine and allow you to begin pumping air into your tire.Place the nozzle of the air pump onto the valve stem on your tire. Push down firmly to ensure that it’s secure before continuing.
Finally, start pumping air into your tire until it reaches the recommended PSI level. Most pumps have a gauge that will tell you how much pressure is in your tire as you’re adding air. Once it reaches the proper level, pull out the nozzle and replace the cap on your valve stem.
Check Your Pressure….Talking Truck Tires
How to Put Air in Semi Truck Tires
If you’re driving a semi truck, chances are you’re transporting some pretty heavy cargo. That means that your tires have to be in good shape and properly inflated in order to avoid any accidents or breakdowns. Here’s a step-by-step guide on how to put air in your semi truck’s tires:
1. Park your truck on a level surface and set the parking brake.2. Locate the tire valve stem on each tire – it’s usually located near the rim of the wheel.3. Unscrew the cap from the valve stem and use an air compressor hose to fill up the tire with air.
Fill it up to the recommended PSI (pounds per square inch).4. Once the tire is full, screw the cap back onto the valve stem and move onto the next tire until all four are done.
Conclusion
If you have a truck, it’s important to keep the tires inflated properly. Here’s how to put air in truck tires:1. Park your truck on a level surface and turn off the engine.
2. Locate the valve stem on each tire. It’s usually on the side of the tire near the rim.3. Remove the cap from the valve stem and attach the air hose from the air compressor.
Make sure it’s tight so there’s no air leakage.4. Turn on the air compressor and add air to each tire, checking the pressure with a gauge as you go. The recommended pressure for most truck tires is 80 psi (pounds per square inch).

How to Recognize Snow Tires
One way to tell if a car has snow tires is by the tread. The tread on snow tires is deeper and more aggressive than all-season tires. This helps the tire grip the road in slippery conditions.
Another way to tell if a car has snow tires is by the material. Snow tires are made of a softer rubber compound than all-season tires. This helps the tire grip the road in cold weather conditions.
- Look for the words “snow” or “winter” on the tire
- These tires are designed specifically for driving in snow and ice
- Look for a deep tread pattern
- The deeper the tread, the better the tire will grip in snow and ice
- Check for special features like studs or siping
- Some snow tires have studs that protrude from the tread to provide extra traction on icy roads
- Others have siping, which are small cuts in the tread that help improve traction on slippery surfaces
What you need to know about winter tires
Tire Symbols Meaning
When you’re shopping for new tires, you’ll notice a variety of symbols on the sidewalls. These markings are required by the U.S. Department of Transportation (DOT) and provide important information about the tire. Here’s a quick guide to what those tire symbols mean:
Tire Type: The first symbol on a tire’s sidewall indicates the type of tire it is. “P” denotes passenger car tires, “LT” means light truck tires, and “T” stands for temporary spare tires.Tire Width: The next symbol indicates the width of the tire in millimeters.
This measurement is taken from sidewall to sidewall, not across the tread.Aspect Ratio: The aspect ratio is represented by a two-digit number following the width symbol. It expresses the height of the tire’s sidewall as a percentage of its width.
For example, an aspect ratio of 50 would indicate that the height of the sidewall is half as tall as the width of the tire. Lower numbers mean shorter sidewalls and a rougher ride, while higher numbers signify taller sidewalls and a smoother ride.Construction: Afterthe aspect ratio, you’ll see either “R” or “D.” “R” signifies radial construction, in which nylon cord plies run perpendicular to each other from bead to bead.
Radial tires are standard on most passenger cars today because they offer good tread life and durability with excellent traction and handling characteristics.”D” denotes bias-ply construction in which nylon cords crisscross each other at an angle between 30 and 40 degrees from bead to bead..
Bias-ply tires were once common but have largely been replaced by radials due to their inferior performance qualities..speed RatingAfterthe construction designation comes a letter code indicating speed rating .
Speed ratings range from “A,” which has a maximum speed capability below 25 mph , all way up to “Y,”with top speeds above 186 mph . Most passenger car tires have speed ratings between S (112 mph ), T(118 mph ), U(124 mph )and H(130 mph ).
Credit: www.tranbc.ca
How Do I Know If I Have Snow Tires?
If you live in an area that experiences a lot of snow and ice during the winter months, it’s a good idea to invest in a set of snow tires. But how do you know if you need them? Here are a few things to consider:
1. The weather in your area. If you live in an area that regularly sees below-freezing temperatures and significant snowfall, then snow tires are a good investment. They’ll provide better traction and handling on icy roads.
2. The type of vehicle you drive. Some vehicles are more susceptible to slipping and sliding on icy roads than others. If you drive a sports car or a luxury vehicle, for example, you may want to consider getting snow tires.
3. Your driving habits. Do you frequently find yourself driving in snowy or icy conditions? If so, then snow tires can help improve your safety on the roadways.
Ultimately, whether or not to get snow tires is up to you and depends on factors like where you live, what kind of vehicle you drive, and how often you find yourself driving in wintry conditions. But if you’re unsure, it’s always best to err on the side of caution and get them!
How Can You Tell the Difference between Snow Tires And Regular Tires?
When winter arrives and the temperatures start to drop, it’s time to think about changing over your tires. But what’s the difference between snow tires and regular tires?Most importantly, snow tires are designed to provide better traction in icy and snowy conditions.
They’re made with a special tread pattern that helps grip the road, and they’re often made from a softer rubber compound that remains pliable in cold weather. Some snow tires also have metal studs embedded in the tread for even better grip on ice.Regular tires, on the other hand, are designed for use in warmer weather and dryer conditions.
They don’t provide as much traction in icy or snowy conditions, and they can become hard and brittle in cold weather.So if you live in an area that gets a lot of snow and ice during the winter months, it’s a good idea to switch to snow tires. It could make all the difference when it comes to safety on the roads.
How Do I Know If My Tires are Summer Or Winter?
Most people don’t realize that there is a difference between summer and winter tires. Summer tires are designed to provide optimal performance in warm weather conditions, while winter tires are specifically engineered to provide superior traction and handling in cold weather and on snow-covered roads. So, how can you tell if your tires are summer or winter?
One way to tell is by looking at the tread pattern. Summer tires typically have shallower tread depths than winter tires. This helps them maintain good contact with the road surface for better grip, but it also means that they wear down faster in warmer conditions.
Winter tires, on the other hand, have deeper tread depths which help them bite into snow and ice for better traction.Another way to tell if your tires are summer or winter is by looking at the sidewall markings. Most summer tires will have a “S” (for example: P225/50R16 89S) or “T” speed rating (for example: P215/60R16 95T), while most winter tires will have a “Q” speed rating (for example: 225/50R18 98Q).
The speed rating tells you how fast the tire can safely go; the higher the number, the higher the speed. So, if you see a “T” speed rating on a tire, that means it’s rated for speeds up to 118 mph; if you see a “Q” speed rating, that means it’s rated for speeds up to 99 mph.Finally, another way to tell if your tires are summer or winter is by their compound.
Summer tire compounds are designed to be softer than those of winter tires; this helps them provide better grip on warm pavement but also causes them to wear down faster. Winter tire compounds are designed to be harder than those of summer tyres; this helps them stay flexible in cold temperatures and provides better traction on snow and ice.
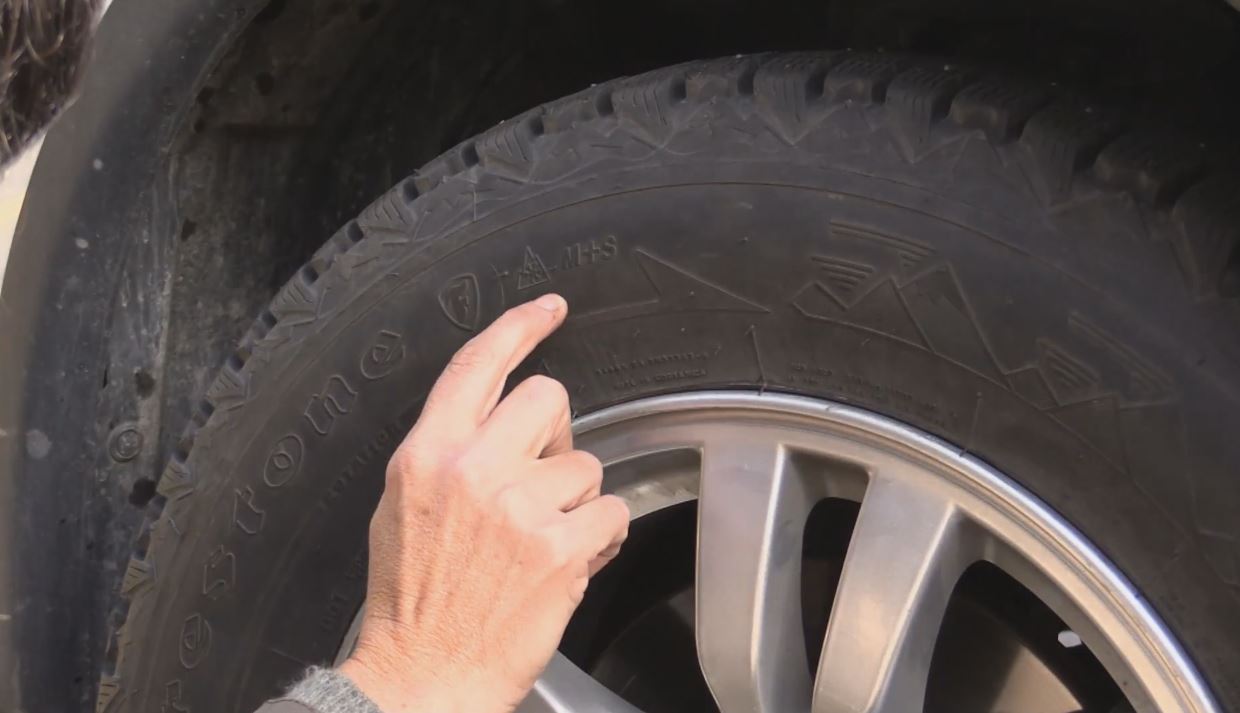
Do All Weather Tires Have the Snowflake Symbol?
Most weather tires will have the snowflake symbol on them. This means that they have been designed to perform well in cold weather and winter conditions. The snowflake symbol indicates that the tire has been tested and approved for use in these conditions.
Conclusion
If you live in an area where it snows, you know how important it is to have good snow tires on your car. But how can you tell if a tire is a good snow tire? Here are some things to look for:
The treads on snow tires are deeper than regular tires, which gives them better traction in the snow. Look for tires with deep, wide treads.Snow tires also have special grooves and siping (tiny cuts in the tread) that help them grip the road better.
Some snow tires are made with special compounds that stay flexible in cold weather, so they grip the road better. These are called winter or all-season tires.

How to Spot Fake Pirelli Tires
When looking for Pirelli tires, it is important to be able to spot a fake. There are a few things that you can look for when trying to determine if a tire is real or not. The first thing that you should look at is the sidewall of the tire.
If the sidewall has any sort of raised lettering or logos, it is likely that the tire is fake. Another thing to look for is how the tread pattern looks on the tire. If the tread pattern appears to be off, or if there are any irregularities in the way that it looks, chances are that the tire is not genuine.
Finally, you can also tell a fake Pirelli tire by its weight. If the tire feels abnormally light, it is probably because it is made with lower quality materials and construction.
- Inspect the Pirelli logo
- Fake Pirelli tires will often have an incorrect or misspelled logo
- Check the tire size
- Fake Pirelli tires may have the wrong size listed on them
- Examine the tread pattern
- Fake Pirelli tires may have a different tread pattern than genuine Pirelli tires
- Feel the texture of the rubber
- Fake Pirelli tires may be made of lower quality materials and will feel different to the touch than authentic Pirelli tires

Credit: maseratiguide.com
How Can You Tell a Fake Pirelli?
It can be difficult to tell a fake Pirelli from a genuine one, but there are some things you can look out for. Firstly, check the tyres themselves. Genuine Pirellis will have high-quality construction with even tread patterns and no defects.
The lettering should also be clear and sharp. If you’re unsure, take a close-up photo of the tyre and compare it with ones on the Pirelli website.Another way to tell if a Pirelli is fake is by checking the packaging.
Genuine Pirellis will come in high-quality packaging that is undamaged and correctly labelled. The barcode should also match the one on the Pirelli website. Finally, check the price.
If you’re being offered a significantly discounted price, it’s likely that the tyre is fake.
How Can You Tell a Fake Tire?
When you are in the market for new tires, it is important to be able to spot a fake. There are a few things that you can look for when trying to determine if a tire is fake.One of the most obvious ways to tell if a tire is fake is by looking at the tread pattern.
If the tread looks worn or uneven, it is likely a fake. Another way to tell if a tire is fake is by looking at the sidewall. If the sidewall has any cracks or cuts, it is likely a fake.
If you are unsure about whether or not a tire is fake, you can always take it to a reputable tire shop and have them inspect it for you.
How Can I Tell Where My Tyres are Manufactured?
As a car owner, it’s important to know where your tyres are manufactured. There are many factors that go into choosing the right tyres for your car, and knowing where they’re made is one of them. Here are a few tips on how to tell where your tyres are manufactured:
1. Check the tyre label. All tyres have a label that includes information about the manufacturer. This is usually located on the sidewall of the tyre.
2. Look for the country code. Each country has its own code that is used to identify products made there. For example, “Made in China” would be labelled “C-CHN”.
3. Research the brands. Some brands of tyres are only made in certain countries. If you know which brand you want, you can narrow down your search by checking to see where that brand is manufactured.
4. Ask your tyre dealer or mechanic. If you’re still not sure where your tyres were made, ask someone who knows more about them!
How Can You Tell If a Dunlop Tire is Real?
There are a few ways that you can tell if a Dunlop tire is real. One way is to look for the Dunlop logo on the sidewall of the tire. Another way is to look for the DOT code, which should be located on the sidewall of the tire.
The DOT code will have a series of numbers and letters that correspond with the manufacturing date of the tire. Finally, you can contact Dunlop customer service to verify whether or not a specific tire is real.
How to Identify Fake Tire?
How to Check Original Michelin Tyre
When you are buying new tyres, it is important to make sure that they are original Michelin tyres. There are a few ways that you can do this.The first way is to look for the Michelin logo on the tyre.
This should be located on the sidewall of the tyre. If you cannot find this logo, then the tyre is not an original Michelin tyre.Another way to check if a tyre is an original Michelin, is to look for the serial number on the sidewall of the tyre.
This number should start with “Michelin” followed by a series of numbers and letters. If this serial number is not present, then the tyre is not an original Michelin.You can also contact Michelin customer service and give them the tyre’sserial number.
Conclusion
If you’re in the market for Pirelli tires, beware of fakes! There are a few things to look out for that can help you spot a fake. First, check the sidewall of the tire for any irregularities.
The Pirelli logo should be embossed, not printed, and the text should be clear and free of any smudging. Second, take a close look at the tread pattern. Genuine Pirelli tires have very distinct tread patterns that are easy to spot if you know what to look for.
Finally, pay attention to the price. If it seems too good to be true, it probably is! If you’re unsure about a tire, always err on the side of caution and buy from an authorized dealer.

How to Calculate Psi for Tires
If you’ve ever wondered how those “psi” numbers on the side of your tires are calculated, wonder no more! Here’s a quick and easy guide to help you calculate psi for your tires. All you need is a few simple tools and some basic math.
- Find the vehicle’s tire psi rating
- This can be found in the owner’s manual or on a sticker inside the driver’s door
- Use a tire pressure gauge to check the air pressure in each tire
- Compare the reading on the tire pressure gauge to the recommended psi for your tires
- If the reading is lower, add air to the tires until they reach the correct psi
- If the reading is higher, release some air from the tires until they reach the correct psi
Credit: www.tyresizecalculator.com
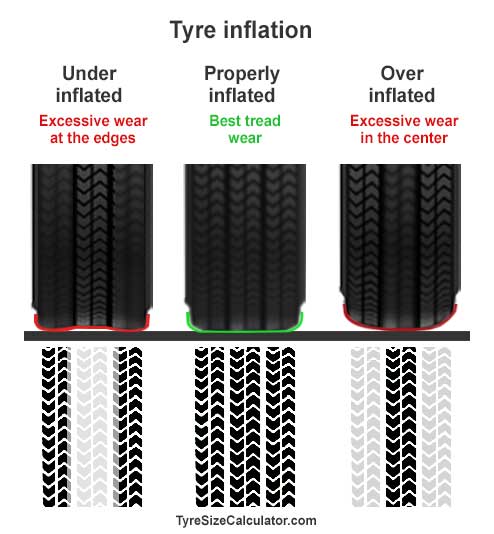
How Do I Know What Psi My Tires Need?
If you’re like most people, you probably don’t think too much about the psi in your tires. But if you’re a car enthusiast or just want to make sure your tires are properly inflated, it’s important to know how to check and fill them. Here’s what you need to know about psi and your tires.
The “psi” in tires stands for pounds per square inch. This is the measurement of how much pressure is in each tire. Your car’s owner’s manual will have the recommended psi for your particular vehicle.
It’s important to keep your tires inflated at the proper level because it can affect gas mileage, handling, and even safety.To check the psi in your tires, you’ll need a tire gauge. These can be purchased at most auto parts stores.
Once you have a gauge, simply remove the cap from one of your tires and press the end of the gauge onto the valve stem. The gauge will give you a reading of the current pressure in that tire.If your tire pressure is low, use an air compressor or hand pump to add more air until it reaches the recommended level.
If it’s too high, let some air out until it reaches the proper level. It’s best to check all four tires regularly so that they all stay properly inflated.
How Do You Calculate Car Psi?
To calculate car psi, you’ll need to know the vehicle’s tire size and wheel diameter. With this information, you can use a tire pressure gauge to measure the amount of air pressure in each tire. The ideal psi for most cars is between 30 and 35.
Is Tire Pressure Based on Tire Size?
Tire pressure is based on the size of the tire, as well as the load that the tire is carrying. The amount of air pressure that a tire can hold varies by manufacturer and model, but generally speaking, a passenger car tire can hold between 30 and 35 PSI.
Determining the correct PSI for new tires and upsized wheels
Tire Pressure Calculator Bicycle
If you’ve ever wondered what tire pressure is best for your bicycle, there’s a quick and easy way to find out- by using a tire pressure calculator. All you need is the width of your tires (in millimeters), and the recommended PSI range for your riding surface. Once you have that information, simply plug it into the calculator and it will give you a starting point for finding the perfect tire pressure.
Of course, every rider is different and will prefer different pressures based on their own preferences. But if you’re not sure where to start, using a tire pressure calculator is a great way to get in the ballpark. And from there, it’s just a matter of fine-tuning until you find what works best for you.
Conclusion
If you want to calculate psi for your tires, there are a few things you need to know. First, find the recommended psi for your specific vehicle and tire size. Once you have that number, use a tire pressure gauge to measure the pressure in each tire.
Finally, divide the total psi by the number of tires on your car. This will give you the average psi for all of your tires.