- Home
- Archive: November, 2022

How to Add Weight to Rc Rock Crawler Tires? Quick Guide
If your tires are too light for the terrain you’re trying to conquer, there are a few things you can do to add weight. This is especially important for rock crawlers, as they need all the traction they can get. Here are a few ways to add weight to your RC rock crawler tires:
One way to add weight is by filling them with liquid silicone. You’ll need to drill a small hole in the tire, insert a needle, and slowly inject the silicone. Once it’s full, seal up the hole and let the tire sit overnight so the silicone can set.
This method is effective, but keep in mind that it will make your tires less flexible and more prone to punctures. Another option is to simply glue weights to the outside of the tire. This is an easy way to add weight without changing the tire’s structure or compromising its flexibility.
You can use lead fishing weights, BBs, or even pennies – whatever you have on hand that’s heavy enough. Just be sure that whatever you use is securely glued on, so it doesn’t fall off mid-crawl!
- Purchase the desired tires for your RC rock crawler
- Fill a bucket with water and place the tires in the bucket overnight
- This will add weight to the tires and help them grip better on surfaces
- In the morning, remove the tires from the bucket and allow them to air dry before using them on your rock crawler
How Do I Add Weight To My Rc Crawler Wheels? Lower Center of Gravity. Redcat Gen 8 / TRX4 / SCX10
Diy Rc Crawler Wheel Weights
Looking to add a little extra weight to your RC crawler wheels? Here’s a quick and easy DIY solution that will do the trick! What you’ll need:
RC crawler wheels (of course!)
Some type of lead or steel shot (you can find this at most hardware stores)
Super glue or epoxy
A drill with a small bit (around 1/8″ should do the trick)
Brass Weights Rc Crawler
If you’re a fan of RC crawlers, then you know that brass weights are essential for getting the perfect crawl. But what exactly are brass weights, and how do they help your crawler perform? Here’s everything you need to know about brass weights for RC crawlers.
Brass weights are small metal weights that attach to the body of your RC crawler. They help add weight to the vehicle, which is important for several reasons. First, extra weight helps the tires grip the ground better, giving you more traction and control.
Second, it increases the stability of your crawler, making it less likely to tip over uneven terrain. And finally, heavier vehicles tend to crawl slower than lighter ones, so if you’re looking for a more realistic crawling experience, adding some brass weights can help. There are a few things to keep in mind when choosing brass weights for your RC crawler.
First, make sure the weights are compatible with your particular model of crawler – not all brands and models will work with every type of weight. Second, consider how much weight you want to add – too much can make your crawler difficult to control, while too little may not provide enough traction or stability benefits. Finally, think about where you’ll be using your crawler – if you are crawling over rocks and other obstacles frequently, then heavier weights may be beneficial; but if you mostly stick to smooth surfaces like concrete or asphalt, lighter weights might be just fine.
Once you’ve selected the right brass weights for your needs, attaching them is usually a simple process. Most sets come with adhesive-backed stickers that make it easy to affix the weights directly to your Crawler’s body. Just peel off the backing paper, apply pressure, and voila!
Your new Brass Weights Rc Crawlers should be good to go.
Rc Crawler Axle Weights
Crawler axle weights are one of the most important aspects of your RC crawler. They provide traction and stability to your crawler and can make the difference between a successful run and a wreck. There are four main types of crawler axle weights: stock, light, medium, and heavy.
Each has its own advantages and disadvantages, so it’s important to choose the right weight for your particular crawling needs. Stock axle weights are typically the heaviest and provide the most stability and traction. However, they can also be the slowest and most difficult to maneuver.
Light axle weights are much lighter than stock weights, making them easier to maneuver. However, they don’t provide as much stability or traction as heavier weights. Medium axle weights fall somewhere in between light and heavy weights.
They offer good maneuverability while still providing decent stability and traction. Heavyweights are the heaviest type of crawler axle weight, offering the best stability and traction but at the expense of speed and maneuverability.
Trx4 Wheel Weights
TRX4 Wheel Weights If you’re looking to add some weight to your TRX4 for better traction and stability, wheel weights are a great option. Here’s everything you need to know about them.
What are they? Wheel weights are small metal weights that attach to your vehicle’s wheels. They help add traction and improve stability, especially on slippery surfaces like mud or sand.
They also help keep your vehicle from becoming bogged down in deep snow. How do I choose the right ones? There are a few things to consider when choosing wheel weights for your TRX4:
The size of your wheels: Make sure the weights you choose are compatible with the size of your wheels. If they’re too big or too small, they won’t work properly.
The type of terrain you’ll be driving on: Heavier weights are best for off-road use, while lighter weights may be sufficient for pavement or light dirt roads.
Your budget: Wheel weights can range in price from around $30-$100 per set, so be sure to shop around and find the best deal.
Credit: rc-vehicles.wonderhowto.com
How Can I Add Weight to My Remote Control Car?
If you’re looking to add weight to your remote control car, there are a few different methods you can try. One way is to simply add lead weights to the body of the car. This will increase the overall weight of the car, making it slower and harder to control.
Another way to add weight is to fill the tires with a heavier substance like sand or gravel. This will make the car more difficult to turn but will also add traction and stability. Whichever method you choose, be sure to test drive your car after adding the extra weight to get a feel for how it handles.
How Can I Make My Rc Crawler Grip Better?
One of the main ways to make your RC crawler grip better is by ensuring that the tires are properly inflated. You can also try adding weight to the front or rear of the crawler to help with traction. Another option is to add a set of shocks that are softer in the front and firmer in the rear, which will help keep the tires on the ground.
Finally, you can also add some sort of texturing to the tires themselves, such as spikes or studs, which will help them grip onto surfaces better.
Conclusion
Adding weight to your tires is a great way to improve traction and performance, especially when rock crawling. Here are a few tips on how to add weight to your RC rock crawler tires:
Use lead weights or shots. You can purchase these at most fishing or hunting stores. Simply glue them onto the outside of the tire.
Use steel washers. These can be found at any hardware store and are easy to attach with zip ties or wire.
Seal the inside of the tire with silicone caulk. This will add some weight and also help to seal in air pressure.

How to Balance Tires Yourself: Learn the Tricks of the Trade
Are you tired of spending money on getting your tires balanced at a mechanic or tire shop? Did you know that you can balance your tires yourself at home? Balancing your tires is essential to ensure a smooth ride and prolong the life of your tires.
Tire balancing is a process of equalizing the weight distribution of a tire and wheel assembly to ensure proper rotation and reduce vibrations. It’s a crucial maintenance task that should be performed regularly, especially after installing new tires or wheels.
Balancing your tires yourself may seem daunting, but it’s a simple process that can save you time and money. In this article, we will guide you through the step-by-step process of balancing your tires at home, with minimal tools and equipment. So let’s get started and learn how to balance your tires like a pro.
How to Balance Your Car’s Tires – Balance Them Like a Pro
Can You Balance a Tire at Home?
Most people believe that they need to take their car to a professional in order to get the tires balanced. However, this is not true! You can balance your own tires at home with just a few simple tools.
The first thing you need is a tire pressure gauge. This will help you determine how much air is in each tire. Next, you need a weight scale.
This will be used to weigh the tires so that you can find the center of gravity for each one. Finally, you need some tape and a marker. Now that you have all of your supplies, it’s time to start balancing your tires!
Start by finding the spot on each tire where the tread meets the sidewall. This is called the “tread wear indicator.” Place your weight scale on the ground next to the tire and rest the tire on top of it so that the tread wear indicator is in the center of the scale.
Use your tape measure to find out how far away from the center the tread wear indicator is on each side of the tire. For example, if it’s 3 inches to the left on one side and 2 inches to the right on another side, then that means that there is 1 inch more weight on one side than there is on another side. To balance this out, put 1 inch worth of weights onto the lighter side until both sides have equal amounts of weight.
Once you’ve done this for all four tires, congratulations! You’ve now balanced your own tires at home without having to pay someone else to do it for you!
What is the Most Accurate Way to Balance a Tire?
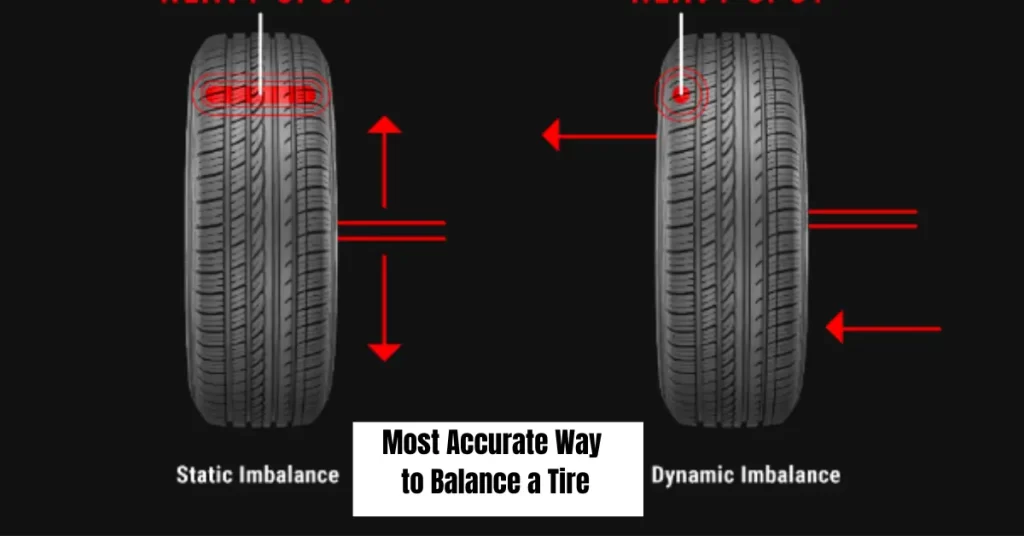
When it comes to balancing a tire, there are a few different schools of thought. Some people believe that the most accurate way is to use a digital or electronic balancer. Others swear by the old-fashioned method of using weights.
And still, others believe that the best way is to actually physically spin the tire until it’s balanced. So, which method is the most accurate? Well, that depends on who you ask.
If you ask someone who uses a digital or electronic balancer, they’ll likely tell you that their method is the most accurate. And if you ask someone who uses weights, they’ll say the same thing. The truth is, all three methods can produce fairly accurate results.
It really just depends on your own preference and what works best for you.
Can You Balance a Tire Without Weights?
It is possible to balance a tire without weights, but it is not recommended. Without weights, the tire will be balanced unevenly and could cause problems with the vehicle’s handling. Additionally, over time the unbalanced tire will wear down more quickly than a balanced one, resulting in shortened tire life.
Can You Mount And Balance Tires Yourself?
No, you cannot mount and balance tires yourself. You need special equipment to do this, and it’s best left to the professionals.
How to Balance Tires at Home Without Equipment
It’s no secret that maintaining proper tire pressure is crucial to prolonging the life of your tires. But did you know that you can actually save money by balancing your own tires at home? That’s right – with a little patience and the right tools, you can achieve professional-level results without spending a fortune on equipment or services. Here’s how:
First, inflate all of your tires to the manufacturer-recommended pressure levels. Next, using a chalk line or string, mark a line around the circumference of each tire.
Now it’s time to get started! For each tire, place one end of a 2×4 board underneath the center portion of the tire. Slowly and evenly lift up on the other end of the board until the entire weight of the tire is supported by the board.
Using your marked lines as a guide, slowly rotate the tire until you find its heaviest point (this will be different for each tire). Once you’ve found the heaviest point, make a small mark on both sides of the tread at that location. Remove the 2×4 and repeat this process for each remaining tire.
Now it’s time to add weight to those marked locations. The amount will vary depending on how far off-balance your tires were, to begin with, but start with 1/2-ounce increments and go from there. Attach lead weights (available at any auto parts store) to either side of each mark using strong adhesive tape or wire ties. Be sure not to over-correct – too much weight will throw off your balance again!
How to Mount And Balance Tires Yourself
If you’re reading this, then you probably already know the importance of having properly inflated and balanced tires on your vehicle. Not only does it make for a smoother ride, but it can also help improve fuel economy and prolong the life of your tires. Many people take their car to a mechanic or tire shop to have this done, but did you know that you can actually do it yourself?
It’s not as difficult as you might think, and in most cases, all you need is a few simple tools and an afternoon to get the job done. Here’s a step-by-step guide on how to mount and balance tires yourself:
Start by inflating all of your tires to the recommended pressure levels. You can find these numbers in your owner’s manual or on the placard located on the doorjamb of your driver’s side door.
Once they’re all inflated, use a tire iron to loosen each lug nut about half a turn. Do not remove them completely yet!
Now it’s time to jack up your car so you can work on the tires. Place the jack under the frame rail near where the tire is located, then crank it until the tire is slightly off of the ground. Be sure to place jack stands under the vehicle before continuing!
With the tire still supported by the jack, finish removing the lug nuts and set them aside somewhere safe (you don’t want to lose them!). Now carefully pull off the old tire from its wheel rim. Inspect both sides of it for any nails or other objects that may have become lodged in there; if you find anything, use a pair of pliers or needle-nose pliers to remove it before proceeding further.
How to Tell Which Tire is Out of Balance
If you’re like most people, you probably don’t think much about your car’s tires until there’s a problem. But keeping your tires in good condition is important for both your safety and the longevity of your vehicle. One way to keep your tires in good shape is to make sure they’re properly balanced.
If you’re not sure what tire balancing is or how to tell if your tires are out of balance, don’t worry. We’re here to help. Keep reading to learn everything you need to know about tire balancing and how to tell if yours are out of balance.
What is Tire Balancing? Tire balancing is the process of making sure that the weight of each tire and wheel assembly is distributed evenly around the axle. This ensures that each tire spins at the same speed, which helps improve the ride quality and prevents premature tread wear. How Do I Know if My Tires Are Out of Balance?
Frequently Ask & Questions
Are you tired of paying expensive fees to have your tires balanced at a mechanic or tire shop? Balancing your own tires may seem like a daunting task, but with the right tools and knowledge, it can be done easily and at a fraction of the cost.
In this FAQ, we will guide you through the steps of balancing your own tires, including the tools you will need, the process to follow, and some tips and tricks to make the job easier. So, let’s get started and learn how to balance your tires yourself!
What is the best way to balance tires?
The best way to balance tires is to use a computerized wheel balancer. This machine can accurately measure the weight distribution of the tire and wheel assembly and determine where to add or remove weights to achieve balanced rotation. The technician will place the tire and wheel on the balancer, spin it at high speeds, and then attach weights to the rim to counterbalance any weight imbalances. This ensures a smooth and safe ride for the vehicle.
What are some common mistakes people make when balancing tires?
Some tips for balancing tires safely include using a reliable tire balancer, ensuring the wheel is properly cleaned and free of debris, mounting the tire correctly, and ensuring that the weight is evenly distributed around the wheel. Additionally, it’s important to regularly check tire balance and make adjustments as needed to prevent uneven wear and potential safety hazards while driving.
What are some tips for balancing tires safely?
Some tips for balancing tires safely include using a quality tire balancer, making sure the wheel is clean and free of debris, properly mounting the tire on the balancer, and using the correct weight to balance the tire. Additionally, it is important to be aware of any safety precautions recommended by the manufacturer and to follow them carefully to ensure a safe and effective balancing process.
Conclusion
Balancing tires is an important aspect of vehicle maintenance that ensures a smooth and safe driving experience. While professional assistance is recommended for precise balancing, you can still perform basic tire balancing yourself with the right tools and knowledge.
By following the steps outlined in this guide, including identifying tire imbalance, removing weights, and adding or adjusting weights, you can improve tire performance and extend its lifespan. Remember to regularly check tire balance, especially after rotating or replacing tires, to maintain optimal handling, reduce vibration, and enhance overall road safety.
However, if you are uncertain or encounter persistent issues, it’s best to consult a professional tire technician for a thorough inspection and precise balancing.

How to Black Out White Letters on Tires? Stylish Tires Today!
Are you tired of your white-lettered tires ruining the sleek look of your car? Do you want to give your tires a more aggressive and uniform appearance? The solution is simple: blacking out the white letters.
White lettering on tires was popular in the 1970s and 80s, but the trend has lost its appeal to many car enthusiasts. The contrast between the white letters and the black tire can be jarring and can distract from the overall look of the vehicle. Blacking out the white letters is an easy and inexpensive way to give your car a more modern and cohesive look.
If you’re looking to black out the white letters on your tires, there are a few methods to consider. In this article, we’ll explore the different techniques and materials you can use to achieve the desired result. Whether you’re a car enthusiast or just looking to give your ride a fresh look, this guide will help you achieve the perfect blacked-out tire.
Can You Blackout White Letter Tires?
When it comes to blacking out white letter tires, there are a few things that you need to take into account. The first is the type of paint that you use. You want to make sure that you use paint that is specifically designed for use on tires.
This will ensure that the paint adheres properly and doesn’t peel off easily. The next thing to consider is how you apply the paint. You want to avoid getting any on the sidewalls of the tire, as this can cause problems down the road.
The best way to apply the paint is with a brush or roller specifically designed for use on tires. This will help you get an even coat and avoid any streaks or brush marks. Finally, you need to be mindful of the curing process.
Most tire paints need to cure for 24 hours before they are fully dry and ready to be driven on. During this time, it’s important not to expose the tires to any extreme temperatures or weather conditions (i.e., don’t leave them out in direct sunlight or in freezing temperatures). Once the 24 hours have passed, your blacked-out white letter tires should be good to go!
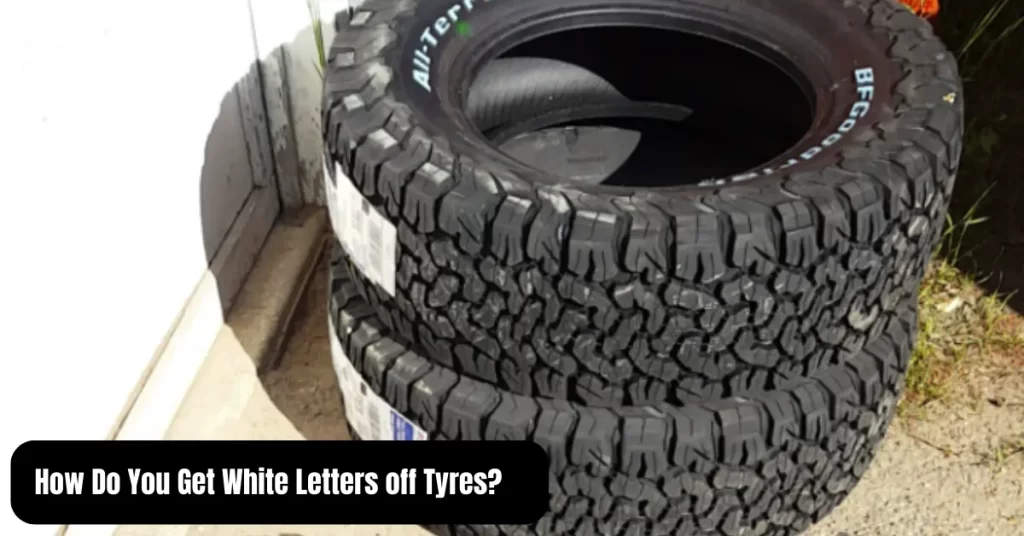
How Do You Get White Letters off Tyres?
Assuming you would like tips on how to clean white lettering off your tyres: One way you can remove white lettering from your tyres is by using a product called Goo Gone. This is a gel that is specifically designed to break down and remove adhesive residue.
You can find this product at most hardware stores. To use, firstly make sure the area you will be working in is well-ventilated as Goo Gone has strong fumes. Next, apply a generous amount of the gel to the tyre and let it sit for a few minutes so it can start breaking down the adhesive.
Once it has had time to work, use a putty knife or old toothbrush to scrub at the letters until they start to come off. You may need to reapply more Goo Gone and let it sit for longer if the letters are proving difficult to remove. Finally, once all the letters are off, wash the tyre with soapy water and dry it off.
How Do You Paint Car Tire Letters?
Car tire lettering is a great way to add some personalization to your ride. There are a few different ways that you can go about painting your car tire letters, and the method you choose will likely depend on the look you’re going for and the amount of time you’re willing to spend. One of the quickest and easiest ways to paint car tire letters is to simply use a permanent marker.
This method is great if you want something that’s quick and easy, but it’s not going to give you the most professional or durable results. If you go this route, be sure to use a thick-tipped marker so that the lines are thick and easy to see. You’ll also want to make sure that the surface of your tires is clean and free of any dirt or debris before you start writing.
If you’re looking for something a little more permanent, then painting your car tire letters is probably the way to go. You’ll need some basic supplies like painter’s tape, masking paper, primer, paint, and clear coat sealer. Start by taping off the area around each letter so that only the letter itself is exposed.
Next, apply a layer of primer followed by two coats of paint. Once everything is dry, carefully remove the tape and paper masks and apply a layer of clear coat sealer over top. This will help protect your new paint job from chipping or fading over time.
No matter which method you choose, painting car tire letters is a fun way to show off your personality while adding some visual interest to your ride. Just be sure to take your time and follow all directions carefully for the best results!
What Takes Blue off White Letter Tires?
If you have blue lettering on your tires and want to remove it, there are a few things you can try. One is to use rubbing alcohol or nail polish remover. Another is to use a magic eraser or similar product. You might also be able to scrape it off with a razor blade.
White Lettering Or Black Lettering on Tires
If you’re like most people, you probably don’t think about the lettering on your tires very often. But did you know that there are actually two different types of lettering used on tires? White lettering and black lettering each have their own distinct advantages and disadvantages.
White lettering
Advantages:
- White lettering is easier to see, making it ideal for low-light conditions or for people with poor vision.
- White lettering can make a tire look newer and more stylish.
- Some people believe that white lettering provides better traction than black lettering in snowy or icy conditions.
Disadvantages:
- White lettering is more susceptible to dirt and grime, so it may need to be cleaned more frequently than black lettering.
- Because white lettering is more visible, any imperfections on the tire’s surface will be more noticeable as well.
Black Lettering:
Advantages:
- Black lettering doesn’t show dirt and grime as easily as white lettering, so it requires less frequent cleaning
- Blackletter ing can make a tire look more aggressive and sporty.
- Some people believe that blackletter ing provides better traction than white-letter ing in dry conditions.
How to Remove White Lettering on Tires
Removing white lettering from tires is a process that can be done at home with some simple supplies. The most important thing to remember when removing white lettering is to work slowly and carefully to avoid damaging the tire. Here are the steps to remove white lettering from your tires:
Begin by inflating the tire so that the surface is tight. This will make it easier to remove the lettering without damaging the tire.
Use a razor blade or utility knife to score along the edge of the lettering. Be careful not to press too hard so that you don’t cut into the tire. It may help to use a straightedge as a guide for your blade.
Once you’ve scored all around the letters, use your hands or a small tool to pry them off of the tire surface. Start at one corner and work slowly until all of the letters are removed.
How to Remove Permanent Tire Lettering
Are you looking to remove permanent tire lettering? If so, there are a few things you need to know. First, tire lettering is made from a special vinyl material that is designed to withstand the elements and last for many years.
However, over time this material can degrade and become brittle, making it difficult to remove. Additionally, the adhesive used to attach the letters can also become weaker over time, making removal even more challenging. If you’re determined to remove the lettering from your tires, there are a few methods you can try.
One popular method is using heat to soften the vinyl and adhesive. This can be done with a hair dryer or heat gun. Start by heating up one section of the lettering for 30-60 seconds.
Then use a putty knife or razor blade to slowly peel back the softened vinyl. Be careful not to apply too much heat at once as this could damage the tire itself. Another method you can try is using WD-40 or another lubricant spray.
Simply spray liberally over the letters and let them soak in for several minutes. Then use a putty knife or razor blade to scrape off the loosened letters. You may need to repeat this process several times before all of the letters are removed.
Whichever method you choose, the removal of permanent tire lettering can be a time-consuming and tedious process. But with patience and persistence, you’ll eventually get those pesky letters off your tires!
Change the Lettering to Black Tire Lettering in less than 15 minutes per tire.
Frequently Ask & Questions
If you’re looking to give your car or truck a unique and edgy look, blacking out the white letters on your tires is a great way to achieve that. Not only does it give your vehicle a cool and customized appearance, but it also helps protect the white lettering from fading or yellowing over time.
However, if you’re new to this process, you may have some questions about how to black out white letters on tires. In this FAQ section, we’ll answer some of the most common questions to help you achieve the look you want.
How do I black out white letters on my tires?
Blacking out white letters on your tires is a relatively simple process. The first step is to clean the tires thoroughly with soap and water, then rinse them off with a garden hose. This will remove any dirt or debris that could interfere with the blacking-out process.
Next, you’ll need to sand down the white letters using an abrasive material such as sandpaper or steel wool. This will help create a smooth surface for applying paint. Once you’ve finished sanding, make sure to wipe away any dust created by the process.
Finally, apply several coats of tire paint or spray paint that matches the color of your tires to the white lettering until it is completely covered. Allow each coat to dry before adding another one, and make sure to let the entire area dry for at least 24 hours before driving on it again.
What are the best ways to black out white letters on tires?
One of the best ways to black out white letters on tires is to use tire paint or marker. Tire paint is specifically designed for this purpose and will give you the most durable results. It’s important to make sure that the tire is clean and dry before applying the paint, as dirt or moisture can cause it to bubble or peel off.
Another option is to use a permanent marker, such as a Sharpie. This method may not be as durable as tire paint, but it can be a good choice if you need a quick solution. Make sure that you go over each letter several times for the best coverage.
Finally, if you want to add some extra protection against wear and tear, you can apply a clear coat of automotive wax over the blacked-out letters. This will help keep them looking fresh for longer.
What are the risks of not blacking out white letters on tires?
Not blacking out white letters on tires can present a number of risks. Firstly, the tire’s sidewall is made of rubber that has been designed to flex and absorb shock. When the white lettering is exposed, it can be more susceptible to cracking or peeling due to the additional exposure to heat and sunlight.
Additionally, when the white lettering is exposed it can make it difficult for drivers to read the tire’s specifications such as load rating or speed rating. This can lead to an unsafe situation if a driver unknowingly puts too much weight on a tire with a lower load rating or drives too fast for a tire with a lower speed rating.
Finally, not blacking out white letters on tires may be illegal in certain states or municipalities, so it’s important to check local laws before leaving them exposed.
Conclusion
If you want to black out the white letters on your tires, there are a few things you can do. You can either use a tire paint or a black Sharpie. If you use tire paint, make sure to apply several thin coats so that it doesn’t peel off. If you’re using a Sharpie, be careful not to get any on your car’s paint. Once you’ve blacked out the letters, enjoy your new look!

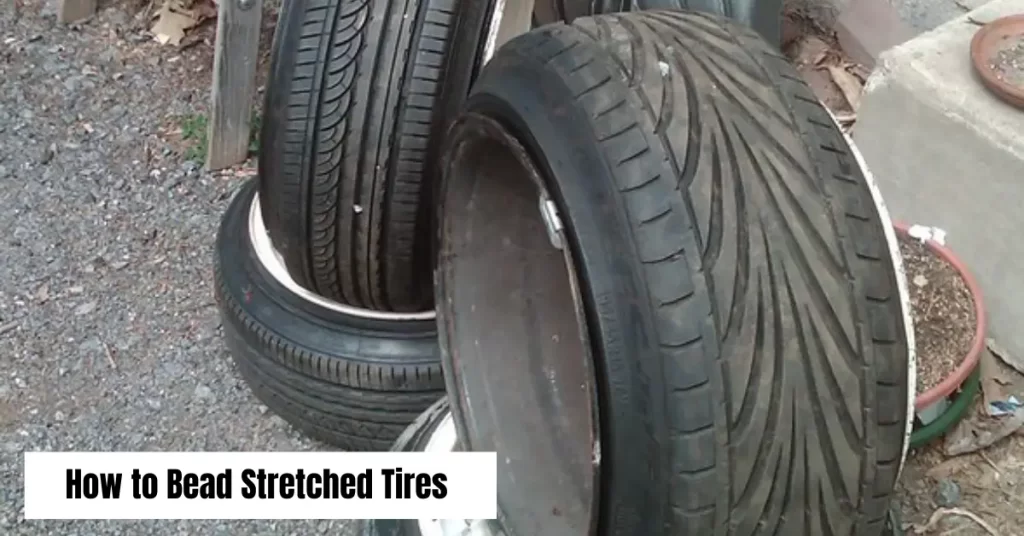
How to Bead Stretched Tires – Transform Your Tread
Have you ever seen a car with stretched tires and wondered how it’s done? It’s a popular trend in the car scene, but it’s not just for looks. Beading stretched tires can actually improve the handling and performance of your vehicle.
Stretched tires have grown in popularity over recent years, with car enthusiasts looking for ways to make their rides stand out. However, it’s not just a matter of slapping on some tires and calling it a day. Beading stretched tires takes a certain level of skill and knowledge to ensure that it’s done correctly and safely.
If you’re interested in beading stretched tires on your car, there are a few things you need to know before getting started. From the right tools to the proper techniques, we’ll guide you through the process step-by-step to help you achieve the perfect look and performance for your ride.
How Far Can You Stretch a Tire?
It’s important to know how far you can stretch a tire before needing to replace it. Depending on the severity, stretching a tire too much can cause irreparable damage or even a blowout. While there are ways to temporarily fix a stretched tire, it’s ultimately best to replace it as soon as possible.
How Much Can You Stretch a Tire? The amount that you can stretch a tire will depend on the type of tire and its condition. In general, however, most tires can be stretched up to 3/32 of an inch before they need to be replaced.
This may not seem like much, but when you consider that the average new tire is only about 10/32 of an inch thick, it’s actually quite a lot. Why Does Stretching a Tire Matter? When you drive on roads with potholes or other debris, your tires can take a beating.
Over time, this can cause them to become misshapen or even develop bulges and bald spots. Not only does this make your car less stable and more difficult to handle, but it also decreases your fuel efficiency and puts extra strain on your suspension system. In extreme cases, poorly maintained tires can even lead to blowouts while you’re driving which can be extremely dangerous (not to mention expensive).
How Do You Know if Your Tire Needs To Be Replaced? If you’re not sure whether or not your tire needs to be replaced, there are a few things you can look for:
Uneven tread wear: If one part of the tread is significantly more worn down than the rest, it’s time for a new tire.
Cracks in the sidewall: Even if the tread looks fine, cracks in the sidewall are an indication that the structural integrity of the tire has been compromised and needs to be replaced.
Bulges or blisters: If you notice any bulges or blisters on the surface of the tire, this means that air is leaking from inside and causing weakness in the structure of the tire itself.
How Do You Pump Stretch Tyres?
Assuming you are asking how to stretch car tyres: There are a few ways that people typically go about stretching tyres, and which method you use will depend on the tools and materials that you have available. One common way is to use a hydraulic jack to lift up the car so that the tyre is clear of the ground, then place a block of wood or similar under the tyre.
Once the tyre is supported, grab hold of it at 12 and 6 o’clock and push and pull alternately to stretch it out. Another way is to use a ratchet strap or similar hooked around the circumference of the tyre; again, jacking up the car so that the tyre is off the ground, take up any slack in the strap until it is tight, then drive forwards a short distance before reversing back into your starting position. This process can be repeated as necessary.
Whichever method you choose, be sure to check your work afterward by measuring the circumference of the stretched tyre with a tape measure it should be significantly larger than before!
Are Stretched Tires Legal?
Most people think that stretched tires are illegal because they don’t meet the minimum tread depth requirement. However, this is not always the case. Stretched tires can be legal if they are used for off-road purposes or if they have a deep tread depth.
Stretched tires can give your car a unique look and can improve your traction when driving on slick roads. They can also help you to corner better by increasing the contact patch of your tire with the ground. However, there are some drawbacks to using stretched tires.
One of the biggest concerns with stretched tires is safety. Because they have a smaller contact patch, they can slip and slide more easily on wet roads. This can lead to accidents or even rollovers.
Additionally, stretched tires put extra stress on your suspension and steering components, which can cause premature wear or failure. If you do decide to use stretched tires, make sure you know what you’re doing and that you understand the risks involved. Never exceed the recommended tire pressure for your vehicle, and always inspect your tires before each drive to ensure they are in good condition.
How Do You Get a Tight Tire on a Rim?
It can be difficult to get a tight tire on a rim, but there are a few things you can do to make it easier. First, make sure the rim is clean and free of any dirt or debris. Next, use a tire bead seating lubricant on the beads of the tire.
This will help the tire slide onto the rim more easily. Finally, use a tire mounting tool to help push the bead of the tire over the edge of the rim. With these tips, you should be able to get a tight fit on your tires!
Tire Stretch Visualizer
Do you know how much your tires have stretched? It’s important to be aware of, because it can affect your vehicle’s handling. The Tire Stretch Visualizer is a tool that can help you see how much your tires have stretched.
All you need is a picture of your car (preferably with the wheels on) and the visualizer will do the rest. Simply upload the image and then click on each tire. The visualizer will show you how much the tire has stretched.
This is a valuable tool for anyone who wants to make sure their car is handled properly. Check it out today!
How to Stretch Tires Without Fire
If you’ve ever wondered how to stretch tires without fire, wonder no more! Here’s a step-by-step guide:
- Find a wide, flat surface on which to work.
- A driveway or parking lot is ideal. Park your car in the middle of the space and set the emergency brake.
- Loosen each of the lug nuts on your tires about half a turn. Do not remove them completely.
- Using a tire iron or other appropriate tool, jack up your car so that the tires are clear of the ground. Place jack stands under the frame of your car for added stability and safety.
- With one hand on either side of the tire, push outward with both hands until you feel resistance. Hold this stretch for 10 seconds before releasing and repeating on the other side of the tire. Repeat this process 5-10 times per tire.
Stretched Tires Guide
If your car’s tires are looking a little low, you may be wondering if they need to be replaced or if they can just be refilled. The answer depends on the type of tire. If you have a tubeless tire, it can simply be refilled with air. However, if you have a tube-type tire, you will need to replace the entire tire. Here is a guide to help you know when it is time to replace your tires:
Check the tread depth. You can do this by inserting a penny into the tread groove. If the top of Lincoln’s head is visible, then the tread depth is less than 2/32 inch and it is time to replace the tire.
Look for cracks or splits in the sidewall of the tire. These indicate that the structure of the tire has been compromised and it needs to be replaced.
Check for uneven wear patterns on the tires. This could indicate that the wheels are out of alignment or that there is something else wrong with the suspension system.
How to stretch a tire and how you don’t – Beaded Tires!
Frequently Ask & Questions
What is the best way to stretch tires?
The best way to stretch tires is not to stretch them at all. Tire stretching is generally not recommended by tire manufacturers and automotive experts due to safety concerns and potential negative effects on performance.
Stretching tires involves fitting a tire with a narrower width onto a wider wheel, which can compromise the tire’s structural integrity and affect handling characteristics. It is important to prioritize safety and choose tires that are properly sized for the wheel, as recommended by the tire manufacturer and automotive industry standards.
This ensures optimal performance, handling, and durability while reducing the risk of accidents or tire failures. It is always advisable to consult with professionals and follow their recommendations when it comes to tire fitment to ensure a safe and enjoyable driving experience.
What are the risks of not stretching tires?
The risks of not stretching tires primarily stem from improper fitment and mismatch between the tire and wheel size. If a tire is not stretched properly or is not the appropriate size for the wheel, several issues may arise.
Firstly, it can negatively impact the handling and stability of the vehicle, leading to decreased control and increased risk of accidents. Additionally, improper fitment can cause premature tire wear, uneven tire wear patterns, and compromised tire sidewall integrity.
This increases the likelihood of tire blowouts or failures, especially during high-speed maneuvers or abrupt braking. It is also worth noting that stretching tires may void tire warranties and insurance coverage. To ensure safety, it is advisable to follow tire manufacturer recommendations and use tires that are designed to properly fit the specified wheel size.
How often should I stretch my tires?
Tire stretching is not a recommended practice, and therefore, it is not necessary or advisable to stretch tires at any regular intervals. Tire stretching involves fitting a tire with a narrower width onto a wider wheel, which can compromise safety and performance.
Tire manufacturers do not endorse or support this practice, and it may void tire warranties. It is important to prioritize safety and choose tires that are properly sized for the wheel, as recommended by the tire manufacturer and automotive industry standards.
Regularly inspecting tires for wear, maintaining proper tire pressure, and replacing them when they are worn or damaged are more important factors for ensuring safe and reliable performance on the road.
Conclusion
If you’re looking to add some extra style to your vehicle, bead-stretched tires are a great way to do it. This tire stretching technique involves taking a regular tire and adding beads around the circumference of the tire. This gives the appearance of a much larger tire and can make your car look more aggressive.
The best part about this mod is that it’s relatively simple to do and doesn’t require any special tools or equipment. All you need is a few hours of time and patience. In this article, we’ll show you how to bead stretch tires step-by-step so that you can get the look you want.