- Home
- Archive: August, 2023

How to Tell the Age of New Tires
Tires are an important part of your car, and it is important to know when they need to be replaced. There are a few different ways to tell the age of new tires. The first way is by the tread depth.
You can measure the tread depth with a tire tread depth gauge. The second way is by looking at the sidewall of the tire for the date code. The date code will tell you when the tire was manufactured.
The third way is by looking at the wear on the tires. If there are any bald spots or uneven wear, this can be an indication that the tires need to be replaced.
How old are my tires? // How to check tire age
- Check the sidewall of the tire for a four-digit DOT code
- The first two digits of the DOT code represent the week of manufacture, and the last two digits represent the year
- For example, if the DOT code on your tire is “1210,” it means that your tire was manufactured during the 12th week of 2010
- You can also look for a three-digit Tire Identification Number (TIN) on the inside surface of your tire’s tread near the bottom of the sidewall
- The first two digits of the TIN represent the week of manufacture, and the last digit represents the year
- If there is no DOT code or TIN on your tires, they were most likely manufactured before 2000 and may need to be replaced soon regardless of their tread depth
How to Tell Age of Tires
Tires are a crucial part of your car, and it’s important to know when they need to be replaced. Here’s a quick guide on how to tell the age of your tires.The first thing you’ll want to look for is the DOT code.
This is a series of numbers and letters that indicate when the tire was manufactured. The last four digits of the DOT code represent the week and year the tire was made. For example, if the last four digits are 1210, that means the tire was made in week 12 of 2010.
If there is no DOT code, or if it’s illegible, you can also tell the age of a tire by looking at its tread depth. Tires have tread wear indicators, which are raised bars located in the deepest grooves of the tread pattern. When these bars become flush with the surrounding tread, it’s time to replace your tires.
You can check tread depth with a penny – simply insert the penny into a groove with Lincoln’s head facing down. If you can see all of Lincoln’s head, your tread depth is less than 2/32nds of an inch and it’s time for new tires. If you can only see his head up to his ears, you have 4/32nds remaining and should start shopping for new tires soon.
It’s important to keep an eye on your tires and replace them when needed – not only for safety reasons but also to improve fuel efficiency and prolong the life of your car overall!

Credit: www.tirebuyer.com
How Can You Tell How Old a New Tire is
When you are shopping for new tires, it is important to know how old they are. The age of a tire can affect its performance and safety. Here are some ways to tell how old a new tire is:
The date code: Most tires have a date code stamped on the sidewall. This code indicates when the tire was manufactured. The first two digits represent the week of production, and the last two digits represent the year.
For example, a code of 1215 means that the tire was made during the 12th week of 2015.The DOT code: Every tire has a DOT code, which is required by law. This code includes information about the manufacturing plant, as well as the Tire Identification Number (TIN).
The TIN consists of four parts:
-The first two digits indicate the week of production
-The second two digits indicate the year
-The third and fourth digits identify the factory where it was made
For example, a DOT code of 4012 would mean that it was manufactured during 40th week of 2012 at factory number 12.Knowing how old your tires are can help you make informed decisions about when to replace them.
If you have any concerns about your tires, be sure to consult with a qualified professional for advice.
The Last Four Digits of the Code are Used to Represent the Week And Year the Tire was Produced
The last four digits of a tire’s code represent the week and year the tire was produced. The first two digits indicate the week of production, while the second two digits indicate the year. For example, a code of “1210” would indicate that the tire was produced in the 12th week of 2010.
It’s important to keep track of when your tires were manufactured, as tires degrade over time and need to be replaced after a certain number of years. Check your tires’ codes before you buy them to make sure they’re not too old.
For Example, 1409 Would Indicate That the Tire was Made During the 14Th Week of 2009
Tire age can be determined by looking at the last four digits of the DOT code. The first two digits indicate the week of production, while the last two digits indicate the year. For example, 1409 would indicate that the tire was made during the 14th week of 2009.
As tires age, their performance deteriorates and they become more susceptible to failure. This is why it’s important to regularly check your tires’ tread depth and air pressure, and to replace them when they reach the end of their useful life.If you’re not sure how old your tires are, or if you suspect that they might be nearing the end of their life, it’s a good idea to have them inspected by a qualified technician.
Conclusion
If you’ve ever wondered how old a new tire is, the process is actually quite simple. There is a four digit code on the sidewall of every tire that indicates when the tire was manufactured. The first two digits represent the week of production and the last two digits represent the year.
For example, a code of “2509” would mean that the tire was produced in the 25th week of 2009.
How Much Is It to Retread Tires? | Tire Hubz
The cost of retreading tires varies depending on the size and type of tire being retreaded. The average cost to retread a passenger tire is between $30 and $35, while the average cost to retread a truck tire is between $70 and $80. The costs associated with retreading tires are typically lower than the costs associated with buying new tires, making retreading an attractive option for many people.
The cost of retreading a tire can vary depending on the type of tire and where you have it done. Generally, the cost is between $30 and $60 per tire. There are several benefits to retreading tires.
It extends the life of the tire, which is good for your wallet and for the environment. Retreading also improves traction and grip, making your vehicle safer to drive. If you’re considering retreading your tires, be sure to find a reputable shop that specializes in this process. You want to make sure your tires are done right so that you can enjoy all the benefits of this money-saving option.
Table of Contents
Is It Cheaper to Retread a Tire?
The answer to this question depends on a few factors. The first factor is the type of tire you have. If you have a passenger car tire, it will be cheaper to retread it than if you have a semi-truck tire.
The second factor is the condition of your tire. If your tire is in good condition, it will be cheaper to retread it than if your tire is in poor condition. Lastly, the cost of labor and materials will also affect the price of retreading a tire.
In general, though, it is usually cheaper to retread a tire than to buy a new one. This is because when you retread a tire, you are essentially just replacing the tread on the outside of the tire. The rest of the tire (the carcass) is still in good condition and can be reused.
This saves money because you don’t have to buy an entirely new Tire – just new treads. The process of retreading a Tire begins by removing the old tread from the Tire carcass. The carcass is then cleaned and inspected for any damage that could affect its ability to hold new threads securely.
Once the carcass has been approved, new treads are glued or vulcanized onto it using special machines designed for this purpose. After the new treads are in place, the Tire undergoes final inspection before being released for use again.
How Long Does a Retread Tire Last?
A retread tire can last anywhere from 10,000 to 20,000 miles. The lifespan of a retread tire depends on the quality of the original tire and how well it was made. Retread tires are made by taking an old tire and bonding a new tread to the existing carcass.
The new tread is made from a rubber compound that is similar to the original material. Retreads typically cost 30 to 50 percent less than a brand new tire because they use recycled materials. They also offer good traction and grip because of their textured surface.
However, they may not last as long as a brand-new tire since they don’t have as much rubber. If you’re considering getting retread tires, make sure to do your research and buy them from a reputable source. With proper care, retread tires can provide you with many miles of safe driving!
Are Retread Tires Safe for Cars?
Are Retread Tires Safe? When it comes to the safety of your car, you want to make sure that you are using the best possible tires. This means that you may be wondering if retread tires are safe for cars. The good news is that retread tires are just as safe as new tires, as long as they are used properly. Here is everything you need to know about retread tires and their safety. What Are Retread Tires?
Retread tires are simply old tires that have been repaired and then reused. The tread on the tire is what provides traction, so it is important that this part of the tire is in good condition. To repair a tire, the damaged portion of the tread is cut away and a new piece of tread is glued or vulcanized onto the tire.
Once this process is complete, the tire looks and functions just like a new one! Are Retread Tires Safe? There is a common misconception that retreaded tires are not as safe as new ones.
However, this could not be further from the truth! In fact, retreaded tires must meet stricter safety standards than new ones in order to be sold. In addition, most major tire manufacturers offer a warranty on their retreads – something they would not do if they were not confident in their safety.
Of course, like with anything else, there are always some risks involved with using retreaded tires. If a tire has been improperly repaired or if it sustains too much damage during its lifetime, it may not be safe to use. That being said, as long as you purchase your retreads from a reputable dealer and follow all instructions for care and use, they should serve you just as well – if not better!
Are Retread Tires Cheaper Than New Tires?
Retreading tires is a process where the tread of a worn tire is replaced with new rubber. This can be done multiple times and can extend the life of a tire significantly. Retreaded tires are cheaper than new tires, but they are also not as good in terms of quality.
The main advantage of retreading tires is that it is much cheaper than buying new ones. A typical retread can cost around $30 to $60, while a new tire can cost upwards of $100. In addition, retreading tires helps to reduce waste and environmental impact since it extends the life of a tire rather than discarding it after just one use.
However, there are some disadvantages to using retreaded tires. One is that they are not as safe as new tires since the old treads may have been damaged or worn down in ways that make them more likely to fail. Additionally, retreaded tires may not last as long as new ones – meaning you could end up spending more money in the long run if you have to keep getting your tires retreaded frequently.
Ultimately, whether or not you choose to use retreaded tires comes down to a matter of personal preference and budget. If you’re looking for the cheapest option possible, then retreading your tires is probably the way to go.
Credit: www.tirerecappers.com
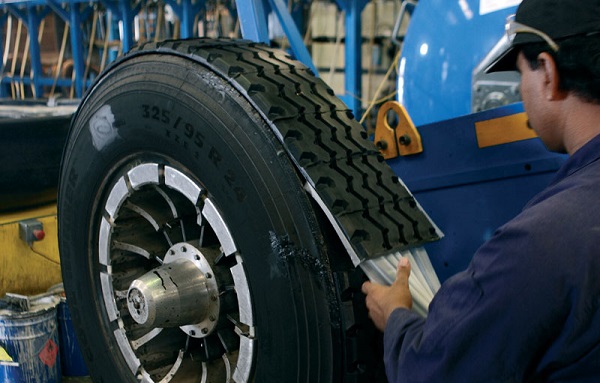
How Old Tires Are Retreaded So They Can Be Used Again
Recap Tires
A recap tire is a retreaded tire. Retreading is the process of removing the worn tread from a tire and replacing it with a new tread. Recap tires are significantly cheaper than new tires, but they don’t last as long.
Recap tires have been around since the early 1900s, and they were originally made by hand. The process has become much more streamlined and efficient over the years, but it’s still not as cheap or fast as simply buying a new tire.
There are two main types of retreading: cold retreading and hot retreading.
Cold retreading involves using a pre-cured rubber compound that’s applied to the bare carcass of the tire. Hot retreading, on the other hand, uses heat to mold the new tread onto the carcass. Both methods have their pros and cons.
Cold retreading is generally considered to be safer and more reliable, but it’s also more expensive. Hot retreading is less expensive, but there’s a greater risk of damaging the tire during the process. If you’re considering getting recap tires for your car, make sure to do your research ahead of time.

Frequently Asked Questions (FAQs)
1. What Is Tire Retreading?
Tire retreading, also known as recapping or remolding, is a process where worn out tires undergo a refurbishing process to extend their lifespan. The worn-out tread is removed and replaced with a new one, making the tire safe to use again.
2. How Much Does It Cost To Retread Tires?
The cost of retreading tires can vary greatly depending on the size and type of the tire, as well as the retreading process used. However, it is generally much cheaper than buying new tires, often costing between 30% to 50% less.
3. Is Retreading Tires Worth It?
Yes, retreading tires can be worth it for several reasons. It’s cost-effective, as retreaded tires are typically much cheaper than new ones. It’s also environmentally friendly, as retreading extends the life of tires and reduces the number of tires in landfills.
4. How Many Times Can A Tire Be Retreaded?
A tire can typically be retreaded up to two or three times, depending on the tire’s condition and type. However, it’s important to note that each tire must pass a rigorous inspection before it’s deemed suitable for retreading.
5. What Types Of Tires Can Be Retreaded?
Nearly all types of tires can be retreaded, including car tires, truck tires, airplane tires, and even off-the-road (OTR) tires used in construction and mining. However, the tire must be in good condition and pass a thorough inspection before it’s suitable for retreading.
Conclusion
Retreading tires can be a cost-effective solution for extending the life of your tires and saving money in the long run. The price of retreading tires varies depending on factors such as tire size and tread design but generally ranges from $20 to $50 per tire. While this may seem like a significant investment upfront, it is important to consider the potential savings compared to buying new tires. By retreading your tires, you can reduce waste and contribute to a more sustainable environment. So, if you’re looking for an affordable way to keep your vehicle safe on the road while also being conscious of your budget and environmental impact, consider getting your tires retreaded today.

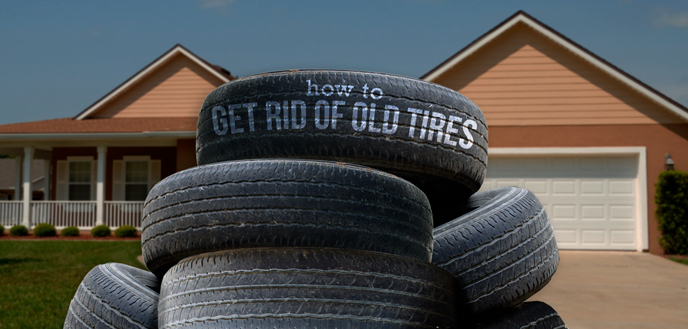
How to Dispose Old Tires of Cars
Old tires can be recycled and used in a variety of ways. Here are some tips on how to dispose old tires of cars.Tires are made from natural rubber and other synthetic materials, so they can be recycled and reused.
Many tire recycling facilities accept old tires from cars, trucks, motorcycles, and bicycles.The first step in disposing old tires is to contact your local recycling facility to see if they accept them. If not, there are many private companies that will recycle your old tires for a fee.
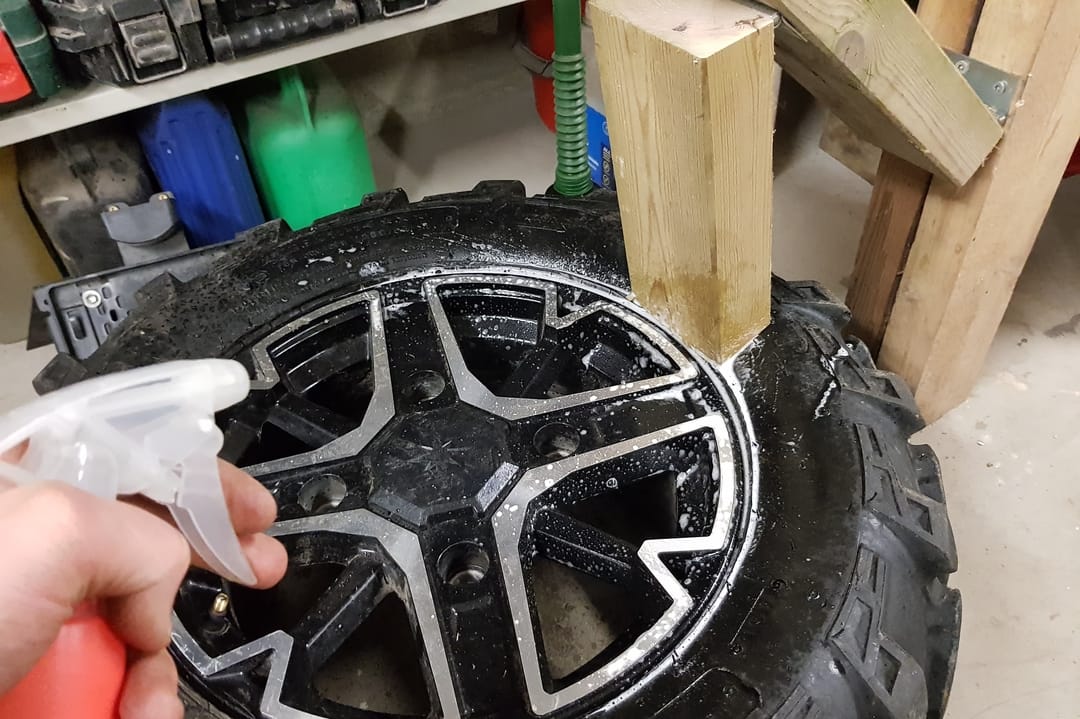
Once you have found a place to recycle your old tires, the next step is to remove the tire from the car or bike. This can be done by either taking it to a mechanic or doing it yourself if you know how.After the tire has been removed from the vehicle, it needs to be cleaned before it can be recycled.
This can be done with soap and water or with a pressure washer. Once the tire is clean, it can be taken to the recycling facility where it will be shredded and used in other products such as playgrounds, running tracks, or even artificial turf.
How to dispose of old tires in the trash!!
- Take the old tires to a tire recycling center
- Most tire recycling centers will accept passenger car tires, as well as truck and tractor tires
- There may be a fee for disposing of the tires; however, many centers will recycle the tires for free
- Call ahead to find out what type of documentation or ID is needed in order to drop off the old tires
Used Tire Disposal near Me
If you’re looking for used tire disposal near me, there are a few options available. You can either take them to a local recycling center or landfill, or you can dispose of them yourself.Recycling centers will usually accept tires as long as they’re not rusted out or damaged beyond repair.
They’ll then shred them up and use the material to create new products, like rubber mulch for playgrounds.Landfills will also accept tires, but they typically have to be buried deep underground so they don’t take up too much space. Once they’re buried, microorganisms will break down the tires over time and eventually turn them into soil.
If you want to get rid of your tires on your own, one option is to cut them up and use them as firewood in a wood-burning stove or fireplace. Just make sure to properly dispose of the nails that are holding the tire together!
Credit: www.budgetdumpster.com
Can I Do Anything With Old Tires?
As the world looks for ways to become more eco-friendly, many people are wondering what they can do with their old tires. The good news is that there are actually a number of different things that you can do with old tires! Here are just a few ideas:
1. Use them as planters! This is a great way to upcycle those old tires and add some greenery to your yard or garden. Simply clean out the tire, fill it with soil, and add your favorite plants.
2. Make a tire swing! This is a fun project for both kids and adults. All you need is one large tire, some rope, and a few hours of time.
3. Create a garden path! If you have extra tires lying around, why not put them to good use by creating a garden path? This is a great way to add some interest to your landscaping.
4. Donate them! There are many organizations that accept donations of old tires.
How Much is a Tire Disposal Fee in Texas?
The disposal fee for a tire in Texas is $2.50 per tire, with a maximum of $10 per household. This fee helps to cover the cost of disposing of tires that are no longer safe to use on vehicles. Tires that are worn down or damaged can be recycled or disposed of at a landfill.
What Must Be Done With the Old Tires at Home?
There are a number of options for what to do with old tires at home. One is to simply recycle them. This can be done by taking them to a local recycling center or by contacting a company that specializes in tire recycling.
Another option is to reuse the tires. This could involve using them as planters or garden edging, for example. Or, they could be cut down and used as treads for a DIY project such as creating a tire swing or climbing wall.
Finally, old tires can also be disposed of in an environmentally-friendly way. One option is to bury them deep in the ground so that they break down naturally over time. Another is to burn them in a controlled manner (known as pyrolysis) so that they can be used as fuel.
How Do I Dispose of Old Tires in Texas?
There are a few options available for disposing of old tires in Texas. One option is to take them to a tire recycling center. This option is usually free or very low cost.
Another option is to dispose of them at a landfill. This option may be more expensive, but it guarantees that the tires will be disposed of properly.
Conclusion
If your car has worn out tires, you may be wondering how to dispose of them. The good news is that there are several options for recycling old tires. Here are a few ideas:
1. Check with your local tire store or automotive shop. Many stores offer tire recycling services and may even give you a discount on new tires if you recycle your old ones.2. Contact your local waste management company.
Some companies offer tire recycling programs and may even pick up the tires from your home.3. Take them to a tire recycling facility yourself.

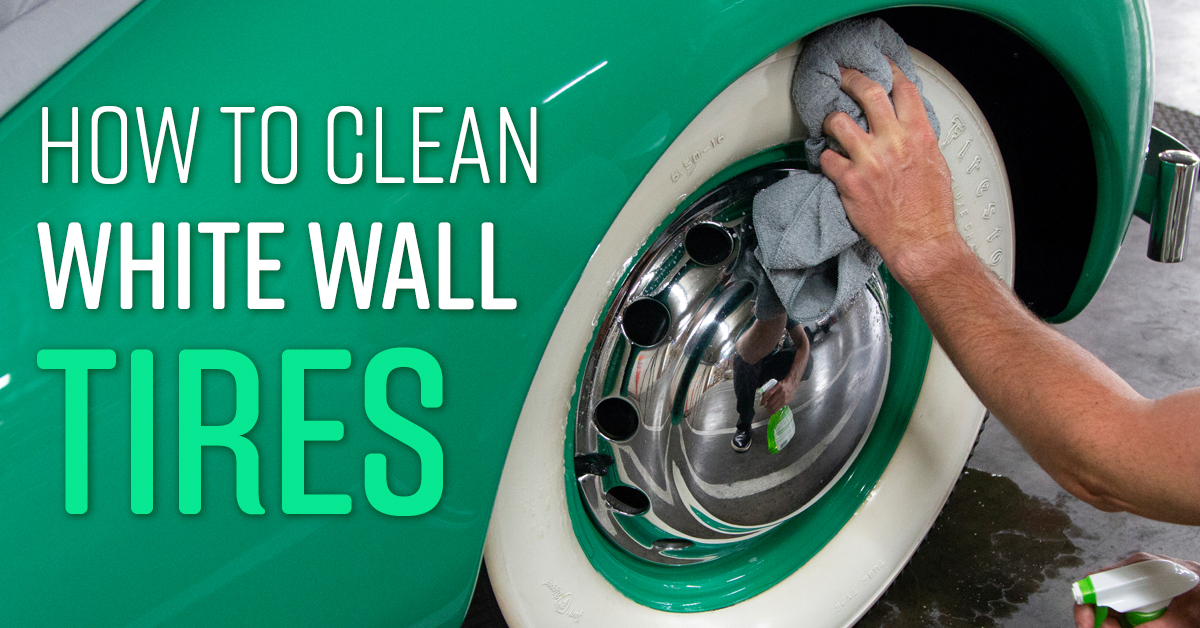
How to Protect White Wall Tires
It’s no secret that white wall tires can be difficult to keep clean. Whether you’re driving a classic car with whitewall tires or a modern car with white walls, there are a few things you can do to protect your investment and keep your tires looking their best.
- Purchase tires that are specifically designed for white walls
- Regularly clean your tires with a mild soap and water solution
- Apply a clear coat sealant to your tires after cleaning them to help protect the whiteness of the sidewalls
- Park your car in a garage or covered area whenever possible to avoid sun damage and other environmental factors that can cause fading or discoloration
- Have your tires professionally cleaned and sealed on a yearly basis to maintain their appearance and extend their lifespan
Best Whitewall Tire Cleaner In 2022 – Top 10 Whitewall Tire Cleaners Review
How Do I Keep My White Wall Tires from Turning Yellow?
There are a few things you can do to keep your white wall tires from turning yellow. First, avoid exposing them to direct sunlight for long periods of time. Second, clean them regularly with a mild soap and water solution.
Third, apply a tire protectant product designed to resist yellowing.
Can You Put Tire Shine on White Walls?
Yes, you can put tire shine on white walls. There are a few things to keep in mind, however. First, make sure that the product you’re using is designed for tires – some products are not and can damage the paint on your wheels.
Second, be sure to follow the directions on the product label – too much of any kind of tire shine can actually make your tires look worse, not better. Finally, always test any new product on a small area of your tire first to make sure there are no adverse effects.
How Do I Make My White Walls White Again?
If you’re wondering how to make your white walls white again, there are a few things you can do. First, check to see if they’re actually dirty. Sometimes, they may just look dull because of the lighting in your room.
If they’re actually dirty, you can clean them with a mild soap and water solution. Just be sure to rinse them well afterwards so that no soap residue is left behind. You can also use a whitening agent like bleach or vinegar to help brighten up your walls.
Just be sure to use these sparingly as they can damage your paint if used too frequently.
Can You Clear Coat White Wall Tires?
Assuming you are asking if you can clear coat white wall tires:Although you can technically clear coat white wall tires, we do not recommend it. The reason being is that once the clear coat dries, it will become very difficult to get an even application.
Also, if you happen to get any overspray on the sidewall of the tire, it will be next to impossible to remove without damaging the tire.
Credit: simplegreen.com
White Wall Tire Protector
If you are looking to keep your car clean and free of scratches, you may want to invest in a white wall tire protector. This product is designed to fit over the top of your tires, protecting them from road debris and other potential sources of damage. While there are many different brands and styles of white wall tire protectors on the market, they all serve the same basic purpose: to keep your tires looking new.
Here are some things to consider when shopping for a white wall tire protector:-Size: Make sure to measure your tires before purchasing a white wall tire protector. Some protectors are designed specifically for certain sizes of tires, so you’ll want to make sure you get the right size for your vehicle.
-Style: White wall tire protectors come in both solid and mesh designs. Solid protectors provide more coverage but can be more difficult to install. Mesh protectors offer less coverage but may be easier to put on and take off.
Choose the style that best suits your needs.-Material: White wall tire protectors are typically made from vinyl or PVC. Vinyl is more flexible and can conform to different shapes, while PVC is more rigid and durable.
Consider the type of material that will best suit your needs before making a purchase.
Conclusion
If you want to protect your white wall tires, there are a few things you can do. First, make sure to clean them regularly. You can use a mild soap and water solution or a tire cleaner specifically designed for whitewalls.
Second, apply a tire protectant to help repel dirt and stains. Third, be careful when parking your car. Avoid curbs and other objects that could damage the tires.
Finally, have your tires professionally cleaned and protected every few months to keep them looking their best.

How to Ship Wheels Without Tires
Assuming you want tips on how to ship wheels without tires:If you’re planning on shipping your wheels without the tires, there are a few things you should keep in mind. First, make sure that the wheels are clean and free of any debris.
This will help protect them during shipping. Next, wrap each wheel individually in bubble wrap or another protective material. Finally, place the wrapped wheels in a sturdy box with plenty of packing material around them.
How To Package and Ship Wheels for Cheap
- Find a large, sturdy box that will fit the wheels without tires
- You may need to go to a shipping or packaging store to find the right size
- Place the wheels in the box, being careful to not damage them
- Fill any empty space in the box with packing material such as bubble wrap or Styrofoam peanuts to prevent the wheels from moving around during shipping
- seal up the box and label it with “Fragile” and “This Side Up
Cost to Ship Wheels Without Tires
The cost to ship wheels without tires can vary depending on a few factors. The most important factor is the size and weight of the shipment. Other factors that can affect shipping costs include the distance being shipped and the number of items being shipped.
For example, shipping four 16-inch wheels from Los Angeles to New York would cost about $100 with UPS Ground. If you were to add tires to those same wheels, the shipping cost would increase by about 50%. This is because adding tires increases both the size and weight of the shipment.
If you’re looking to save on shipping costs, one option is to ship your wheels without tires. This can be a great option if you’re only looking to get new tires mounted locally. Just be sure to factor in the potential increased cost of mounting and balancing once you receive your shipment.

Credit: www.nickscarblog.com
How Do You Ship Wheels?
When it comes to shipping wheels, there are a few things you need to take into account in order to ensure they arrive safely at their destination. Here are a few tips on how to ship wheels:1. Choose the right packaging material.
When shipping wheels, it is important to choose the right packaging material in order to avoid any damage during transit. Make sure to use sturdy cardboard boxes or plastic containers that are specifically designed for shipping wheels.2. Protect the wheel’s surface.
To protect the wheel’s surface from scratches or other damage, be sure to wrap each wheel in bubble wrap or another soft material before placing it in the box or container.3. Fill any empty space in the packaging. Once all of the wrapped wheels have been placed in the box or container, be sure to fill any empty space with packing peanuts or other filler material.
This will help keep the wheels from moving around during transit and becoming damaged.4. Seal up the package securely.
How Can I Ship My Car Wheels for Cheap?
When it comes to shipping car wheels, there are a few things you can do to save money. First, consider using a service that offers discounts for multiple items. This could include using the same company to ship your car and your wheels, or finding a company that specializes in shipping car parts.
You can also save money by disassembling your wheels before shipping them. This will make them easier to pack and will reduce the overall size of your shipment. Finally, be sure to compare rates from different companies before making your final decision.
By taking these steps, you can be sure to find the most affordable option for shipping your car wheels.
Can I Ship Wheels With Ups?
UPS offers a number of shipping options for wheels, including UPS Ground, UPS 3 Day Select, and UPS 2nd Day Air. If you’re shipping wheels within the United States, you can use UPS Ground service. This service is available for packages weighing up to 150 lbs.
(68 kg). If your shipment weighs more than this, you’ll need to use one of UPS’s air services.If you’re shipping internationally, you’ll need to use one of UPS’s air services.
The company offers several options for international shipments, including UPS Worldwide Express Plus, UPS Worldwide Saver, and UPS Standard.
Can You Ship Wheels Through Usps?
Yes, you can ship wheels through USPS. You will need to package the wheels securely in a box or crate so that they are protected during shipping. Make sure to include all of the necessary paperwork with your shipment so that it can be processed correctly.
Conclusion
If you’re looking to ship wheels without tires, there are a few things you need to keep in mind. First, make sure the wheels are properly secured so they don’t move around during shipping. You can use wheel chocks or tire straps to do this.
Second, make sure the wheels are clean before shipping them. This will help prevent any damage during transit. Finally, be sure to label the shipment clearly so the recipient knows it contains just wheels and no tires.

How to Get Curb Paint off Tires
If you’re like most people, you probably don’t think twice about the white paint on curbs. But if you’ve ever gotten curb paint on your tires, you know it can be a real pain to remove. Here’s a few tips on how to get curb paint off tires without damaging them.
First, try using a rubber eraser. If the paint is fresh, this may be all you need to do. Just rub the eraser over the paint until it comes off.
If the paint is old and hardened, you may need to use something a little more abrasive, like sandpaper or a wire brush.Second, use WD-40 or another lubricant to loosen the bond between the tire and the paint. Spray WD-40 onto a rag and then wipe it over the affected area.
Let it sit for a few minutes before scrubbing with an abrasive material as mentioned above.Third, try using heat to loosen the bond between the tire and the paint. This method should only be used as a last resort as it can damage your tires if not done carefully.
Use a hair dryer or heat gun on low heat and hold it about 6 inches from the tire for several minutes. Then use an abrasive material to scrub off the loosened paint.
- Begin by wetting the tires with a hose or pressure washer
- Apply a generous amount of tire cleaner to the tires and scrub with a brush to loosen the dirt and grime
- Rinse the tires thoroughly with water
- If necessary, repeat steps 2-3 until the tires are clean
- Dry the tires with a towel or air compressor to prevent rusting
Curb Rash Repair on 26×14
How Do You Get Dried Paint off of Tires?
If you have ever gotten paint on your tires, you know how difficult it can be to remove. Paint seems to just soak in and become a part of the tire. But with a little elbow grease and the right materials, you can get that paint off of your tires.
One way to remove dried paint from tires is to use WD-40. WD-40 is a versatile product that can be used for many things, including removing dried paint from surfaces. Just spray some WD-40 onto the affected area and let it sit for a few minutes.
Then, use a cloth or brush to scrub the area and loosen the dried paint. Once the paint is loosened, you should be able to wipe it away easily.Another option for removing dried paint from tires is denatured alcohol.
Denatured alcohol will also help to dissolve and loosen the dried paint so that it can be wiped away easily. Simply apply some denatured alcohol to a cloth or brush and scrub at the affected area until the paint starts to come off.If neither of these options seem to be working, you may need to resort to sandpaper or a razor blade.
This should only be done as a last resort, as it could damage your tires if not done carefully. First, start with sandpaper and gently sand away at the dried paint until it starts to come off in flakes.
How Do You Get Dried Paint off Rubber?
If you have ever gotten paint on rubber, you know how difficult it can be to remove. Paint seems to just soak into the material and then becomes almost impossible to get off. But don’t worry, there are a few things you can do to remove dried paint from rubber.
One way is to use a putty knife or another sharp object to scrape off as much of the paint as you can. This won’t remove all of the paint, but it will help get rid of a good amount of it.Another way is to use nail polish remover or rubbing alcohol.
Simply apply some of the liquid onto a rag and then rub it onto the area with the dried paint. This should help loosen up the paint so that you can wipe it away.If those two methods don’t work, you can try using heat.
Use a hair dryer or heat gun and hold it close to the area with the dried paint (but not too close or you could damage the rubber). The heat will help soften up the paint so that you can scrape it off with a putty knife or other sharp object.Hopefully one of these methods will work for you and you’ll be able to remove that pesky dried paint from your rubber surface!
How Do You Get Spray Paint off of Rubber Tires?
If you’re looking to remove spray paint from rubber tires, there are a few different methods you can try. One is to use a commercial cleaner or degreaser designed for removing paint. Apply the cleaner to the tires and let it sit for a few minutes before scrubbing with a brush or cloth.
You may need to repeat this process several times to get all the paint off.Another option is to use rubbing alcohol or acetone. Again, apply the solvent to the tires and let it sit for several minutes before scrubbing.
This method may take a bit longer than using a commercial cleaner, but it will ultimately get the job done.Finally, if you’re really in a pinch, you can try using WD-40. Simply spray WD-40 onto the affected area and then wipe away with a cloth.
The lubricating properties of WD-40 will help break down the paint so that you can easily wipe it away. Just be sure not to leave anyWD-40 residue on the tire as this could cause problems down the road.
Does Wd 40 Remove Road Paint?
While WD-40 can remove road paint from many surfaces, it is not a recommended method for doing so. The reason for this is that WD-40 is a petroleum-based product and can actually damage the paint on your car if used too frequently or left on for too long. It’s also important to note that WD-40 should never be used on hot surfaces, as it can cause the paint to blister.
If you do decide to use WD-40 to remove road paint from your car, be sure to wash the area with soap and water afterwards to remove any residue.

Credit: itstillruns.com
Will Paint Remover Damage Tires
If you’re considering using paint remover to remove paint from your tires, there are a few things you should know first. Paint remover can damage the surface of your tires, making them more susceptible to punctures and other damage. It can also cause the treads on your tires to become uneven, which can lead to traction problems.
For these reasons, it’s best to avoid using paint remover on your tires unless absolutely necessary. If you do need to use it, be sure to follow the instructions carefully and take all necessary precautions to protect your tires.
Conclusion
If you’ve ever gotten curb paint on your tires, you know how difficult it can be to remove. But with a little elbow grease and the right product, you can get that paint off in no time. Here’s what you’ll need:
-A putty knife or razor blade
-WD-40 or another lubricant
-Soap and water
-A stiff brushFirst, use the putty knife or razor blade to scrape as much of the paint off as possible. Next, apply WD-40 or another lubricant to a rag and wipe down the tire.
Be sure to work it into any nooks and crannies where the paint may be hiding. Finally, wash the tire with soap and water to remove any residue. If there are still stubborn streaks of paint remaining, use a stiff brush to scrub them away.

How to Mount Atv Tires by Hand
One of the most common questions we get here at Rocky Mountain ATV/MC is how to mount ATV tires by hand. While it may seem like a daunting task, it’s actually not that difficult – as long as you have the right tools and know-how. In this blog post, we’re going to walk you through everything you need to know about mounting ATV tires by hand, from what tools you need to how to do it step-by-step.
- Park the ATV on a level surface and set the parking brake
- Place a jack under the ATV frame, near one of the rear tires
- Lift the rear end of the ATV off the ground with the jack, until the tire is free from contact with the ground
- Remove the cap from the valve stem on each tire to be mounted, using a Phillips screwdriver
- Insert one end of an inflation hose onto each valve stem and screw it on tightly by hand
- Fill each tire with air to its maximum recommended pressure, using an air compressor or hand pump connected to the inflation hoses
- 6Remove each inflation hose and quickly replace each tire’s valve stem cap before any air can escape from the tires
How to Change ATV Tires Yourself at Home!
How Do You Change Atv Tires by Hand?
Assuming you don’t have a tire changing machine and are doing it by hand:Tools needed:
-Lug nut wrench
-Socket wrench
-Ratchet
-Jack
-Penetrating oil or WD40
-Sturdy block of wood1. Park your ATV on a level surface and engage the parking brake.
Place the block of wood in front of the tire you will be changing to keep the ATV from rolling while you work.
2. Remove the wheel cover, if there is one. Using the lug nut wrench, loosen each lug nut about a turn but do not remove them yet.
3. Place the jack under the frame near the tire you are changing. Pump the jack handle until the tire just clears the ground. 4. Finish removing the lug nuts and pull the wheel off of the axle 5. Inspect old tire for any nails or other objects that may have causedthe puncture 6. If reusing old tire, use penetrating oil or WD40on each side of bead where it meets rim to help break seal 7. Align new tire with opening in fender well and press onto hub, being careful not to pinch your fingers 8 .
Hand tightening each lug nut as much as possible, lower vehicle to ground 9 . Once all four tires are on ground, use socket wrench to finish tightening each lug nut in a star pattern 10 .
How Hard is It to Mount Atv Tires?
It’s not hard to mount ATV tires if you have the right tools and know-how. You’ll need an air compressor, a tire iron, and some patience. First, make sure your ATV is on a level surface.
Second, loosen the lug nuts with the tire iron. Third, use the air compressor to inflate the tire. Fourth, use the tire iron to tighten the lug nuts back onto the wheel.
Finally, check that the pressure in the tire is correct before you ride off.
How Do You Put a Tire on a Rim Without a Machine?
One of the most common questions we get here at Discount Tire is how to put a tire on a rim without using a machine. While it may seem like a daunting task, it’s actually quite easy to do with just a few tools and some patience. Here’s a step-by-step guide on how to put a tire on a rim without using a machine:
1. Start by placing the rim upside down on a clean, flat surface. If you’re working with an aluminum alloy rim, be careful not to scratch or damage the finish.2. Next, take your tire and place it over the top of the rim.
Make sure that the bead of the tire is seated evenly all the way around the circumference of the rim.3. Once the tire is in place, begin inflating it with an air compressor or hand pump. As you’re inflating, keep an eye on the bead of the tire to make sure that it’s staying seated properly on the rim.
If it starts to come off, simply deflate and start over again from step 2.
How Do You Mount a Tire by Hand?
In order to mount a tire by hand, you will need the following supplies: a rim, a bead breaker, a tire lever, and soapy water. You will also need access to an air compressor in order to inflate the tire once it is mounted.1. Begin by breaking the bead on the rim with the bead breaker.
This will allow you to get the tire levers under the lip of the tire.2. Use the tire levers to pry the rest of the bead over the rim. Work your way around the entire circumference of the tire until it is completely off of the rim.
3. Inspect both the rim and tire for any damage that may have occurred during removal. If everything looks good, proceed to step 4. If not, consult a professional before continuing.4. Apply some soapy water to both sides ofthe new Tire tube .
This will help lubricate it as you work it onto the rim . Inflate The tube slightly , just enough so that It holds Its shape .
Credit: boostatv.com
Walmart Atv Tire Mounting
If you’re in the market for a new ATV, you might be wondering about the best place to buy one. You might also be wondering about the best place to get your ATV tires mounted. Walmart is a great option for both of these things!
Walmart offers a wide selection of ATVs from top brands like Yamaha, Honda, and Polaris. They also offer competitive pricing on tire mounting services. So whether you’re looking for a new ATV or just need your tires mounted, Walmart is a great option!
Conclusion
If you’re looking to save some money, you can mount your ATV tires by hand. It’s not a difficult process, but it does require a little bit of patience and effort. Here’s how to do it:
1. Start by inflating the tire to its recommended pressure. This will make it easier to work with.2. Position the tire on the rim and line up the valve stem with the hole in the rim.
3. Use your hands to push the tire over the rim until it’s seated all the way around. You may need to use a rubber mallet to help get it started.4. Once the tire is in place, finish inflating it to its proper pressure and check for leaks around the bead area.

How to Downsize Tires for Winter
As the weather gets colder, it’s time to start thinking about down-sizing your tires. This is a simple process that can be done at home with a few tools. The first thing you’ll need to do is measure your tires.
You’ll want to measure the width, height, and diameter of each tire. Once you have these measurements, you can start shopping for new tires. When you’re looking for new tires, pay attention to the load rating and speed rating.
These ratings will help you determine if the tire is suitable for winter driving conditions. Once you’ve found the right tires, it’s time to install them. To do this, simply remove your old tires and put on the new ones.
Be sure to tighten the lug nuts properly and inflate the tires to the recommended pressure levels before hitting the road.
Winter Tires Downsizing
- Before you downsize your tires for winter, consult your car’s owner’s manual to see if there are any specific recommendations from the manufacturer
- Once you have consulted your car’s owner’s manual, choose a tire size that is appropriate for winter driving conditions
- Install the new tires on your car
- Make sure to follow all instructions provided by the manufacturer when installing new tires
- Enjoy improved traction and handling while driving in winter conditions!
Winter Tire Downsize Calculator
If you’re like most people, you probably don’t think about your tires much until there’s a problem. But if you live in an area with cold winters, it’s important to make sure your tires are up to the task of keeping you safe on the roads. That’s why we’ve developed this handy winter tire downsize calculator.
Just enter a few pieces of information about your vehicle and driving habits, and we’ll tell you whether it’s safe to downsize your tires for the winter months. We’ll also give you some tips on how to choose the right winter tires for your car.So don’t wait until it’s too late – use our winter tire downsize calculator today!
:max_bytes(150000):strip_icc()/1200px-Snow_Chain_Honda-57f058375f9b586c3525e955.jpg)
Credit: www.liveabout.com
Is It Better to Go down a Size for Winter Tires?
As the temperatures start to dip, many drivers begin to think about whether they need to switch to winter tires. Winter tires are designed to provide better traction and handling in cold weather and on snowy or icy roads. But is it better to go down a size for winter tires?
The answer really depends on your vehicle and how you plan to use it in the winter. If you have a smaller car, going down a size for winter tires may be the best option. This will help improve traction and handling without sacrificing too much comfort or fuel economy.
However, if you have a larger car or SUV, you may not want to go down a size for winter tires. This is because smaller tires can negatively impact braking and acceleration, and you may also notice more road noise with smaller tires.Ultimately, the decision of whether or not to go down a size for winter tires comes down to personal preference.
If you’re unsure, it’s always best to consult with your trusted mechanic or tire dealer before making a decision.
Can You Go down Two Sizes for Winter Tires?
While it is possible to go down two sizes for winter tires, it is not always the best idea. This is because when you go down in tire size, you are also reducing the amount of contact patch between the tire and the road. This can have a negative impact on traction and handling, both of which are important when driving in winter conditions.
It is also worth noting that going down two sizes may impact the speed rating of your tires. Speed ratings are based on tests conducted with the original equipment manufacturer (OEM) sized tires. Therefore, if you reduce your tire size by two sizes, you may no longer be able to achieve the same speeds as you could with OEM sized tires.
How Much Narrower Should Winter Tires Be?
As the weather starts to turn colder, you may be wondering if it’s time to switch out your tires for winter ones. But how much narrower should winter tires be?The answer really depends on the type of vehicle you drive.
For example, if you have a 4×4 SUV, you’ll need wider tires for better traction in snow and ice. However, if you have a smaller car or sedan, narrower tires may be just fine.It’s always a good idea to consult with your local tire shop or dealership to see what they recommend for your specific vehicle.
And when in doubt, err on the side of wider tires – they’ll give you more traction and stability in winter weather conditions.
Should I Use Smaller Wheels for Winter Tires?
When it comes to winter tires, there are a few things to consider when deciding on which size wheels to use. One of the main factors is the type of vehicle you drive. For example, if you have a smaller car, you may want to opt for smaller wheels in order to maintain good traction and control.
Another factor to consider is the depth of snowfall in your area. If you live in an area with large amounts of snowfall, larger wheels can help you plow through the snow more easily.Ultimately, it is up to you to decide what size wheels will work best for your winter tires based on your specific needs and driving conditions.
If you are unsure, it is always best to consult with a professional who can help you make the best decision for your situation.
Conclusion
As the weather gets colder, it’s time to start thinking about switching to winter tires. But if you’ve got a smaller car, you might be wondering how to downsize tires for winter.There are a few things to keep in mind when downsizing tires for winter.
First, you’ll need to make sure that your car can handle the smaller size. Second, you’ll want to choose a tire that will still provide good traction and grip in snow and ice. And finally, you’ll need to make sure that your tires are properly inflated.
With those things in mind, let’s take a look at how to downsize tires for winter. The first step is to measure your car’s wheel well so you know what size tire you need. Once you have that information, you can start shopping for new tires.
When choosing tires, look for ones that are rated for both snow and ice traction. And be sure to check the pressure rating; most winter tires should be inflated to around 35 PSI.Once you have your new tires, it’s time to install them on your car.
This is a pretty simple process; just follow the instructions that come with your new tires. Once they’re installed, be sure to check the pressure and adjust as needed. And that’s it!

How to Remove Water from Tires
Most people know that it is important to keep their tires inflated in order to avoid getting a flat tire. However, what many people do not realize is that water can build up in your tires and cause them to become underinflated. When this happens, it can lead to a blowout or other serious problems.
Fortunately, there are a few simple steps you can take to remove water from your tires.
- If your tires are wet, use a towel or rag to remove as much water as possible
- Use a tire shine product to help remove any remaining water and protect the tires from future damage
- Apply the tire shine evenly across the surface of the tire
- Allow the tire shine to dry completely before driving or storing your vehicle
The EASY Way to Empty Water From a Tire!
What Happens If Water Gets in Tire?
If water gets in your tires, it can cause a number of problems. The first is that it can make your tires feel unbalanced and could lead to a blowout. It can also corrode the metal parts of your tires, which can eventually lead to tire failure.
Additionally, water in your tires can freeze in cold weather, which can cause the tire to crack or burst.
How Does a Tire Get Water in It?
A tire may get water in it due to a hole in the tread or sidewall, which can be caused by driving over potholes or other debris. If you notice your tires are losing air quickly or there is water visibly pooled inside the tire, have it checked out by a professional as soon as possible. Driving on a flat tire or with too much water in the tire can cause irreparable damage.
How Do You Dry Out Tires?
Most people believe that the best way to dry out tires is to use a hairdryer. However, this is not the most effective method. The hairdryer will only help to remove the surface water from the tires.
If you want to completely dry out your tires, you need to use a towel.Start by removing any excess water from your tires with a paper towel or rag. Once you have removed as much water as possible, take a clean, dry towel and rub it over the entire surface of each tire.
Be sure to pay special attention to the treads, as this is where most of the water will be hiding.If you are in a hurry and need to get your tires dried out quickly, you can also use a air compressor. Simply point the nozzle at your tires and turn it on.
The airflow will help to remove any remaining moisture from your tires. Just be careful not to get too close, as the high pressure air can damage your tires if they are not completely dry.
Do Tires Soak Up Water?
Do tires soak up water?This is a question that many people have asked, and it is one that does not have a simple answer. The fact is that tires can absorb a certain amount of water, but they are not designed to do so.
Water can cause problems for your tires, and it is important to be aware of these issues before driving in wet conditions.Tires are made from rubber, which is a material that is naturally porous. This means that the tire can absorb some water if it comes into contact with it.
However, the amount of water that a tire can absorb is limited. If a tire absorbs too much water, it can start to swell and distort. This can cause the tire to lose its shape and affect its performance on the road.
In extreme cases, a swollen tire can even burst.Water can also make your tires more susceptible to punctures. If there is water between the treads of your tires and the ground, it can act as a lubricant and allow sharp objects to penetrate the rubber more easily.
This could lead to flats or blowouts while you are driving.It is important to remember that tires are not designed to be submerged in water. If you must drive through deep floodwaters, try to find an alternate route if possible.
If you cannot avoid deep water, drive slowly and carefully through it so that your tires do not have time to soak up too much liquid.
Credit: racenrcs.com
Water in Tires from Compressor
If you own a car, at some point you’re going to have to deal with a flat tire. And if you don’t know how to change a tire, you’re going to need to call for help. But what if you have a compressor and want to try to fix the tire yourself?
One thing you should know is that water in tires from compressors is not uncommon. In fact, it’s quite common for there to be water in the air compressor when you go to use it. This is because compressors work by compressing air, which also creates moisture.
While this moisture isn’t harmful to your tires, it can cause your tires to lose pressure over time. So if you notice that your tires seem softer than usual after using your compressor, just let the air out and add more air until the pressure is back up to normal.And if you do find yourself with a flat tire and no compressor, remember that most service stations will have an air compressor that you can use for free.
So don’t be afraid to ask!
Conclusion
Water can build up in your tires from driving in the rain or through puddles, and if it’s not removed it can cause problems. Here are a few tips on how to remove water from your tires:1. Use a tire brush to scrub the surface of the tire.
This will help loosen any dirt or grime that may be clinging to the tire.2. Use a garden hose to rinse off the tires. Be sure to use a high-pressure setting on the hose so that all of the dirt and grime is removed.
3. Use a clean cloth to dry off the tires. Make sure that you get rid of any moisture that is left on the surface of the tire.

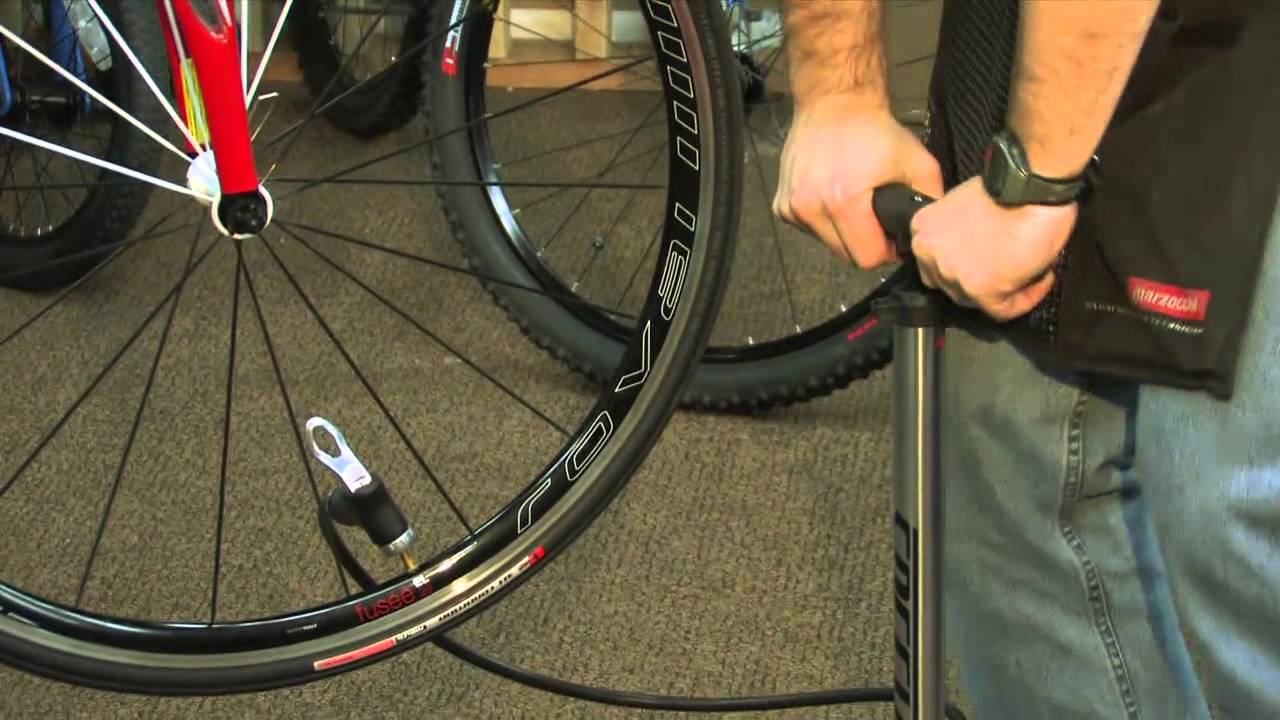
How to Inflate 700C Tires
Tires provide the only contact your bike has with the ground, so it’s important to keep them properly inflated. The ideal pressure for 700C tires is usually between 60 and 80 PSI. To inflate a 700C tire, you will need a pump with a Presta valve adapter.
You can find these adapters at most bike shops. Start by unscrewing the cap from the valve stem. Then, attach the adapter to the valve and screw it on snugly but not too tight.
Next, use your pump to add air to the tire until it reaches the desired pressure. Finally, remove the adapter and screw the cap back onto the valve stem.
- Open the valve on the Presta-type tire by unscrewing it counterclockwise with your fingers
- If it is tight, use a tire lever to loosen it
- Insert the nozzle of a hand pump into the valve and start pumping air into the tire
- Continue until the tire is firm but not rock hard
- You should be able to depress the tire with your thumb when it is properly inflated
- Remove the pump nozzle from the valve and screw on the cap clockwise to close it tightly
How To Pump A Bike Tyre
How Do You Pump Up a 700C Tire?
Assuming you have a Presta valve:1. Unscrew the cap at the top of the valve stem and pull it out.
2. Insert the tube into the tire so that the valve stem is sticking out through the hole in the rim.
3. Put some air into the tube using a pump (or CO2 cartridge if you’re fancy). Make sure not to overinflate – stop when the tire is firm, but still has some give to it.
4. Screw the cap back on to hold in the air, and voila!
You’ve successfully pumped up your 700c tire.
How Do You Pump Up a 700C Tube?
You will need a 700c tube, a pump, and an adapter.To begin, remove the valve cap from the tube and unscrew the valve nut. Next, insert the adapter onto the valve stem.
Then, use the pump to inflate the tube by placing the nozzle over the adapter and pumping until the tube is full. Finally, screw on the valve cap and you’re done!
How Do You Fill a Tire With a Presta Valve?
Assuming you’re talking about a bicycle tire:To fill a tire with a Presta valve, you’ll need a hand pump or an air compressor. If using a hand pump, start by unscrewing the cap at the top of the valve stem.
Next, fit the pump onto the valve and begin pumping air into the tire. You’ll know it’s full when the tire is firm to the touch. Finally, screw the cap back on to keep all the air in.
How Do You Put Air in Road Bike Tyres?
Road bike tires need air just like any other type of tire. The process is pretty much the same as well. You’ll need an air pump – either a hand-held one or one that you can attach to your bike – and either a Presta or Schrader valve adapter, depending on the valves on your tires.
To start, remove the cap from the valve stem on your tire. If you’re using a Presta adapter, simply screw it onto the valve stem. If you’re using a Schrader adapter, you’ll need to first unscrew the retaining nut before screwing on the adapter.
Once the adapter is in place, put the end of your air pump into it and start pumping.It’s important not to overinflate your tires. Most road bike tires have a maximum pressure of around 100 psi (pounds per square inch).
Check your tire sidewalls to find out what the maximum pressure is for yours – it will be listed in psi next to the word “maximum” (or sometimes “max”). Once you’ve reached that pressure, stop pumping and replace the valve cap (if applicable).
Credit: www.youtube.com
Presta Valve Adapter
Do you have a bike with Presta valves but want to use Schrader pumps and accessories? No problem! You just need a Presta valve adapter.
Presta valve adapters are small metal or plastic fittings that screw onto the end of your Presta valve. This allows you to use Schrader pumps, floor pumps, and other accessories with your Presta-valve bicycle tires. Most adapters also have a built-in valve core tool, so you can remove and replace your tire’s valve cores without having to carry a separate tool around.
Presta valve adapters are inexpensive and easy to find at most bike shops. They’re also small enough to fit in your pocket or saddlebag, so you can take them with you on rides in case you get a flat tire and need to use a public air pump.
Conclusion
If you have a road bike with 700C wheels, you’re going to need to know how to inflate your tires. Here’s a step-by-step guide:1. Attach the pump to the valve on your tire.
Make sure that the pump is securely attached so that air doesn’t escape while you’re pumping.
2. Start pumping air into the tire until it reaches the desired pressure. You can usually find this information on the side of the tire.
3. Once the tire is inflated, detach the pump and replace the cap on the valve. This will prevent any air from escaping from the tire.
4. Repeat steps 1-3 for each tire on your bike.