- Home
- Archive: September, 2023

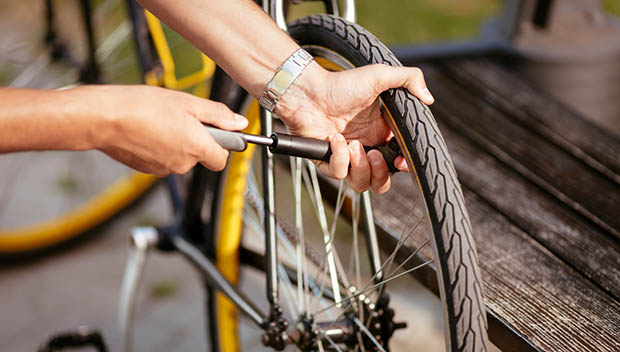
How to Inflate Thin Bike Tires
If you have a thin bike tire, it’s important to know how to inflate it properly. Otherwise, you could end up with a flat tire or even a blowout. Here’s what you need to do:
First, check the pressure of your tire. If it’s low, you’ll need to add air. Use a pump or an air compressor to add air to the tire until it reaches the recommended pressure.
Next, check the bead of the tire. The bead is the part of the tire that sits on the rim of the wheel. If the bead is not seated properly, air can escape from the tire and cause a flat.
To fix this, use a lever to push the bead down onto the rim.Finally, double-check the pressure of your tire and make sure that there are no leaks. Now you’re ready to ride!
- You will need an air pump in order to inflate your bike tires
- The type of air pump you use will depend on the valves on your tires
- If your tires have Presta valves, you will need a Presta-compatible air pump
- If your tires have Schrader valves, you will need a Schrader-compatible air pump
- Remove the cap from the valve on the tire that you wish to inflate
- Place the tip of the air pump nozzle onto the valve and begin pumping air into the tire until it is at the desired pressure level
- Once the tire is inflated, replace the cap on the valve and remove the air pump nozzle

Credit: www.diymountainbike.com
How Do You Pump Air into a Skinny Bike Tire?
Assuming you don’t have a pump and need to do it with your mouth:– Remove the cap from the valve stem on the tire.
– Put your mouth over the valve stem and blow into it.
– Keep blowing until the tire is inflated to the desired pressure.
– Replace the cap on the valve stem.
How Do You Pump Air into a Presta Valve?
Presta valves are common on road bikes and require a different technique to get air into them. Here’s how it’s done:Unscrew the valve cap and gently pull up on the valve itself.
You should feel a small amount of resistance. Insert your bike pump nozzle onto the valve (it should fit snugly) and start pumping air into the tire. Keep an eye on the pressure gauge – when you reach your desired PSI, stop pumping!
Screw the valve cap back on tightly to prevent any air from escaping.And that’s it! Now you know how to pump air into a Presta valve tire.
How Do You Pump a Bike Tire With a Presta Valve Without Adapter?
If you have a Presta valve and want to pump up your bike tire without an adapter, here’s what you need to do:unscrew the top of the valve so that the small metal pin is exposed
screw the pump onto the valve, making sure that the metal pin on the valve lines up with the hole in the pump
once air starts flowing into the tire, quickly unscrew the pump slightly so that air doesn’t escape back out through the PumpDoing this will ensure that you get a tight seal onthe Presta valve and can successfully Pump up your bike tire.
Can You Use a Normal Bike Pump on a Presta Valve?
If you’re a cyclist, sooner or later you’re going to have to deal with a flat tire. And if you’re dealing with a Presta valve, you might be wondering if you can use a normal bike pump on it.The answer is yes, you can use a normal bike pump on a Presta valve.
However, there are a few things to keep in mind.First of all, make sure that the pump you’re using has an air chuck that’s compatible with Presta valves. Some pumps have an air chuck that’s only compatible with Schrader valves, so double check before you start pumping.
Secondly, when attaching the air chuck to the Presta valve, make sure that the lever is in the “open” position. If the lever is in the “closed” position, it won’t allow air to flow into the tire.And finally, once you’ve finished pumping up your tire, remember to close the lever on the Presta valve.
This will prevent air from escaping from your tire as you ride.
How to Pump a Mountain Bike Bicycle Tire With Presta Valve
How to Pump a Bike Tire With a Presta Valve
If you ride a bike with thin tires, you’ve probably got a Presta valve on your wheel. Here’s how to pump it up:1. Open the valve by unscrewing the cap counterclockwise.
2. Place the pump nozzle over the valve and push down to open it.
3. Pump the tire until it reaches the desired pressure (usually around 80 psi for road bikes).
4. Remove the nozzle and screw the cap clockwise to close the valve.
Conclusion
Assuming you don’t have a flat tire and are just trying to inflate a thin bike tire, here’s what you do:-Remove the valve cap and use your bike pump to start pumping air into the tire.
-If you don’t have a bike pump, you can use a hand pump or even blow into the valve.
-Once the tire is inflated, check the pressure with a pressure gauge to see if it’s at the recommended PSI for your tires.
-If it’s not, add or release air until it is.
-Replace the valve cap and enjoy your ride!

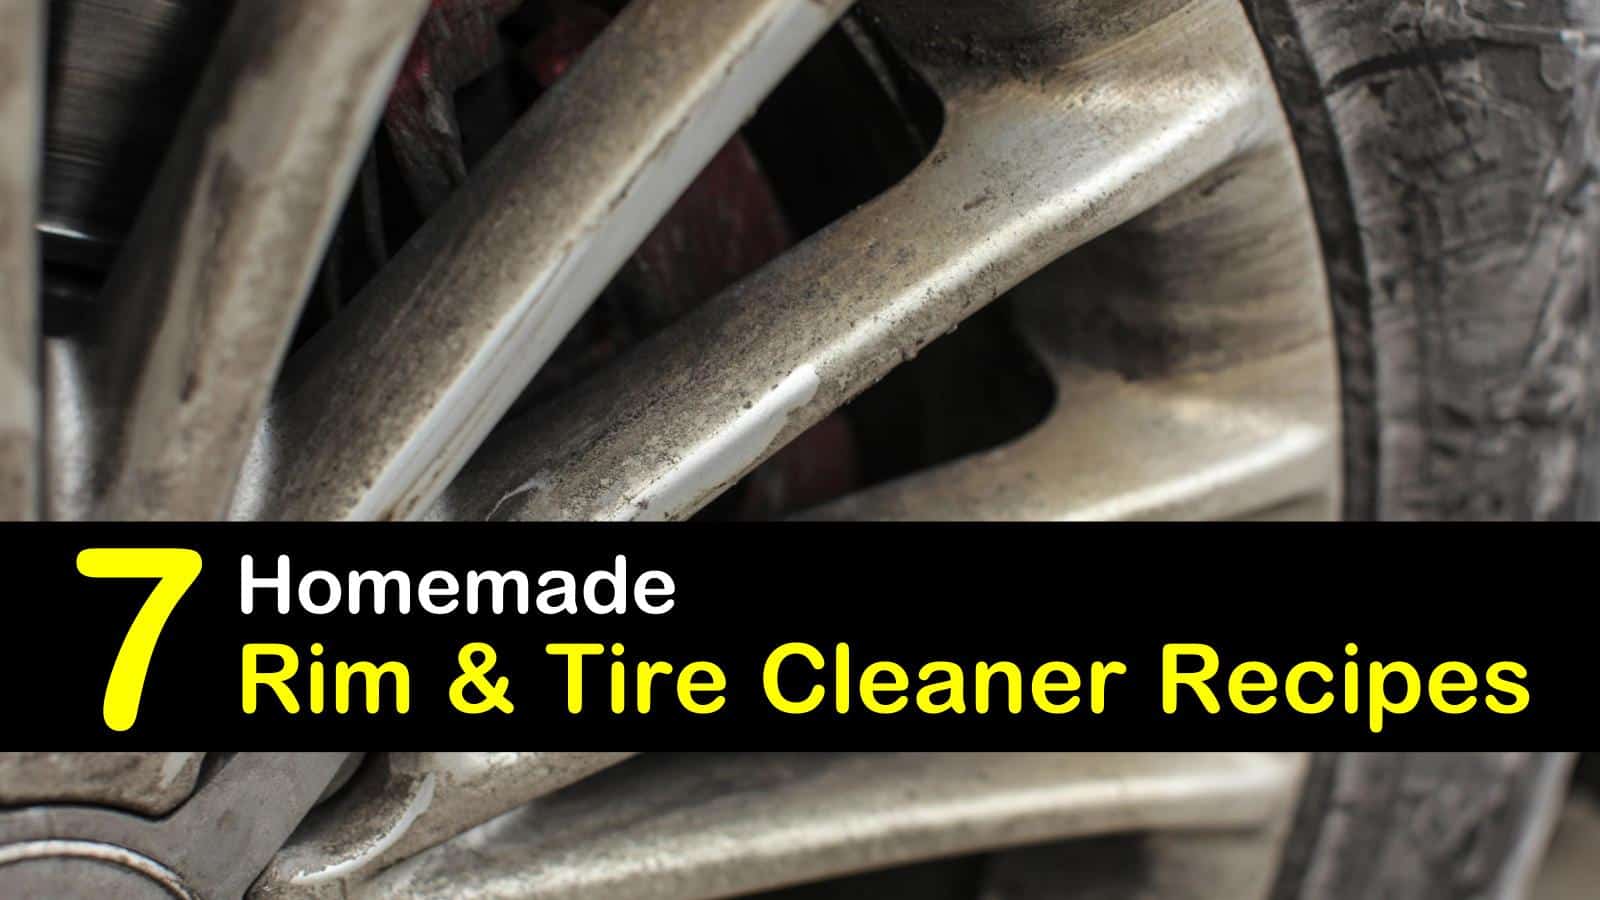
How to Detail Wheels And Tires
Detailing your wheels and tires is important to keeping your car looking its best. Here are some tips on how to detail them properly. First, start by cleaning the wheels with a wheel cleaner and a brush.
Be sure to get in all the nooks and crannies. Then, move on to the tires. Clean them with a tire cleaner and a sponge or brush.
Again, be sure to get in all the crevices. Finally, dry everything off with a clean towel or cloth.
- Rinse the wheels and tires with water to remove any loose dirt or debris
- Apply a generous amount of wheel cleaner to the wheels and tires, and scrub with a brush to loosen any stubborn dirt
- Rinse the wheels and tires again with water
- Add a few drops of dish soap to a bucket of warm water, and use this solution to wash the wheels and tires
- Scrub thoroughly with a brush to remove any remaining dirt or grime
- Rinse the wheels and tires one last time with clean water
- 6 Allow the wheels and tires to air dry completely before moving on to the next step
Credit: www.tipsbulletin.com
What Do Professional Detailers Use to Clean Wheels?
There are a few different ways that professional detailers clean wheels. One way is to use a wheel cleaner that is specifically designed for the type of wheel you have. Another way is to use a pressure washer with a brush attachment.
You can also use a garden hose with a sprayer attachment and some elbow grease! Whichever method you choose, make sure you rinse the wheels thoroughly afterwards to remove any cleaner residue.
How Do I Detail My Wheels?
Assuming you would like tips on how to clean and detail your wheels:Start by washing your wheels with a quality wheel cleaner. Be sure to use a brush designed specifically for cleaning wheels – do not use a regular household brush, as this can damage the finish of your wheels.
Rinse the cleaner off completely and dry the wheels with a soft cloth.Once the wheels are clean, you can start working on the detailing. Use a quality metal polish to clean and protect the metal surfaces of your wheels.
Apply the polish with a soft cloth, using circular motions until the entire surface is covered. Allow the polish to dry and then buff it off with another soft cloth.To clean and protect your wheel’s tires, use a tire shine gel or spray.
Apply it evenly across the surface of the tire, being careful not to get any on the wheel itself. Allow it to dry completely before driving or else you run the risk of getting tire marks on your freshly cleaned and detailed wheels!
How Can I Clean My Tires And Rims at Home?
It’s no secret that keeping your car clean can be a bit of a pain. But, when it comes to tires and rims, it’s important to make sure they’re sparkling clean – not just for looks, but for safety purposes as well. Here are a few tips on how you can clean your tires and rims at home:
1. First things first – gather your supplies. You’ll need a garden hose, bucket, soap (dish soap or car shampoo will do), sponge or brush, and some elbow grease!2. Start by hosing down your tires and rims with water.
Be sure to get in all the nooks and crannies – you don’t want any dirt or grime left behind.3. Next, mix up some soapy water in your bucket and start scrubbing away at the tires and rims with your sponge or brush. Pay special attention to any areas that seem extra dirty.
4. Once you’re satisfied that everything is nice and clean, rinse off the soap with more water from the hose.5 . And that’s it!
Your tires and rims should now be shining like new – ready to take on the open road (or wherever else your adventures may take you).
Why Do Detailers Wash Wheels First?
Detailers wash wheels first because they are the dirtiest and most difficult part of the car to clean. The grime and brake dust build up on the wheels can be very stubborn and hard to remove. By washing the wheels first, it allows the detailer to focus on getting them clean without having to worry about the rest of the car.
HOW TO CLEAN YOUR WHEELS AND TIRES !!
How to Clean Tires With Household Products
If your tires are looking a little lackluster, you can clean them up with some common household products. All you need is some dish soap, baking soda, and white vinegar.Start by mixing together 1/2 cup of dish soap with 1/4 cup of baking soda and 1/4 cup of white vinegar.
This will create a foamy mixture that you can use to scrub your tires.Apply the mixture to your tires and let it sit for about 15 minutes. This will give the cleaning agents time to break down any dirt and grime on your tires.
After 15 minutes, use a brush or sponge to scrub the tires in a circular motion.Rinse the tires off with water and dry them with a clean towel. You should notice a significant difference in the appearance of your tires after following these simple steps!
Conclusion
If you’re looking to get your wheels and tires looking their best, there are a few things you can do to make sure they’re properly detailed. First, start by cleaning the wheels with a quality wheel cleaner. Then, move on to the tires and clean them with a tire dressing or soap and water.
Once everything is clean, you can apply a protectant to help keep it looking good for longer. With just a little bit of effort, your wheels and tires will be looking their best in no time!

How to Replace Road Bike Tires
Road bike tires don’t last forever. Even if you take good care of them, eventually they’ll need to be replaced. Here’s a quick guide on how to replace your road bike tires.
You’ll need a few things: a new tire, a tire lever, and some patience. First, use the tire lever to pry off the old tire. Be careful not to damage the wheel in the process.
Next, line up the new tire with the wheel and carefully push it on. Again, be careful not to damage the wheel. Once the new tire is in place, inflate it to the recommended pressure listed on the side of the tire.
And that’s it! You’ve successfully replaced your road bike tire.
- Unscrew the bolts that hold the wheel in place with a wrench and remove the tire
- Insert the new tire into the wheel, making sure that it is seated properly
- Screw the bolts back in place, finger-tightening them first before using the wrench to finish tightening them
- Inflate the tire to the proper pressure with a pump
Credit: www.active.com
Can You Replace Bike Tires Yourself?
If you’re like most cyclists, you probably don’t think much about your bike tires until they go flat. Then, all of a sudden, you need to know how to replace them! Don’t worry, it’s not as difficult as it may seem.
With a little bit of know-how, you can easily change your own bike tires.Here’s what you’ll need:– A new bike tire (or two if you’re changing both at the same time)
– A tire lever (or two if you don’t have one that’s long enough)
– A patch kit (optional)
– An air pump (optional)
To start, loosen the bolts that hold the wheel in place. You’ll find these on either side of the wheel. Once they’re loose, pull the wheel out and set it aside.
Next, use your tire levers to pry the old tire off of the rim. If it’s stubborn, try inserting the lever under the bead of the tire (the part that sits on top of the rim). Once you’ve got one side off, work your way around to the other side until the tire is completely off.
At this point, you can decide whether or not to patch any holes in your old tube or simply replace it with a new one. If you do need to patch a hole, follow instructions included with your patch kit. Now it’s time to put on the new tire!
Start by putting one edge of the tire onto the rim and then working your way around until it’s fully seated. Be careful not to pinch or damage your new tube in this process! Finally, reattach your wheel and tighten down those bolts! Give yourself a pat on the back – changing bike tires isn’t so difficult after all!
How Often Should Road Bike Tires Be Replaced?
Bike tires are one of the most important parts of your bike, and they need to be replaced regularly to keep your bike running smoothly. Depending on how often you ride and the conditions you ride in, you may need to replace your tires as often as every few months, or only once a year.If you ride frequently in wet or icy conditions, or if you do a lot of mountain biking on rough trails, you’ll need to replace your tires more often than someone who only rides on paved roads.
The same goes for if you’re a heavier rider; the extra weight will wear out your tires faster.In general, though, it’s a good idea to inspect your tires at least once a month to see if they need to be replaced. If they’re starting to look worn down or have any cracks or bald spots, it’s time for new ones.
And even if they look fine, it’s still a good idea to replace them every few years just to be safe. After all, your safety is worth the cost of a new set of bike tires!
How Long Does It Take to Change a Road Bike Tire?
It usually takes around 15-20 minutes to change a road bike tire. This includes taking the old tire off, putting the new tire on, and making sure that the brakes and gears are all properly adjusted. If you’re not familiar with changing a bike tire, it’s probably best to watch a tutorial or ask someone who is before attempting it yourself.
How Do I Change the Rear Tire on My Road Bike?
Assuming you don’t have a quick release on your rear axle, you’ll need a wrench that fits the nuts on your axle. You’ll also need a new inner tube (assuming the puncture is in the tube and not the tire), and some tire levers. Park your bike in an area where you can comfortably work on it without blocking traffic or putting yourself in danger.
Put your bike in a stand if you have one, or flip it over so the drivetrain side is facing up if you don’t.Remove the wheel from the frame by first removing the brake caliper (if applicable). There are two ways to do this- either by removing the bolts that hold it in place, or by opening up the quick release lever that holds it tight against the frame.
Once the caliper is removed, loosen one of the nuts holding the wheel in place with your wrench, and then unscrew both nuts until they’re completely off. The wheel should now come free from the frame. If it’s stuck, make sure both nuts are completely unscrewed before gently prying it loose with your hands.
Now that the wheel is off, use your tire levers to pry off one side of the tire (the beveled edge should face outwards when you put it back on). Work slowly and carefully so you don’t damage either the tire or rim. Once one side is off, remove any debris from inside the rim before inserting a new tube and replacing the tire.
Make sure to line up all ofthe valve stem holes before putting air into tbe tube; otherwiseyou risk pinching tbe tube as yon inflate it which will cause another flat tire!
How To Change A Tyre On Your Road Bike
How to Change a Road Bike Tire Without Levers
If you’re new to cycling, or have never changed a road bike tire before, the process may seem daunting. But with a little practice, it’s actually quite easy to do! Here’s a step-by-step guide on how to change a road bike tire without levers:
1. First, remove the wheel from the bike frame. If your bike has quick release skewers (the lever is on the outside of the axle), simply open them up and pull the wheel out. If your bike has thru-axles (the axle goes through the center of the wheel), you’ll need an allen key to loosen and remove them.
2. Once the wheel is off, flip it over so that you can access the tire. Use your fingers to pry off one side of the tire bead (the edge of the tire that sits on top of the rim). It takes a bit of effort, but be careful not to damage or puncture the tube!
3. Once one side of the bead is loose, gently work your way around until both sides are completely off. The old tube can now be removed from inside the tire. Inspect it for any holes or punctures and discard it if necessary.
4 . To install the new tube, start by inflating it slightly so that it holds its shape .
Conclusion
Road bike tires are one of the most important parts of your bike. They provide traction and stability on the road, and they can be a big factor in how your bike handles. If you’re looking to replace your road bike tires, there are a few things you need to keep in mind.
First, you need to know what size tire you need. You can usually find this information on the side of your current tires. Once you know the size, it’s time to choose a new tire.
There are a variety of different types of road bike tires, so it’s important to do some research before making a purchase.Once you’ve chosen a new tire, it’s time to install it. Road bike tires are relatively easy to install, but if you’re not comfortable doing it yourself, there are plenty of videos and tutorials online that can help walk you through the process.
With new road bike tires installed, you’ll be ready to hit the pavement and enjoy the ride!

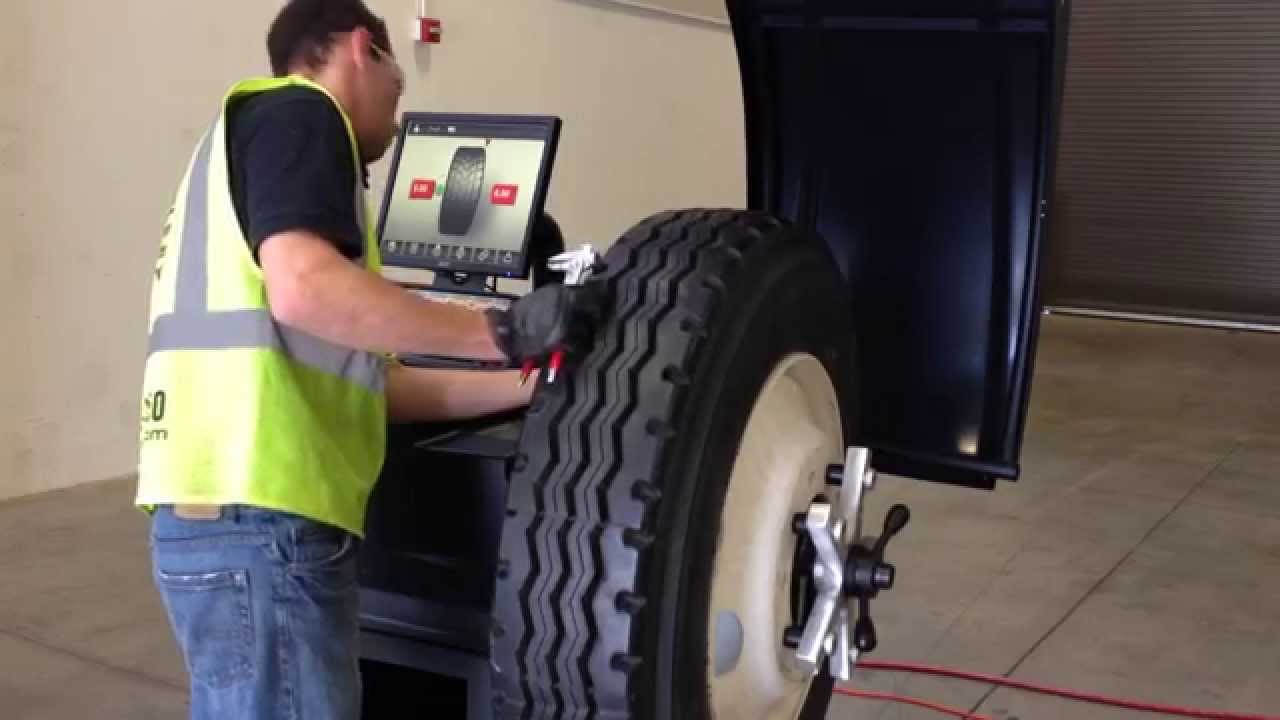
How to Balance Big Truck Tires
If you’re like most people, you probably don’t think about your truck’s tires very often. But if you want your truck to last, it’s important to keep them in good shape. One of the most important things you can do for your truck’s tires is to keep them balanced.
Here’s a quick guide on how to balance big truck tires.
- Park your truck on a level surface and set the parking brake
- Place blocks under the trailer’s tires if necessary to prevent it from rolling while you’re working
- Remove the hubcaps or wheel covers from the front wheels, if necessary
- Loosen the lug nuts on the front wheels with a tire iron or socket wrench, but don’t remove them yet
- Jack up the front of the truck with a floor jack and support it with jack stands placed under the frame near the axle on each side
- Spin each front tire to find its heaviest point, marked by a chalk line or paint mark made earlier when you removed it from service 7
- Suspend each balance weight on one of its arms over the heavy point of the tire until it falls into place 8 Re-install each wheel cover or hubcap, then lower your truck to the ground and finish tightening down all four lug nuts with your tire iron or socket wrench
Credit: www.youtube.com
How Do You Balance Oversized Tires?
Oversized tires can be a great way to improve your vehicle’s performance, but they can also be a bit of a handful to deal with. Here are a few tips on how to balance oversized tires:1. Check the air pressure in your tires regularly.
Overinflated tires can lead to instability and increased risk of blowouts, so it’s important to keep an eye on the pressure.2. Use tire weights or balancing beads to help offset the weight of the larger tires. This will help keep your vehicle stable and reduce wear on your suspension components.
3. Be mindful of your speed when driving with oversized tires. Sudden starts and stops can cause problems, so take it easy out there!4. Have your alignment checked regularly.
Oversized tires can put extra stress on your suspension and cause premature wear if they’re not properly aligned.
Do Big Truck Tires Get Balanced?
Truck tires are big and heavy, so it’s important to make sure they’re properly balanced. Otherwise, the truck will vibrate and shake, which can be uncomfortable for the driver and passengers and can also cause damage to the truck.Most tire shops will balance truck tires as part of their normal service.
The process is similar to balancing car tires, but the weights used are much larger. Typically, four ounces (113 grams) of weight are added to each wheel.
How Can I Balance My Truck Tires at Home?
It is important to keep your truck tires in balance. This can help to prevent premature wear, and can also improve your fuel economy. You can have your truck tires balanced at a shop, or you can do it yourself at home with a few simple tools.
To balance your truck tires at home, you will need:-A tire balancing machine (available at most auto parts stores)
-A set of weights (also available at most auto parts stores)
-An air compressor (if you don’t have one, you can borrow one from a friend or neighbor)Here’s how to do it:
1. Park your truck on a level surface and engage the parking brake.
Remove the hubcaps (if applicable).
2. Jack up each tire and remove the wheel. Place the wheel on the tire balancing machine.
3. Add weight to the machine until it shows that the tire is balanced. The amount of weight required will vary depending on which side of the tire is heavier.
4.) Repeat this process for each tire and then re-install the wheels on your truck.
Lower the jack and torque the lug nuts to their proper specification.
Are Bigger Tires Hard to Balance?
No, bigger tires are not hard to balance. In fact, most people find that it is easier to balance larger tires than smaller ones. The reason for this is that the weight of the tire is evenly distributed over a larger surface area.
This makes it less likely for the tire to become unbalanced.
Balancing a commercial truck wheel & Tire
Commercial Truck Tire Balancing near Me
If you’re a commercial truck driver, then you know how important it is to have properly balanced tires. Not only does it improve your fuel economy, but it also helps extend the life of your tires. If you’re looking for a tire balancing service near you, then we’ve got you covered.
We have a wide network of tire balancing services across the country that can help keep your commercial truck tires in tip-top shape. Whether you need a quick balance check or a full tire rotation and balance, our team can help get the job done quickly and efficiently.Give us a call today or fill out our online form to get started.
We’ll be happy to provide you with a free quote and answer any questions you may have about our services.
Conclusion
If you’re a trucker, then you know how important it is to have well-balanced tires. Not only does it make for a smoother ride, but it also helps with fuel economy and extends the life of your tires. Here are some tips on how to balance big truck tires:
1. Use a tire balancer. This is the easiest and most accurate way to balance your tires.2. Check your tire pressure regularly.
Keeping your tires properly inflated will help with balancing them.3. Rotate your tires regularly. This will help distribute the wear and tear evenly, which can help with balancing issues over time.
4. Get your wheels aligned if necessary. Sometimes, unbalanced tires are simply due to misaligned wheels.

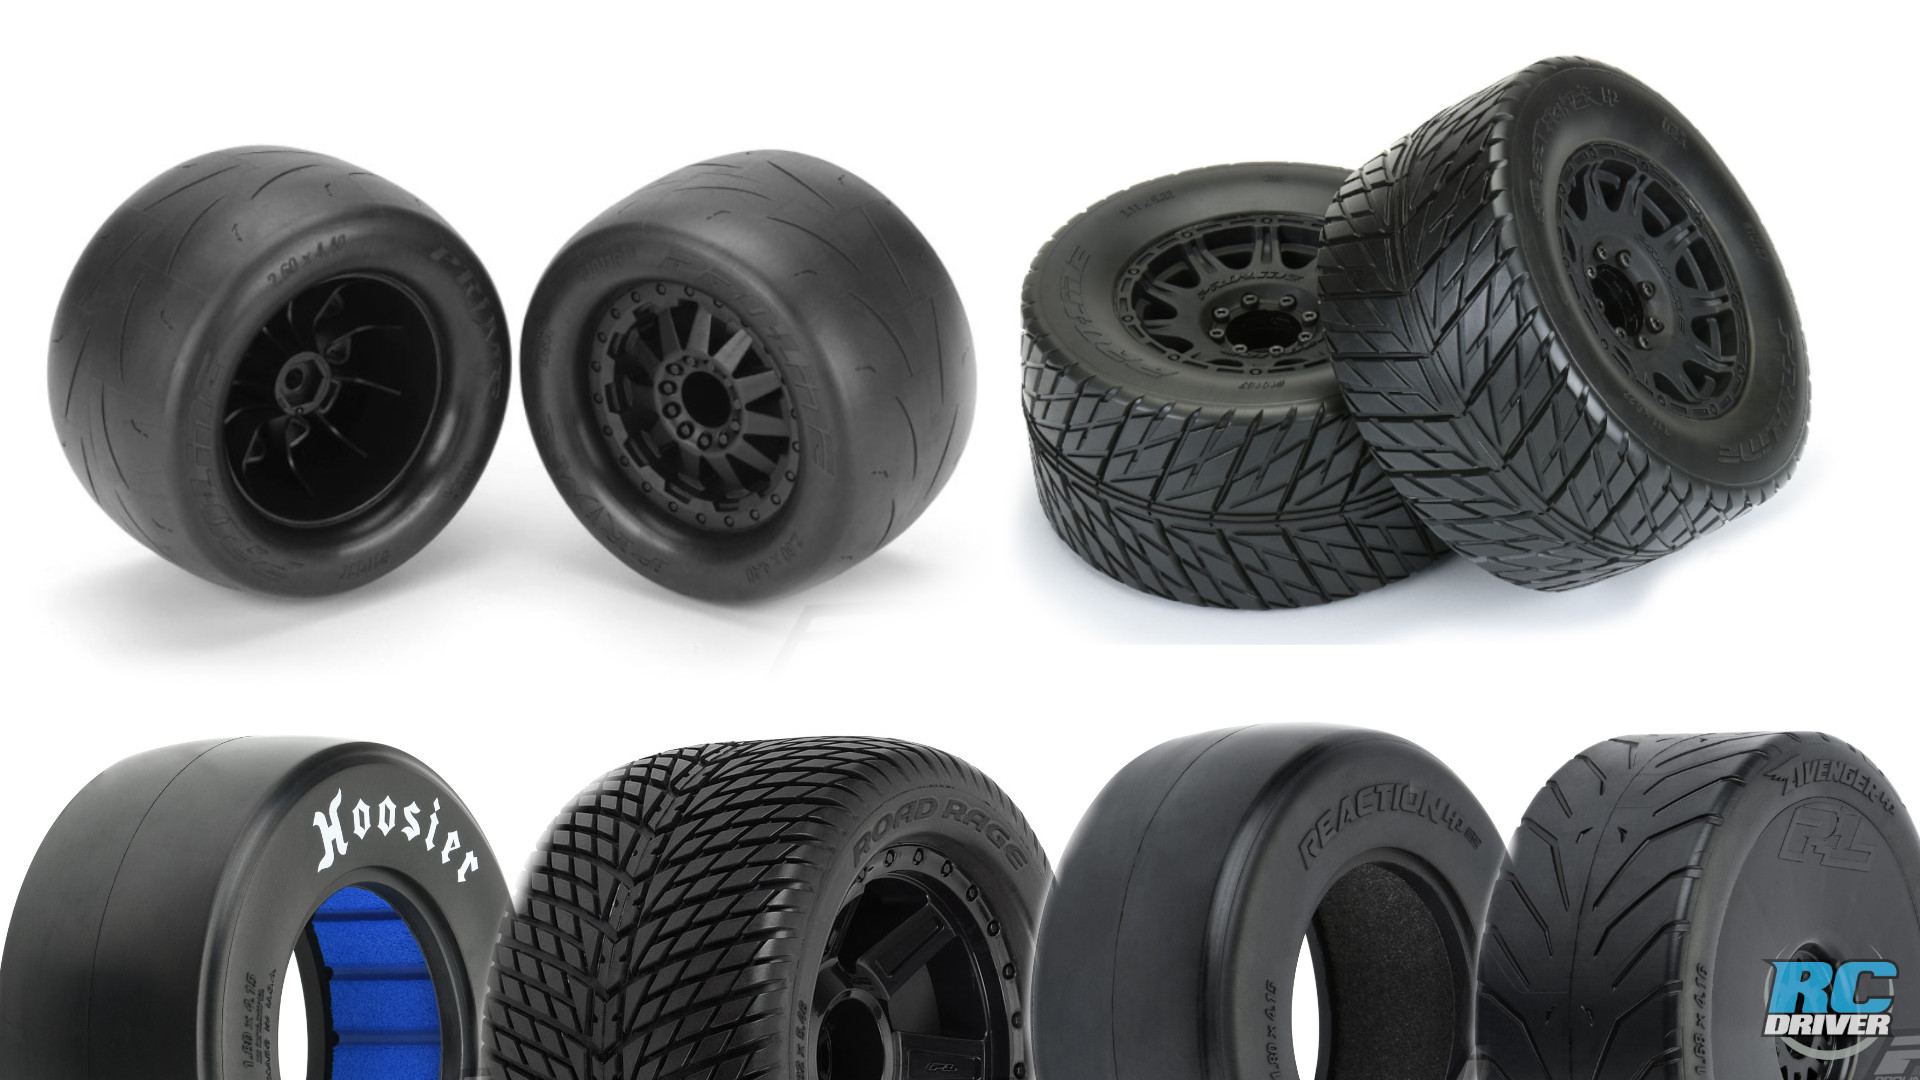
How to Prep Rc Drag Tires
Prepping your rc drag tires is important if you want to get the most out of them. Here are some tips on how to prep your tires:1. First, clean the tires with a degreaser or soap and water to remove any contaminants.
2. Next, sand the tires with medium-grit sandpaper to rough up the surface. This will help the tire grip better.3. Finally, apply a thin layer of traction compound to the tires.
This will help increase traction and make the car faster.
- Decide which drag racing class you will be competing in
- This will determine the size and type of tires you will need
- Purchase the correct size and type of tires for your class
- Make sure to get tires that are specific for drag racing and not just general purpose tires
- Clean the wheels and rims thoroughly before mounting the tires
- Any dirt or debris on the surface can cause problems with tire adhesion
- Mount the tires onto the wheels using a tire machine or by hand if you have experience doing so
- Be careful not to damage the tire during installation
- 5 Inflate the tires to their recommended pressure levels before heading to the track
“Tire Prep” RC No Prep – How To Prep your tires for race day
How Do You Prepare Rc Drag Tires?
To prepare RC drag tires, you will need the following items:-Tire balancer
-Stick-on weights
-A drill
-CA glue or tire cement
-A hobby knife
-Sandpaper (220 grit)Start by balancing the tires. This is done by adding stick-on weights to the inside of the rim until the tire is balanced.
You can use a commercial tire balancer, or make your own using a piece of string and a pencil. Once the tires are balanced, they should be marked so you know which side is up. Next, drill two holes in each tire, about 1/2″ apart.
These holes will be used to mount the tires to the wheels.Now it’s time to glue or cement the tires to the wheels. If you are using CA glue, apply a generous amount to both surfaces and let it cure for 24 hours before mounting the tires on the car.
If you are using tire cement, follow the directions on the package. Once the adhesive has set, mount The tires on The wheels and let them dry overnight before proceeding to The next step.
The final step is to sand down The treads of The tires with 220 grit sandpaper until they are smooth and even.
This will help reduce friction and heat build-up during drag racing events.
How Do You Soften Rc Drag Tires?
One way to soften RC drag tires is to use a tire softener. This is a chemical that you can add to the tires that will make them softer and more pliable. There are a few different brands of tire softener on the market, so you will need to experiment to find one that works best for your particular tires.
Another way to soften RC drag tires is to use heat. You can either use a heat gun or hair dryer on low heat to warm up the tires before you race. This will make them softer and easier to grip the track.
How Do You Make Rc Drag Tires Sticky?
When it comes to making your RC drag tires sticky, there are a few things you can do to help ensure optimal traction. First and foremost, be sure to start with a clean surface. Any dirt or debris on the tires will only serve to create more resistance, making it harder for the tires to get traction.
Next, use a tire prep compound designed specifically for RC drag racing. This type of compound will help to soften the rubber on the tires, making them more pliable and able to grip the track better. Finally, make sure that your track is in good condition.
If there are any cracks or irregularities, these can also cause your tires to lose traction. By taking these simple steps, you can help ensure that your RC drag tires have the best possible chance of getting optimal traction.
How Long Do I Boil Rc Tires?
It is important to know how long to boil RC tires, as boiling them for too long can cause the tires to become deformed. The recommended time to boil RC tires is between 3-5 minutes. Boiling the tires for any longer than 5 minutes can cause irreparable damage to the tire.
Credit: www.rcdriver.com
Rc Drag Tire Conditioner
If you want your RC drag tire conditioner to last, then you need to take care of it. Here are a few tips on how to do that:1. Store it in a cool, dry place.
This will help prolong its shelf life.2. Keep the lid tightly sealed when not in use. This will prevent the evaporation of the volatile components that give it its performance-enhancing properties.
3. When applying the conditioner to your tires, make sure to evenly distribute it across the surface. Wiping it on haphazardly will result in an uneven application and reduced effectiveness.
Conclusion
Prepping your RC drag tires is important if you want to ensure that they provide optimal grip and traction on the track. Here are a few tips on how to prep your RC drag tires:1. First, clean the tires with a cotton swab dipped in rubbing alcohol.
This will remove any dirt or debris that could potentially interfere with the tire’s grip.
2. Next, apply a thin layer of tire sauce to the treads of the tire. Tire sauce is a sticky substance that helps to increase traction.
3. Finally, use a hairdryer to heat up the tires before racing. This step is optional, but it can help to further increase traction by making the tire sauce more effective.

How to Install Gatorskin Tires
Gatorskin tires are a great option for those who want the durability of a Kevlar tire with the puncture resistance of a latex tube. Here’s how to install them:1. Remove the old tire and inner tube from the wheel.
If you’re using rim brakes, be sure to loosen the brake pads before removing the tire.
2. Inspect the wheel for any damage and make sure that it’s clean before installing the new tire.
3. To avoid pinching the tube, start by installing the valve stem in the hole at the rim.
Then, work your way around the tire, evenly seating it on the rim.
4. Inflate the tire to about 60 psi and then check to see that it’s seated properly on the rim all around. If not, let some air out and try again until it’s seated correctly.
5 .Fill up your new Gatorskin tires with sealant according to manufacturer’s directions (usually about 2oz per tire).
- Obtain two Gatorskin tires of the same size and model
- Using a tire iron, loosen the bolts on each side of the wheel that you will be replacing the tire on
- Remove the old tire from the wheel and set it aside
- Place the new Gatorskin tire onto the wheel, making sure that it is properly aligned
- Use the tire iron to tighten the bolts on each side of the wheel, being careful not to over-tighten them
- 6 Lower the car back down to the ground and repeat these steps for the other tire

Credit: www.biketiresdirect.com
How Do You Install Gatorskin?
If you’re looking to install Gatorskin tires, the process is actually quite simple. Here’s a step-by-step guide to get you started:1. Start by removing the old tires from your bike.
You’ll need a tire lever or two to help with this process.2. Once the old tires are off, clean the rims of any dirt or debris.3. Take your new Gatorskin tire and line it up with the rim, making sure that the bead is seated correctly.
4. Begin inflating the tire using a hand pump or CO2 cartridge. Inflate to the recommended pressure listed on the sidewall of the tire.5. Continue around the circumference of the tire, seating each bead as you go until both sides are fully seated on the rim.
Finish inflating to full pressure and double check that everything looks good before heading out for a ride!
What Psi Should Gatorskin Tires Be?
Gatorskin tires are high-performance, puncture-resistant tires made by Continental. They’re a popular choice for road cyclists because they offer excellent protection against flats.So what PSI should you inflate your Gatorskins to?
It depends on a few factors, including rider weight, tire width, and desired riding comfort.For most riders, we recommend inflating Gatorskins to a pressure of 100-120 PSI. This gives the tire a good balance of comfort and performance.
If you’re heavier or carrying extra gear, you may want to inflate to the higher end of that range. If you’re lighter or looking for a smoother ride, you can go closer to the lower end.Of course, it’s always best to follow the maximum pressure rating printed on the side of your tire (usually 110 or 120 PSI).
And remember: when in doubt, air up!
How Do You Remove Continental Gatorskin?
Continental Gatorskin tires are designed for durability and long life, but eventually they will need to be replaced. The process of removing a Continental Gatorskin tire is not difficult, but it does require some special tools and knowledge. Here are the steps to remove a Continental Gatorskin tire:
1. Park your vehicle on a level surface and engage the emergency brake. Loosen the lug nuts on the wheel with the Continental tire using a lug wrench, but do not remove them completely.2. Place a jack under the frame of your vehicle and raise the car until the wheel is off the ground.
Remove the lug nuts and carefully pull the wheel off of the axle.3. Use a pry bar or screwdriver to loosen the bead of the tire from its rim. You may need to use some force, but be careful not to damage either component.
Once one side is loose, work your way around the entire circumference of the tire until it is completely removed from its rim.4._ Inspect both sides ofthe bead seat onthe rim for any damage or debris that could prevent proper seatingofa newtire._ Cleanand/orrepair as necessarybefore proceedingto step 5._ If everything looks good, you’re readyto installthe newtire!
Do Gatorskins Slow You Down?
Gatorskins are a type of tire designed to be resistant to punctures. They are made with thick walls and an extra layer of Kevlar or other material in the sidewall. This makes them heavier than regular tires, which can slow you down on the road.
However, if you’re riding on rough terrain or in an area with a lot of debris, Gatorskins can help you avoid flats and keep your bike rolling.
Continental Gatorskin How To Install
How to Set a Bead on a Bike Tire
If you’re a fan of biking, you know that one of the most important things to keep in mind is tire pressure. Not only does this affect your speed and pedaling efficiency, but it can also be a safety issue if your tires are too low. So how do you make sure your tires are at the perfect pressure?
By setting a bead on your bike tire, of course!Here’s what you need to know about setting a bead on a bike tire:1. You’ll need an air pump – preferably one that attaches to your bike frame so you can Pump as you ride.
If not, any small hand held air pump will do the trick.2. Check the maximum psi (pounds per square inch) rating for your tires – this will be printed on the sidewall of the tire. You don’t want to overinflate, as this could cause the tire to burst while riding.
3. Inflate your tires until they reach the desired pressure – again, using the psi rating as a guide. If you’re unsure of what PSI to use, consult with your local bike shop or look up an online chart that lists pressures for different types of terrain and riding conditions (e.g., road vs off-road).4 Once both tires are inflated, release some air from each one until beads on both sides of BOTH tires are seated evenly around The rim .
This is important! Uneven seating can cause premature wear and tear on your tires, as well as affect their performance while riding.
Conclusion
If you’re looking for a durable tire that can handle all kinds of riding conditions, then you should definitely consider Gatorskin tires. Here’s a quick guide on how to install them:1. Start by removing the old tires from your wheels.
You’ll need a tire lever or two to help with this.2. Once the old tires are off, clean up the rims with some soapy water. This will help ensure that the new tires seat properly.
3. Take your new Gatorskin tire and line it up with the rim, making sure that the printed side is facing outwards.4. Use your hands to work the tire onto the rim, starting at one end and working your way around until it’s fully seated. If you find it difficult to do this, you can use a tire lever (or two) to help get things started.
Just be careful not to pinch the tube!
5. Inflate the tire to its recommended pressure using a pump or CO₂ cartridge – never use a car air compressor! And that’s it!

How to Read Wear Bars on Tires
One of the easiest ways to tell when your tires are beginning to wear down is to look at the wear bars. These are raised sections of rubber that are located in the tread grooves, and they act as indicators for how much tread is left on the tire. When the tread wears down to the point where the wear bars are flush with the rest of the tire, it’s time to replace them.
Here’s a quick guide on how to read wear bars and know when it’s time for new tires.
- Look at the tread of your tires to see if there are any wear bars present
- If you see wear bars, that means the tread on your tires is getting low and you will need to replace them soon
- The wear bars are located at the bottom of the tread grooves and are raised slightly above the rest of the tread
- They act as an indicator of how much tread is left on your tires
- Once the wear bars become flush with the rest of the tire, it’s time to replace them

Credit: www.prioritytire.com
What Depth are Wear Bars on Tires?
Most passenger car tires have tread wear bars that are designed to show when the tire has worn down to the point where it needs to be replaced. These bars are usually located in the center of the tread, and they can be either raised or flush with the rest of the tread. The depth of these bars varies depending on the manufacturer, but they are generally between 2/32 and 4/32 of an inch deep.
What Do Tire Wear Bars Tell You?
Tire wear bars are indicators of when your tire needs to be replaced. They are small raised areas in the tread of your tire that become visible when the tread has worn down to a certain depth. The depth that the wear bars reach will vary depending on the type of tire, but is typically between 2/32 and 4/32 of an inch.
Once the wear bar is visible, it is time to replace your tire.
Do You Measure Tires from the Wear Bar?
Yes, you measure tires from the wear bar. The wear bar is located at the bottom of the tread and is an indicator of how much tread is left on the tire. To measure the amount of tread remaining, insert a penny into the tread with Lincoln’s head facing down.
If you can see all of Lincoln’s head, then you have less than 2/32″ of tread remaining and it’s time to replace your tires.
When Should I Replace My Wear Bar Tires?
As the name implies, wear bars are designed to show when your tire has worn down to the point where it needs to be replaced. Most tires have treadwear indicator bars molded into the tread at regular intervals around the tire. As the tire wears, these bars gradually become visible.
Once they’re flush with the surrounding tread, it’s time for new tires.Of course, there are other factors that can affect how quickly your tires wear out, including inflation pressure, alignment, and even driving habits. So if you’re unsure about whether it’s time for new tires or not, it’s always a good idea to consult with a qualified technician who can inspect your tires and give you an expert opinion.
What is a Tire Wear Indicator Bar? Quickly check if your tires are safe!
Tire Wear Bars Reddit
Tire wear bars are an important feature on your car’s tires. They help indicate when it is time to replace your tires. Here is some information about tire wear bars and how they work.
When you look at the tread on your tires, you will notice small raised bars in the grooves. These are called tire wear bars. They are designed to show when your tires need to be replaced.
As your tires wear down, the tread depth decreases. When the tread depth reaches the level of the tire wear bars, it is time to replace your tires.You may not always see the tire wear bars when you first start noticing that your traction is decreased or that your ride is becoming rougher.
That’s because they are designed to be slightly below the surface of the tread so they don’t become visible until the tire is nearly worn out. This helps prevent premature replacement of tires.If you wait too long to replace your tires after the tread wears down to the level of the tire wear bars, you risks compromising safety and performance.
So check your tread regularly and replace your tires when necessary!
Conclusion
It is important to check your tires regularly to ensure they are in good condition. One way to do this is to look for wear bars. Wear bars are raised areas of rubber that indicate when a tire is worn down and needs to be replaced.
They are usually located in the center of the tread, and you can feel them with your fingers. If you see wear bars on your tires, it’s time for new ones!