- Home
- Blog

How to Change Tires Manually
If you find yourself stranded on the side of the road with a flat tire, you may not know how to change it. Changing a tire is a simple process that anyone can do, as long as they have the right tools. All you need is a lug wrench and a jack.
With these two things, you can easily change your own tire in no time.
- Park your car in a safe location and turn off the engine
- Loosen the lug nuts on the wheel that you need to change using a wrench
- Do not remove them completely, just loosen them so they can be removed by hand later
- Lift up the car with a jack and secure it in place with jack stands
- Remove the lug nuts and then the tire from the wheel
- Place the new tire on the wheel and screw on the lug nuts by hand as tight as possible
- Lower the car back down to the ground and use the wrench to tighten all of the lug nuts as much as possible
Manual Tire Changer
A manual tire changer is a great way to save money on tires. It is a simple machine that can be operated by anyone with a little bit of mechanical knowledge. The biggest advantage of using a manual tire changer is that it does not require any electricity or compressed air, making it very versatile and portable.
Manual tire changers are also much less expensive than their electric or pneumatic counterparts.There are several different types of manual tire changers available on the market, but they all operate on the same basic principle. To change a tire, first place the machine over the wheel that needs to be changed.
Then, use the lever to loosen the clamp and remove the old tire from the wheel rim. Next, place the new tire onto the wheel rim and use the lever to tighten the clamp back down. Finally, spin the wheel to make sure that the new tire is seated properly before lowering the car back down onto its wheels.
Changing a flat tire can be a dirty and dangerous job, so always be sure to wear gloves and eye protection when using a manual tire changer. Also, be careful not to over-tighten the clamp as this could damage both the machine and your wheel rim. With a little practice, changing tires with a manual tire changer is quick and easy – and it will save you money in long run!
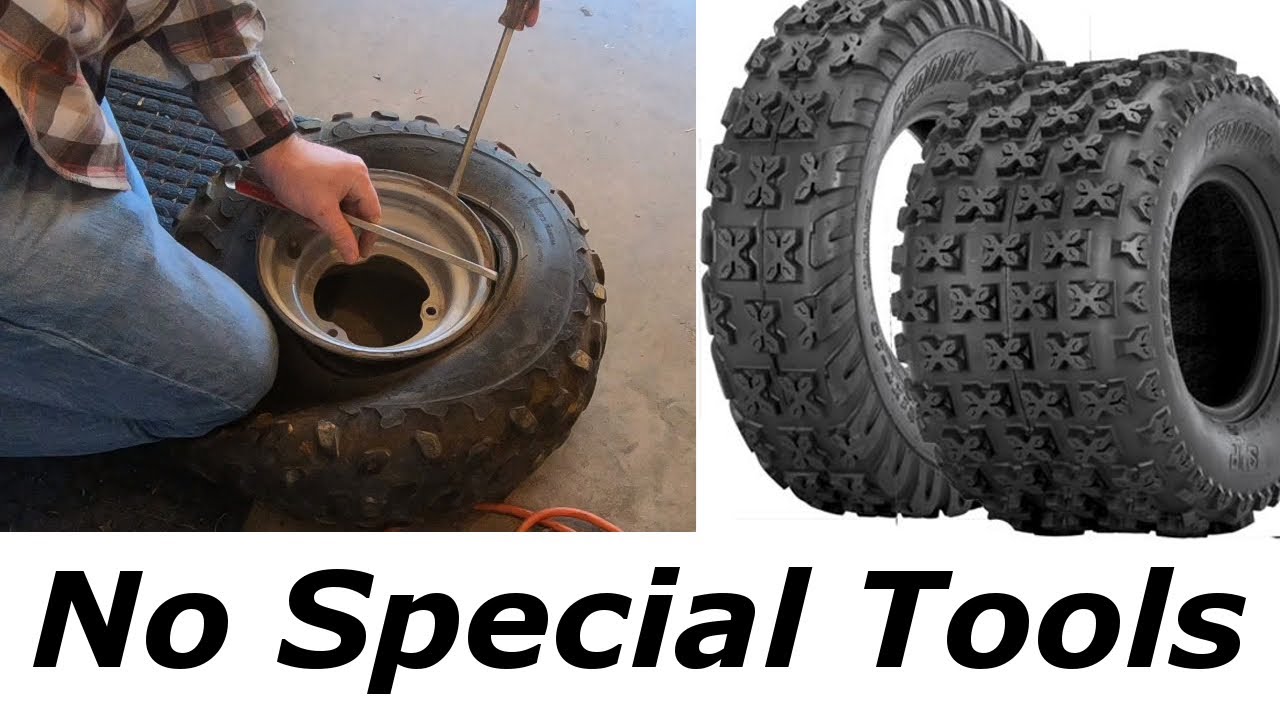
Tire Removal Tool
Most people don’t think about their tire removal tool until they get a flat tire. Then, they realize that they don’t have one! If you’re caught without a tire removal tool, you can use a few household items to remove the tire.
First, find something that will fit under the lip of the tire. A screwdriver or butter knife will work. Insert it under the lip and pry up on the tire.
You may need to wiggle it around a bit to get it started.Once you’ve pried up on the tire, you can use your hands to pull it off. If the tire is really stuck, you can try using a pair of pliers or another tool to help pry it off.
Be careful not to damage the rim of the wheel!With the tire off, you can proceed with changing your flat tire. Once you’ve finished, put the old tire back on (or put on your spare) and be sure to keep a good Tire Removal Tool in your car so you’re prepared next time!
How to Change a Flat Tire
If you’re like most people, the thought of changing a flat tire is enough to make you break into a cold sweat. But it doesn’t have to be that way! With a little bit of know-how, you can change a flat tire in no time at all.
Here’s what you’ll need:A jack
A lug wrench (sometimes called a “wheel wrench”)
A spare tire that is in good conditionFirst, use your jack to lift the car up so that the flat tire is off the ground. Then, use your lug wrench to loosen the lug nuts that hold the wheel on.
Be sure to turn them counterclockwise until they’re loose enough to remove by hand.Next, remove the flat tire and put on the spare. Again, use your lug wrench to tighten the lug nuts, this time turning them clockwise until they’re tight.
Lower the car back down to the ground and give each nut another quarter-turn with your wrench for good measure. Voila! You’ve just changed a flat tire like a pro!
Tire Change near Me
If you’re looking for a tire change near you, there are a few things to keep in mind. First, you’ll want to find a reputable shop that has experience changing tires. Second, you’ll want to make sure the shop has the right equipment for the job.
Third, you’ll want to be sure the shop can properly dispose of your old tires.When it comes to finding a reputable shop, ask around for recommendations from friends or family members. You can also check online reviews to get an idea of what others have thought about their experiences with different shops.
Once you’ve found a few potential shops, give them a call and ask about their experience changing tires. Be sure to also ask about their prices so that you can compare apples-to-apples.As far as making sure the shop has the right equipment, most reputable shops will have no problem showing you their tire changing setup.
However, if they don’t have anything on display or they seem hesitant to show you their setup, that’s definitely a red flag. In addition, be sure to ask about how they dispose of old tires. Many times, old tires can be recycled – so this is something definitely worth inquiring about!
All in all, finding a tire change near me doesn’t have to be difficult – as long as you know what to look for!
How to Change a Tire With a Jack
If you’re like most people, you probably don’t think about your car’s tires very often. But when one goes flat or blows out, you need to know how to change it quickly and safely. Here’s a step-by-step guide to changing a tire with a jack.
1. Find a safe place to pull over: If possible, try to find a level spot on the side of the road. If you can’t find one, turn on your hazard lights and slowly drive until you do.2. loosen the lug nuts: Use your wrench to loosen the lug nuts before you jack up the car.
You’ll want to do this while the tire is still on the ground so that it doesn’t spin when you try to remove them later.3. Jack up the car: Place your jack under the frame of the car (consult your owner’s manual for where exactly), and pump it until the tire is lifted off of the ground. Make sure that the car is secure before you go any further!
4 .Remove the old tire and put on the new one: Take off the old tire and put on the new one, making sure that all ofthe lug nuts are tight before loweringthe car back downtothe ground.

Credit: www.wikihow.com
How Do You Change a Tire Without a Machine?
If you find yourself with a flat tire and no machine to help, don’t despair! Here is a step-by-step guide to changing a tire without a machine.1. Park your car on level ground and set the parking brake.
Place a jack under the frame of your car (consult your car’s owner’s manual to find the best location) and lift the car until the flat tire is off the ground.
2. Remove the hubcap or wheel cover, if necessary, then loosen the lug nuts with a wrench (again, consult your manual for specifics). You may need to use two hands or stand on the wrench to get enough leverage.
Do not remove the lug nuts at this point!
3. With the lug nuts still loosely in place, finish jacking up the car until the flat tire is completely off the ground. Now you can remove those lug nuts and take offthe flat tire.
4 Putthe spare tire on by lining up its holes with those onthe wheel rim. Hand-tighten each ofthe lug nuts as much as possible before loweringthe jack and removing it from underthe car.
5 Once all four tires are backon solid ground, use your wrenchto fully tighten each ofthe lug nusts – again, consultingyour owner’s manual for guidanceon how tight they should be (it will usually specify “ft/lbs”of torque).
6 Replace any hubcaps orwheel covers that you removedbefore startingthis process –and congratulations,you’ve just changeda tire withouta machine!
Can You Change Car Tires by Hand?
You can absolutely change a car tire by hand – and in some cases, it’s even necessary. If you’re stuck on the side of the road with a flat tire, you don’t have any other choice but to change it yourself. And even if you’re not stranded, changing your own tires can be a great way to save money.
Of course, changing a tire is not as simple as just taking off the old one and putting on a new one. You’ll need to know how to properly loosen and remove the lug nuts, how to jack up the car safely, and how to put on the new tire. But don’t worry – we’ll walk you through the whole process step-by-step.
Before we get started, there are a few things you’ll need:– A lug wrench (sometimes called a “wheel wrench”)
– A jack
– A spare tire that is in good condition
– A few rags (to clean up any grease)First things first: loosening the lug nuts.
Place your lug wrench on one of the nuts and turn it counterclockwise until it feels loose. Repeat this step for all of the lug nuts – but don’t take them completely off just yet! Once they’re all loose, give each nut another quarter turn with the wrench to make sure they’re fully loosened.
Now it’s time to jack up the car. There are two different types of jacks – floor jacks and scissor jacks – so make sure you have the right kind for your car before proceeding. For most cars, a floor jack will work just fine.
Place your jack under one of the car’s frame rails (the metal beams that run along either side of the underside of the car) and pump it until the wheel is lifted off of the ground. It’s important to make sure that your jack is placed securely before continuing – if it slips while you’re lifting up your car, it could cause serious injury or damage to your vehicle.
Once your wheel is raised high enough off of ground that you can easily access it, go ahead and remove those lug nuts completely by hand (no need for the wrench anymore). Now carefully pull off your old tire – being careful not to damage eitherthe rim orthe new tire – and setitaside.
How Do You Manually Put a Tire On?
Assuming you are putting a tire on a wheel that is already mounted to a vehicle:For most passenger vehicles, the first step is to loosen the lug nuts with a lug wrench. Once they are loose, you will need to jack up the vehicle and remove the flat tire.
You can then proceed to mount the new tire onto the wheel. Make sure that the tire is properly seated on the wheel before tightening down the lug nuts. Once they are tight, lower the vehicle back down to the ground and give them another couple of turns with the lug wrench to ensure they are secure.
How Do You Manually Remove a Tire from a Rim?
First, you’ll need to break the bead on the tire. To do this, you’ll need to insert a tire lever between the bead and the rim and pry it over. You may need to use two or three levers to get the job done.
Once the bead is broken, you can deflate the tire completely. Then, using your hands, work your way around the circumference of the tire until it pops off of the rim.Now that the tire is off of the rim, you can proceed to repair or replace it as needed.
How to change your own tires by hand
Conclusion
If you’re a driver, it’s important to know how to change your own tires. You never know when you’ll be stranded on the side of the road with a flat. While changing a tire may seem like a daunting task, it’s actually pretty simple.
All you need is a jack, some lug nuts, and a wrench. With these tools and a little bit of elbow grease, you can have your new tire on in no time.

Nitto Nt450 275/50R17 110 V Tire
The Nitto NT450 is a high-performance all-season tire that provides excellent traction and handling in both wet and dry conditions. The NT450 features a unique tread design that helps to improve traction on slippery surfaces, while also providing a comfortable ride.
Looking for a new set of tires? Check out the Nitto NT450! This all-season tire is perfect for both on and off-road use.
With a 275/50R17 size, it’s great for SUVs and trucks. Plus, the 110 V rating means it can handle speed and load without issue.

Credit: toysfortrucks.com
What is the Best Nitto Nt450 275/50R17 110 V Tire for My Car
The Nitto NT450 is a great all-season tire for your car. It has a symmetric tread design with large shoulder blocks that provide good traction and handling in all weather conditions. The NT450 also has a wide tread width that helps it resist hydroplaning in wet weather.
This tire has a speed rating of V, which means it can handle speeds up to 149 mph.
How Long Will the Nitto Nt450 275/50R17 110 V Tire Last
Assuming you are asking about the Nitto NT450 275/50R17 110 V tire’s tread life, it would depend on various factors such as driving habits, terrain, weather conditions, etc. However, according to Nitto’s website, the NT450 has a treadwear rating of 680 and a UTQG (Uniform Tire Quality Grading) of 200 AA A. The higher the treadwear rating and UTQG grading, the longer the tire should last. Therefore, based on these ratings alone, the NT450 should have a relatively long tread life.
How Do I Know If the Nitto Nt450 275/50R17 110 V Tire is Right for My Car
If you are looking for a new set of tires, the Nitto NT450 275/50R17 110 V Tire may be a good option for your car. Here is everything you need to know about this tire to see if it is the right fit for your vehicle.The Nitto NT450 275/50R17 110 V Tire is a all-season tire that is designed for light trucks, SUV’s, and crossovers.
This tire has a UTQG rating of 520 AA A and features an asymmetric tread design with wide circumferential grooves. The NT450 also has large shoulder blocks to help improve handling and stability. Additionally, this tire has Nitto’s Dura-Belt technology which helps extend the tread life.
One thing to keep in mind with the Nitto NT450 275/50R17 110 V Tire is that it does not come with a warranty. So, if you are looking for a tire with a warranty, this may not be the best option for you.Overall, the Nitto NT450 275/50R17 110 V Tire is a good option if you are looking for an all-season tire for your light truck, SUV or crossover.
It offers good performance and durability without breaking the bank.
Nitto NT450
275/50R17 All Season Tires
If you’re in the market for new all season tires, you may be wondering what size to choose. A popular option is the 275/50R17 size. Here’s what you need to know about this size tire.
The first number in a tire size, 275, refers to the width of the tire in millimeters. The second number, 50, is the aspect ratio and refers to the height of the sidewall. The R in this case means that it’s a radial tire.
And finally, 17 is the diameter of the wheel that this tire can be mounted on.One advantage of choosing a 275/50R17 tire is that it offers a smooth ride thanks to its larger contact patch with the road. This size also provides good grip and handling characteristics while still being suitable for everyday driving conditions.
Plus, with a width of 275mm, these tires can accommodate wider wheels which can give your vehicle an aggressive stance.If you’re looking for an all season tire that offers good performance and looks great too, consider going with a 275/50R17 size. You won’t be disappointed!
Conclusion
Looking for a new set of tires? Check out the Nitto NT450! This all-season tire is designed for both high performance and long wear, making it a great choice for drivers who want the best of both worlds.
The NT450 features a unique tread pattern that helps to provide traction in all conditions, while the robust sidewalls help to resist damage from impact and abrasion. With a 110 V speed rating, this tire is also capable of handling high speeds without issue. So if you’re looking for a tire that can provide excellent performance and long lasting durability, be sure to check out the Nitto NT450!

How to Change And Balance Tires
If you’ve ever found yourself on the side of the road with a flat tire, you know how frustrating it can be. Changing a tire is not difficult, but it can be time-consuming and dirty. Balancing a tire is even more difficult, and if not done correctly, can lead to more flats.
Here’s a step-by-step guide on how to change and balance tires so you can be prepared for anything.
- Park your vehicle on a level surface and set the parking brake
- Place jack stands under the frame of your vehicle to support it while you work
- Loosen the lug nuts on the wheel you want to remove with a lug wrench, but don’t remove them yet
- Raise your vehicle with a jack until the tire is clear of the ground
- Remove the lug nuts and wheel from your vehicle
- Inspect the tire for damage and measure the tread depth with a tread depth gauge if necessary
- If the tire needs to be replaced, do so now
- Remove any debris from inside the wheel well before installing a new tire or re-installing a used one
- Install the new tire on your vehicle and hand-tighten each of its lug nuts
- 9 Lower your vehicle tothe ground and torque each lug nut to between 80 and 100 ft
- , using a torque wrench
How To Change & Balance Your Own Motorcycle Tires | MC GARAGE
How to Mount And Balance Tires Yourself
If you’ve ever been to a tire shop, you know that mounting and balancing tires can be quite expensive. But did you know that you can actually do it yourself? It’s not as difficult as it may seem, and it can save you a lot of money in the long run.
Here’s how to mount and balance tires yourself:1. First, make sure that your tires are properly inflated. This will help to prevent them from becoming unbalanced while you’re working on them.
2. Next, use a tire bead breaker to loosen the bead of the tire from the rim. You’ll need to do this for all four tires.3. Once the beads are broken, remove the old tires from the rims.
Be careful not to damage the rims in the process.4. Now it’s time to install the new tires onto the rims. Start by putting one bead of the tire over the rim, then work your way around until both beads are in place.
Again, be careful not to damage the rims during this process.
How to Balance Tires at Home Without Equipment
Assuming you don’t have a professional tire balancer at home, there are still a few ways you can balance your tires without any special equipment. The most common way is to use weights that you affix to the rim of the wheel. You can purchase these weights at most auto parts stores.
Another way to balance your tires is by using a drill and some washers. First, mark the center of each tire with chalk or a marker. Next, drill a hole through the center of each tire, being careful not to damage the inner workings of the tire.
Finally, thread washers onto bolts and screw them into the holes you just drilled. The number of washers you’ll need will depend on how out-of-balance your tires are.If neither of these methods seem like they’ll work for you, there’s one last option: take your car to an experienced mechanic or tire specialist and have them balance your tires for you.
This is usually the best option, as they will have access to professional equipment that will ensure that your tires are balanced correctly.
How to Balance a Tire at Home
If you’ve ever had a flat tire, you know how frustrating it can be. Not only do you have to deal with the hassle of changing the tire, but then you also have to take it to get balanced. If you’re looking to save yourself some time and money, you can balance your tires at home with a few simple tools.
To start, you’ll need a set of weights specifically designed for balancing tires, which can be found at most auto parts stores. You’ll also need a way to measure the weight of each tire – either a standard bathroom scale or a more sophisticated tool like a beam balance. Once you have your supplies gathered, follow these steps:
1. Park your car on level ground and remove the affected tire. Place it on top of the bathroom scale or beam balance and record its weight.
2. Add the appropriate amount of weight to each side of the tire until its total weight matches that of the other three tires on your car.
For example, if your other three tires weigh 30 pounds each and this one weighs 28 pounds, add one pound of weight to each side of the tire.
3. Re-install the tire on your car and repeat steps 1-3 for each remaining tire.With a little patience and attention to detail, balancing your own tires is a relatively easy process that anyone can do at home!
Cheapest Place to Mount And Balance Tires
Cheapest Place to Mount And Balance TiresTire mounting and balancing is an important part of maintaining your vehicle. Properly inflated and balanced tires can help improve your gas mileage, increase the life of your tires, and make your ride more comfortable.
So where’s the best place to get your tires mounted and balanced?The answer may surprise you – the cheapest place to get your tires mounted and balanced is often at a tire dealership or a tire retailer that offers this service. Many times, these businesses will offer special deals or discounts on tire mounting and balancing when you purchase new tires from them.
They may also offer free lifetime balancing with the purchase of a set of four new tires.So if you’re in the market for new tires, be sure to ask about mounting and balancing deals before you make your purchase. You may be able to save yourself some money!

Credit: www.moderntiredealer.com
Can I Balance My Tires by Myself?
It is possible to balance your own tires, but it is not recommended. While it may save you some money in the short-term, it can lead to more problems down the road. First, you need to have a way to measure the weight of each tire and wheel combination.
Second, you need to know how much weight needs to be added or removed from each tire. Third, you need an accurate way to add or remove that amount of weight. And fourth, you need to be able to do all of this without damaging your tires or wheels.
If you don’t have experience balancing tires, it’s best to leave it to the professionals. They have the right equipment and expertise to get the job done quickly and correctly.
Do I Need to Balance My Tires When I Change Them?
Most people believe that they need to balance their tires when they change them, but this is actually not the case. When you get new tires, the weight of the tire is evenly distributed around the circumference of the tire. This means that there is no need to balance your tires.
The only time you would need to balance your tires is if you notice that your car is vibrating or if the ride is not smooth. If this is the case, then you can take your car to a mechanic and they will be able to balance your tires for you.
How Do You Balance Car Tires at Home?
It is important to keep your car’s tires in good condition and properly inflated. This not only improves gas mileage, but also helps to prevent flats and blowouts. One way to ensure that your tires are properly inflated is to balance them regularly.
You can do this yourself at home with a few simple tools.First, you’ll need an air pressure gauge and a tire iron. You’ll also need a chalk pencil or marker and something to use as a weight, such as washers or small coins.
Begin by checking the air pressure in all of your tires using the gauge. If any of the tires are low, add air until they reach the recommended level.Next, use the tire iron to loosen the lug nuts on one of the front wheels.
Remove the wheel from the car and set it upside down on a flat surface. Find the heavy spot on the tire by spinning it slowly and marking where it stops with chalk. This is usually near where the valve stem is located.
To balance the tire, place weights equal to this amount on the opposite side of the wheel. For example, if you determined that the heavy spot was two ounces off-balance, then you would place two ounces of weight on the other side ofthe wheel.
How Much Does It Cost to Get Tires Changed And Balanced?
It is important to keep your tires in good condition to ensure a safe and comfortable ride. Tires that are properly inflated and have the correct amount of tread can help improve your gas mileage. It is typically recommended to get your tires changed and balanced every 5,000 miles.
The cost of this service will vary depending on the type of vehicle you have and where you take it to be serviced.The average cost of having your tires changed and balanced is between $30 and $50. This price includes both the labor and materials needed to complete the job.
If you need new tires, the cost will be higher. You can expect to pay anywhere from $60 to $200 for a set of four new tires, depending on the brand and style you choose.
Conclusion
If you’re not confident in your ability to change a tire, it’s best to learn how before you get stranded on the side of the road. It’s a relatively easy process, and only requires a few tools. You’ll need a jack, a lug wrench, and either a spare tire or a can of fix-a-flat.
Once you have all of your supplies, follow these simple steps:1. Park your car on level ground and engage the emergency brake. Place blocks behind the back tires for extra safety.
2. Loosen the lug nuts with your wrench before you start jacking up the car. This will make it easier to remove them later.3. Place the jack under the car at an appropriate spot (consult your owner’s manual if you’re unsure) and raise it until the tire is lifted off the ground.
4. Remove the lug nuts and take off the flat tire. Put on the spare tire and screw on the lug nuts by hand as tight as you can; they don’t need to be super tight just yet.
5 Lower your car back down to the ground but don’t removethe jack just yet!

How to Change Atv Tires at Home
It’s inevitable. Sooner or later, you will have to change the tires on your all-terrain vehicle (ATV). The good news is that you can do it at home with just a few tools and some elbow grease.
- Park your ATV on a level surface and put it in neutral
- Apply the parking brake and block the wheels to prevent the ATV from rolling while you’re working on it
- Loosen the lug nuts on all four tires with a socket wrench, but don’t remove them yet
- Lift up each tire one at a time and place a jack under the frame of the ATV next to the tire you’re changing
- Raise the jack until the tire is lifted off of the ground, then remove the lug nuts and pull the tire away from the wheel hub
- Put the new tire on and hand-tighten each of the lug nuts before loweringthe jack back down to supportthe ATV’s weight on all four tires again
- 7 Finish tightening each ofthe lug nuts with your socket wrench until they’re snug, but don’t overtighten them
Change ATV UTV Tires at home The EASY way
Atv Tire Change Cost
If you own an ATV, sooner or later you will need to change the tires. Depending on how often you ride and what kind of terrain you ride on, your tires may last a few months or a few years. When it is time to change them, the cost can vary depending on the type of tire you need and where you have them installed.
Here is a breakdown of what you can expect to pay to have your ATV tires changed.The average cost to have four ATV tires changed is between $200 and $400. This includes the cost of the tires as well as the labor to install them.
The exact cost will depend on the type of tire you choose and where you have them installed. For example, if you need specialized off-road tires, they will likely be more expensive than standard all-terrain tires. Likewise, if you have your tires installed at a dealership or by a professional mechanic, the labor costs will be higher than if you do it yourself.
Assuming that you are changing your own ATV tires, here are some tips to help make the process easier and save money:1. Choose the right tire for your needs – There are many different types of ATV tires available ranging from standard all-terrain treads to specialized mud or sand treads. Consider what kind of riding you do most often and choose accordingly.
If in doubt, ask for advice at your local powersports store or online forum.2.. Buy in sets of four – It is generally best to replace all four ATV tires at once rather than just changing two at a time.
This helps ensure that all four wheels are evenly matched in terms of traction and wear pattern which can improve handling and prevent premature wear on individual tires.. Not only that but many retailers offer discounts when buying multiple units so it’s worth checking around before making your purchase.
.3.. Compare prices online – Just like with anything else these days, shopping around for the best price is important when buying new ATV tyres . A simple search online will reveal numerous retailers selling tyres so take some time compare prices before making your purchase.. You may also want to check for any special offers or promotions that could save even more money..4.. Ask about installation – Many tyre retailers also offer installation services but this can sometimes be quite pricey so it’s worth asking about beforehand..
How to Remove Atv Tire from Rim at Home
Assuming you don’t have access to a tire machine, here’s how to remove a tire from an ATV rim at home:1. Loosen the lug nuts on the wheel using a socket wrench. Don’t remove them completely – just loosen them so they’re easy to turn by hand.
2. Place the ATV on a jack or other lifting device so that the wheel is off the ground. This will make it easier to work with.3. Use a pry bar or similar tool to break the bead of the tire away from the rim.
Start at one side of the tire and work your way around until the entire bead is broken loose.4. Once the bead is broken, deflate the tire completely using a tire gauge or air compressor. This will make it easier to remove later on.
5. Using both hands, grab hold of the tire and slowly pull it off of the rim. If it’s being stubborn, you can try hitting it lightly with a rubber mallet to help dislodge it. Be careful not to damage either piece in this process!
Does Walmart Change Atv Tires
If you’re like most people, you probably don’t think too much about the tires on your all-terrain vehicle (ATV). But if you’re a Walmart shopper, you may want to take a closer look at the next set of ATV tires you buy from the retail giant.According to a recent report, Walmart has been quietly switching out the traditional all-terrain tires found on many popular ATVs for cheaper, lower quality substitutes.
The report claims that Walmart is sourcing these replacement tires from China and other countries with little or no regulatory oversight.As a result, many of these replacement tires are failing prematurely and putting riders at risk of serious injury or even death. In one particularly tragic case, a young man was killed when his ATV flipped over after hitting a bump in the road; an investigation revealed that the tire he was riding on had been manufactured by a company based in China with no safety certification whatsoever.
While Walmart has not commented publicly on this issue, it’s important to be aware of what’s happening. If you’re shopping for ATV tires at Walmart, be sure to inspect them carefully before making your purchase. It may be worth spending a few extra dollars elsewhere to get a quality product that won’t put your safety at risk.
Where to Get Atv Tires Mounted
There are a few different places that you can take your ATV to get new tires mounted. One option is to go to a tire shop that specializes in mounting ATV tires. These shops usually have the proper equipment and knowledge to properly mount your new tires.
Another option is to take it to a mechanic or auto body shop. Many of these shops also have the proper equipment and knowledge to mount your new tires. However, they may not specialize in ATVs and may not be as familiar with the process.
You can also mount the tires yourself if you have the proper tools and know-how. This option will save you money, but it is important that you know what you are doing before attempting this project. If done incorrectly, it could damage your ATV or even cause an accident.
Credit: www.youtube.com
How Do You Change Atv Tires by Hand?
Assuming you don’t have a tire changing machine, you’ll need to do it by hand. Here’s how:1. Park your ATV on a level surface and engage the parking brake.
Place blocks behind the rear tires to prevent the ATV from rolling while you’re working.2. Loosen the lug nuts on the wheel that you want to remove with a lug wrench. Do not remove them completely, just loosen them enough so that you can remove them by hand when the time comes.
3. Use a jack to lift the ATV off of the ground until the tire is clear of the ground. Be sure to place jack stands under the frame of the ATV for support before proceeding further.4. Remove the lug nuts and then pull the wheel off of the axle.
You may need to wiggle it a bit to get it free.5. To install the new tire, simply reverse these steps! Put the new tire on and hand-tighten each lug nut before lowering back down onto its wheels.
.
Can You Install Atv Tires Yourself?
If you’re looking to install ATV tires yourself, there are a few things you’ll need to keep in mind. First, make sure that the new tires you’re installing are the same size as the old ones. You’ll also want to check that the new tires are compatible with your ATV’s rims.
Once you have all of that sorted out, it’s time to get down to business.The first step is to remove the old tires from your ATV. To do this, you’ll need a tire iron and a jack.
Start by loosening the lug nuts on each tire using the tire iron. Once they’re loose, use the jack to lift up your ATV so that you can take the wheels off completely. With the wheels off, pull the old tires off of your ATV’s rims.
Now it’s time to install the new tires onto your ATV’s rims. Start by putting one bead of each tire over one side of the rim. Then, use your hands to work both beads of each tire over their respective sides of the rim until they’re seated properly.
Finally, use the lug nuts and tire iron to secure each wheel back in place. That’s all there is to it!
How Do You Change a 4 Wheeler Tire at Home?
If you’re like most people, you probably don’t think about your ATV tires until they go flat. But flat tires are a fact of life when you ride off-road, and knowing how to change a tire quickly and easily can make all the difference when you’re miles from civilization. Here’s a step-by-step guide to changing an ATV tire at home:
1. Park your ATV on level ground and set the parking brake. You’ll also want to place something under the front or rear of the ATV to keep it from rolling while you’re working.2. Remove the wheel cover (if applicable) and loosen the lug nuts with a wrench or socket wrench.
Do not remove them completely – just loosen them enough so that they can be removed by hand later on.3. Use a jack to lift the ATV off the ground high enough so that you can remove the tire completely. Place the jack under one of the frame rails for stability.
4. Remove the lug nuts completely and pull the old tire off of the wheel rim. Inspect both for any damage and clean any dirt or debris from them before proceeding.5 .
Line up your new tire with the wheel rim and push it onto place, being careful not to pinch your fingers between them! Screw onthe lug nuts by hand as tight as possible, then use your wrench or socket wrenchto tighten them further (but don’t overdo it – just snug them up). Double checkthat all four are tight before lowering yourATV back down tothe ground .
Putyourwheel cover backon(if applicable)and enjoyyourride!
How Do You Break the Bead on an Atv Tire at Home?
ATV tires are designed to be ridden on all types of terrain, so they need to be strong and durable. But sometimes you may find yourself in a situation where you need to break the bead on an ATV tire. Maybe you’re changing a tire and the old one is stuck on the rim, or maybe you want to deflate the tire for storage.
Whatever the reason, it’s not difficult to break the bead on an ATV tire at home with a few simple tools.First, make sure your ATV is parked on a level surface and put the transmission in neutral. Next, loosen the lug nuts slightly with a wrench so that they can be removed easily later.
Once the lug nuts are loosened, use a bead breaker bar or similar tool to pry open the gap between the bead of the tire and rim. You may need to use some force, but be careful not to damage either the tire or wheel rim.With the gap opened up, insert a deflator needle into the valve stem and release air until the tire is completely flat.
At this point, you should be able to remove both beads of the tire fromthe wheel rim by hand. Now you can change your ATV tire or store your wheels without worry!
Conclusion
If you have a few tools and an ATV that needs new tires, then you can change them at home with this step-by-step guide. First, use a jack to lift up the ATV so that the tire is off of the ground. Next, loosen the lug nuts with a wrench and remove them entirely.
The old tire can now be taken off and set aside. To put on the new tire, line it up with the bolts and start threading on the lug nuts. Once they are all tight, lower the ATV back down to the ground and give each lug nut another turn to make sure they are secure.
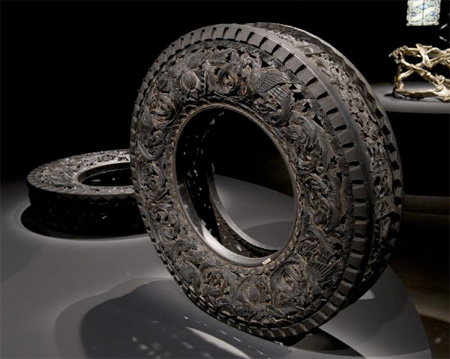
How to Carve Tires
Tires are one of the most important parts of a car, and they need to be well-maintained in order to keep the car running smoothly. When it comes time to change or repair tires, many people choose to simply buy new ones. However, this can be quite expensive, and it’s not always necessary.
If you know how to properly carve tires, you can save yourself a lot of money.
- Select the tires you want to carve
- Make sure they are clean and dry before beginning
- Using a sharp knife, make a cut around the circumference of the tire
- Continue making cuts until you have carved out the design you desire
- Be careful not to cut yourself!4
- Once your carving is complete, sand down any rough edges with sandpaper
Credit: www.toxel.com
What Tool Can I Use to Cut Tires?
If you’re looking to cut tires, there are a few different tools that can do the job. A utility knife can work in a pinch, but for a more permanent solution, you’ll want to invest in a tire cutter.Tire cutters are specifically designed to make clean, precise cuts in tires.
They typically have a handle and a cutting blade that comes down from above, allowing you to get a nice, even cut all the way around the tire.When shopping for a tire cutter, look for one that is made of durable materials and has a comfortable grip. You’ll also want to make sure that the blade is sharp enough to easily cut through tires.
With the right tool in hand, cutting tires is quick and easy. So if you’re looking for an efficient way to get rid of old tires, investing in a tire cutter is your best bet.
Are Regrooving Tires Legal?
There is a lot of debate on whether or not regrooving tires is legal. The general consensus seems to be that as long as you are not changing the tread pattern or making the tire any wider, it is legal. Some people argue that regrooving tires gives you an unfair advantage because it makes the tire grip better.
However, many race tracks allow regrooved tires and some even require them. So as long as you check with your local race track regulations, you should be fine to regroove your tires.
How Deep Can You Regroove Tires?
There are a few ways to measure the depth of your tires’ tread. The easiest way is to use a tread depth gauge, which you can purchase at most auto parts stores. To use one, simply insert the gauge into the tread and read the number on the gauge.
This will tell you how many millimeters (mm) of tread remain on your tire.Another way to measure tread depth is to place a penny head-first into the tread. If you can see all of Lincoln’s head, then your tread has worn down to 2/32″. Conversely, if you can’t see any of his head, then your tread is still at 4/32″, which is above the minimumdepth for safe driving.
In general, you should aim to have at least 4/32″ of tread remaining on your tires before needing to replace them. However, keep in mind that this varies depending on where you drive and what kind of weather conditions you typically encounter. For example, if you live in an area with a lot of snowfall, it’s best to have more like 6/32″ or even 8/32″ remaining before replacing your tires.
How Do You Make Groove Tyres?
Groove tyres are made by taking a regular tyre and adding grooves to the tread. The depth, width and number of grooves can vary depending on the manufacturer and the type of vehicle that the tyre is for. Groove tyres are generally used on off-road vehicles, as the added grip can be beneficial when driving on rough or slippery surfaces.
making tools for carving tires
Tyre Carving Tools
If you’re looking to add a unique touch to your car’s tyres, then tyre carving tools are the way to go. With these tools, you can create custom designs and patterns in your tyres that will really make them stand out.There are a few different types of tyre carving tools available on the market, so it’s important to choose the right one for your needs.
The most popular type of tool is the rotary cutter, which can be used to create intricate designs. For simpler designs, you can use a stencil or even just a sharp knife.Once you’ve selected the right tool for your design, it’s time to get started.
First, clean off the surface of the tyre so that your design will be visible. Next, sketch out your design onto the tyre with chalk or a similar material. Then, start carving away at the tyre following your sketched lines.
If you’re not confident in your ability to freehand carve a design, there are also some ready-made stencils available that can be used instead. Simply place the stencil onto the tyre and trace around it with your chosen carving tool.With a little bit of practice and patience, you’ll be able to create amazing designs in no time at all!
So grab some tire carving tools and get creative!
Tire Groover
A tire groover is a machine that is used to cut grooves into the tread of a tire. This is done in order to provide better traction for the vehicle, as well as to improve the appearance of the tire. There are two types of groovers: manual and automatic.
Manual Tire Groovers Manual tire groovers are operated by hand, and they require the user to push or pull a handle in order to move the cutting head across the surface of the tire. These devices usually have a small cutting head that can make shallow or deep cuts into the tread, depending on how much pressure is applied. Automatic Tire Groovers Automatic tire groovers are powered by electricity, and they use a rotating cutting head to score the surface of the tire.
These devices can be set to make shallow or deep cuts, and they can also be programmed to create patterns in the tread.
Homemade Tire Grooving Tool
A homemade tire grooving tool can save you time and money when grooving your own tires. With a few simple tools and materials, you can make your own tire groover that will work just as well as any commercial tool.Here’s what you’ll need to make your own tire groover:
– A length of pipe or tubing (about 18 inches long)
– A sharp knife or utility blade
– A file or rotary tool with a grinding bit
– A drill with a 1/4 inch drill bit
– Sandpaper (optional)
Start by cutting the pipe or tubing to length.
Then, use the knife or utility blade to score a line around the circumference of the pipe, about 1/4 inch from one end. This scored line will act as a guide for cutting the groove into the tire.Next, use the file or rotary tool to slowly grind away material along the scored line, being careful not to go too deep.
You want to remove just enough material to create a consistent groove all the way around the tire. If necessary, use sandpaper to smooth out any rough edges on the inside of the groove.Finally, drill a hole through one end of the pipe or tubing.
This hole will be used to attach the Tire Groover Tool to an air compressor hose for operation. That’s it! Your homemade Tire Groover Tool is now ready for use.
Best Tire Grooving Tool
If you are in the market for a new tire grooving tool, there are a few things you should keep in mind to ensure you purchase the best one for your needs. First, consider the type of tires you will be working with. Some tools are designed specifically for passenger or light truck tires while others can handle heavy duty truck tires.
Next, think about the size of the tires you need to groove. Some tools can only handle certain sizes so make sure to check that the tool you’re considering can accommodate the size range you require. Finally, take into account how often you’ll be using the tool and how much money you’re willing to spend.
There are many high quality options available at different price points so it’s important to find one that fits both your budget and your needs. With these factors in mind, here are some of our top picks for best tire grooving tools currently on the market:1) The Ranger R80GT Tire Groover is a great all-around option that can be used on passenger car, light truck, and even some heavy duty truck tires.
It’s easy to operate and comes with everything you need to get started including six carbide inserts.
2) If you’re looking for a more affordable option, try the Escalade Sports EZ Tire Groover Kit. It doesn’t have as many bells and whistles as some of the other options but it gets the job done and is very reasonably priced.
3) For those who need a tire grooving tool that can handle larger sized tires, check out The Roadster from Allstar Performance . This powerful tool can easily groove up to 22″ diameter tires making it ideal for use on RVs, trailers ,and semi-trucks .
Conclusion
Carving tires is a great way to add traction and style to your car. Tire carving is a relatively simple process that can be done at home with a few tools. The first step is to remove the tire from the car.
Once the tire is removed, you will need to use a saw to cut through the tread of the tire. Next, you will need to use a chisel or knife to carve away any excess rubber from the tread area. Finally, you will need to sand the carved area smooth and paint it if desired.

How to Catch Someone Letting Air Out of Tires
The best way to catch someone letting air out of your tires is to be proactive and check the pressure in your tires regularly. You can either use a tire pressure gauge or take your car to a nearby gas station that has an air pump. If you notice that the pressure in one or more of your tires is significantly lower than it should be, chances are that someone has been letting air out on purpose.
Another telltale sign is if you find a small nail or other sharp object near the valve stem of one of your tires. If you suspect that someone is deliberately trying to sabotage your car, it’s important to take action right away so that they don’t succeed in causing serious damage.
- If you think someone is letting air out of your tires, keep an eye on your tire pressure gauge
- A sudden drop in pressure could be a sign that someone has let air out of your tires
- Pay attention to any hissing sounds coming from your tires
- If you hear a hissing sound, it could mean that someone is releasing air from your tires
- Inspect your tires for any punctures or holes
- If you find any punctures or holes, it’s likely that someone has been deliberately letting air out of your tires
- Contact the police if you suspect that someone has been deliberately letting air out of your tires
- The police can investigate and potentially catch the person responsible for damaging your property

Credit: www.youtube.com
Can Someone Let the Air Out of Tires?
Most people know that you can let air out of tires, but few know how or why. Letting air out of tires is actually a very simple process. All you need is a tire gauge and an air compressor.
First, use the tire gauge to check the pressure in your tires. If the pressure is too high, then use the air compressor to let some air out. It’s important to not let too much air out, as this can cause your tires to wear down prematurely.
Is Letting the Air Out of Someone’S Tires Vandalism?
When it comes to air and tires, the two are not always on good terms. Letting the air out of someone’s tires can be considered an act of vandalism, depending on the situation.Tires rely on pressurized air in order to maintain their shape and provide a comfortable ride.
When that air is let out, it can cause the tire to go flat, which can be a major inconvenience (and expense) for the owner. In some cases, it may even render the car unusable until the tire is repaired or replaced.So, if you’re thinking about letting the air out of someone’s tires as a prank or act of revenge, think twice – it could be considered vandalizing their property.
Why are People Letting Air Out of Tires?
It’s a common question asked by car owners: why are people letting air out of tires? The answer, it turns out, is two-fold. In some cases, people may be deliberately releasing air from their tires in order to gain a competitive advantage.
This practice, known as “ballooning,” is used by drag racers to lighten their cars and improve traction. Releasing air from the tires also lowers the vehicle’s center of gravity, making it easier to handle.In other cases, people may simply be unaware that their tires are low on air.
Tires can lose pressure gradually over time due to factors like temperature changes and driving conditions. As a result, it’s important to check your tire pressure regularly (at least once a month) and add air as needed. Letting your tires get too low can lead to problems like decreased fuel efficiency and premature wear and tear.
So next time you see someone releasing air from their tires, don’t be so quick to judge – they may just be trying to get an edge on the competition or keep their car running smoothly.
What Can You Do If Someone Slashed Your Tires?
If you find that your tires have been slashed, it’s important to take action right away. Here are a few steps you can take:1. File a police report.
This is important in order to document the incident and potentially help catch the culprit.2. Take pictures of the damage. This will be helpful for insurance purposes and for documentation.
3. Call your insurance company. Your auto insurance policy may cover tire slashing, so it’s worth giving them a call to find out.4. Get your tires replaced.
You’ll need to do this as soon as possible in order to get back on the road safely. Be sure to keep all receipts and documentation for your insurance claim.
Deflating car tire/Letting air out of tire
Letting Air Out of Tires Illegal
Most people don’t know that letting air out of tires is illegal in many states. It’s considered a form of littering and can result in a fine. Some states have even made it a felony offense.
The reason for this law is because tire deflation leaves behind debris on the roadway which can be hazardous to other drivers. Additionally, when tires are not properly inflated they can cause decreased fuel efficiency and increased wear and tear on the vehicle.If you’re caught letting air out of your tires, be prepared to pay a hefty fine.
In some states, the penalty is up to $1,000! So next time you’re thinking about letting some air out of your tires, think again – it’s not worth the risk.
Letting Air Out of Tires Prank
If you’re looking for a prank that’s sure to get a reaction, try letting the air out of someone’s tires. This classic prank is easy to do and can be done with just about any car. All you need is a tire valve stem cap remover and a sharp object like a nail or key.
To start, find the victim’s car and unscrew the valve stem cap on one of their tires. Then, use your sharp object to puncture the tire and let the air out. Make sure to do this quickly so they don’t have time to react!
Once the tire is flat, screw the valve stem cap back on and watch from afar as they realize what you’ve done.
How to Tell If Someone Flattened My Tire
If you’re worried that someone has flattened your tire, there are a few ways to tell. First, take a look at the tread. If it’s significantly smoother in one spot than the others, that’s a good indication that the tire has been tampered with.
Another way to tell is by feeling the side of the tire. If it’s abnormally soft or spongy, that could be a sign that it was deliberately punctured.Of course, the best way to know for sure is to check your surveillance footage (if you have any).
If you see someone approaching your car and then suddenly your tire goes flat, there’s a good chance they did it on purpose.In any case, if you suspect that your tire has been flattened intentionally, it’s best to call the police so they can investigate.
How to Let Air Out of Tire Without Screwdriver
If you’ve ever had a flat tire, you know the frustration of trying to get the air out without a screwdriver. Luckily, there’s an easy way to do it!All you need is a straw and a needle.
First, poke a small hole in the straw. Next, insert the needle into the hole in the straw. Finally, put the straw over the valve on your tire and blow into the straw.
The air will come out of your tire and you won’t need a screwdriver!
Conclusion
It can be frustrating to find that someone has let the air out of your tires, especially if it happens repeatedly. There are a few things you can do to catch the culprit in the act.First, try to park your car in a well-lit area where there is plenty of foot traffic.
This will make it more difficult for someone to sneak up on your car and let the air out of your tires without being seen.If you have a security camera, point it towards your car so that you can review the footage if your tires are deflated. You may also want to set up a hidden camera to catch the person in the act.
Keep an eye on your tire pressure gauge and check it regularly. If you notice that your tires are losing air frequently, this is a good indication that someone is deliberately letting the air out.If you think someone is letting the air out of your tires, confront them directly and ask why they are doing it.
Most likely, they will deny everything and you won’t be able to prove anything. However, just by asking them about it, you may deter them from doing it again in the future.

How to Change Car Tires at Home
If you’re like most people, the prospect of changing a car tire is daunting. It’s not something that most of us do on a regular basis, so it’s easy to feel intimidated when faced with a flat. But changing a tire is actually a pretty simple process, and it’s something that anyone can do with just a few basic tools.
Here’s how to change a car tire at home, in just a few easy steps.
- If you have a spare tire and jack in your trunk, you’re ready to change a tire
- If not, you can purchase these items at an auto parts store
- Once you have the necessary supplies, follow these steps to change a tire:1
- Park your car on level ground and set the parking brake
- Place blocks behind the back tires if necessary
- Loosen the lug nuts on the flat tire with the lug wrench (counterclockwise)
- Do not remove them yet
- Lift up the vehicle with the jack until the flat tire is lifted off the ground (consult your owner’s manual for proper placement of the jack)
- Remove the lug nuts and take off the flat tire
- Put on the spare tire in its place and hand-tighten each of its lug nuts clockwise as much as possible until they’re snug against wheel studs but can still be turned easily with your fingers
- 6 Lower your car from its jacked-up position by turning Jack handle counterclockwise until it contacts floor or ground (again, refer to owners manual)
- 7 Tighten each of lug nuts securely using lug wrench in a star pattern (loosen each nut one complete turn then retighten in same order until all are tight)
- 8 After tightening last nut , recheck all others to make sure they are tight before removing jack stands or lowering vehicle completely to ground
How to change your own tires by hand
How to Change Tires on Rims
If you’re like most people, you probably don’t think about your tires until there’s a problem. But taking care of your tires can save you time and money in the long run. That includes knowing how to change a tire on a rim.
Most rims these days are made of aluminum, which is softer than the steel used in older rims. That means they’re more susceptible to damage from road debris or curbs. If you hit something hard enough, it can cause a leak in the tire or even break the rim.
That’s why it’s important to know how to change a tire on a rim. It’s not as difficult as it sounds, and it could save you from having to buy a new rim or even worse, getting stranded on the side of the road.Here’s what you’ll need:
– A lug wrench (preferably one that fits over the end of the wheel)
– A jack
– A spare tire
– Wheel chocks (optional but helpful)Assuming your car is already parked on level ground:1) Put wheel chocks around the front wheels if you have them – this will help prevent your car from rolling while you’re changing the tire.
If you don’t have chocks, try wedging something behind the wheels (like rocks).2) Use your lug wrench to loosen each of the lug nuts about half a turn – do not remove them completely yet! If any of the nuts are too tight or stuck, spray some WD-40 or similar lubricant on them and wait a few minutes before trying again.
You may need to use all your body weight to loosen stubborn nuts.3) Now that all the lug nuts are loose, use your jack to lift up the car untilthe flat tire is just barely offthe ground – this will make removing and installingthe new tirymuch easier. Make sureto placethe jack undera solid partofthe frame soit doesn’t collapsewhileyou’re workingon changingthe tire!4) Remove eachofthelugnutsand takeofftheflat t ire . Be carefulnot toget dirtor gravelin thenewtire–this couldcauseleaks lateron . Also , donot touchthenewtirewithyour barehandsas oilsfromyour skincouldcausesmallcracks inthenewtire surface .
Change Tires at Home Service
If you’re a do-it-yourselfer, you can save money and time by changing your own tires. It’s not as difficult as you might think, and with the right tools and supplies, it can be done in an afternoon. Here’s what you need to know about changing tires at home:
Tools and Supplies Needed:• Tire iron or lug wrench
• Jack
• Wheel chocks (optional)
• New tire (make sure it’s the same size and type as the old one)
Steps to Follow:
1. Park your car on a level surface and engage the emergency brake. Place wheel chocks around the wheels if desired.
2. Loosen the lug nuts with the tire iron or lug wrench (do not remove them).
If they’re really tight, stand on the wrench to get more leverage. 3. Position the jack under one of the frame rails (consult your owner’s manual for specific instructions). Raise the car until the tire is clear of the ground.
4. Remove the lug nuts and then pull off the old tire. 5. Put on the new tire, lining up The valve stem with The hole in The rim . Push The tire onto The rim until it’s seated all The way around .
6 . Replace The lug nuts , hand-tightening them until they’re snug . 7 . Lower The car back down toThe ground 8 .
How to Change a Flat Tire
If you find yourself with a flat tire, don’t panic! Changing a flat tire is relatively simple, and can be done by most anyone. All you need is a good jack, a lug wrench, and a spare tire.
Here’s a step-by-step guide to changing your flat:
1. Park your car in a safe location. If you’re on the side of the road, make sure to put your hazard lights on.
You’ll also want to make sure you’re not too close to traffic.
2. Use your jack to lift up the car. Place the jack under the frame of the car (usually near the wheel) and crank it until the car is high enough off the ground that you can work on the tire.
3. Remove the lug nuts from the wheel using your lug wrench. Be sure to turn them counterclockwise so they’ll come loose more easily.
4. Take off the wheel by hand and set it aside (be careful not to lose any of your lug nuts!).
5 Put your spare tire on by aligning it with the bolts sticking out of your car’s frame, and then pushing it onto those bolts until it’s snug against the car.
6 Screw on your lug nuts by hand as tight as possible, then use your wrench to give them an extra tightening (turn them clockwise this time).
7 Lower your car back down to the ground by cranking on your jack in reverse order from how you raised it up originally .
How to Change a Tire on a Car Step by Step
Assuming you have a spare tire and necessary tools:1. Park your car on level ground, far away from traffic. Turn your wheels to the curb, and set your parking brake.
Loosen the lug nuts on your wheel before jacking up the car.
2. Place the jack under the frame of your car—not under the axle or control arm—and jack up the car until the tire is about 6 inches off the ground.
3. Finish taking off the lug nuts and remove the flat tire.
Put it in a safe place so it doesn’t roll away.
4. Take your spare tire out of its storage place (usually found in the trunk). Line up holes in the rim with those on your wheel hub, making sure that any valve stem is facing outward, and push it onto the hub until you hear or feel it click into place.
5. Screw on each lug nut by hand as tight as possible until they’re snug against the wheel; don’t use power tools yet because you might strip them later when tightening for real if they’re over-tightened now . With all five lug nuts hand-tightened, lower your vehicle to resting position so that all four tires are touching ground again—but don’t fully removethe jack just yet!
6 Use a socket wrench to tighten each lug nut in a star pattern (one after another) until each is tight againstthe wheel .
You should be able to do this without too much force; if you can’t, then stop and check that eachnut is screwed on correctly according to step 5 above . If everything looks good but one or more lugs arestill very hardto turn , then lightly tap these lugs with a hammer while continuing to hold downon themwithyour wrench—this will help “break” them free so you can finish screwingthemontightlybyhandorwithalightpowertoolsetting .
Credit: www.wikihow.com
Can You Change Car Tires Yourself?
It’s not advisable to change car tires yourself unless you have the proper tools and know-how. Trying to save a few bucks by doing it yourself could end up costing you more in the long run if you damage your car or injure yourself. Here are a few things to keep in mind before attempting to change car tires:
– Make sure you have the right tools for the job, including a jack, lug wrench and tire iron.
– Park your car on level ground before beginning.
– Loosen the lug nuts on your wheel before jacking up the car.
This will make it easier to remove them later.
– Place the jack under the frame of your car, not under the axle or control arm. Doing so could damage vital parts of your suspension system.
– Once the jack is in place, slowly raise your car until the tire is off the ground. Don’t go too high – only enough so that you can easily remove and replace the tire.
– Remove the lug nuts and then take off the wheel completely.
Inspect it for any cracks or damage before replacing it with your spare tire.
– Put on the new tire and hand tighten each lug nut as much as possible before lowering your car back down to the ground.
How Do You Change a Tire Without a Machine?
If you’re on the side of the road and have a flat tire, you may be wondering how to change it without a machine. While it’s always best to have a professional do it for you, if you’re in a pinch and need to do it yourself, here’s how:1. Park your car on level ground and turn on your hazard lights.
2. Loosen the lug nuts with a wrench (but don’t remove them yet).
3. Jack up your car using the jack that came with your car or a universal jack. Place the jack under the frame of your car (usually near the wheel) and crank it until the tire is off the ground.
4. Remove the lug nuts and take off the flat tire.
5. Put on the spare tire and snugly hand-tighten each of the lug nuts onto each wheel stud.
6. Lower your car back down to the ground and use your wrench to fully tighten each lug nut (in a star pattern).
Is It Worth It to Change Your Own Tires?
It is definitely worth it to change your own tires! Here are a few reasons why:1. You can save a lot of money by doing it yourself.
The cost of a new tire can be quite high, especially if you need to replace all four. By changing your own tires, you can avoid this expense.2. It’s actually not that difficult to do, and you can learn how with a little practice.
Once you know how, it will take you less than an hour to change all four tires.3. You’ll be able to get the job done much faster than waiting for a tow truck or service station to do it for you. This can be very important if you’re stranded on the side of the road with a flat tire.
4. It’s always good to know how to do things like this in case of an emergency. If you’re ever stuck somewhere with a flat tire and no help in sight, being able to change it yourself could get you out of a bind!
What Do You Need to Change Tires at Home?
If you’ve ever had a flat tire, you know the feeling of frustration and helplessness that comes with it. Fortunately, changing a tire is not as difficult as it may seem, and anyone can do it with the right tools and a little bit of know-how. Here’s what you’ll need to change a tire at home:
– A jack
– A lug wrench or impact wrench
– A spare tire (preferably one that is in good condition)
First, use your jack to raise the car up so that the flat tire is off the ground. Then, use your lug wrench or impact wrench to loosen the lug nuts that hold the wheel in place. Once they are loose, remove them completely by hand and set them aside.
Now you can pull the flat tire off of the wheel hub.To install the new tire, simply line it up with the wheel hub and push it on until the lug nuts are snug. Then, use your lug wrench or impact wrench to tighten them down.
Lower your car back to the ground and give each lug nut another turn to make sure they’re all tight before driving away.
Conclusion
If you’re not comfortable changing your own car tires, it’s important to know how to do it in case of an emergency. Here’s a step-by-step guide on how to change a tire at home:1. Park your car in a safe and level spot.
Make sure you have enough room to work around the car and that the vehicle is secure before you start.
2. loosen the lug nuts on the flat tire with a wrench. You may need to use all your body weight to get enough leverage.
3. Lift the flat tire off of the ground and set it aside.
4. Take the spare tire out from under the car or from inside the trunk and line up the holes with those on the wheel hub.
5) Screw on each lug nut by hand until they’re snug, then use the wrench to tighten them further until they’re tight enough that they won’t come loose when driving.
How to Buy Truck Tires
There are a few things to consider when purchasing truck tires. The first is the size of the tire. Truck tires come in many different sizes, so it is important to know what size tire you need before making a purchase.
The second thing to consider is the type of tread you need. There are various types of tread patterns available, so it is important to select the one that best suits your driving needs. Finally, you will need to decide on a budget for your truck tires.
Prices can range from a few hundred dollars to several thousand dollars, so it is important to set a budget and stick to it.
- Research the different types of truck tires available and decide which type is right for your needs
- Find a reputable tire dealer that carries the type of tire you need
- Get price quotes from several dealers to compare costs
- Choose the dealer you want to buy from and purchase your tires
How To Buy Tires, the RIGHT WAY
Tips for Buying Tires
When it comes to buying tires, there are a few things you need to keep in mind. Here are some tips to help you make the best decision for your vehicle:1. Know Your Vehicle’s Needs – The first thing you need to do is determine what size and type of tire your vehicle needs.
You can usually find this information in your owner’s manual or on the placard located on the doorjamb or inside the glove compartment. Once you know what size tire you need, you can start shopping around.2. Consider All-Season Tires – If you live in an area with mild weather conditions, all-season tires may be a good option for you.
These tires provide good traction year-round and can handle most driving conditions. However, if you live in an area with extreme weather conditions (e.g., hot summers or cold winters), then all-season tires may not be the best option as they may not provide adequate traction during those times of the year.3. Compare Prices – When shopping for tires, it’s important to compare prices from different retailers before making a purchase.
Keep in mind that cheaper isn’t always better – sometimes, paying a little bit more will get you a better quality tire that will last longer and perform better than a cheaper tire would have. Also, don’t forget to factor in installation costs when comparing prices between retailers.4。
Ask About Warranties – Most reputable retailers offer some kind of warranty on their tires (e。g。, road hazard protection).

Credit: www.bankrate.com
What is a Good Price for Truck Tires?
There is no definitive answer to this question as the price of truck tires can vary depending on a number of factors, such as the type of tire, the size of the tire, the brand and where you purchase them from. However, we can give you some general guidelines to help you get an idea of what a good price for truck tires might be.First, it’s important to know that there are different types of truck tires available on the market.
Tires are typically categorized by their intended use, such as all-terrain tires, mud-terrain tires or highway terrain tires. The type of tire you need will depend on how you plan to use your truck – if you’re mostly driving on paved roads, then all-terrain or highway terrain tires may be a better option for you. However, if you’re planning on doing a lot of off-roading in your truck, then mud-terrain tires would be a better choice.
Next, you’ll need to decide on the size of tire you need. Truck tires are typically sold in sizes ranging from 15 inches up to 22 inches. Again, the size that’s right for you will depend on how you plan to use your truck – if you’re using it for mostly city driving, then smaller sized tires may be just fine.
However, if you’re planning on doing a lot of highway driving or hauling heavy loads with your truck, then larger sized tires would be a better option for you.Finally, when it comes to brands, there are many reputable brands out there that make quality truck tires at reasonable prices. Some popular brands include Michelin,, BFGoodrich and Goodyear,.
Do some research online or ask around at your local auto parts store for recommendations on which brand would be best suited for your needs and budget.
What Should I Look for in a Truck Tire?
There are a few things you should look for when shopping for truck tires. First, consider the type of truck you have and the types of roads you’ll be driving on. If you have a heavy-duty truck, you’ll need a tire that can handle the weight and wear of hauling heavy loads.
For lighter trucks, there’s more leeway in terms of tire choice.Next, take a look at your budget. Truck tires can be expensive, so it’s important to find a balance between quality and price.
There are plenty of affordable options out there that will still get the job done without breaking the bank.Finally, read reviews before making your final decision. This is especially important if you’re buying online.
Make sure to buy from a reputable seller with good customer reviews. That way, you can be sure you’re getting a quality product that will meet your needs.
Can I Just Buy 2 New Tires on My Truck?
It’s a common question: can I just buy two new tires for my truck? The answer is maybe, but it really depends on a few factors. Here’s what you need to know before making your decision.
First, take a look at your current tires. If they’re severely worn down, it’s probably not a good idea to just replace two of them. That could create an uneven wear pattern and lead to problems down the road.
It’s best to replace all four tires at once if possible.If your current tires are in decent shape but you’re due for a tire rotation anyway, then replacing two tires may make sense. Just be sure to put the new tires on the rear axle; putting them on the front axle could adversely affect handling and braking performance.
Another thing to consider is your budget. Replacing all four tires will obviously be more expensive than just buying two, so that’s something to keep in mind when making your decision.Ultimately, whether or not you should just buy two new tires for your truck comes down to a variety of factors.
Consider your current tire condition, whether or not you need a tire rotation, and what your budget looks like before making your final decision.
What is the Average Cost of Truck Tires?
There is no definitive answer to this question as the average cost of truck tires can vary greatly depending on a number of factors. Some of the main factors that can affect the cost of truck tires include the type and size of the tire, the brand, and where you purchase them from. With all of these variables in play, it’s tough to say what the average cost of truck tires might be.
However, we can take a look at some rough estimates to get an idea of what you might expect to pay.For a basic set of four all-season truck tires, you could expect to pay anywhere from $400 to $1,000. If you need specialty tires for off-roading or winter driving conditions, you could be looking at an even higher price tag.
And if you’re looking for top-of-the-line performance tires, you could easily be paying over $1,000 for just a single tire!Of course, there are ways to save money when shopping for truck tires. One option is to buy used tires; however, this comes with its own set of risks (such as not knowing how long the tire has been used for or if it has sustained any damage).
You can also look for discounts and special offers from tire retailers; however, these can be difficult to find and may only apply to certain types or brands of tires.Ultimately, the best way to get an accurate estimate for the average cost of truck tires is to shop around and compare prices from multiple retailers. By taking your time and doing your research, you’ll be sure to find the best deal on truck tires that fit both your vehicle and your budget.
Conclusion
If you’re in the market for new truck tires, there are a few things you should keep in mind. First, consider the type of terrain you’ll be driving on most often. If you’re mostly on paved roads, you’ll want a different tire than if you’re doing a lot of off-roading.
Second, think about the weight of your truck and how much weight it’s typically carrying. This will affect the size and load rating of the tires you need. Finally, take into account any special features or requirements that your truck might have, such as four-wheel drive.
Once you’ve considered all of these factors, you can start shopping around for the best deal on truck tires.

How to Change Dirt Bike Tires
One of the most important aspects of maintaining a dirt bike is keeping the tires in good condition. Over time, tires will naturally wear down and will need to be replaced. This can be a daunting task for those who have never done it before, but with a little patience and know-how, it can be easily accomplished.
- Park the bike on a level surface and put the kickstand down
- Loosen the bolts that secure the wheel to the frame with a wrench
- Remove the wheel from the frame and set it aside
- Take the old tire off of the wheel and discard it
- Put the new tire on the wheel, being careful to line up the bead with the rim of the wheel
- Inflate the tire to its recommended pressure using a hand pump or an air compressor
- 7
- Replace 8the wheel on 9the frame 10and 11tighten 12the bolts securely 13with 14a wrench 15test 16the bike 17on 18a soft 19surface 20to 21make sure 22it’s working properly 23before riding 24it 25on 26dirt 27again
How To Change a Dirt Bike Tire
Dirt Bike Tire Changer
As a dirt bike rider, you know that changing your own tires can be a real pain. You have to remove the old tire, clean up the rim, and then install the new tire. If you don’t do it right, you can easily damage your rims or even injure yourself.
That’s why having a good quality dirt bike tire changer is so important.A good dirt bike tire changer will make changing your tires much easier and safer. It will also help to extend the life of your tires by keeping them properly inflated and preventing flat spots from forming.
When shopping for a dirt bike tire changer, look for one that is durable and easy to use. Be sure to read the reviews before purchasing to make sure you are getting a quality product.With a good dirt bike tire changer in your garage, changing your own tires will be quick and easy – no more wrestling with those heavy wheels!
Change Dirt Bike Tire near Me
If you’re a dirt bike rider, then you know that changing your own tires is a necessary part of maintenance. Depending on how often you ride, you may need to change your tires every few months or so. While it’s not a difficult task, it does require some time and effort.
Here’s a step-by-step guide to changing your own dirt bike tires:1. First, you’ll need to gather all the tools and supplies you’ll need: tire irons, rim lock removal tool, new inner tubes (if needed), and of course, new tires.2. Once everything is gathered, begin by removing the old tire from the wheel.
Start at one side of the tire and work the tire iron under the edge of the tire bead. Lever the bead over the edge of the rim until it’s completely off. Repeat on the other side until the entire tire is removed from the wheel.
3. Inspect both sides of the wheel for any damage such as bent or cracked spoke nipples or cracks in the aluminum itself. If there is any damage, have it repaired before continuing.4. Next, remove any existing rim locks from both sides of the wheel using a rim lock removal tool (or pliers if needed).
If there are no rim locks present, skip to step 6.5a) For tubed tires: Install new inner tubes into each tire before proceeding to step 6 below. Make sure that each tube is properly inflated (not too much or too little) before installation!
How to Change a Dirt Bike Tire Without Scratching the Rim
When you’re out on the trail, the last thing you want is a flat tire. But if it happens, don’t worry! You can change your dirt bike tire without scratching the rim.
Here’s how:1. First, loosen the lug nuts with a wrench. Don’t remove them completely, just loosen them so they’re easy to take off later.
2. Next, use a tire iron to pry the old tire off the rim. Start at one side and work your way around until the tire pops off.3. Now it’s time to put on the new tire.
Again, start at one side and work your way around, using the tire iron to help guide it into place. Once it’s seated properly on the rim, go ahead and tighten up those lug nuts!4. And that’s it!
Just pump up your new tire and you’re ready to hit the trails again.
Dirt Bike Tire Changing Stand
If you’re a serious dirt bike rider, then you know the importance of having a good tire changing stand. After all, changing your tires is one of the most important maintenance tasks you can do to keep your bike in top condition. But with so many different stands on the market, it can be hard to know which one is right for you.
Here’s a quick guide to help you choose the best dirt bike tire changing stand for your needs.First, consider how often you’ll be using the stand. If you only need to change your tires once in awhile, then a less expensive model will probably suffice.
However, if you plan on changing tires frequently, then it’s worth investing in a higher quality stand that will hold up better over time.Next, take into account the size and weight of your dirt bike when choosing a tire changing stand. Heavier bikes will require a sturdier stand that can support their weight without tipping over.
Conversely, lighter bikes can be changed on lighter-weight stands without any problems.Finally, think about where you’ll be using the stand. If you only need it for at-home use, then there’s no need to spend extra money on a portable model.
However, if you want to be able to take your stand with you to the track or other riding areas, then portability should be one of your main considerations.
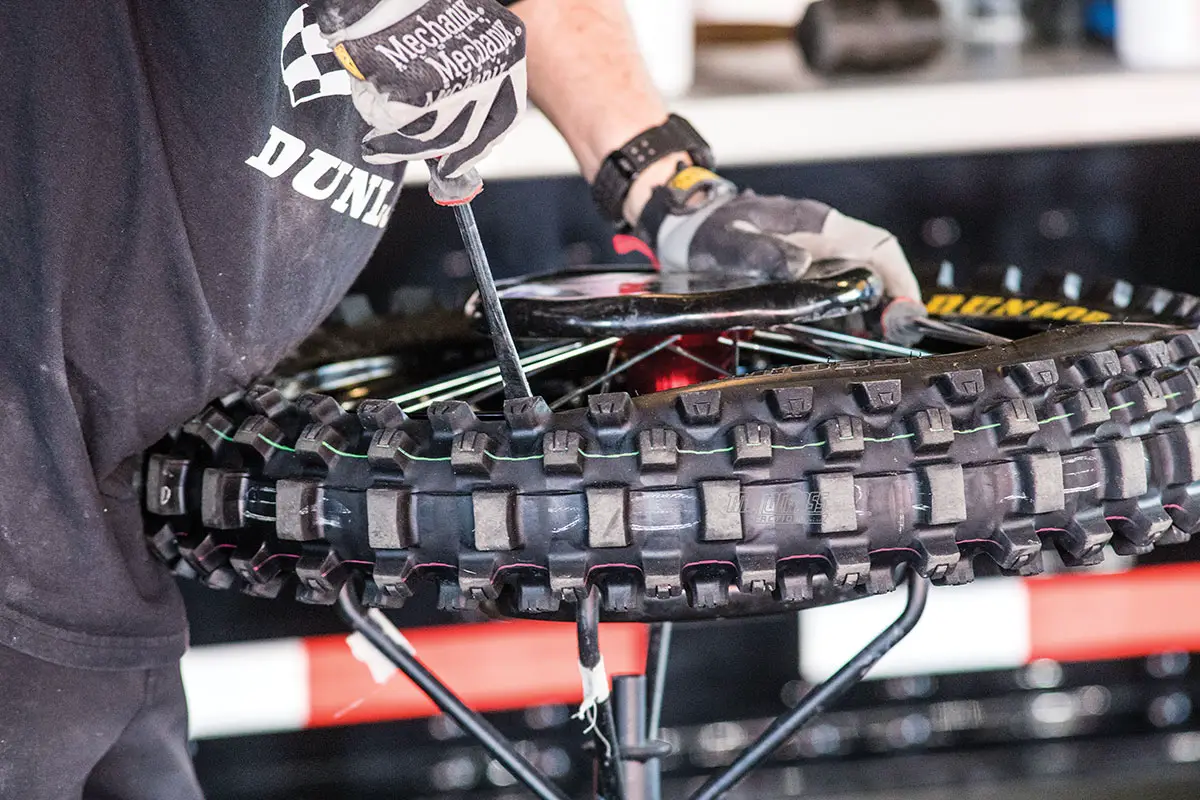
Credit: motocrossactionmag.com
Can I Change a Dirt Bike Tire Myself?
You can absolutely change a dirt bike tire yourself! You’ll need a few tools and supplies, but it’s not difficult to do. Here’s what you’ll need:
– A bead breaker tool (this is the most important tool – without it, you won’t be able to get the old tire off the rim)
– A set of tire levers
– A clean workspace
– New tires (of course!)
– Some sort of air compressor (a hand pump will work in a pinch, but an air compressor is much faster and easier)Once you have all of your tools and supplies gathered, follow these steps to change your dirt bike tires:
1. Use the bead breaker tool to break the seal between the tire and the rim. Start at one side of the tire and work your way around. It may take some force, but don’t worry – you’re not going to damage anything.
Just be sure to keep the bead breaker squarely on the rim so that you don’t scratch or gouge it.
2. Once the seal is broken, use the tire levers to pry the tire off of the rim. Start at one side and work your way around untilthe entire tire is removed.
Again, be careful not to damage eitherthe rim orthe tire as you’re doing this. 3. Take a look atthe inner surface ofthe old tire – ifit’s damaged or excessively worn, now would be a good time toreplace it with a new one. If everything looks good, though,you can simply clean off any debris fromthe old tiré before movingon to step 4 4 Installthe new tiré onto thérim.
, again startingat one sidéand workingyour way around until thétiré is seatedproperly on all sides 5 Inflate thénew tiréto itsrecommended pressureusing an air compressoror hand pump 6 Double checkthat thénew tiréis properlyinflatedbefore headingout fora ridë!
How Much Does It Cost to Get Dirt Bike Tires Changed?
It costs between $30 and $50 to change dirt bike tires, depending on the type of tire and the number of tires being changed. The average cost to have all four tires changed is around $120.
What Tools Do You Need to Change a Dirt Bike Tire?
Assuming you don’t have a tire changing stand, the following tools are required to change a dirt bike tire:
-Tire irons (2)
-Flat head screwdriver
-Rim protector/tape (to avoid scratching your rim while changing the tire)
-New tube (the size will be specific to your bike model)
-Soapy water (to help seat the new tube’s valve stem in the rim hole)
-A way to inflate the new tube once it’s installed (a portable air tank or pump will suffice)To begin, use the flat head screwdriver to pry one side of the bead of the old tire away from the rim. Insert one end of a tire iron underneath this section of bead and lever it up and over so that the entire bead is now sitting on top of the rim.
Do this all the way around until both sides of the bead are completely removed. The old tube can now be pulled out through the center of the tire. Inspect both inside surfaces of your tire for any sharp objects that may have punctured your old tube and caused it to go flat in order to avoid flats in your new tube.
Next, take your new tube and lightly coat its valve stem with soapy water. This will help ensure a good seal when installing it in the next step. Take one side of your new tube and insert it into place inside of one side of your tire, then do likewise with other side until both sides are inserted.
Once again working all around, use your hands and fingers to press evenly on both sides of each bead until they’re seated correctly back onto their respective rims. If you see any bulges or creases in either sidewall after seating both beads, gently push these areas inward towards center using just your fingers until they lay flat againssthe restof sidewall – taking care not toreplaceone issue with another! Before inflating, double check that there’s nothing caught between either beadand its respectiverim edge that could prevent proper inflation and sealing later on downthe road(this includes making sureyour valve stemis pointing upwardsand not sidewaysor downwardsbefore proceeding).
How Long Does It Take to Change a Dirt Bike Tire?
It usually takes about 15-20 minutes to change a dirt bike tire. You will need:-a tire changing stand (or something similar to support the bike while you work)
-a set of tire irons
-a new inner tube (and possibly a new outer tire if you are changing both)1. First, use the stand to prop up the bike so that the wheel you are working on is off the ground.
2. Use the tire irons to loosen one side of the old tire from the rim. Start at the valve stem and work your way around.
3. Once one side is loose, pull the tire completely off of the rim.
Be careful not to damage or puncture the old inner tube in this process.
4. Take out the old inner tube and inspect it for any holes or leaks. If it is damaged, you will need to replace it with a new one before continuing.
5 Put some air in the new inner tube (just enough to give it shape, not enough to fully inflate it) and insert it into the space wherethe old one was located..6 Alignone sideof thenewtirewiththe rim and begin workingit backon usingthetireirons if necessaryto pryit overtheedgeofthe rim.
.7 Continueworkingyourwayarounduntiltheentiresidetireisbackontherim..8
InflateTheTubetoItsProperPSI(usuallybetween20and30 PSI dependingonthetiretypeandbrand)usingapumporfingerleversifavailable..9 LowerTheBiketoTheGroundAndTestRideItToMakeSureEverythingIsWorkingProperlyBeforeHeadingOut!
Conclusion
No one likes getting a flat tire, least of all when you’re out on the trail. But flats happen, and knowing how to change a dirt bike tire is an essential skill for any rider. Luckily, it’s not as difficult as it might seem.
With a few basic tools and some practice, you’ll be changing your own tires in no time.The first step is to gather your supplies. You’ll need a new inner tube, a set of tire levers, and either a hand pump or CO2 cartridge.
Once you have everything you need, begin by removing the wheel from your bike. Most bikes have quick-release axles, but if yours doesn’t, you’ll need a wrench to remove the axle nuts.With the wheel off, use the tire levers to pry off the old tire.
Be careful not to puncture the inner tube while you do this. Once the tire is off, remove the old inner tube and inspect it for holes or leaks. If there are any damaged areas, make sure to mark them so you can avoid them when installing the new tube.
Now it’s time to install the new inner tube. Start by inflating it slightly so that it holds its shape when you put it back on the rim. Then line up the valve stem with the hole in the rim and tuck The rest of The tube under The bead of The tire .
Slowly work your way around The circumference Of The wheel , making sure that The tube stays tucked in And doesn’t get pinched between The bead And The rim . Once you’ve gone allthe Way around , inflateThe Tire fully And re-install It OnYour Bike .

How to Change Tires on Rims With Machine
There are a few things you need to know before attempting to change a tire on your own. First, you’ll need to identify what kind of machine you have. There are three types of machines: pneumatic, electric, and manual.
Each type has its own unique set of instructions. Second, you’ll need to gather the necessary tools. For this project, you’ll need a wrench, a jack, and a lugnut key.
Third, you’ll need to find a safe place to work. Once you have all of these things in order, you’re ready to begin!
- Park your car on a level surface and set the emergency brake
- Loosen the lug nuts on the wheel that you will be changing with a lug wrench
- Do not remove them completely yet
- Place a jack under the car and raise it up until the tire is off the ground
- Remove the lug nuts and take the tire off of the rim
- If you are having difficulty, try using a tire iron to pry it off
- Put the new tire on the rim and hand-tighten each of the lug nuts
- 6 Lower the car back down to the ground and use your lug wrench to tighten each ofthe lug nuts securely in place

Credit: en.wikipedia.org
How Do You Take a Tire off the Rim With a Tire Machine?
If you’re planning on changing a tire yourself, it’s important to know how to take the tire off the rim. This can be done using a tire machine.First, you’ll need to loosen the lug nuts that hold the wheel in place.
You can do this with a wrench or socket set. Once the lug nuts are loose, you’ll need to jack up the car so that the wheel is suspended in air. Place a jack stand beneath the car for safety before proceeding.
Next, position the tire machine next to the wheel and follow its instructions for taking the tire off the rim. Most machines will require you to attach some sort of clamp around the circumference of the tire before it can be pulled off.With the machine turned on, slowly lower its arm untilthe clamp comes into contact withthe top ofthe tire.
The arm will then start spinning and pullingthe tire away fromthe rim simultaneously. Keep an eye onthe progressto make sure everything is going smoothly.
What Machine is Used to Put Tires on Rims?
The machine that is used to put tires on rims is called a tire changer. This machine makes it possible to change the tires on a vehicle quickly and easily. The tire changer is operated by a lever that is located at the side of the machine.
This lever is used to raise and lower the platform that the tire rests on. The platform can be lowered so that the tire can be placed on the rim. Once the tire is in place, the platform can be raised again so that the weight of the vehicle is taken off of the tire.
How Does a Tire Changer Machine Work?
A tire changer is a machine used to remove and replace the tires on a vehicle. The process of changing a tire can be done by hand, but it is much easier and faster to use a tire changer. There are two types of tire changers: manual and automatic.
Most modern tire changers are automatic, which means that they have a lever or pedal that you press to start the machine. The machine will then do all the work for you. It will loosen the lug nuts, raise the vehicle off the ground, remove the old tire, install the new tire, lower the vehicle, and tighten the lug nuts.
All you have to do is load the new tire onto the machine and make sure it is properly seated.Some older model machines are semi-automatic, which means that you have to manually loosen and tighten the lug nuts yourself. These machines will still raise and lower the vehicle for you though.
If you are changing your own tires at home, chances are you will be using a manual Tire Changer Machine. These units tend to be smaller in size than their commercial counterparts so they can easily fit into a garage or workshop area. They generally operate in much same way as an automatic unit with some slight variations depending on make and model type.
Can You Put New Tires on Rims Yourself?
You can absolutely put new tires on rims yourself! It’s a pretty simple process that anyone can do with just a few tools. Here’s what you’ll need:
– A tire iron
– A jack
– A lug wrench
– New tires
– A clean, level surface to work onFirst, use the tire iron to loosen the lug nuts on the old tires.
Then, use the jack to lift up the car so you can remove the old tires. Once they’re off, clean the rims really well before putting on the new tires. Make sure to put them on evenly and snugly, then use the lug wrench to tighten everything back up.
That’s it! You’ve now successfully changed your own tires.
Tire Machine: Tire Remove & Install
Conclusion
If your car has rims, you’ll need to take a few extra steps when changing the tires. Rims can be difficult to remove without the right tools and technique. Here’s how to change tires on rims with a machine:
1. Loosen the lug nuts with a lug wrench. You may need to use a breaker bar if the nuts are particularly tight.2. Jack up the car and place jack stands under the frame for support.
3. Remove the lug nuts and old tires. Be careful not to scratch the rims while doing this.4. Place new tires on the rims and hand-tighten the lug nuts.
5. Lower the car back down and tighten the lug nuts with a torque wrench until they’re snug but not too tight (you don’t want to strip them).