- Home
- Blog

How to Fill a Flat Tire
If you have a flat tire, don’t panic! You can easily fix it with a few simple tools. First, find a safe place to pull over.
Then, use a jack to lift up your car so you can remove the flat tire. Once the flat tire is off, put on the spare tire and lower your car back down. Finally, tighten the lug nuts with a wrench to make sure the spare tire is secure.
How to Fix a Flat Tire EASY (Everything you need to know)
- Park your car on a level surface and set the parking brake
- Loosen the lug nuts on the flat tire with a lug wrench
- Raise the car up with a jack, and then remove the flat tire
- Take the spare tire and line it up with the bolt holes on the wheel well
- Put the lug nuts back on, but don’t tighten them all the way just yet
- Lower the car down and then tighten all of the lug nuts with the wrench
How to Put Air in a Flat Tire at Home
It’s happened to all of us. You’re driving along and suddenly you feel that tell-tale thumping that indicates you have a flat tire. If you’re lucky, you’re near a gas station or service center where someone can take care of it for you.
But if you’re not, don’t despair. You can easily put air in a flat tire at home with just a few simple tools.First, find your owner’s manual and locate the recommended tire pressure for your car.
You want to be sure not to overinflate the tire, as this can cause damage. Once you have the correct pressure, use an air compressor or hand pump to add air to the tire until it reaches the desired level.If you don’t have an air compressor or hand pump, you can still put air in your tires using a soda bottle and some elbow grease.
First, remove the cap from the bottle and screw on the valve stem of your tire (the part that sticks out from the side of the tire). Then, holding the bottle upside down, push down on it repeatedly until the tire is inflated to its proper level. It takes a bit of effort, but it works in a pinch!
Now that you know how to put air in a flat tire at home, hopefully you won’t find yourself stranded by the side of the road next time your tires need some TLC.
How to Tell If Tire is Flat Or Just Needs Air
If you’ve ever wondered whether your tire is flat or just needs air, you’re not alone. It can be tricky to tell the difference, especially if you’re not familiar with how a tire should look and feel when it’s properly inflated. Here are a few tips to help you figure it out:
1. Check the tread depth. If the tread looks shallow, it’s likely that the tire is flat. You can check this by inserting a quarter into the tread – if the coin doesn’t go in more than halfway, the tread is shallow and your tire may be flat.
2. Feel around the circumference of the tire. If it feels bumpy or has raised areas, it’s probably flat. A properly inflated tire will be smooth all around.
3. Press down on the center of the tire with your thumb. If it feels soft or spongy, there’s not enough air in the tire and it may be flat. A properly inflated tire will feel firm to the touch.
4. Look at the sidewall of the tire for bulges or cracks. These are signs that the structure of the tire has been compromised and it may beflat even if there’s still some air in it.
My Tire is Completely Flat What Do I Do
If you have a completely flat tire, don’t panic! There are a few things you can do to get back on the road.First, try to find a safe place to pull over.
If you’re on the side of the road, make sure you’re as far away from traffic as possible. Once you’re safely off the road, take a look at your tire. If it’s completely flat, you’ll need to replace it with your spare tire.
If you don’t have a spare tire, or if your spare tire is also flat, you’ll need to call a tow truck. They’ll be able to take your car to a nearby service station where you can get a new tire.In the meantime, there are a few things you can do to make sure your car is safe until help arrives:
-Turn on your hazard lights so other drivers know to give you space.
-Put out reflectors or flares around your car so it’s easier for others to see in low light conditions.
-Stay inside your car and wait for help – don’t wander off!
What to Do When You Have a Flat Tire at Home
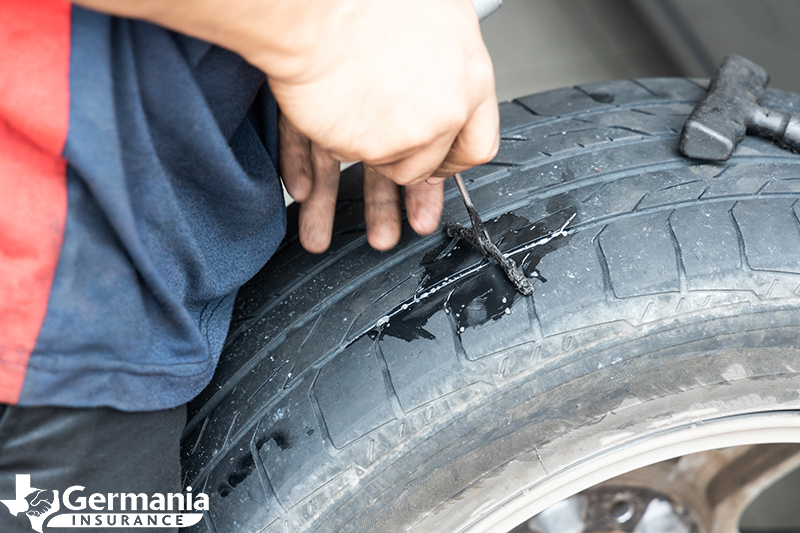
If you’re like most people, you probably don’t think much about your tires until you have a problem with one. But flat tires happen, and it’s important to know what to do when they do.If you have a flat tire at home, the first thing you need to do is find the source of the leak.
This can be tricky, especially if the leak is small. Once you’ve found the leak, patch it up with a tire repair kit or take it to a nearby tire shop for help.Once the leak is fixed, inflate the tire to the correct pressure using a air compressor or hand pump.
If your car has a spare tire, now is the time to use it. Put the spare tire on and tighten all of the lug nuts securely before driving off.If you don’t have a spare tire or can’t fix the leak, call a tow truck and have your car taken to a nearby service station for help.
In either case, be sure to drive slowly and carefully until you can get your car properly repaired.
How to Fix a Flat Tire on a Bike
Bicycles are a great way to get around, but they’re not always the most reliable mode of transportation. Sometimes you can’t avoid getting a flat tire. It happens to everyone eventually.
But don’t worry, it’s not the end of the world. Here’s how to fix a flat tire on a bike:1. Start by removing the wheel from the bicycle frame.
You’ll need to remove the quick release lever or unscrew the axle nuts, depending on your bicycle.2. Once the wheel is removed, take out the inner tube and inspect it for holes or punctures. If you find one, use a patch kit to repair it.
3. If there are no holes in the inner tube, check for debris in the tire that may have caused the flat (e.g., glass, nails, thorns). Remove any foreign objects and inspect the tire for damage. If necessary, replace the tire before proceeding.
4. To reinflate the inner tube, use a hand pump or CO2 cartridge (if you have one). Insert one end of the pump into the valve stem and begin pumping until the tube is firm but not too tight againstthe side of the tire . Reattach the wheel to the frame and you’re ready to go!
Credit: germaniainsurance.com
How Do You Fill a Flat Tire at a Gas Station?
If you’re lucky, you may have never had to deal with a flat tire. But if you have, you know it’s not a fun experience. If it happens while you’re driving, it can be dangerous.
And even if it doesn’t happen while you’re driving, changing a tire is no picnic. If you find yourself with a flat tire and no spare, your only option is to fill the tire with air and drive to the nearest gas station.Here’s how to do it:
1. Drive slowly to the gas station – Don’t try to speed or drive recklessly just because you have a flat tire. Driving too fast could make the situation worse and put you in danger. Just take it easy and get to the gas station as safely as possible.
2. Find an air pump – Most gas stations have air pumps that are available for public use. Look for one near the entrance of the station or ask an employee if you can’t find it.3..
Insert money into the machine – In order to use the air pump, you’ll need to insert money into the machine. Usually, it costs around $1-2 for a minute or two of use.4..
Remove the cap from your tires – Once you’ve found an air pump and inserted money into the machine, locate your car’s tires. You’ll need to remove the cap from each tire in order to fill them with air..
To do this, simply unscrew the cap until it comes off completely.. Be careful not to lose track of any caps! They’re small and easy to misplace..5.. Attach hose from pump to tire valve – Take the hose from the air pump and attach it securely onto your car’s tire valve.. Make sure that there is a tight seal so that no air will leak out when pumping.. If there isn’t a tight seal,air will escape fromthetire asyou tryto fillit upandyou’llwaste timeandmoney.(Mosthoseshaveacouplingdevice thatcanbe tightenedwitha simplequarterturn.) Also double checkthatthishoseisn’tconnectedtoanothertire—youdon’twanttopumpairintothesurroundingatmosphere!
Can You Fill Up a Flat Tire?
If you have a flat tire, you may be wondering if you can fill it up yourself or if you need to call a tow truck. While it is possible to fill up a flat tire, it is not recommended. This is because filling up a flat tire can cause the tire to burst.
When a tire bursts, it can cause serious injury or even death. If you have a flat tire, the best thing to do is to call a tow truck and have the tire replaced.
How Do I Fill My Tires at Home?
Filling your tires at home is a simple process that only requires a few tools and some patience. First, you’ll need to locate the valve stem on your tire. This is the small black or silver cap on the side of the tire that allows air to enter or exit.
Once you’ve found the valve stem, unscrew the cap and attach your air compressor hose. If you don’t have an air compressor, you can use a hand pump or even just a straw.Next, turn on your air compressor (or start pumping if using a hand pump) and fill your tires to the recommended pressure.
You can find this information either in your car’s owner’s manual or on a sticker inside one of the doors. Once the tires are filled, screw the caps back onto the valve stems and you’re all set!
Conclusion
It’s inevitable. At some point, you’ll experience the joys of dealing with a flat tire. But don’t worry, changing a flat is easy and only takes a few minutes.
Here’s how to do it:1. Park your car in a safe place and turn on your hazard lights.
2. Find your spare tire, jack, wrench, and owner’s manual (if you have one).
3. Place the jack under the frame of your car (consult your manual for specific instructions).
4. Lift the car until the flat tire is off the ground (again, consult your manual).
5. Remove the wheel cover (if applicable) and loosen the lug nuts with the wrench.
6. Remove the flat tire and replace it with your spare tire by screwing on the lug nuts in a clockwise direction until they’re tight enough that they won’t come loose when driving (don’t over tighten them).
7. Lower your car to the ground and remove the jack from under your car frame 8Check that all of your lug nuts are tight before driving away!

How to Get Bulletproof Tires in Gta 5
There are two ways to get bulletproof tires in GTA 5: through a cheat code or by purchasing them from the LS Customs. The former is obviously the easier method, but if you’re not into using cheats, then you’ll have to shell out some money for the latter. Either way, once you’ve got your hands on some bulletproof tires, your car will be virtually indestructible – at least when it comes to taking gunfire.
Just keep in mind that this invincibility doesn’t extend to things like explosions or crashing into walls at high speeds; your car can still be totaled under those circumstances.
- Drive to any Los Santos Customs location in GTA 5
- Select the “Tire” option from the menu
- Choose the “Bulletproof” option to make your tires invincible to damage
- Pay the required amount of money to upgrade your tires
How to Get Bulletproof Car in Gta 5 Online
In GTA 5 Online, there are two main ways to get a bulletproof car – either by purchasing one from the in-game store, or by finding and stealing one.If you’re looking to buy a bulletproof car, the best place to start your search is at the in-game store. Here you’ll find a variety of different vehicles that come with varying levels of protection.
The most expensive option is the Armored Karin Kuruma, which will set you back a whopping $1,265,000. However, if you’re on a budget, there are still plenty of good options available – like the Armored BF Injection for $675,000 or the Bravado Buffalo S for $450,000.If you’d rather steal a bulletproof car than buy one outright, your best bet is to keep an eye out for security vans.
These vans always have at least one heavily armored vehicle inside them, making them ideal targets for theft. Of course, stealing a security van isn’t exactly easy – so make sure you’re prepared before taking one on.

Credit: www.reddit.com
How Much are Bulletproof Tires in Gta 5?
One of the most popular questions we get here at GTA 5 Cheats is “how much do bulletproof tires cost in GTA 5?” The answer, unfortunately, is a bit complicated.First off, there is no such thing as “bulletproof” tires in GTA 5.
While certain vehicles (like military vehicles) may have reinforced or armored tires that offer some protection from gunfire, they will eventually succumb to sustained fire.That being said, there are ways to make your tires more resistant to damage in GTA 5. The first is by using a tire spray, which can be purchased from any Los Santos Customs location for $150.
Tire spray will make your tires impervious to bullets for a short period of time, though it will slowly wear off over the course of several minutes.The other option is to install ballistic inserts into your vehicle’s tires. These are available from certain mod shops around Los Santos (including Benny’s Original Motor Works), and will permanently increase the durability of your vehicle’s tires.
Ballistic inserts cost $1,500 each, so they’re not cheap – but they’re definitely worth it if you find yourself under fire often!
Do Bulletproof Tires Make Your Car Slower in Gta 5?
No, bulletproof tires do not make your car slower in GTA 5. In fact, they actually provide a slight speed boost to your vehicle. The main downside to having bulletproof tires is that they are significantly more expensive than regular tires.
How Do You Get New Tires in Gta 5?
There are a few ways that you can get new tires in GTA 5. You can either buy them from a tire shop, or find them lying around the map.If you want to buy new tires, the easiest place to do so is at a tire shop.
There are several tire shops located around the map, and they will sell you a new set of tires for your car. The price of the tires will vary depending on the type of car you have, but they typically range from $100-$200.You can also find new tires lying around the map.
They are often found in parking lots or on the side of the road. If you see a tire lying around, you can pick it up and take it to a tire shop to have it installed on your car.
How Do You Get Slick Tires in Gta 5?
There are a few ways to get slick tires in GTA 5. The first is to purchase them from Los Santos Customs. The second is to find them scattered around the map, usually near race tracks or other high-performancedriving areas.
The third is to complete certain missions that will award you with a set of slicks. And finally, the fourth way is to simply buy a sports car that comes equipped with slicks from the start.
How To Get Bulletproof Tires
Conclusion
If you want to get bulletproof tires in GTA 5, there are a few things you need to do. First, you need to find a car with bulletproof tires. You can either find one by searching online or by visiting a car dealership.
Once you’ve found a car with bulletproof tires, you need to purchase the car and then take it to a garage. Once the car is in the garage, you need to select the “Tire” option and then choose the “Bulletproof” option. This will make your tires invulnerable to bullets and other damage.

How to Build a House Out of Old Tires
Tires are one of the most common environmental pollutants. They can be found in landfills, on roadsides, and in our oceans. But what if we could repurpose them into something useful?
Something like a house! Here’s how to build a house out of old tires.
- Gather old tires from a junkyard or tire store
- Make sure they are in good condition and not too worn down
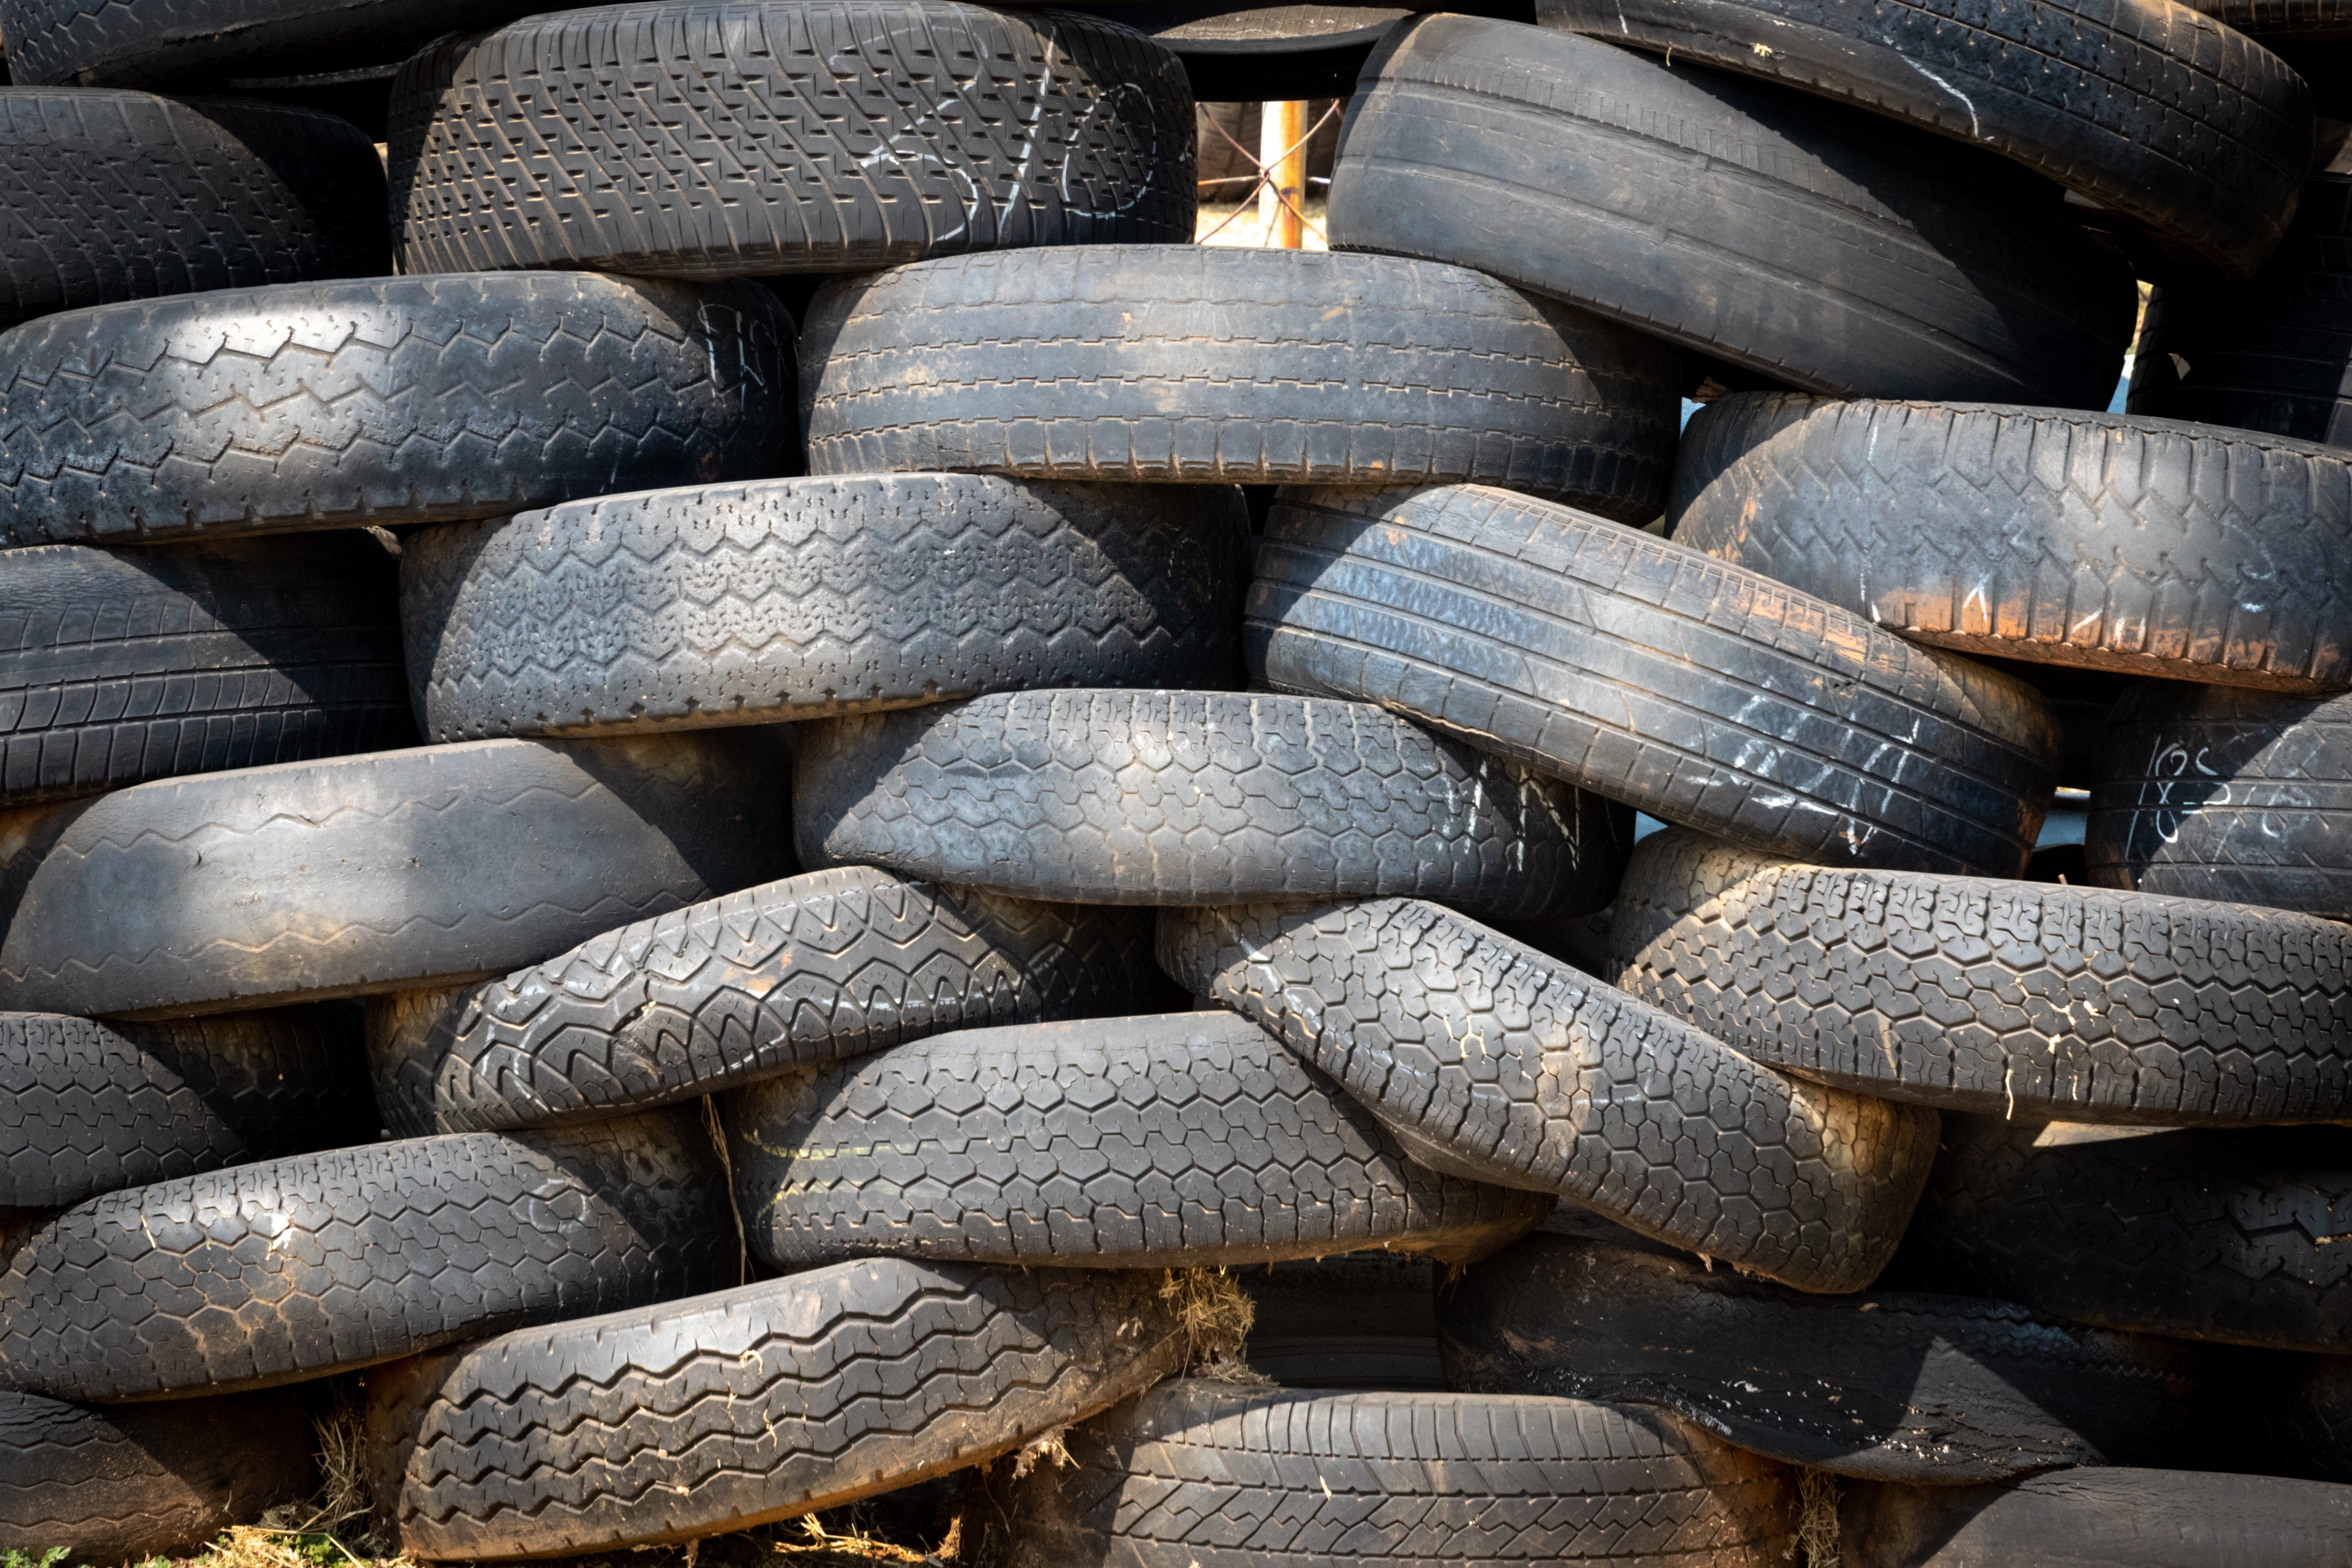
- Stack the tires on top of each other, alternating between big and small tires
- Use bricks or cinder blocks to stack them if necessary
- Once you have a tall stack of tires, start filling them with dirt, sand, or gravel until they are completely full
- Pack the fillings tightly so that the structure is sturdy
- Use mortar or cement to seal the cracks between the tires
- This will further reinforce your house and make it weatherproof
- 5 Let the mortar or cement dry completely before moving on to the next step
- 6 Now you can start building walls around your tire foundation using any type of material you want, such as wood, stone, or metal sheets
Off-Grid Tire House
We all know that living “off the grid” is becoming more and more popular. And, there are many different ways to do it. One way is to build a tire house.
Tire houses are made from, you guessed it, old tires! They are relatively easy and inexpensive to build, and they can be quite cozy. The best part about them is that they are eco-friendly and will help reduce your carbon footprint.
If you’re interested in building an off-grid tire house, here are some things you need to know:1. Find some old tires – You can usually find these for free at your local dump or recycling center. Just make sure they aren’t too worn out.
2. Clean the tires – This is important because you don’t want any chemicals leaching into your home. You can clean them with a mixture of water and vinegar.3. Stack the tires – Start by stacking two tires on top of each other, then add three more on top of that (for a total of five).
Make sure the tires are staggered so that they create a stable foundation.4. Fill the tires with dirt – Once your tires are stacked, fill them with dirt until they are level with the ground around them. This will help insulate your home and keep it warm in winter and cool in summer .
. Add a layer of straw over the top for even more insulation . 5 Create walls & roof- To create walls , simply stack more tires on top of each other , leaving spaces in between for windows & doors .
For the roof , you can use plywood or tin sheets . 6 Finish the inside- Now it’s time to finish the inside of your new home ! Add drywall , paneling , or whatever else you want to make it feel like home sweet home . 7 Move in & enjoy! – Congrats , you did it ! Now move into your new off-grid tire house & start enjoying all the benefits that come along with living sustainably !
Credit: www.backwoodshome.com
Can You Use Old Tires As Insulation?
One of the most common questions we get here at Earthbound Recycling is whether or not old tires can be used as insulation. The answer is yes! But there are a few things to keep in mind before using tires as insulation.
Tires make great insulation because they are made of rubber, which is an excellent insulator. Rubber also has a high R-value, meaning it can resist heat transfer very well. This makes tires ideal for use in walls, ceilings, and floors where you want to keep heat in (or out).
However, there are a few things to consider before using tires as insulation. First, tires can off-gas chemicals like benzene and styrene, so it’s important to make sure they are properly ventilated if you’re going to use them indoors. Second, tire rubber is flammable, so you’ll need to take precautions if you’re using them near any heat sources.
Overall, though, using old tires as insulation is a great way to recycle them and save energy at the same time!
How Do You Build a Retaining Wall Out of Old Tires?
A retaining wall is a structure that holds back soil or rock from a site. It is usually used to stabilize slopes and prevent erosion. Retaining walls can be made out of many different materials, including concrete, stone, wood, and metal.
One unusual material that can be used to build a retaining wall is old tires.Tires are typically made out of rubber and steel. They are strong and durable, making them ideal for use in a retaining wall.
Tires can be stacked on top of each other to create a tall wall. They can also be filled with dirt or sand to give them extra weight and stability.Building a retaining wall out of old tires is not as difficult as it may sound.
The first step is to collect enough tires to build the desired height of the wall. Once you have enough tires, you will need to prepare the site where the wall will be built. This includes clearing away any debris and level off the ground so that the tires can sit evenly on top of each other.
The next step is to start stacking the tires on top of each other. It is important to make sure that each tire is level before adding another one on top. Once all the tires are in place, you can fill them with dirt or sand until they are completely full.
What is a Tire Home?
A tire home is a type of temporary housing made out of recycled tires. It is an eco-friendly and inexpensive way to provide shelter for people in need, such as refugees or disaster victims. The tires are filled with earth or sand and arranged in a dome-like structure, then covered with a waterproof tarp or other material.
Tire homes are sturdy and can withstand high winds and heavy rains. They can also be insulated to help protect against extreme temperatures.
How Do You Build a Tire Wall?
Building a tire wall is a great way to create a natural looking barrier. Tires are readily available and inexpensive, making them an ideal material for this type of project. Here are the steps you’ll need to take to build your own tire wall:
1. Choose your location. When selecting a spot for your tire wall, make sure it’s in an area that won’t be disturbed by foot traffic or landscaping equipment. You’ll also want to avoid any areas where water might pool, as tires can become quite heavy when wet.
2. Gather your materials. In addition to tires, you’ll need something to hold them in place while they dry. Wire fencing or landscape fabric can work well for this purpose.
3. Begin stacking the tires. Start by placing one tire on its side and then stacking another on top of it, offsetting the second tire so that its center is aligned with the edge of the first tire. Continue adding tires in this manner until you reach your desired height.
4….
Want to Build an Off Grid Home for less than $10,000? Try this
Conclusion
In this blog post, the author explains how to build a house out of old tires. The process is relatively simple and does not require many materials. The first step is to find a suitable location for the house.
Once the location is found, the next step is to start digging a hole for the foundation. After the hole is dug, the next step is to lay down a layer of tires followed by a layer of dirt. Repeat this process until the desired height is reached.
Finally, add a roof and you’re done!

How to Put Chains on Snowblower Tires
Putting chains on snowblower tires is a necessary wintertime chore for many people who live in areas where it snows. It can be a little bit tricky to do, but with a little practice it becomes much easier. Here are the steps to follow to put chains on your snowblower tires:
1. Park the snowblower on a level surface and engage the parking brake. 2. Place the chains around the outside of the tire, making sure that they are not twisted. 3. Hook the ends of the chain together and tighten them as much as possible by hand.
4. Use pliers or another tool to twist the tightening link until it is tight against the side of the tire.
- Park your snowblower on a level surface and engage the parking brake, if it has one
- Place a piece of cardboard or plywood under each tire to prevent them from spinning while you’re working
- Locate the chains for each tire
- They will be marked “L” for left and “R” for right
- Starting with the rear tires, loop the chain around the tire and secure it with the S-hook or other type of connector provided with the chain
How to Make Tire Chains for Snowblower
When the snow starts to fall and the temperatures drop, it’s important to have a good set of tire chains for your snowblower. Tire chains provide extra traction on icy or snowy surfaces, making it easier to get around in winter weather. Here’s how to make your own tire chains for a snowblower:
You’ll need:-Two lengths of chain (each should be long enough to reach from one side of the tire to the other)
-Four S-hooks
-Wire cuttersInstructions:1. Attach one length of chain to each side of the tire, using two S-hooks on each side.
Make sure that the chains are tight against the tires.2. Cross the chains in the center of the tire, and secure them together with two more S-hooks. Again, make sure that the chains are tight against the tires.
Trim any excess chain with wire cutters if necessary.3. Repeat steps 1 and 2 for the other tire on your snowblower. And that’s it!
You’re now ready to tackle any snowy or icy surface with confidence.
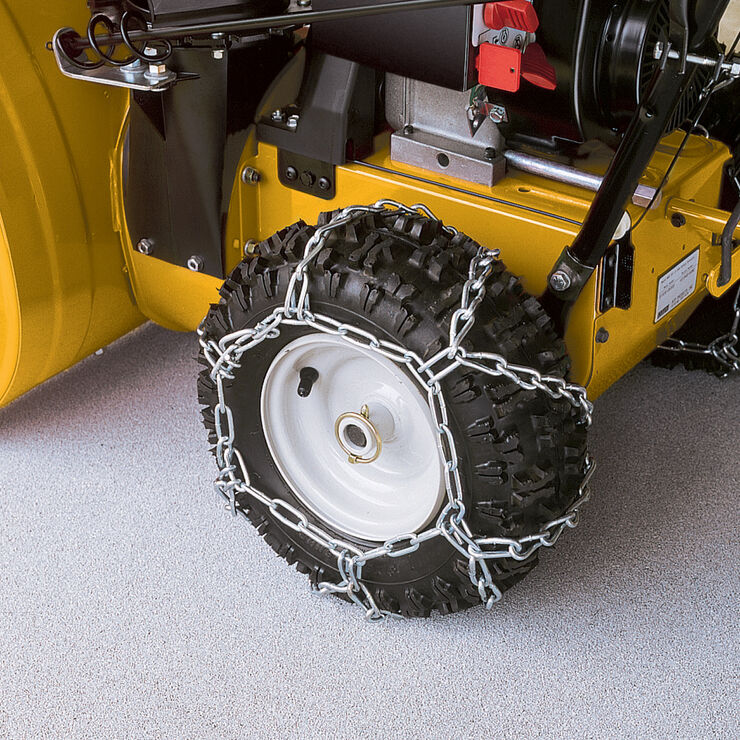
Credit: www.cubcadet.com
How Do You Put Chains on a Snowblower Wheel?
If you live in an area where it snows, you know that a snowblower is a necessity. But if you’ve never used one before, the prospect of putting chains on the wheels can be daunting. Here’s a step-by-step guide to help you get your snowblower ready for action.
First, make sure that the chains are the right size for your snowblower’s wheels. You can find this information in the owner’s manual. Once you have the right size chains, put them around the outside of each tire, making sure that they’re centered and not too tight or too loose.
Next, take the end of each chain and connect it together with the provided hooks or clips. Again, refer to your owner’s manual for specific instructions. Once both chains are securely in place, test them out by moving the snowblower back and forth to see if they’re tight enough.
If they seem too loose, tighten them up a bit; if they’re too tight, loosen them slightly.And that’s it! Now you’re ready to tackle those snowy sidewalks and driveways like a pro!
Should You Put Chains on Your Snowblower?
Chains can help improve traction on a snowblower, but they’re not always necessary. If you live in an area with a lot of snow and ice, chains may be a good idea. But if you don’t get much snow or your snowblower has good traction without chains, you probably don’t need them.
How Do You Remove Chains from Snowblower?
If your snowblower has a chainset, it’s important to know how to remove the chains when they need to be replaced. Here’s a step-by-step guide on how to do it:1. Unscrew the bolts that hold the chains in place.
You’ll find these at the top of the snowblower, near where the handlebars meet the body of the machine.2. Carefully remove the old chains from around the auger and discard them.3. Wrap the new chains around the auger, making sure they’re tight and snug against the metal surface.
4. Screw the bolts back in place to secure thechains. Make sure they’re tight so thatthe chains don’t come off while you’reusing the snowblower.
What is the Easiest Way to Install Snow Chains?
There are a few different ways that you can install snow chains, but some are definitely easier than others. If you’re stuck in the snow and need to get your chains on quickly, here are a few tips to make it as easy as possible.1. Read the instructions that come with your chains.
This may seem like a no-brainer, but it’s important to make sure you know how your particular chains should be installed. Every set is slightly different, so take a few minutes to familiarize yourself with the process before you start.2. Park on level ground if possible.
This will make it much easier to install the chains and get them tight enough that they’ll actually do their job once you’re driving. If you’re stuck in the snow and can’t find level ground, try to park as close to the side of the road as possible so that you have room to work.3. Put the car in park or neutral and set the parking brake.
Again, this will just make things easier when you’re trying to install the chains. No one wants the car rolling around while they’re trying to work!4. Start with the front tires (assuming your car is rear-wheel drive).
It’s generally easiest to work on one tire at a time, so put your chains on one front tire and then move onto the other one. Make sure that the chains are positioned correctly before tightening them up – most sets will have arrows or other markings indicating which way they should face.
How to Install Snow Blower Tire Chains
Conclusion
If you live in an area that gets a lot of snow, you know how important it is to have a good snowblower. But even the best snowblower can’t do its job if the tires aren’t properly chained. In this post, we’ll show you how to put chains on your snowblower tires so you can keep your driveway clear all winter long.
First, make sure you have the right size and type of chains for your tires. Then, position the snowblower so that the front tires are off the ground. This will make it easier to put the chains on.
Next, thread the chain around the tire, making sure that all of the links are engaged. Once the chain is in place, tighten it up so that it’s snug but not too tight. You don’t want to damage the tire or make it difficult to turn.
Finally, test-drive your snowblower to make sure that the chains are working properly. If they seem loose or they’re coming off, adjust them and try again until they’re just right.

How to Buy Costco Tires
For many of us, buying tires is a necessary but dreaded task. It’s not something most of us are experts in and can be confusing and expensive. But if you’re a Costco member, you can take advantage of their tire center to get great deals on quality tires.
Here’s what you need to know about how to buy Costco tires.
- Research the types of tires that will work best for your vehicle and driving needs
- You can read reviews online or ask friends for recommendations
- Once you’ve decided on the type of tire you want, visit Costco’s website to see if they carry it
- If so, note the price and any special features or deals
- If you’re a member, sign in to your account
- If you’re not a member, you can still purchase tires from Costco, but you’ll need to create an account first
- Add the tires you want to purchase to your cart and proceed to checkout
- Enter your shipping information and choose a delivery method (in-store pick-up or home delivery)
- Pay for your order using a credit card, debit card, or PayPal account
- Costco will process your payment and send you an email confirmation once your order is complete
Walmart Tires
Walmart Tires are an excellent choice for those looking for a quality tire at an affordable price. There are a variety of tires available from Walmart, which means that there is sure to be a tire that fits your specific needs. Whether you need tires for your car, truck, or SUV, Walmart has the right tires for you.
One of the best things about shopping at Walmart for tires is the convenient location of most stores. This makes it easy to find a store near you so that you can get your new tires installed quickly and easily. In addition, Walmart offers a wide range of services to help make sure that your experience with them is as positive as possible.
These services include free tire installation, free flat repair, and even free alignment checks.When it comes time to buy new tires, be sure to check out Walmart first. With their great selection and low prices, you’re sure to find the perfect tires for your vehicle.
Credit: daily.slickdeals.net
Is Costco a Good Place to Get Tires Installed?
There are a few things to consider when deciding if Costco is a good place to get tires installed. First, you need to determine if your vehicle is compatible with the types of tires that Costco sells. If not, then you’ll need to find another retailer that carries the right type of tire for your car.
Second, you should compare the cost of installation at Costco with other places in order to get the best deal. Third, you should read reviews of the tire installation process at Costco before making a decision.From what we can gather, it seems that most people are happy with their experience getting tires installed at Costco.
The staff is typically very helpful and knowledgeable, and the process is usually quick and easy. However, there have been some complaints about long wait times during busy periods. Overall, it seems that Costco is a good place to get tires installed, as long as you’re aware of potential wait times and price compare beforehand.
Can You Buy Tires from Costco Without Having Them Installed?
If you’re looking to buy tires, you may be wondering if you can purchase them from Costco without having them installed. The short answer is yes, you can. However, there are a few things to keep in mind before making your purchase.
First, it’s important to note that not all Costco locations offer tire installation services. So, be sure to call ahead and confirm that the location you’re planning to visit does indeed offer this service.Second, while you can buy tires from Costco without having them installed, it’s generally not recommended.
That’s because the cost of tire installation at Costco is very reasonable – usually around $15-20 per tire. And, when you have your tires installed at the same time that you purchase them, you’ll also get a free wheel alignment check (a $60 value).So, while it is possible to buy tires from Costco without having them installed, it’s usually best to go ahead and have the Installation done at the same time.
It will save you money in the long run and help ensure that your new tires are properly aligned.
Why Install Tires at Costco?
If you’re thinking about getting new tires, you may be wondering if it’s worth it to install them at Costco. After all, they offer competitive pricing and a wide selection of tire brands.Here are a few reasons why installing your tires at Costco can be a good idea:
1. You can get your tires installed for free.Costco offers free installation on all tires that are purchased through their store. This can be a significant savings compared to other places where you would have to pay for installation separately.
2. They use high-quality equipment.Costco only uses state-of-the-art tire mounting and balancing equipment. This ensures that your tires will be mounted properly and won’t experience any issues down the road.
Are Costco Tires Cheaper Quality?
If you’re looking for cheap tires, Costco is a great place to start your search. The warehouse club offers a wide variety of tire brands and sizes at very competitive prices. However, some shoppers wonder if the tires sold at Costco are of lower quality than other brands.
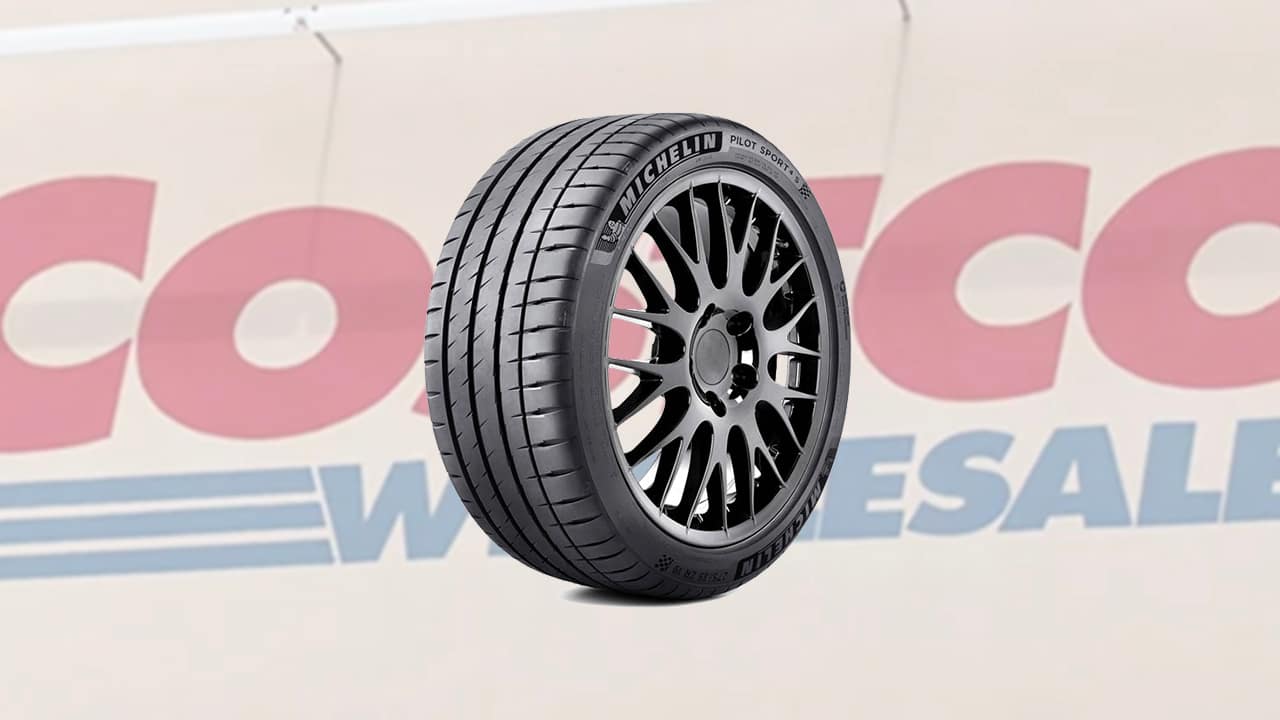
In general, the answer is no – Costco tires are not cheaper quality. The warehouse club offers name-brand tires from manufacturers like Michelin, Goodyear, and Bridgestone. These are all high-quality tire brands that offer excellent durability and performance.
Of course, there are always going to be exceptions to the rule. You might occasionally find a dud tire at Costco (or any other store), but this is rare. In most cases, you’ll get a good quality tire when shopping at Costco – and you’ll save money compared to buying from another retailer.
ℹ️ How to: Purchase tires at Costco.com – Tutorial / Guide (Prod.Solas)
Conclusion
If you’re looking to buy new tires, you may be considering Costco. In this blog post, we’ll give you a few tips on how to buy Costco tires.First, it’s important to know what kind of vehicle you have and what size tires you need.
You can usually find this information in your owner’s manual or on the doorjamb of your car. Once you know this information, head to the tire center at your local Costco store.There, a Tire Advisor will help you select the right tires for your vehicle and driving needs.
They’ll also take into account any warranties or discounts that may be available.Once you’ve selected the perfect set of tires, the Tire Advisor will install them free of charge! They’ll even dispose of your old tires for you.
And if you ever have any problems with your new Costco tires, just bring them back and we’ll make it right.

How to Do a Wheel Alignment With a Tape Measure
If you have a tape measure and know how to use it, you can do a wheel alignment at home. This is a simple process that anyone can do, and it will save you money by not having to take your car to a mechanic. First, park your car on level ground and put the transmission in neutral.
Next, measure the distance from the ground to the center of the wheel well.
- Park your vehicle on a level surface and put it in neutral
- Place a tape measure at the center of the front wheel and measure to the ground
- Write down this measurement
- Repeat step 2 for the rear wheels
- Adjust the front wheels so that they are parallel to each other and perpendicular to the ground, using the measurements from steps 2 and 3 as a guide
- Adjust the rear wheels so that they are parallel to each other and perpendicular to the ground, using the measurements from steps 2 and 3 as a guide
Wheel Alignment Using Measuring Tape… EASY DIY At Home
How Do You Align a Car With a Tape Measure at Home?
If you’re looking to get your car’s alignment checked, it’s best to visit a professional mechanic. However, if you want to check your car’s alignment at home, there are a few things you can do.First, Park your car on a level surface and put the transmission in neutral.
Next, measure the distance from the ground to the center of the front wheel hubs. Then, measure the distance from the ground to the center of the rear wheel hubs.Once you have those measurements, compare them to see if they’re equal.
If they’re not equal, then your car is out of alignment. To fix this, you’ll need to adjust the suspension components until both distances are equal.Keep in mind that checking and adjusting your car’s alignment at home is only a temporary fix.
For a more permanent solution, it’s best to visit a professional mechanic who can properly align your car using special equipment.
Can You Do a Wheel Alignment at Home?
If you have some experience with car maintenance, you can probably do a basic wheel alignment at home. But if you don’t know what you’re doing, it’s best to leave it to the professionals.A wheel alignment involves adjusting the angles of your wheels so that they’re pointing in the same direction.
This is important for several reasons:1. It helps your car drive straight. If your wheels are out of alignment, your car will pull to one side or the other.
This can be dangerous, especially at high speeds.2. It improves fuel efficiency. When your wheels are properly aligned, they create less resistance as you drive.
This means that your engine doesn’t have to work as hard, and you’ll use less fuel overall.3. It prevents premature tire wear. If your tires are constantly fighting against misaligned wheels, they’ll wear down much faster than they should.
How Do I Know If My Wheel Alignment is Correct?
It is important to have your wheel alignment checked regularly to prolong the life of your tires and ensure a smooth ride. There are a few telltale signs that indicate your alignment may be off, such as:1. Your vehicle pulling to one side
2. Uneven or rapid tire wear
3. The steering wheel being off-center when driving straight ahead
4. A vibration in the steering wheel or through the seat
If you notice any of these symptoms, it’s time to get your alignment checked. Many auto repair shops offer this service, and it’s relatively quick and easy to do.
Credit: centro-innato.com
How to Do a Wheel Alignment With String
If your car is pulling to one side or the other, it may be time for a wheel alignment. This is a relatively simple process that you can do at home with just a few tools. You’ll need some string, tape measure, and chalk.
First, park your car on a level surface and put the transmission in neutral. Next, measure the distance from the ground to the center of each wheel. Write down these measurements so you can reference them later.
Now, take your string and tie one end to the front left tire and the other end to the rear right tire. Make sure that the string is taut but not stretched too tight. Once you have the string in place, use your chalk to mark where it touches both tires all the way around.
Remove the string and measure the distance between your marks on both tires. The difference between these two measurements is your toe-in or toe-out. If the measurement on the front tire is greater than that of rear tire, then you have toe-in.
Conversely, if the rear measurement is greater than that of front tire, then you have toe-out . To adjust for this , most cars have an adjustment screw on either side of their steering knuckle . By turning this screw , you can move either wheel inward or outward until they match up with desired measurement .
For example , if my desired toe -in was 1/8″, I would turn each adjustment knob until each corresponding mark was 1/8″ closer together than when I started . Check your owner’s manual for specific instructions on how to make these adjustments on your car . After making these adjustments , recheck your measurements to ensure they are correct before taking it for a spin!
How to Do an Alignment Without a Machine
If your car is starting to pull to one side of the road or your steering wheel is no longer centered when you’re driving straight, it’s likely that your vehicle needs an alignment. Many people think that they need to take their car into a shop in order for it to be aligned, but this is not the case. You can do an alignment at home without even needing a machine.
First, you’ll want to check your tire pressure and adjust it if necessary. Next, locate the adjustment screws on your suspension. These are typically located at the top of each wheel well.
Once you’ve found them, use a wrench to turn them until the vehicle is level from front to back and side to side.It’s important to note that each adjustment screw will affect both the wheels on that particular side of the car as well as the opposite wheel. So, if you turn one screw clockwise, you’ll also want to turn the other screw on the same side counterclockwise by an equal amount.
The goal is to get both sides of the vehicle level with each other.Once you’ve made all four adjustments, take your car for a test drive down a straight stretch of road and see how it feels. If everything feels good, then you’re done!
Step by Step Wheel Alignment Procedure Pdf
As a car owner, it is important to know how to properly align your vehicle’s wheels. This process is known as wheel alignment. Wheel alignment ensures that all four tires are pointing in the same direction and that they are at the correct angle relative to the ground.
This helps improve your car’s handling, fuel economy, and prevents premature tire wear.There are three main types of wheel alignment: toe, camber, and caster. Toe refers to the angle at which your tires point in relation to each other.
If your tires point inward (toward each other), this is called toe-in. If they point outward (away from each other), it is called toe-out. Camber refers to the angle of your tires in relation to vertical; if they tilt inward (at the top), this is called negative camber, while if they tilt outward (at the bottom), it is called positive camber.
Caster refers to the angle of the steering axis in relation to vertical; if it tilts toward the front of the vehicle, this is called positive caster, while if it tilts toward the rear, it is called negative caster.Most cars will have some degree of misalignment from factory standards due to normal driving conditions and wear and tear over time. When you take your car in for service or repair, ask them to check your wheel alignment and make any necessary adjustments.
You may also want to get your wheels aligned if you notice unusual tire wear patterns or if your car seems to be pulling to one side when driving straight ahead.
Conclusion
If your car is pulling to one side or the other, chances are you need a wheel alignment. You can check this yourself with a tape measure. First, measure the distance from the ground to the center of each tire at the front and back of the car.
Then measure the distance between the two front tires and between the two back tires. These measurements should be equal if your car is properly aligned. If not, then you’ll need to adjust the alignment.

How to Fill Air in Car Tires at Gas Station
If you’ve ever driven on a flat tire, you know it’s not a fun experience. You also know that it’s important to keep your tires inflated to the proper pressure. But what happens when you’re out and about and realize that one of your tires is low?
If you’re near a gas station, you can easily fill up your tire with air. Here’s how to do it:Pull into the gas station and park near the air pump.
Most pumps are located near the entrance of the station. Look for a sign that says “air” or “air pump.”Remove the cap from your tire.
You’ll need to unscrew the cap in order to get to the valve stem. Once the cap is off, take a look at the valve stem. There are two types of valve stems: Schrader valves and Presta valves.
How To: Fill Your Cars Tires With Air At The Gas Station
- Locate the air pump at your gas station
- There is usually a dedicated area for air pumps, and they are often located near the self-serve gas pumps
- Insert your coins or card into the machine to start the air pump
- Remove the cap from your tire valve stem and place the end of the air hose over it
- Press down on the handle to start pumping air into your tire until it reaches the desired pressure level as indicated on your car door placard or in your owner’s manual
- If you don’t have either of these, a general rule of thumb is that passenger car tires should be inflated to between 32 and 35 PSI (pounds per square inch)
- Once you’ve reached the desired pressure, release the handle and quickly remove the hose from your tire valve before any air escapes back out
- Replace the cap on your valve stem to prevent dirt and debris from getting inside
Put Air in Tires at Gas Station near Me
If you’re looking to put air in your tires and don’t have a compressor at home, you can always visit a gas station. Most gas stations have an air pump that you can use for free. Simply drive up to the air pump, remove the cap from your tire, and insert the nozzle.
Once the desired amount of air has been added, replace the cap and you’re good to go!
How to Put Air in Tires Without Gauge
If you’re like most people, you probably don’t know how to put air in your tires without a gauge. It’s actually not that difficult, and it can save you a lot of time and hassle at the gas station. Here’s what you need to do:
First, find the valve stem on your tire. It’s the small metal part that sticks out and has a cap on it. Remove the cap and place the end of your hose over the valve stem.
Next, open up your compressor and turn it on. Slowly add air to your tire until it reaches the desired pressure. You can check the pressure by using a tire pressure gauge or by looking at the sidewall of your tire.
Once you’ve reached the correct pressure, turn off your compressor and replace the valve stem cap. That’s all there is to it!
Where to Put Air in Tires near Me
If you’re looking for a place to put air in your tires near you, there are a few options. You can go to a gas station, or if you have an air compressor at home, you can use that. There are also some public air pumps that are available for use.
Do You Have to Turn Your Car off to Put Air in Tires
It’s a common misconception that you need to turn your car off to put air in your tires. However, this is not the case! You can safely add air to your tires while the engine is running.
There are a few reasons why people think you need to turn your car off:1. They don’t want to waste gas.2. They’re worried about the engine overworking.
3. They think it’s unsafe to have the engine running while adding air to the tires.Let’s debunk these myths one by one:1. You don’t need to worry about wasting gas when adding air to your tires.
The amount of gas used while idling is very minimal, and it won’t make a significant difference in your gas tank.2. The engine won’t overwork when you’re adding air to your tires. In fact, it’s actually beneficial to keep the engine running because it will help cool down the compressor (which can get very hot).
Gas Station Air Pump
A gas station air pump is a machine that pumps air into tires. Most gas stations have them, and they are usually located near the gas pumps. Many people use them to fill up their tires before going on a long drive.
There are two types of gas station air pumps: those that take coins and those that don’t. The ones that take coins usually cost around 25 cents per minute, while the ones that don’t take coins are free.To use a gas station air pump, first make sure that your tire is properly inflated.
Next, find an air pump and insert your tire’s valve stem into the hole in the center of the pump. If you are using a coin-operated machine, insert your quarters and turn on the machine. If you are using a free machine, just turn it on.
Let the machine run until your tire is fully inflated, then remove your tire’s valve stem from the hole in the center of the pump and replace its cap. You may need to check your owner’s manual to see what PSI (pounds per square inch) rating is appropriate for your tires; most passenger car tires should be inflated to between 32 and 35 PSI.

Credit: mechanicbase.com
How Do I Put Air in My Tire at a Gas Station?
If you need to add air to your tires, you can do so at most gas stations. Here’s how:1. Locate the air pump.
This is usually near the gas pumps, and will have a sign that says “air” or “inflation.”2. Insert your tire’s valve stem into the chuck (clamping device) on the air pump.3. Press down on the lever to open the chuck and secure it around the valve stem.
4. Set the desired PSI (pounds per square inch) on the gauge, then press down on the handle to start pumping air into your tire.
+5. When the needle on the gauge reaches your desired PSI, release the handle to stop pumping air into your tire.
Can I Fill My Car Tires at a Gas Station?
If you need to fill up your car’s tires, a gas station is probably the most convenient place to do it. Most gas stations have air pumps that you can use to fill up your tires. Just look for the air pump near the gas pumps and follow the instructions.
Of course, you’ll need to know how much air your tires need. You can usually find this information on a sticker inside your driver’s door, or in your owner’s manual. Once you know how much air to add, just attach the air hose to the valve stem on your tire and add air until it reaches the proper level.
Keep in mind that not all gas stations are created equal when it comes to their air pumps. Some may be in better condition than others, and some may even charge for use of the pump. So if you’re looking for a quick and easy way to fill up your car’s tires, a gas station is generally your best bet – just be sure to check things out beforehand so you know what you’re getting into!
How Do You Pump Up a Flat Tire at a Gas Station?
If you find yourself with a flat tire at a gas station, don’t worry! You can easily pump it up using the air compressor. Here’s how:
1. Park your car next to the air compressor and turn off the engine.2. Locate the valve stem on your tire. It’s the small metal tube sticking out of the side of the tire.
3. Put the end of the air hose over the valve stem and turn on the compressor.4. The compressor will start pumping air into your tire. Check the pressure gauge periodically to see how much air is going in.
Stop when you reach the recommended pressure for your tires (usually between 30 and 35 PSI).5. Once you’ve reached the desired pressure, turn off the compressor and remove the hose from your tire’s valve stem. That’s it!
How Do You Use a Gas Station Air Pump in a Car?
If your car has a low tire, you can use a gas station air pump to fill it up. Here’s how:1. Park your car near the air pump and turn off the engine.
2. Locate the valve stem on the tire that you want to fill up. The valve stem is usually located on the side of the tire near the rim.3. Unscrew the cap from the valve stem and attach the air hose from the pump to the valve stem.
Make sure that it’s snug so that no air will leak out while you’re filling up the tire.4. Turn on the air pump and set it to the desired PSI (pounds per square inch). Most gas station pumps have a digital display that will show you how much air is going into your tire as well as what PSI it’s being filled up to.
Fill up your tire until it reaches its recommended PSI level, which can be found in your car’s owner’s manual or on a sticker inside one of your car doors. For most passenger cars, this is between 30 and 35 PSI. If you’re unsure, err on the side of too much rather than too little – overinflated tires are less dangerous than underinflated ones since they’re more likely to burst at high speeds if they’re underinflated.
However, don’t go above 45 PSI unless specifically directed by your owner’s manual – overinflating tires can also cause problems like decreased traction and handling issues while driving.. If there isn’t a digital display, watch carefully as you fill up your tire so that you don’t overdo it – most gas station pumps have an analog gauge that will show you how much pressure is going into your tire.
. Onceyour tiresshowsthe correctPSIon adigitaldisplayor readingonanaloggauge , stoptheairpumpby pressingthe redbutton or lever .5 6 7 Disconnectthehosefromyourtire’svalvestemand putthecapbackontopofit .8 Driveawayandenjoyhavingproperly inflatedtires!
Conclusion
If you’re like most people, you probably take your car to a gas station to get the air in your tires checked and refilled on a regular basis. However, did you know that you can actually do this yourself? It’s actually quite simple – all you need is a compressor and an air gauge.
Here’s a step-by-step guide on how to fill air in car tires at a gas station:1. Park your car next to the air compressor at the gas station. Make sure that the hose is long enough to reach all of your tires.
2. Attach the air gauge to the valve stem on one of your tires. This will help you keep track of how much air is going into each tire.3. Turn on the compressor and slowly start filling each tire with air.
You’ll want to stop when the gauge reaches the recommended PSI for your particular vehicle (this information can be found in your owner’s manual).4. Once all of your tires are properly inflated, detach the air gauge and turn off the compressor. That’s it!
You’ve successfully filled your own car tires with air at a gas station – no need to pay someone else to do it for you!

How to Do Alignments on Cars
Most car owners don’t know how to do an alignment on their car. Here are some easy steps to follow to get your car aligned. First, park your car on a level surface and put it in neutral.
Next, locate the adjustment screws on the front of the car. The adjustment screws are usually located near the headlights. loosen the screws with a wrench and turn them until the wheels are pointing straight ahead.
Then, tighten the screws and lower your car back to the ground. Finally, take your car for a test drive to make sure everything is working properly.
- Park the car on a level surface and turn the engine off
- Place wheel chocks in front of and behind the rear tires to prevent the car from rolling while you’re working
- Loosen the lug nuts on all four tires with a tire iron or impact wrench, but don’t remove them yet
- Jack up the front end of the car and support it with jack stands placed under the frame rails
- Remove the lug nuts and wheels from all four tires
- Inspect each tire to look for any signs of wear or damage, and replace them if necessary
- Take measurements of both the front and rear axle using a tape measure, making note of any discrepancies between them
- Adjust the position of each tire until both axles are within specifications, then tighten down all four lug nuts to secure them in place
Procedures And Steps To Perform A Wheel Alignment
Can I Do an Alignment Myself?
No, you cannot do an alignment yourself. You will need to take your car to a professional mechanic or service center that offers alignments. Alignments require special equipment and training to properly perform, so it is not something you can do at home.
How is an Alignment Performed on a Car?
Most carmakers recommend an alignment at least once a year for optimal tire wear and performance. Alignment involves adjusting the angles of your wheels so that they are perpendicular to the ground and parallel to each other. This helps ensure that your car drives straight, without veering to one side or the other.
There are three main types of alignments: front-end, four-wheel, and rear-wheel. Front-end alignments focus on adjusting the angles of just the front two wheels. Four-wheel alignments adjust all four angles simultaneously.
Rear-wheel alignments only focus on the rear wheels.The first step in any alignment is to inspect your vehicle’s suspension system. This includes checking things like shocks, struts, and control arms for wear or damage.
The technician will also measure the thickness of your tires to see if they need replacing. Once the inspection is complete, the technician will hook up your car to an alignment machine.This machine uses lasers and sensors to measure the precise angle of your wheels relative to each other and the ground.
The technician will then make adjustments to your suspension accordingly. Afterward, they’ll test drive your car to make sure everything feels good before sending you on your way!
What Order Should Alignment Be Done?
One of the most common questions I get as a alignment technician is “What order should alignment be done?”. While there are many different schools of thought on this topic, I believe that there is a correct way to do an alignment. Here’s my reasoning:
The first thing that needs to be done is a thorough inspection of the vehicle. This includes checking tire condition and tread depth, suspension components for wear or damage, and making sure that the steering system is functioning properly. Once the inspection is complete, the next step is to measure the vehicle’s ride height.
This will ensure that the suspension is set at the proper level before any further adjustments are made.Next, it’s time to adjust the toe setting. This is one of the most important aspects of an alignment, as it affects how straight the vehicle will drive down the road.
If the toe setting is off, it can cause premature tire wear and make the vehicle harder to handle. After toe has been adjusted, camber and caster can be set next. These two settings work together to affect how well the vehicle tracks down the road and how stable it feels at high speeds.
Finally, once all other settings have been dialed in, focus on adjustingthe thrust angle. This ensures that your vehicle will drive straight ahead without veering off to one side or another.If you follow this order when performing an alignment, you’ll be sure to get great results every time!
What Tools Do You Need to Do an Alignment on a Car?
If you’re in need of an alignment, you’re going to need a few tools to get the job done. Here’s what you’ll need:– A car jack and stands: You’ll need these to lift your car up so that you can work on the wheels.
– A wrench set: You’ll need this to remove the wheel nuts so that you can take the wheels off.– An impact gun: This will make it easier to remove the wheel nuts. If you don’t have one, a regular wrench will do, but it will be more difficult.
– A tape measure: You’ll use this to measure the distance between the tires and the ground so that you can adjust them accordingly.– A level: This is used to make sure that the vehicle is level before beginning the alignment process.

Credit: www.youtube.com
How to Do an Alignment Without a Machine
One of the most common questions we get here at the shop is “How do I align my car without a machine?” The answer is, unfortunately, you can’t. At least not accurately.
But there are a few things you can do to get it close.First, check your tire pressure and adjust as needed. This will help ensure that your tires are in contact with the ground evenly, which is important for a proper alignment.
Next, take a look at your suspension components. If any of them are worn or damaged, they could be affecting your alignment. Check for loose bolts and tighten as needed.
Finally, take your car for a test drive and see how it feels. If it seems to be pulling to one side or the other, chances are you’re out of alignment. And while you won’t be able to get an exact measurement without a machine, this should give you a pretty good idea of where you need to go from here.
Front Wheel Alignment – Do It Yourself
Most people believe that wheel alignment is a difficult and expensive task that must be completed by a professional. However, with the right tools and knowledge, you can easily align your own wheels at home. This can save you time and money, as well as giving you a sense of satisfaction from completing the job yourself.
There are three main types of wheel alignment: toe, caster, and camber. Toe alignment is the most common type of adjustment and simply involves adjusting the angle of the tires so that they point inwards or outwards slightly. Caster alignment adjusts the steering axis to ensure that it’s perpendicular to the ground, while camber adjusts the angle of the tire in relation to the ground.
The first step in performing your own wheel alignment is to jack up your car and remove the wheels. Next, use a tape measure to determine whether your wheels are pointing in or out at the top and bottom. If they’re not perfectly straight, then you’ll need to make an adjustment.
To adjust toe alignment, loosen the lug nuts on one side of the car and turn either tie rod until the wheel is pointing in or out as desired. Then do the same on the other side. For caster adjustment, loosen both upper ball joints and turn one until desired caster is achieved; repeat on other side.
Camber is adjusted by loosening one lower control arm bolt and turning adjusting sleeve until correct camber is attained; repeat on other side. Finally, tighten all bolts back down before lowering vehicle back down onto ground.With a little time and effort, you can easily perform your own wheel alignment at home – no professional required!
Car Alignment near Me
If you’re looking for a great place to get your car aligned, look no further than your local auto shop. Most auto shops offer alignment services and can usually do it while you wait. It’s important to get your car aligned regularly to ensure that it’s running smoothly and efficiently.
Alignment can also help improve your gas mileage.
Conclusion
Assuming you would like a summary of the blog post titled “How to Do Alignments on Cars”:The post begins by explaining that alignment is important for prolonging the life of tires, and preventing issues like poor handling and premature tire wear. The author then goes into detail about how to check whether or not a car needs an alignment, and what signs to look for.
They list three different types of alignment – toe, camber, and caster – and explain what each one does. Finally, they give a step-by-step guide for actually performing an alignment on a car.

How to Fill Atv Tires With Foam
One way to make sure your all-terrain vehicle (ATV) is ready for off-road adventures is to fill the tires with foam. This will not only give the tires a firm grip on the ground, but also help protect against punctures. Foam filling is relatively simple and only takes a few minutes per tire.
You Can’t Safely Foam Fill ATV Tires
- Purchase a tire filling kit that is designed for ATV tires
- These kits can be found at most auto or powersports stores
- Remove the valve stem cap from the tire you wish to fill
- Insert the nozzle of the filler bottle into the valve stem and squeeze the trigger until the desired amount of foam has been dispensed into the tire
- Replace the valve stem cap and repeat steps 2-4 for each remaining tire
How to Fill a Tire With Foam
Foam-filled tires are a type of tire that is filled with a foam material instead of air. They are often used on vehicles that are driven in off-road or rough terrain conditions, as the foam helps to absorb shocks and provide traction. Foam-filled tires can also be used on regular vehicles, but they may not provide as much comfort or grip as traditional air-filled tires.
To fill a tire with foam, you will need to purchase a can of tire foam from an auto parts store. Once you have the foam, remove the valve stem cap from the tire and insert the nozzle of the can into the valve stem. Slowly depress the handle of the can, filling the tire with foam until it reaches the desired level.
You may need to check the level of foam several times during this process to ensure that it is even. Once you have finished filling the tire, replace the valve stem cap and allow the foam to set for at least 24 hours before driving on it.
Polyurethane Tire Fill Kit
A polyurethane tire fill kit is a great way to extend the life of your tires and protect them from punctures and other damage. The kit comes with everything you need to fill your tires with a durable, long-lasting material that will help keep them inflated longer and resist flats.To use the kit, simply follow the instructions included.
You’ll need to remove your tires from your vehicle, clean them thoroughly, and then insert the tube filled with polyurethane into the tire. Once all of the tires are filled, re-install them on your vehicle and enjoy the peace of mind that comes with knowing your tires are better protected!
Who Foam Fills Tires near Me
If you’re looking for a place to get your tires foam filled, there are a few things you should keep in mind. First, make sure you find a reputable shop that has experience with this type of service. Second, be sure to ask about the warranty and what type of fill is used.
Third, be prepared to pay a bit more for this service than you would for regular tire inflation. Foam filling tires is not a cheap process, but it can extend the life of your tires significantly. With that said, here are a few places near you that offer this service:
1. ABC Tire Shop2. 123 Tire Shop
Best Expanding Foam for Tires
One of the most important things you can do to maintain your vehicle’s tires is to keep them properly inflated. But sometimes, no matter how often you check or how carefully you drive, you can still get a flat tire. That’s where expanding foam comes in.
Expanding foam is a great way to temporarily seal a hole in a tire so that you can get to a safe place and change it.There are many different brands and types of expanding foam on the market, so it’s important to choose one that is specifically designed for use on tires. We’ve done the research and found the best expanding foam for tires so that you can be prepared for anything.
One of the most popular products is Fix-A-Flat. This aerosolized polyurethane tire sealant quickly and easily seals punctures in your tire without requiring a jack or tools. It works by filling the puncture with an expandable urethane foam that expands and cures inside the tire to create a long-lasting repair.
Just attach the hose to the valve stem and squeeze the trigger until the proper amount of product has been dispensed into the tire. Inflate the tire as usual and go!Another great option is Slime Tire Sealant.
This latex-based formula instantly seals punctures up to 1/4″ in diameter while also providing long-term protection against flats. Just insert nozzle into valve stem and depress completely until hissing sound stops (indicates full inflation). Inflate tire as usual – no need to remove wheel!
– then ride away confident knowing that Slime has got you covered.
Diy Polyurethane Tire Fill
Looking to extend the life of your tires? DIY polyurethane tire fill is a great way to do just that! Polyurethane is a synthetic material that can be used to coat and protect many different surfaces.
When applied to tires, it acts as a barrier against wear and tear, keeping them looking new for longer.It’s easy to apply polyurethane tire fill – simply spray it on evenly over the surface of the tire. You can find polyurethane tire fill at most auto stores, or online.
Once you’ve applied it, let it dry for 24 hours before driving on it. And that’s it! Your tires will now have an extra layer of protection against everyday wear and tear.

Credit: dirtwheelsmag.com
Can You Fill a Tire With Expanding Foam?
If your tire goes flat and you don’t have a spare, you may be tempted to try and fill it with expanding foam in order to get back on the road. But is this really a good idea? Let’s take a look at whether or not filling a tire with expanding foam is a good idea.
Expanding foam is typically used for insulation or as an adhesive. It’s not designed for use in tires. In fact, if you did try to fill a tire with expanding foam, it would likely cause more damage than good.
The expanding foam would put pressure on the sidewalls of the tire, potentially causing them to bulge or even burst. And if the foam got into the tread area of the tire, it could throw off the balance and cause uneven wear.So, while you may be tempted to use expanding foam to fix a flat tire, it’s not something we would recommend.
If you find yourself stranded with a flat tire and no spare, your best bet is to call for roadside assistance or hail a tow truck.
What Kind of Foam Do You Use to Fill Tires?
Most people think that any kind of foam can be used to fill tires, but this is not the case. There are different types of foam that are designed for specific purposes, and using the wrong type of foam can damage your tires or even cause a blowout.The most common type of foam used to fill tires is polyurethane tire filler.
This type of foam is designed to expand and contract as the temperature changes, so it can maintain a consistent pressure in your tires regardless of the weather. Polyurethane tire filler is also relatively easy to apply, and it doesn’t require any special equipment.Another type of foam that can be used to fill tires is latex tire filler.
Latex tire filler is more flexible than polyurethane, so it’s able to conform to irregular shapes better. This makes it ideal for filling cracks and holes in your tires. However, latex tire filler is more difficult to apply than polyurethane, and it can also be susceptible to punctures from sharp objects.
If you’re not sure which type of foam to use for your tires, consult with a professional mechanic or tire specialist. They’ll be able to recommend the best option for your particular needs.
How Do You Install Foam Filled Tires?
Foam-filled tires are a type of pneumatic tire in which the inner cavity of the tire is filled with a foamed urethane material. Foam-filled tires are used in a variety of applications, including lawn mowers, wheelchairs, and industrial vehicles.Foam-filled tires offer a number of advantages over traditional pneumatic tires, including improved durability, better ride quality, and lower risk of flats.
In addition, foam-filled tires are typically lighter than their pneumatic counterparts and can be made to custom sizes and specifications.To install foam-filled tires, you will need the following tools:
• A drill
• A 3/8” spade bit
• An air compressor (optional)
• A tire iron
• A rim protector (optional)1. Begin by drilling two holes in the sidewall of the tire using the 3/8” spade bit. The holes should be spaced about 1” apart.
If you are using an air compressor, attach the hose to one of the drilled holes now. Otherwise, skip to step 4. 2. Insert the end of the tire iron into one of the holes and lever against the sidewall to break it open slightly.
This will make it easier to insert the air compressor hose into the hole. 3. With the tire iron still inserted into one hole, use your other hand to guide the air compressor hose into the second hole until it is snug againstthe sidewall ofthe tire 4 . If you are not using an air compressor , proceed to step 8 5 .
Turn ontheaircompressorand setittoachieveaninternalpressureof20PSI 6 . Checkthetire pressure periodicallytoensurethatthedesiredpressurehasbeenreached 7 . Onceyouhaveachievedtheproperinflationlevel ,removethehosefromoneoftheholesandallowittorestagainstthesidewallofthetire 8 . Usethetireiron topryopenthesecondholeenoughso thatyoucaninsertthevalve stemintotheopening 9 . Screwonthevalvecapandhand tightenuntilitisonly finger tight 10 .
How Long Do Foam Filled Tires Last?
There is no definitive answer to how long a foam filled tire will last. Several factors can affect the lifespan of a foam filled tire, such as the type of terrain it is driven on, the weight of the vehicle, and how often the tires are used. Generally speaking, though, most people report that their foam filled tires last between 30,000 and 50,000 miles.
One advantage of foam filled tires is that they can be punctured and still hold their shape. This means that you don’t have to worry about getting a flat tire while you’re out on the road. Additionally, because they’re made out of foam, they’re much lighter than traditional tires, which can save wear and tear on your suspension system.
If you’re thinking about switching to foam filled tires, keep in mind that they may not be compatible with all vehicles. Make sure to do your research before making the switch!
Conclusion
ATV tires can be filled with foam to make them last longer and perform better. Foam filling is a process where polyurethane foam is injected into the tire to fill any voids or gaps in the tread. This helps to create a solid, uniform surface that will resist wear and tear.
Foam filling also helps to protect the tire from punctures and other damage.

How to Do a Rear Wheel Alignment at Home
If your car is pulling to one side or the other, or if the steering wheel isn’t centered when you’re driving straight, it’s likely that you need a rear wheel alignment. This is a simple adjustment that you can do at home with just a few tools. Here’s how to do a rear wheel alignment at home.
- Park your vehicle on a level surface and place blocks behind the back tires
- Jack up the rear of the car and remove the wheels
- Suspend the axle with a string from the ceiling, making sure that the suspension is not hanging from any other part of the car
- Measure the distance from the string to each wheel at various points around the circumference of each tire, and adjust accordingly
- Re-install the wheels and lower the car to the ground
How to Perform Wheel Alignment by Yourself
Can You Do an Alignment on Rear Wheels?
Yes, you can do an alignment on rear wheels. Here’s how:1. Park your car on a level surface and set the parking brake.
2. Place jack stands under the rear axle, making sure they’re securely positioned before getting under the vehicle.3. Use a lug wrench to loosen the Lug nuts on the rear wheels. Do not remove them completely – just loosen them enough so that you can turn the wheels by hand.
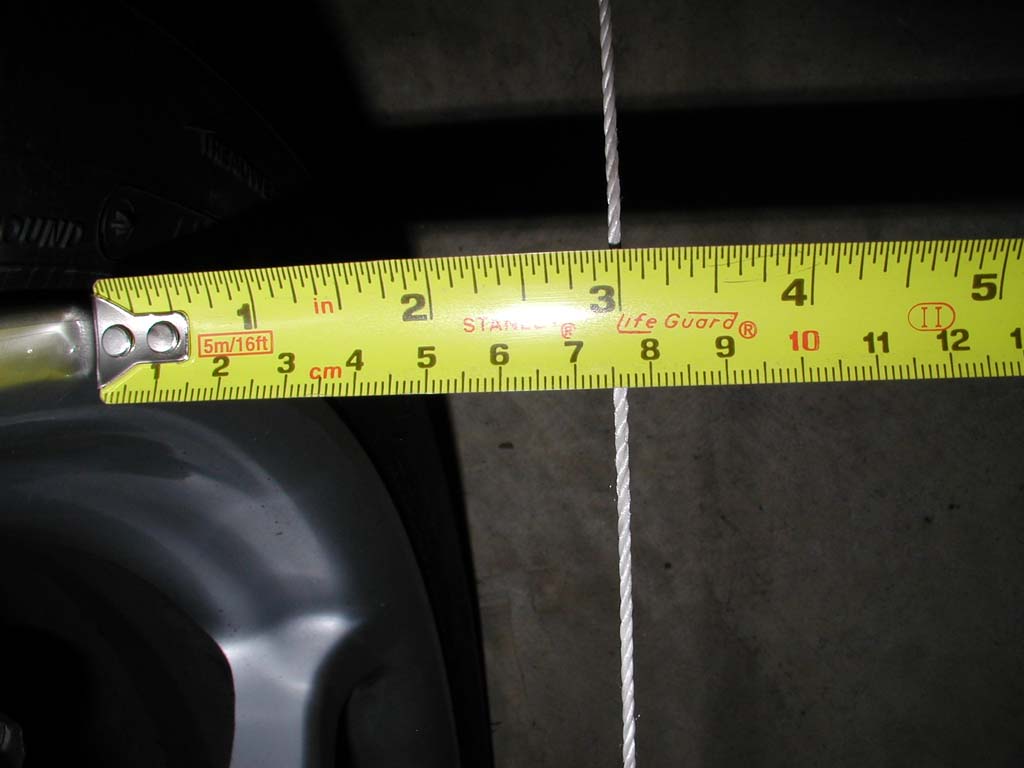
4. Using a tape measure, check the distance between the ground and the center of each wheel (at the 12 o’clock position). Write down these measurements so you can reference them later.5. Check the toe of each rear wheel by measuring from the leading edge of one tire to the trailing edge of the other tire at boththe front and back of each tire (perpendicular to the centerline ofthe vehicle).
The difference between these two measurements is yourtoe setting for that wheel. If this measurement is positive, then yourwheels are “toed in” (pointing inward toward each other); if it’snegative, they’re “toed out” (pointing outward away from eachother). You’ll need to adjust your toe settings as necessary toachieve proper alignment.
Reference your service manual forspecific instructions on how to do this – every car is different!6 Adjust camber next, if needed . Camber measuresthe tilt of each wheel as viewed from directly in front or behindthe car; if a wheel is tilted too far inward (toward the centerofthe car), it has “negative camber,” while if it’s tilted toofar outward, it has “positive camber.”
This tilting affectshow well your tires make contact with road surfaces; too muchpositive or negative camber will result in premature tire wearand poor handling performance . Again , consultyour service manual for specific adjustment procedures – thereare usually shims or bolts that can be moved/adjusted tomaintain proper camber settings .7 Finish up by checking and adjustingcastor ,if needed . Castor refers to how far forward ord backwardthe steering axis sits in relation to true vertical whenviewed from either side; think of it as where your steeringwheel would be pointing if you were looking at it head-on(perpendicular) from either side .
Can You Fix Your Alignment by Yourself?
There are a number of things that can cause your alignment to be off, including hitting a curb or pothole, driving on an uneven surface, or simply wearing down your tires over time. If you notice that your car is pulling to one side or vibrating when you drive, it’s important to get it checked out as soon as possible. While you may be tempted to try and fix the problem yourself, it’s best to leave this type of work to the professionals.
Not only do they have the necessary equipment and training, but they can also spot other potential problems that you may not be aware of.
How Do I Know If I Need a Rear Wheel Alignment?
If your car is veering to the left or right, it’s likely you need a wheel alignment. Other signs that you might need an alignment include your car pulling to one side, uneven or rapid tire wear, and your steering wheel being off center when driving straight. If you’re unsure whether you need an alignment, take your car to a reputable mechanic or tire shop and they’ll be able to diagnose the problem.
How Do You Adjust the Rear Toe Alignment?
If your car is pulling to one side or the other, or if the steering wheel isn’t centered when you’re driving straight down the road, it’s likely that your rear toe alignment is out of adjustment. Toe alignment simply refers to the angle at which your tires point while you’re driving. If they’re pointing too far in (toe-in) or too far out (toe-out), it can cause problems with steering and handling.
Luckily, adjusting rear toe alignment is a pretty easy do-it-yourself job, as long as you have a few basic tools and some patience. Here’s how to do it:1. Park your car on a level surface and set the parking brake.
loosen the lug nuts on the rear wheels slightly so that you can turn them easily by hand later on.2. Place a jack under one of the rear axle tubes and raise the tire off the ground until it’s about 6 inches off the ground. Do not remove the tire completely – just get it high enough so that you can work comfortably underneath it.
Repeat this step for the other side of the car.3. Find adjustable control arms for each side of the car (they should be attached to either end of each axle tube). These are what actually adjust toe alignment – they have threaded holes in them that allow you to lengthen or shorten them as needed.
4. For toe-in adjustment, turn both control arms clockwise equally until they reach their desired length (you may need a helper for this). For toe-out adjustment, turn both control arms counterclockwise equally until they reach their desired length (again, a helper will come in handy here).
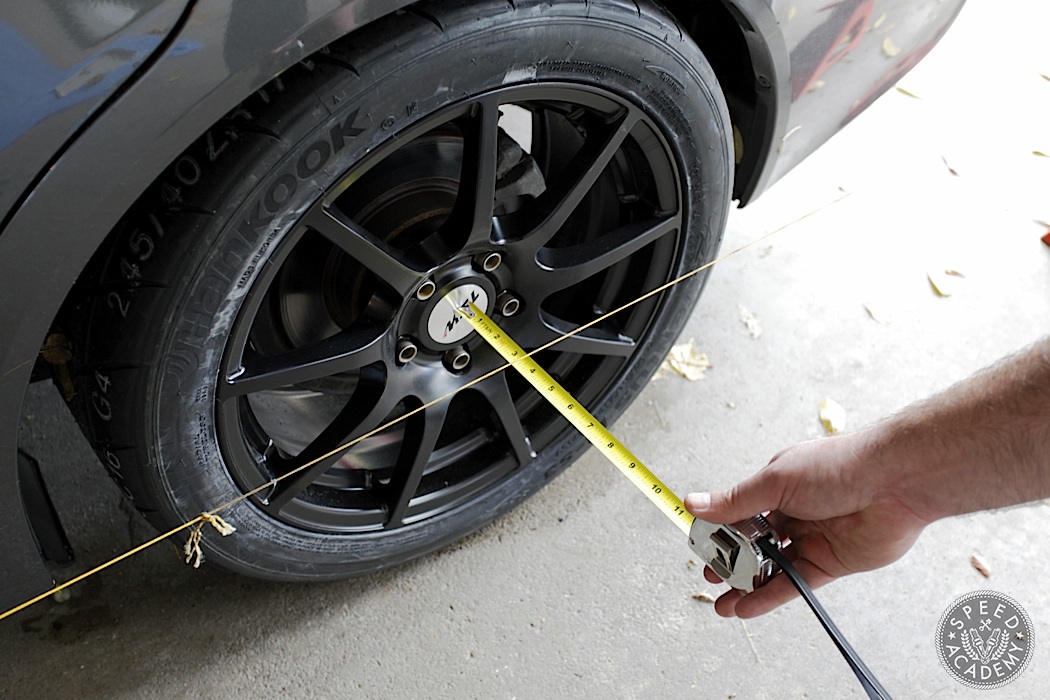
Credit: speed.academy
Step by Step Wheel Alignment Procedure Pdf
Most do-it-yourselfers can easily align their own vehicles, but it’s important to have a clear understanding of the process. This step-by-step guide will walk you through the wheel alignment procedure so you can be sure your vehicle is aligned correctly.Before You Begin:
Check your vehicle’s owner’s manual for specific instructions on how to align your particular model. Some vehicles require special tools or procedures that are not covered in this article.If you’re not comfortable working on your vehicle, we recommend taking it to a professional mechanic or tire shop.
Incorrectly aligning your vehicle can result in premature tire wear and potentially dangerous handling characteristics.
1) Park your vehicle on a level surface and set the emergency brake. Remove any loose items from inside the car that could roll around during the alignment process.
2) Locate the adjustment bolts for both the front and rear wheels. These are usually located at the top or bottom of the suspension components (struts/shocks). In some cases, they may be hidden behind plastic covers.
3) Measure the distance between each wheel and a reference point on the chassis (usually a fender). Use a tape measure or ruler to get an accurate reading. 4) Adjust the bolts until all four wheels are equidistant from their respective reference points within 1/8″.
If you’re having trouble achieving this, try moving one side of the car at a time so you only have to make small adjustments. 5) Once all four wheels are properly aligned, tighten down all of the bolts securely before driving off!
How to Do a Wheel Alignment With a Tape Measure
If your car is pulling to one side or the other, or if your steering wheel is off center, it’s likely that your car needs a wheel alignment. You can check for this yourself with a tape measure.First, park your car on a level surface and put the transmission in neutral.
Next, measure the distance from the ground to the center of each tire at the point where it meets the fender. Write down these numbers so you can compare them later.Now, measure the distance between each tire and the corresponding point on the opposite side of the vehicle (for example, between the left front tire and the right rear tire).
These numbers should be equal. If they’re not, then your car needs a wheel alignment.To adjust your car’s alignment, first loosen all of the lug nuts on your wheels.
Then jack up one end of your car and place jack stands under the frame to support it. Repeat on the other end of the car. Now you can remove all four tires and take them to a professional for adjustment.
How to Do an Alignment Without a Machine
Most people think that you need a special machine in order to get your car’s alignment checked and corrected. However, this is not the case! You can actually do an alignment without a machine, and it’s not even that difficult.
Here’s how:First, park your car on a level surface and turn off the engine. Next, remove the hubcap or wheel cover from the front wheels so that you can access the lug nuts.
Loosen the lug nuts slightly (but don’t remove them), and then jack up your car so that the front wheels are off of the ground.Now it’s time to check the alignment. Take a look at each tire and make sure that it is pointing straight ahead (perpendicular to the ground).
The easiest way to tell if a tire is out of alignment is to see if the tread is wearing unevenly. If one side of the tread is more worn than the other, then your tire is out of alignment.Once you’ve identified which tires are out of alignment, it’s time to adjust them.
To do this, simply loosen or tighten the appropriate lug nuts until the tire is in its correct position. Once all four tires are properly aligned, lower your car back down to the ground and tighten all of the lug nuts securely before driving off!
Conclusion
If you’re a car owner, it’s important to know how to do a rear wheel alignment at home. This simple task can save you money and keep your car running smoothly. Here’s what you need to know.
First, park your car on a level surface and place a jack under the rear end of the vehicle. Next, remove the hubcaps or wheel covers. Then, loosen the lug nuts with a wrench and take off the wheels.
Now it’s time to get started on the alignment itself. For this part, you’ll need two things: an adjustable wrench and a tape measure. First, use the wrench to turn the adjustment screws on the back of the car until they’re flush with the frame.
Next, use the tape measure to check that both rear wheels are exactly 24 inches from each other.If they’re not perfectly aligned, use the wrench to turn one of the adjustment screws until they match up.