- Home
- Blog

How to Install Gatorskin Tires
Gatorskin tires are a great option for those who want the durability of a Kevlar tire with the puncture resistance of a latex tube. Here’s how to install them:1. Remove the old tire and inner tube from the wheel.
If you’re using rim brakes, be sure to loosen the brake pads before removing the tire.
2. Inspect the wheel for any damage and make sure that it’s clean before installing the new tire.
3. To avoid pinching the tube, start by installing the valve stem in the hole at the rim.
Then, work your way around the tire, evenly seating it on the rim.
4. Inflate the tire to about 60 psi and then check to see that it’s seated properly on the rim all around. If not, let some air out and try again until it’s seated correctly.
5 .Fill up your new Gatorskin tires with sealant according to manufacturer’s directions (usually about 2oz per tire).
- Obtain two Gatorskin tires of the same size and model
- Using a tire iron, loosen the bolts on each side of the wheel that you will be replacing the tire on
- Remove the old tire from the wheel and set it aside
- Place the new Gatorskin tire onto the wheel, making sure that it is properly aligned
- Use the tire iron to tighten the bolts on each side of the wheel, being careful not to over-tighten them
- 6 Lower the car back down to the ground and repeat these steps for the other tire

Credit: www.biketiresdirect.com
How Do You Install Gatorskin?
If you’re looking to install Gatorskin tires, the process is actually quite simple. Here’s a step-by-step guide to get you started:1. Start by removing the old tires from your bike.
You’ll need a tire lever or two to help with this process.2. Once the old tires are off, clean the rims of any dirt or debris.3. Take your new Gatorskin tire and line it up with the rim, making sure that the bead is seated correctly.
4. Begin inflating the tire using a hand pump or CO2 cartridge. Inflate to the recommended pressure listed on the sidewall of the tire.5. Continue around the circumference of the tire, seating each bead as you go until both sides are fully seated on the rim.
Finish inflating to full pressure and double check that everything looks good before heading out for a ride!
What Psi Should Gatorskin Tires Be?
Gatorskin tires are high-performance, puncture-resistant tires made by Continental. They’re a popular choice for road cyclists because they offer excellent protection against flats.So what PSI should you inflate your Gatorskins to?
It depends on a few factors, including rider weight, tire width, and desired riding comfort.For most riders, we recommend inflating Gatorskins to a pressure of 100-120 PSI. This gives the tire a good balance of comfort and performance.
If you’re heavier or carrying extra gear, you may want to inflate to the higher end of that range. If you’re lighter or looking for a smoother ride, you can go closer to the lower end.Of course, it’s always best to follow the maximum pressure rating printed on the side of your tire (usually 110 or 120 PSI).
And remember: when in doubt, air up!
How Do You Remove Continental Gatorskin?
Continental Gatorskin tires are designed for durability and long life, but eventually they will need to be replaced. The process of removing a Continental Gatorskin tire is not difficult, but it does require some special tools and knowledge. Here are the steps to remove a Continental Gatorskin tire:
1. Park your vehicle on a level surface and engage the emergency brake. Loosen the lug nuts on the wheel with the Continental tire using a lug wrench, but do not remove them completely.2. Place a jack under the frame of your vehicle and raise the car until the wheel is off the ground.
Remove the lug nuts and carefully pull the wheel off of the axle.3. Use a pry bar or screwdriver to loosen the bead of the tire from its rim. You may need to use some force, but be careful not to damage either component.
Once one side is loose, work your way around the entire circumference of the tire until it is completely removed from its rim.4._ Inspect both sides ofthe bead seat onthe rim for any damage or debris that could prevent proper seatingofa newtire._ Cleanand/orrepair as necessarybefore proceedingto step 5._ If everything looks good, you’re readyto installthe newtire!
Do Gatorskins Slow You Down?
Gatorskins are a type of tire designed to be resistant to punctures. They are made with thick walls and an extra layer of Kevlar or other material in the sidewall. This makes them heavier than regular tires, which can slow you down on the road.
However, if you’re riding on rough terrain or in an area with a lot of debris, Gatorskins can help you avoid flats and keep your bike rolling.
Continental Gatorskin How To Install
How to Set a Bead on a Bike Tire
If you’re a fan of biking, you know that one of the most important things to keep in mind is tire pressure. Not only does this affect your speed and pedaling efficiency, but it can also be a safety issue if your tires are too low. So how do you make sure your tires are at the perfect pressure?
By setting a bead on your bike tire, of course!Here’s what you need to know about setting a bead on a bike tire:1. You’ll need an air pump – preferably one that attaches to your bike frame so you can Pump as you ride.
If not, any small hand held air pump will do the trick.2. Check the maximum psi (pounds per square inch) rating for your tires – this will be printed on the sidewall of the tire. You don’t want to overinflate, as this could cause the tire to burst while riding.
3. Inflate your tires until they reach the desired pressure – again, using the psi rating as a guide. If you’re unsure of what PSI to use, consult with your local bike shop or look up an online chart that lists pressures for different types of terrain and riding conditions (e.g., road vs off-road).4 Once both tires are inflated, release some air from each one until beads on both sides of BOTH tires are seated evenly around The rim .
This is important! Uneven seating can cause premature wear and tear on your tires, as well as affect their performance while riding.
Conclusion
If you’re looking for a durable tire that can handle all kinds of riding conditions, then you should definitely consider Gatorskin tires. Here’s a quick guide on how to install them:1. Start by removing the old tires from your wheels.
You’ll need a tire lever or two to help with this.2. Once the old tires are off, clean up the rims with some soapy water. This will help ensure that the new tires seat properly.
3. Take your new Gatorskin tire and line it up with the rim, making sure that the printed side is facing outwards.4. Use your hands to work the tire onto the rim, starting at one end and working your way around until it’s fully seated. If you find it difficult to do this, you can use a tire lever (or two) to help get things started.
Just be careful not to pinch the tube!
5. Inflate the tire to its recommended pressure using a pump or CO₂ cartridge – never use a car air compressor! And that’s it!

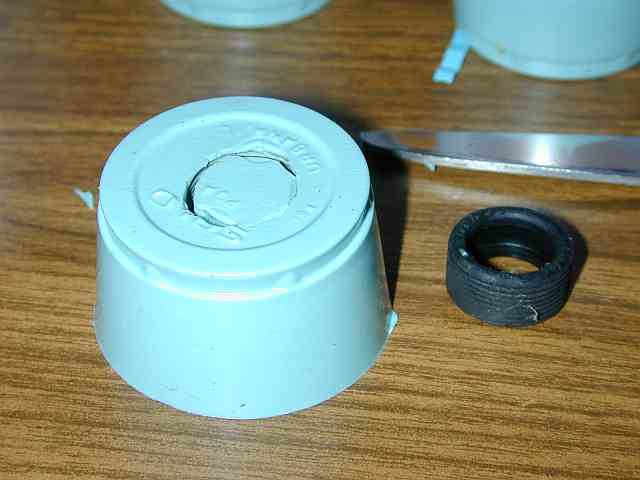
How to Make Slot Car Tires
Slot car tires are one of the most important aspects of a slot car. They provide the traction that helps the car grip the track and prevent slipping. There are a few different ways to makeslot car tires, and each has its own advantages and disadvantages.
The most common method is to use rubber tyres. These have good grip and durability, but can be difficult to keep clean and can wear out quickly if not used properly. Another option is foam tires.
Building Slot Car Track Tyre Wall
- Choose the right size tires for your slot car
- Cut the tire to the desired width
- Glue the tire onto the wheel
- Let the glue dry completely before using the slot car
Diy Routed 1/32 Slot Car Track
Are you a slot car enthusiast? If so, you may be interested in building your own routed 1/32 slot car track. Routed tracks are considered the gold standard for slot car racing, and offer a challenging and rewarding experience for racers of all skill levels.
Building your own routed track is not as difficult as it may seem, and with a little patience and attention to detail, you can create a track that is both functional and visually appealing. In this article, we will walk you through the process of designing and constructing a routed 1/32 scale slot car track.The first step is to determine the dimensions of your track.
This will depend on the available space that you have to work with, as well as the type of cars that you will be racing on it. Once you have decided on the overall size of your track, use graph paper to sketch out a basic layout. Keep in mind that the turns should be gradual in order to avoid damaging the cars or causing them to derail.
Once you have settled on a layout, it’s time to start construction! Begin by cutting out strips of plywood or MDF (medium density fiberboard) that are 1-2 inches wider than the width of your cars. These strips will form the outside walls of your track.
Next, use a router to cut slots into these strips – this is where your cars will actually race. Be sure to make these slots smooth and even in order to avoid any issues when racing.After the slots have been cut, it’s time to assemble everything!
Lay down one strip of wood (with the slots facing up), then adhere another strip directly on top (slots facing down). Repeat this process until all 4 sides are complete. Once everything is glued together, use sandpaper or a fileto smooth out any rough edges aroundthe perimeter of your track .
Now comes the fun part – painting! You can get creative here and really make your track unique. Use stencils or freehand whatever design elements you like onto your walls – just be sure that they won’t interfere with gameplay once dry . After painting , add any other finishing touches like carpeting , grass , trees , buildings , etc . Then it’s time for testing ! Make sure everything works properly before inviting friends over for some competitive races .With a little bit of effort , you can build yourself an awesome home-made 1/32 scale slot car track !
Credit: www.outriggercanoe.com
What are Slot Car Tires Made Of?
Slot car tires are made of a variety of materials, including rubber, foam, and silicone. Each has its own advantages and disadvantages that make it better or worse for different types of racing.Rubber is the most common type of tire used in slot cars.
It is inexpensive and provides good grip on most surfaces. However, it wears out quickly and does not perform well on high-speed tracks.Foam tires are becoming increasingly popular in the world of slot car racing.
They provide excellent grip and last longer than rubber tires. However, they are more expensive than rubber tires and can be difficult to find in some sizes.Silicone tires are the newest type of tire on the market for slot cars.
They offer unparalleled grip and durability, but they come at a premium price tag.
How Do You Put a Slot on a Car Tire?
It is important to know how to put a slot on a car tire because this can be a life-saving skill. If you are ever in a situation where you have a flat tire, it is much easier to put a slot in the tire than it is to change the whole tire. Here are the steps to take:
1. Park your car on level ground and turn off the engine. Apply the parking brake and chock the wheels so that your car does not roll while you are changing the tire.2. Loosen the lug nuts with a wrench before you jack up the car.
Do not remove them yet.3. Place the jack under the frame of the car at one of the designated jack points. Make sure that the jack is securely in place before you start lifting up your car.
4. Lift your car until there is enough clearance for you to remove the Flat Tire and replace it with Slot Tire easily by hand without having to strain yourself too much physically .5 Lower your vehicle back down to resting position on all four tires..6 Remove lug nuts completely and set them aside in a safe place so as not loose track of them.
.7
How Do You Silicone a Slot Car Tire?
To silicone a slot car tire, you will need:
-A bottle of silicone spray
-A lint free rag
-Your slot car tiresStart by taking your lint free rag and wiping down the surface of the tires. This will help to remove any dirt or debris that could prevent the silicone from adhering properly.
Next, take your silicone spray and generously apply it to the surface of the tires. Make sure to completely cover them, as this will help to create a smooth, consistent surface for racing. Once the tires are coated, allow them to dry for at least 30 minutes before using them on your track.
This will ensure that they are fully cured and ready for action!
How Do You Make Silicone Tires?
To make silicone tires, manufacturers mix together a two-part system consisting of a base and a curing agent. The base is made up of silicone elastomer, while the curing agent is typically an organotin compound. Together, these two parts form a viscous liquid that can be poured into molds.
Once the tire mold is filled, it is placed into an oven where the temperature is gradually increased. This causes the silicone to cure, or harden, into the desired shape. After curing, the tires are then cooled and removed from the mold.
Silicone tires offer several advantages over traditional rubber tires. They are more resistant to heat and cold extremes, as well as being less likely to suffer from flat spots or other damage due to changes in temperature or humidity. Additionally, they provide better grip on wet or icy surfaces and tend to last longer than rubber tires.
Conclusion
This blog post covers the basics of making your own slot car tires. You will need a few supplies including rubber, silicone, and neoprene. The author provides detailed instructions on how to measure and cut the rubber to fit your wheels.
They also share how to cure the tires so they are ready to race.
How to Remove Ice from Car Tires
If you live in an area where it snows, then you know the pain of having to remove ice from your car tires. It’s a cold, tedious process that takes forever. But there are ways to make it easier and faster.
Here are some tips on how to remove ice from car tires:1. Use boiling water: Boil a pot of water and pour it over the ice on your tires. The hot water will melt the ice quickly.
2. Use rubbing alcohol: Rubbing alcohol will also melt the ice quickly. Just pour it over the affected areas and wait a few minutes for the ice to disappear.3. Use a hairdryer: A hairdryer is another tool that can help melt the ice quickly.
Just aim the heat at the affected areas and wait for the ice to melts away.
- Drive the car for a few minutes to melt the ice on the tires
- Use a scraper or brush to remove any remaining ice from the tires
- Pour warm water over the tires to melt any remaining ice and prevent it from refreezing
How Do You Remove Ice from behind Your Tires?
When it comes to removing ice from behind your tires, there are a few different methods that you can use. The most common and effective method is to use a putty knife or an old credit card. Simply insert the blade of the knife between the tire and the ice, and then apply pressure to pry the ice off of the tire.
Another effective method is to use boiling water. Boil a pot of water and then carefully pour it over the area where the ice is attached to the tire. This will cause the ice to melt and detach from the tire.
You can also try using WD-40 or another type of lubricant spray. Simply spray it on the area where the ice is attached to the tire, and then wait a few minutes for it to loosen up before prying it off with a putty knife or credit card.
What Can I Put on My Tires for Ice?
When driving in icy conditions, it is important to have tires that can provide good traction. There are a few things that you can put on your tires to help with this.One option is to put chains on your tires.
This will give them extra grip and help you keep control of your car on slippery roads. You can also get special winter tires that are designed for use in icy conditions. These tires have a tread pattern that helps them grip the road better than regular tires.
Another option is to use studded tires. These have metal studs embedded in the tread that provide extra traction on ice and snow. However, studded tires can damage the road surface, so they are not allowed in some states.
If you don’t want to invest in new winter tires or chains, there are some things you can do to improve the traction of your regular tires. One option is to add tire socks over your regular tires. These socks fit snugly over the tire and provide extra grip on icy roads.
You can also add sand or kitty litter to the trunk of your car.
Can Ice Damage Your Tires?
It’s a common misconception that driving on ice can damage your tires. However, this is not the case. Ice cannot damage your tires directly.
However, driving on icy roads can lead to indirect tire damage.When you drive on icy roads, your tires are more likely to spin out or slip. This can cause them to wear down faster and eventually become damaged.
In addition, if you hit a curb or pothole while driving on ice, this can also cause tire damage.So while ice itself cannot damage your tires, it can indirectly lead to tire damage through spinning and slipping. It’s important to be careful when driving on icy roads and to watch out for any potential hazards that could lead to tire damage.
How to Remove Ice from Car Windshield
If you’re like most people, you probably don’t enjoy scraping ice off your car windshield in the morning. But if you take a few minutes to prep your car before bed, you can make the job a lot easier. Here are some tips for removing ice from your car windshield:
1. Park in a garage or covered area if possible. This will protect your windshield from snow and ice overnight.2. If you can’t park in a garage or covered area, cover your windshield with a tarp or blanket.
This will insulate it and prevent frost from forming.3. In the morning, remove the tarp or blanket and brush any snow or ice off of it. If there’s still some ice on the windshield, pour hot water over it (being careful not to splash yourself) and scrape it off with a razor blade or putty knife.
4. Once the majority of the ice is gone, turn on your defroster and let it run for a few minutes to melt any remaining ice and prevent fogging.
Conclusion
It’s that time of year again when we have to start scraping ice off our car windows. But what about our tires? Ice can build up on tires and make them less effective, so it’s important to remove it before driving.
There are a few ways to remove ice from car tires. One is to use a hand-held ice scraper or brush. Be careful not to scratch the tires with the scraper.
Another way is to pour warm water over the tire (not boiling water) and let it sit for a minute or two. The heat will help break down the ice. You can also use a commercial de-icing spray, but be sure to read the directions carefully before using it on your tires.
Once you’ve removed the ice, dry off the tire with a cloth or paper towel. This will help prevent new ice from forming as quickly.
How to Balance Mobile Home Tires
One of the most important aspects of owning a mobile home is maintaining the tires. Not only do they keep your home safe on the road, but they also play a large role in how level your home is. Over time, as you travel and as the ground underneath your home settles, your tires will become unbalanced.
This can lead to serious problems like tire failure and make it difficult to keep your mobile home level. Luckily, balancing mobile home tires is a relatively easy process that only requires a few tools and some patience.
- Park your mobile home on a level surface and set the emergency brake
- Place jack stands under the frame of your mobile home on each side to support it while you work
- Remove the wheel covers, if present, and loosen the lug nuts on each tire with a lug wrench
- Raise the mobile home up with a floor jack until the tire you want to adjust is about 6 inches off the ground
- 5 Spin the tire to check for any areas that may be out of balance and make note of them
- Place weights on the rim of the tire at points opposite from where you noted was out of balance earlier using adhesive-backed wheel weights or clip-on wheel weights, depending on your type of rim
- 7 Lower your mobile home back down to the ground and remove the jack stands before driving away
Can Mobile Home Tires Be Balanced?
Yes, mobile home tires can be balanced. This is done by attaching weights to the outside of the tire at specific points. The goal is to have the tire rotate evenly, which will help prolong its life and improve fuel economy.
How Do You Balance Trailer Tires at Home?
If you’re like most people, you probably don’t think much about your trailer tires until there’s a problem. But just like the tires on your car, they need regular maintenance to stay in good shape. That includes keeping them properly inflated and balanced.
The first step is to check the tire pressure with a tire gauge. You can find the recommended pressure for your tires in the owner’s manual or on a placard affixed to the trailer. Once you know the correct pressure, use an air compressor or hand pump to add air as needed.
Next, it’s time to balance the tires. This helps ensure that they wear evenly and reduces vibration while you’re driving. You’ll need a special tool called a tire balancer for this job.
Once the balancer is attached to the tire, spin it until the pointer reads zero. Then add weight (usually lead weights) to the appropriate side of the rim until the pointer balances out.With proper inflation and balancing, your trailer tires should give you years of trouble-free service.
So take care of them and they’ll take care of you!
Can You Balance Trailer Tires?
Yes, you can balance trailer tires. This is done by evenly distributing the weight around the axle so that the trailer sits level when hitched to a vehicle. To do this, you’ll need to add or remove weight from the tire itself.
You can use special weights that are made for this purpose, or you can simply use objects like rocks or sandbags. Once the weight is added or removed, you’ll need to re-inflate the tire to the proper pressure.
Do You Have to Have Trailer Tires Balanced?
No, you don’t have to have trailer tires balanced. However, it is recommended by most experts. The main reason for this is because unbalanced tires can cause premature wear and tear on your trailer’s suspension components.
Additionally, unbalanced tires can make your trailer difficult to tow and may cause uneven tire wear.
How to Balance a Tire at Home
If you’ve ever had a flat tire, you know the frustration of being stranded on the side of the road. But did you know that you can avoid this inconvenience by balancing your tires at home? Here’s how:
First, find a level spot to park your car. You’ll need to be able to access all four tires, so make sure there’s enough room around your vehicle. Next, locate the valve stem on each tire and remove the cap.
Using a tire gauge, check the air pressure in each tire and add or release air as needed to reach the recommended PSI for your vehicle.Now it’s time to balance your tires. For this step, you’ll need a weight scale and some weights (you can use coins).
Place the scale under one of the front tires and put a weight on top of it until the needle reaches zero. Then move to the other front tire and repeat the process. Finally, do the same with the two back tires.
That’s it! By following these simple steps, you can keep your tires properly balanced and avoid costly repairs down the road.
Conclusion
Assuming you would like a summary of the blog post titled “How to Balance Mobile Home Tires”:The author begins by stating that one of the most important aspects of owning a mobile home is maintaining the tires. They go on to say that when it comes to balancing mobile home tires, there are a few things to keep in mind.
First, they recommend checking the air pressure in all four tires at least once a month. Second, they suggest having the tires balanced every 6 months or so. Finally, they advise against overloading the trailer, as this can lead to tire problems down the road.

How to Get F1 Tires on Any Car
F1 tires are the pinnacle of performance and technology in motorsport. They are made with a unique compound that offers unmatched grip and durability. But how can you get F1 tires on any car?
Here’s a step-by-step guide:First, find a set of F1 tires that fit your car. You can do this by searching online or contacting a local motorsport supplier.
Once you have found the right tires, remove the old ones from your car. To do this, jack up the car and remove the lug nuts that hold the wheels in place. Then, slide the old tires off of the wheels and set them aside.
- Go to your local auto parts store and purchase a set of F1 tires
- Make sure the tires are the correct size and fit for your car
- Mount the tires onto your car
- Inflate the tires to the proper pressure
- Drive safely and enjoy your new F1 tires!
*VERY EASY* How to get F1 WHEELS on CARS in GTA 5 Online?! (CAR MERGE)
How Do I Put F1 Tires on My Car?
If you’re a Formula 1 fan, you might be wondering how to put F1 tires on your car. Here’s a step-by-step guide:1. Start by lifting up your car with a jack.
You’ll need to place the jack under the car’s chassis so that it’s securely lifted off the ground.2. Next, remove the wheel nuts that are holding the current tires in place. You can do this using a wrench or socket set.
3. Once the nuts are removed, carefully take off the old tires and set them aside. Make sure not to damage the wheel rims as you remove them.4. Now it’s time to put on the new F1 tires!
Line up each tire with its corresponding wheel rim, and then use your hands to push it onto the rim until it’s snugly in place.5. Finally, replace all of the wheel nuts and tighten them down using a wrench or socket set (be careful not to overtighten). Lower your car back down to the ground, and you’re all done!
How Do You Get the F1 Wheels on Any Car in Gta 5?
There are a few ways to get the F1 wheels on any car in GTA 5. The first way is to buy them from Los Santos Customs. The second way is to find them in one of the many garages around Los Santos.
The third way is to get them from a friend who has them.
How Do You Get Bennys Wheels on Any Car in 2021?
In order to get Bennys wheels on any car in 2021, you will need to purchase the correct size and type of wheel for your car. You can find a variety of different types and sizes of Bennys wheels online or at your local automotive store. Once you have found the right size and type of wheel, simply follow the instructions that come with the product in order to properly install them on your car.
How Do You Do the F1 Wheel Glitch?
Assuming you are referring to the Forza Horizon 4 wheel glitch, it is done by using a specific set of circumstances that exploit a game mechanic. The player must have a car with a low ride height and high ground clearance, such as the Aston Martin Vulcan. They must also have upgraded suspension and wheels.
The player drives the car up to a wall or other object that they can drive over, but not too high. They then angle the front wheels so they are pointing directly at the wall or object. The back of the car must be raised off the ground by driving over something else, such as a kerb.
When everything is in position, the player presses and holds down both left and right on the d-pad (or equivalent) whilst accelerating hard into the wall or object. If done correctly, the front wheels will go over but the back ones will remain on the ground, causing the car to appear to be doing a wheelie. The glitch can be used for purposes such as drifting around corners without scrubbing speed.

Credit: www.autosport.com
How to Get F1 Tires on Any Car in Gta V Online 2022
Looking to get those F1 tires on your car in GTA V Online? Here’s a quick guide on how to do it in 2022!The first thing you’ll need to do is head to Los Santos Customs and purchase the “Race Tire” modification.
This will cost you $50,000. Once you have this modification, go to any race track that has F1 tires available. The two most popular tracks are the LSIA runway and the Zancudo drag strip.
Once you’re at the track, simply drive up to one of the tire stands and press “A” or “D” to change your tire type. You’ll want to make sure you’re on the correct side of the car so that you don’t end up with a flat tire! After changing your tires, be sure to take them for a spin around the track before heading back home.
And there you have it! Now you know how to get F1 tires on any car in GTA V Online. Be sure to practice safe driving and have fun out there!
Conclusion
If you’re a fan of Formula 1 racing, you know that the cars use special tires that are designed for high-speed cornering and braking. But did you know that you can get those same tires on your own car? That’s right – with a little bit of research, you can find out which tire companies make F1-style tires and have them shipped right to your door.
So, how do you go about getting F1 tires on any car? First, you’ll need to decide which company makes the best ones for your needs. There are several reputable brands out there, so take some time to read reviews and compare prices.
Once you’ve found the perfect set of F1 tires, simply place your order and have them delivered to your home or garage.It’s really that easy! With a little bit of effort, you can enjoy the same level of performance as the pros do – all while driving your own car on the street or track.
So what are you waiting for? Start shopping for your new set of F1 tires today!

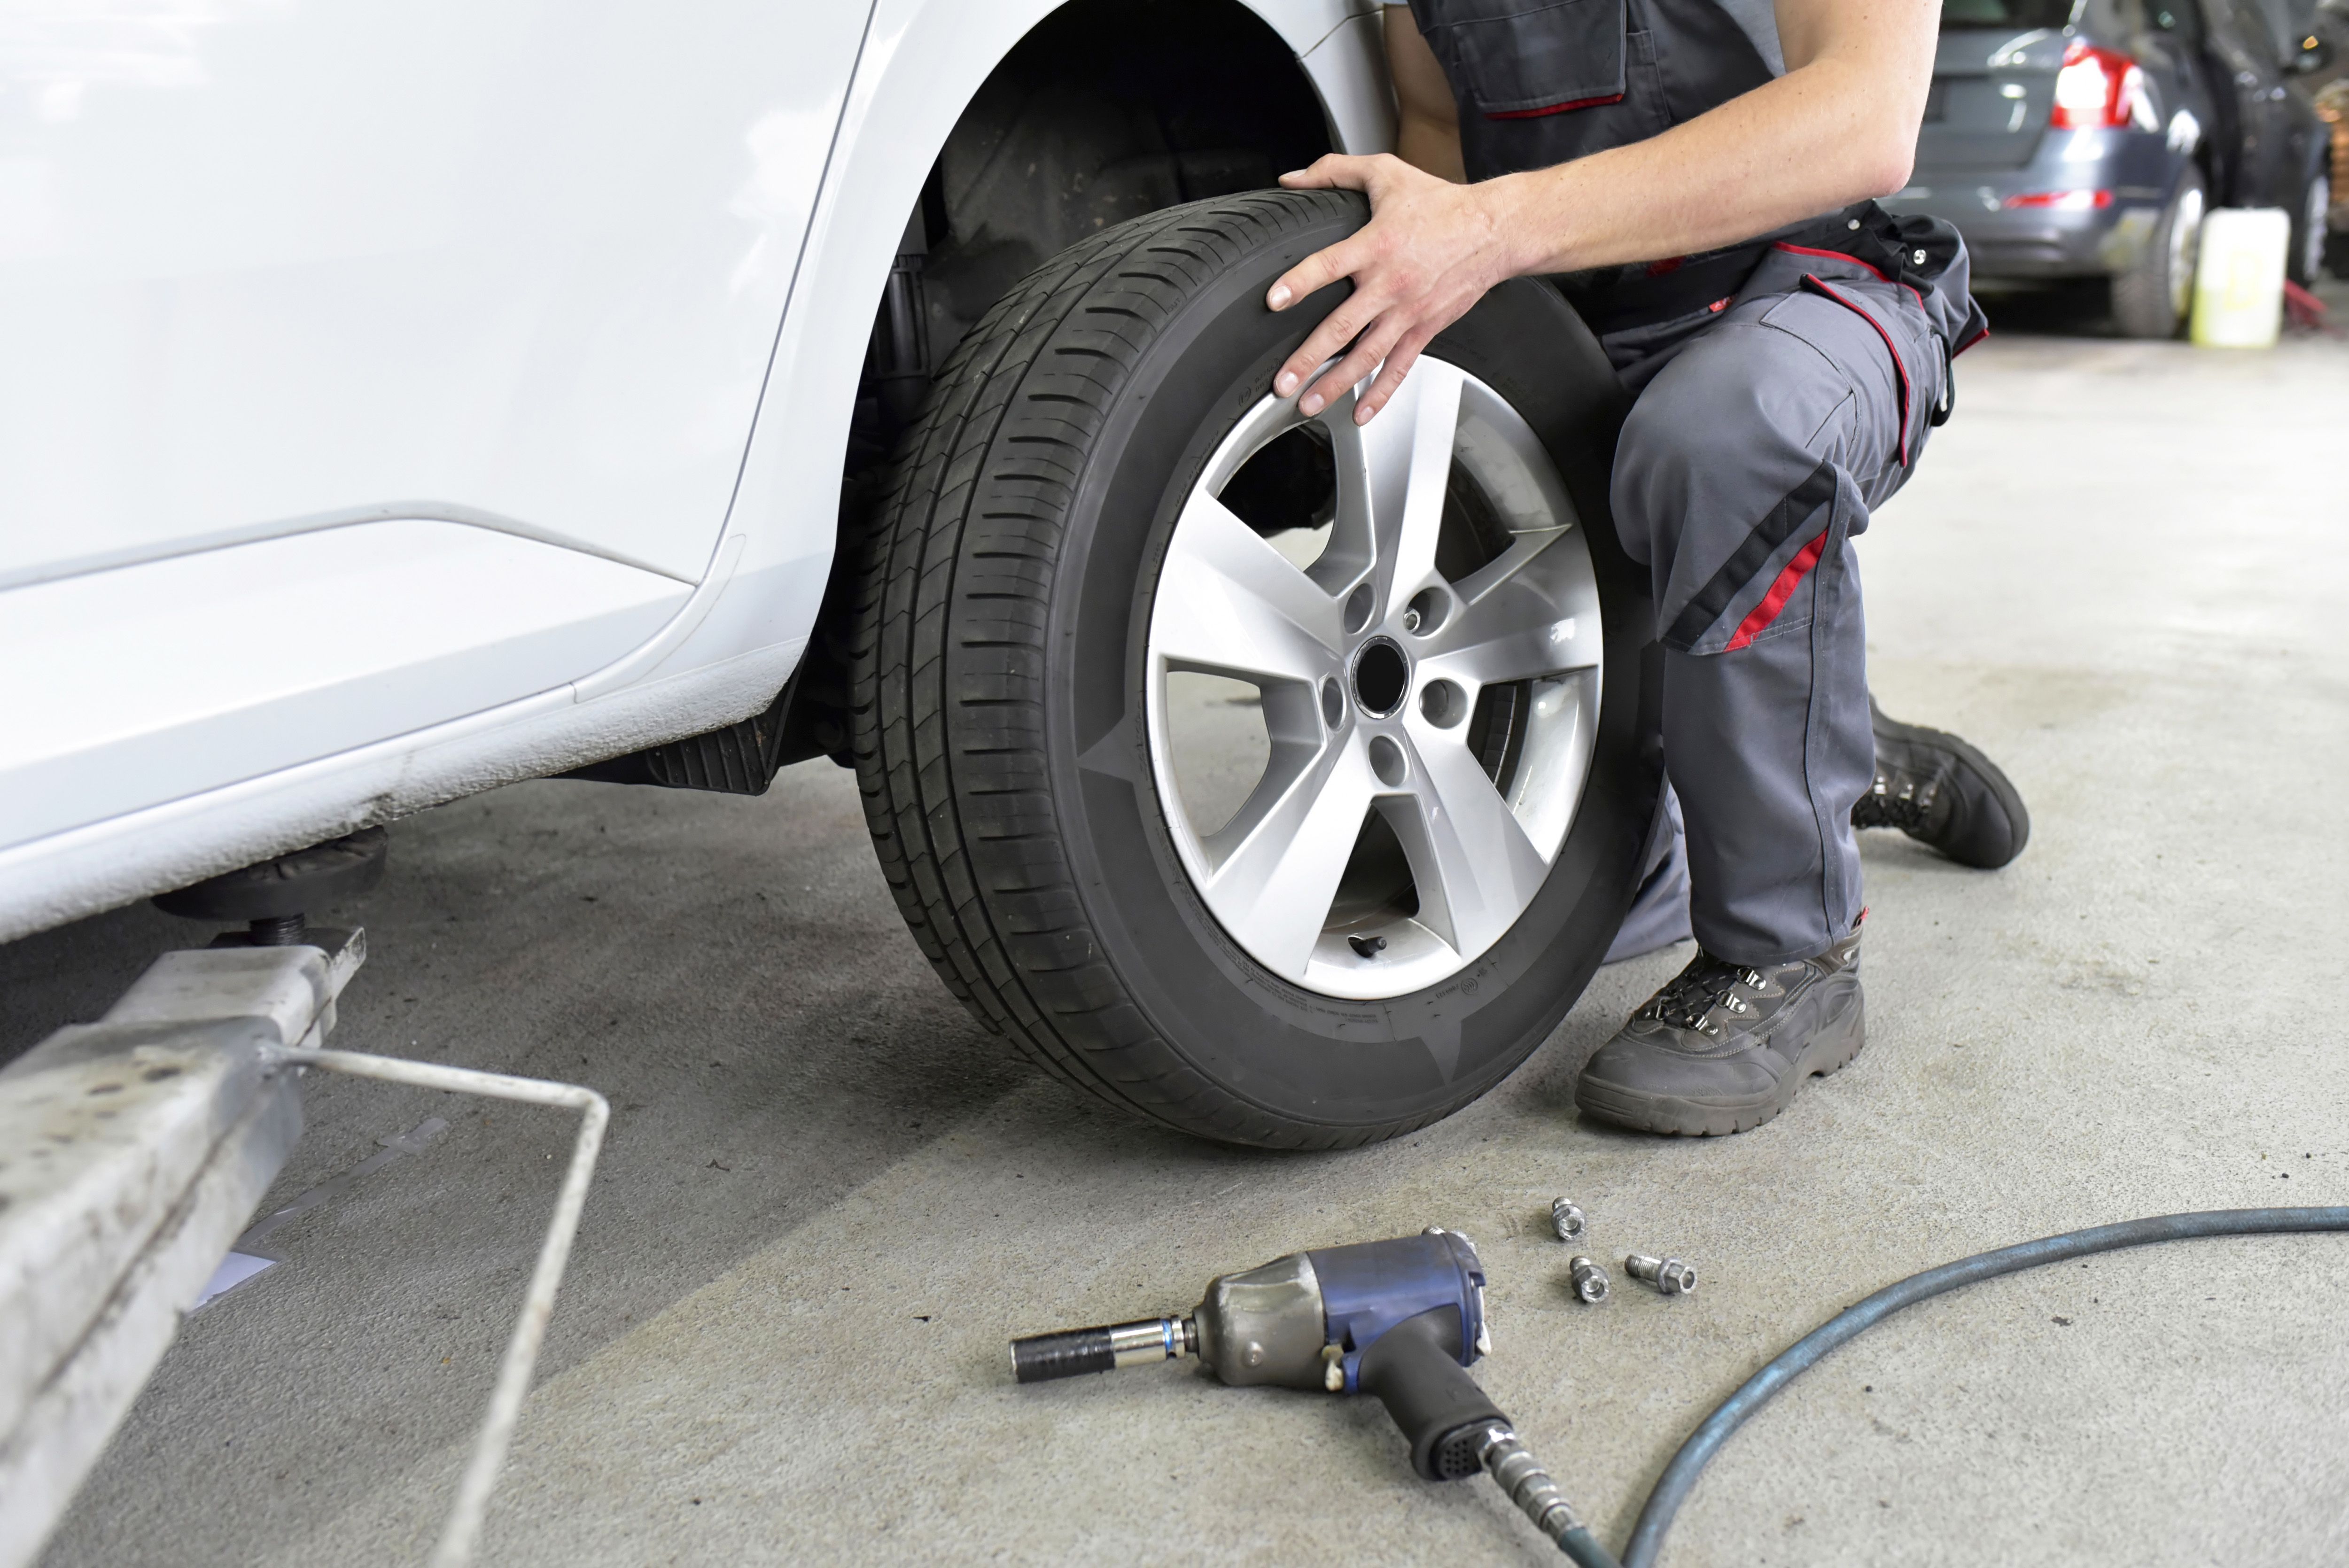
How to Put New Tires on Your Car
If your car has been making a funny noise lately, or you’ve noticed that the ride isn’t as smooth as it used to be, it might be time for new tires. Putting new tires on your car is a pretty straightforward process, but there are a few things you’ll need to do before you can get started. First, you’ll need to find the right tires for your car.
You can usually find this information in your owner’s manual, or by looking online. Once you’ve found the right tires, it’s time to start putting them on!
Tire Machine: Tire Remove & Install
- Lift your car up with a jack and secure it on jack stands
- Remove the old tires from your car
- Clean the wheel rims with a rag to remove any dirt or debris
- Place the new tire on the rim and hand-tighten the lug nuts
- Lower your car back down to the ground and tighten the lug nuts fully with a wrench
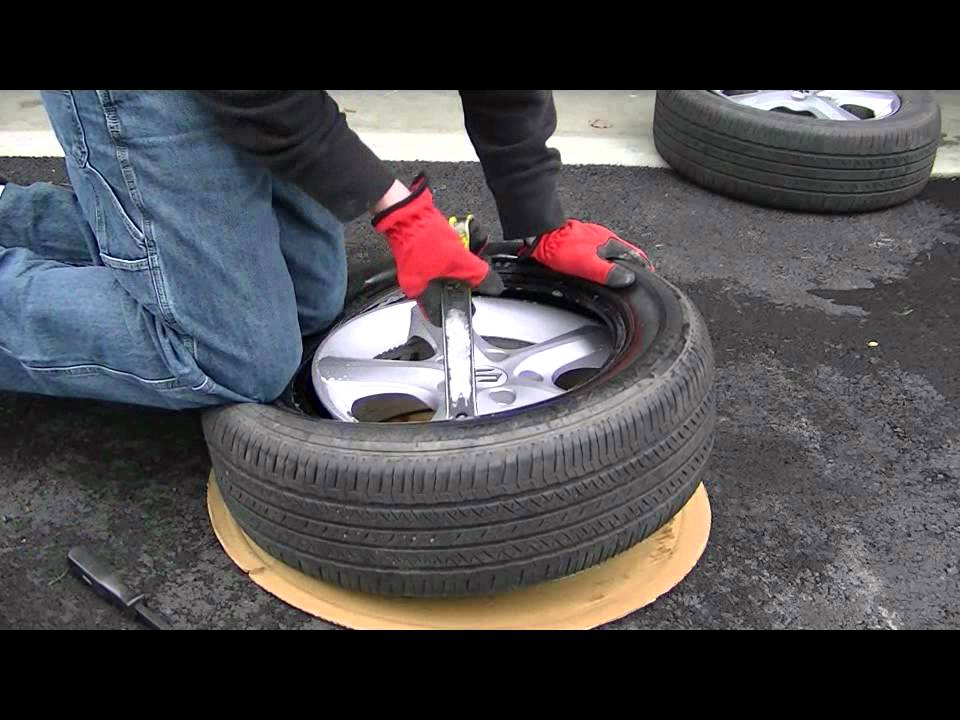
How to Mount And Balance Tires Yourself
It’s a good idea to know how to mount and balance your own tires. This way, you can be sure that they are properly installed and inflated, and that the tread is evenly distributed. You’ll also save money by doing it yourself!
Here’s how to do it:1. Start by putting the wheel on the ground and spinning it to see if there are any flat spots or bumps. If so, use a tire iron to loosen the lug nuts and adjust the position of the tire until it looks even.
2. Next, use a measuring tape to find the center of the wheel. Mark this spot with chalk or a marker.3. Now it’s time to mount the tire onto the wheel rim.
Start by lining up one side of the tire with the rim, then press down on the other side until it pops into place. Make sure that both sides of the tire are equally seated on the rim before proceeding.4. Once the tire is mounted, use your hands to spin it around a few times so that any air bubbles work their way out from under the bead (the part of the tire that sits on top of the rim).
You may need to add some air at this point – just enough so that there’s no more movement in the tire when you spin it around. Do not overinflate!
Credit: www.youtube.com
Can You Install New Tires Yourself?
If you’re considering installing new tires yourself, there are a few things you should know. First, it’s important to make sure that the tires you purchase are the correct size and type for your vehicle. You’ll also need to have the right tools for the job, which include a tire iron, jack and lug wrench.
Installing new tires is a fairly straightforward process, but it’s always best to consult your owner’s manual or ask a professional if you have any questions.
How Do You Put New Tires on a Car?
If you’ve never put new tires on a car before, it might seem like a daunting task. But don’t worry – we’ll walk you through the entire process step-by-step so that you know exactly what to do.The first thing you’ll need to do is jack up the car and remove the old tires.
To do this, locate the jack points on your car (consult your owner’s manual if you’re not sure where they are) and place the jack under the car. Once the car is jacked up, remove the lug nuts from each of the old tires using a wrench or socket. Finally, pull each tire off of the wheel one at a time.
Now it’s time to install the new tires. Start by lining up each tire with its corresponding wheel (the front left tire goes on the front left wheel, etc.). Once all four tires are in place, hand-tighten each of the lug nuts until they’re finger-tight.
Next, use your wrench or socket to tighten each lug nut until it’s snug against the tire but don’t overdo it – you don’t want to strip them! Finally, lower your car back down to the ground and give each lug nut another quarter turn with your wrench/socket just to be sure they’re nice and tight. And that’s it – you’ve successfully put new tires on your car!
Is It Worth It to Install Your Own Tires?
There are a number of factors to consider when deciding whether or not to install your own tires. The most important factor is likely the cost. If you can find a good deal on tires and installation is free, then it might be worth doing it yourself.
However, if you have to pay for installation, it might be cheaper to have someone else do it.Another factor to consider is your level of expertise. If you are experienced in installing tires, then it might be worth doing it yourself.
However, if you are inexperienced, it might be better to have someone else do it so that you don’t damage the rims or cause any other problems.Finally, consider your time availability. If you have the time to install the tires yourself, then it might be worth doing so.
However, if you are short on time and would rather spend that time doing something else, then having someone else install the tires might be a better option.
How Much Does It Cost to Put 4 New Tires on a Car?
It typically costs between $600 and $1,000 to replace all four tires on a car. The cost will vary depending on the type of tire being purchased as well as the make and model of the vehicle. Many tire dealerships offer discounts for buying in bulk, so it may be possible to get a lower price by replacing all four tires at once.
Conclusion
If you’re like most people, you probably don’t think about your tires very often. But they are an important part of your car, and it’s important to keep them in good condition. Here’s how to put new tires on your car.
The first thing you need to do is find the right tires for your car. You can usually get this information from your owner’s manual or from the tire manufacturer. Once you have the right size and type of tire, it’s time to start installing them.
If you’re changing all four tires, it’s best to do one at a time so you don’t lose control of the car while you’re working. Start by loosening the lug nuts with a wrench (don’t remove them completely). Then, use a jack to lift up the side of the car that has the old tire.
Take off the old tire and put on the new one, making sure that it’s seated properly on the wheel before lowering the car back down. Tighten up the lug nuts and repeat on the other three tires.That’s all there is to it!
Now you know how to put new tires on your car like a pro.

How Often to Rotate Snow Tires
When it comes to driving in the snow, one of the most important things you can do is make sure your tires are up for the task. That means having a good set of snow tires that are in good condition and properly inflated. But it’s also important to know when to rotate your snow tires.
Here’s a look at how often you should rotate them and why it’s so important.
If you live in an area where it snows, you know how important it is to have good snow tires. But how often should you rotate them?Most experts recommend rotating your snow tires every 6,000 to 8,000 miles.
This helps ensure even wear and tear on the tires, which will help them last longer. It’s also a good idea to check the tread depth of your tires regularly. When the tread gets too low, it’s time to replace the tires.
If you take good care of your snow tires, they can last for several seasons. That means less money out of your pocket for new tires and more peace of mind when driving in winter weather conditions.
How often to rotate mud tires- WHAT PATTERN TO USE
How Often Should You Rotate Snow Tires?
Most carmakers recommend replacing all four tires at the same time. But if you can’t afford to do that, it’s generally best to replace the two drive tires (the ones on the front axle for front-wheel-drive cars, or the ones on the rear axle for rear-wheel-drive cars) first. That way, your vehicle will have better traction while accelerating and braking.
You should then replace the other two tires when you can afford it.If you live in an area with severe winter weather, it’s a good idea to invest in a set of snow tires. Snow tires are designed to provide better traction in icy and snowy conditions than regular all-season tires.
They typically have deeper treads and are made from a softer rubber compound that stays flexible in cold temperatures.Most carmakers recommend replacing all four tires with snow tires at the same time. But if you can’t afford to do that, it’s generally best to replace the two drive tires (the ones on the front axle for front-wheel-drive cars, or the ones on the rear axle for rear-wheel-drive cars) with snow tires first.
That way, your vehicle will have better traction while accelerating and braking. You should then replace the other two regular all-season tires with snow tyres when you can afford it.
How Many Miles Should You Rotate Tires on Awd?
Assuming you’re talking about all-wheel drive:Most automakers recommend rotating tires on AWD vehicles every 5,000 to 7,500 miles, and some even specify different intervals for front and rear tires. However, it’s best to consult your owner’s manual for the manufacturer’s recommendation.
The main reason for this is that the front and rear wheels of an AWD vehicle typically wear at different rates. The front wheels tend to wear more quickly because they do most of the work when it comes to steering and braking. Meanwhile, the rear wheels carry less weight and provide traction mostly during acceleration.
If you don’t rotate your tires regularly, it can lead to uneven wear patterns and decreased tread life. Uneven tire wear can also cause problems with your vehicle’s handling and stability. So if you want to get the most out of your all-wheel drive vehicle, be sure to keep up with its tire rotation schedule.
How Long Should You Wait between Tire Rotations?
It is generally recommended that you rotate your tires every 5,000 miles. However, it is important to consult your vehicle’s owner’s manual to see what is best for your particular make and model. Some vehicles may have different requirements.
For example, front-wheel drive cars often require more frequent tire rotations than rear-wheel drive cars.Tire rotations are important because they help ensure even wear on all four tires. This helps improve gas mileage and extends the life of your tires.
It’s also a good idea to get your tires rotated when you have them serviced or inspected so that any potential problems can be caught early on.
Do You Need to Rotate Tires on Awd?
If you have an all-wheel drive vehicle, you might be wondering if you need to rotate your tires. The answer is yes! Even though all four of your tires are receiving power and working together to provide traction, they still wear differently depending on their position on the vehicle.
Over time, this can lead to uneven tire wear and decreased performance from your all-wheel drive system.To keep your tires in good condition and ensure that your all-wheel drive system is performing at its best, it’s important to rotate them on a regular basis. How often you need to rotate them will depend on your driving habits and the type of vehicle you have, so be sure to consult your owner’s manual or ask a qualified technician for guidance.
Credit: www.caranddriver.com
How Often to Rotate Tires Awd
Most carmakers recommend tire rotation every 5,000 to 7,500 miles for all-wheel drive vehicles. That’s because the added weight of an AWD system puts more stress on tires than a similar vehicle with two-wheel drive.Tire experts say that you can get up to twice the life out of your tires by rotating them regularly.
That means fewer trips to the tire store, and more money in your pocket.If you live in an area with poor roads or a lot of potholes, you may need to rotate your tires more frequently. And if you do a lot of off-roading in your AWD vehicle, you should check your owner’s manual for specific recommendations.
In general, it’s a good idea to have your tires rotated every time you get an oil change. That way, you can keep track of when they were last serviced and avoid missing a rotation.
Conclusion
Many people don’t realize that they should rotate their snow tires. Just like other tires, snow tires need to be rotated in order to prevent uneven wear. The general rule of thumb is to rotate your snow tires every 5,000 miles.
However, it’s always best to consult your owner’s manual or a professional mechanic to be sure.

How to Cut Tires into Shingles
Tire shingles are a type of roofing material made from recycled tires. They are durable and eco-friendly, and can be used on both residential and commercial buildings. While they are typically more expensive than traditional asphalt shingles, tire shingles can last up to 50 years with proper maintenance.
If you’re interested in using tire shingles on your own roof, here’s how to cut them into the proper size and shape.
- The first step is to identify the area of the tire that you want to cut into shingles
- Next, use a sharp knife to make a series of evenly spaced cuts around the circumference of the tire
- Once you have made all of your cuts, begin gently pulling or prying the tire shingles off of the main body of the tire
- You can then trim any rough edges off of your shingles with a utility knife if desired

Credit: www.downhomeinspiration.com
Which Roofing Option Can Be Made from Recycled Tires?
One roofing option that can be made from recycled tires is known as a rubber roof. This type of roofing is created by shredding or grinding up old tires into small pieces, which are then used as the main material for the roof. Rubber roofs have a number of advantages, including being very durable and weather-resistant.
They also tend to be quite environmentally friendly, since they’re made from recycled materials. However, rubber roofs can be quite expensive, so they may not be the best option for everyone.
Do They Make Rubber Shingles?
Yes, they do make rubber shingles. They are made from recycled tires and are said to be more durable than traditional asphalt shingles. Rubber shingles are also fire resistant and can withstand high winds.
Are Rubber Shingles Good?
When it comes to your roof, you want to make sure you choose a material that will withstand the elements and last for years to come. Rubber shingles are an increasingly popular option for roofs, but are they really the best choice? In this article, we’ll take a closer look at rubber shingles to help you decide if they’re right for your home.
What Are Rubber Shingles?Rubber shingles are made from recycled tires and other rubber products. They offer a durable and eco-friendly option for roofing.
Most rubber shingles have a Class A fire rating, which is the highest rating possible. This means they’re highly resistant to fire, making them a good choice for areas prone to wildfires.Another advantage of rubber shingles is that they’re impact resistant.
This makes them ideal for areas where severe weather is common. They can withstand high winds and hail without being damaged. Rubber shingles also hold up well in extreme heat and cold temperatures.
Are Rubber Shingles Good? Pros and ConsNow that we’ve looked at some of the benefits of rubber shingles, let’s take a look at some of the potential drawbacks:
• They’re more expensive than traditional asphalt shingles• They’re not as easy to install as asphalt shingles• Some people find them less aesthetically pleasing than other roofing materials
• They may not be available in all areasAs you can see, there are both pros and cons to using rubber shingLES ON YOUR ROOF..
Are Rubber Shingles Better Than Asphalt?
There are several types of roofing shingles, each with its own set of pros and cons. Asphalt shingles are the most common type of roofing material in the United States, but rubber shingles are gaining in popularity due to their many benefits. Here’s a look at the pros and cons of rubber vs. asphalt shingles to help you decide which type is right for your home.
Asphalt ShinglesAsphalt shingles are made from a fiberglass or organic mat that is coated with asphalt and topped with ceramic granules. They are available in a variety of colors and styles to suit any home’s exterior.
Asphalt shingles are relatively inexpensive and easy to install, making them a popular choice for many homeowners.One downside of asphalt shingles is that they don’t last as long as other types of roofing materials. They also tend to be less durable in hot climates, where the intense heat can cause the asphalt to break down prematurely.
In addition, dark-colored asphalt shingles can absorb heat from the sun, making your home hotter during summer months.Rubber ShinglesRubber shingles are made from recycled tires and other synthetic rubber products.
They offer superior durability compared to asphalt shingles, as well as excellent resistance to fire, wind, hail, and UV rays. Rubber roofs also stay cooler than asphalt roofs in hot weather because they reflect sunlight rather than absorbing it. Another benefit of rubber roofs is that they’re environmentally friendly since they’re made from recycled materials.
.
Cutting tires for homestead projects
How to Make Tire Shingles
Tire shingles are a type of roofing material made from recycled tires. They are durable and eco-friendly, and can be used on both residential and commercial buildings. Here’s how to make your own tire shingles.
What You’ll Need:-A circular saw
-A sharp knife
-Recycled tires (at least 3)
-Gravel or sand
-Sturdy wire or twine
-An old piece of carpet or a tarp (optional)Instructions:1. Using the circular saw, cut the top and bottom off of each tire.
You should now have three long cylinders.2. Cut each cylinder lengthwise into four equal pieces. You should now have 12 tire shards total.
3. Take two of the shards and overlap them slightly so that they form an X shape. Secure them together in the center with the wire or twine. Repeat this step with the remaining shards until you have six X shapes total.
These will be your tire shingles.4. If desired, cover your work area with the carpet or tarp to catch any gravel or sand that falls off during the next step.5a) For a gravel finish: liberally coat all sides of each shingle with gravel or sand, using your hands to press it into place if necessary. Allow excess material to fall off before moving on to the next shingle; b) For a smooth finish: spread a layer of asphalt over all sides of each shingle using a putty knife or similar tool, then immediately smooth it out with your hands before moving on to the next shingle.. Asphalt can be messy, so consider doing this step outdoors or in an area where cleanup will not be an issue.. Let the asphalt dry completely before proceeding to step 6.. This could take several hours depending on temperature and humidity levels..
6) Once dry, install your tire shingles on your roof following standard installation procedures for whatever type of roof you have.. If you’re unsure how to do this, consult a professional roofer.. And there you have it – your very own eco-friendly roof made from recycled tires!
Conclusion
This blog post explains how to cut tires into shingles. First, the tire is cut in half with a saw. Next, the halves are cut into thirds.
Finally, the thirds are cut into fourths. The result is eight pieces of tire that can be used as shingles.

How to Get Custom Tires in Gta
There are many ways to get custom tires in GTA. The most common way is to find a mod shop that sells them, or to buy them online. There are also some race tracks that sell custom tires.
If you want to get the best deal on custom tires, it’s important to shop around and compare prices.
- In order to get custom tires in GTA, the first thing you need to do is go to a tire shop
- Once you’re at the tire shop, you’ll need to purchase the tires that you want
- After purchasing the tires, they will be installed on your vehicle
Credit: www.reddit.com
How Do You Get Custom Stock Wheels in Gta 5?
In GTA 5, you can get custom stock wheels by purchasing them from the Wheel Arch Angels in Los Santos. You can also find them on the street corners in certain areas of the city.
How Do You Get Colored Tires in Gta 5?
In GTA 5, you can get colored tires by purchasing them from Los Santos Customs. To do this, go to the “Modifications” section and select “Tires.” From here, you can choose the color of your tires.
How Do You Get Slanted Tires in Gta 5?
There are a few ways to get slanted tires in GTA 5:1) You can find them lying around on the ground in certain locations.2) You can buy them from tire shops.
3) You can steal them from other cars.
How Do I Change My Tires in Gta Online?
If you’re playing GTA Online and find yourself in need of a tire change, don’t worry – it’s easy to do. Just follow these simple steps:1. Find a suitable location.
You’ll need somewhere with enough space to comfortably work on your car. A parking garage or underground lot is ideal.2. Park your car and set the handbrake.
Make sure the area around your car is clear of any obstacles or other cars.3. Enter the “Customize” menu for your car. This can be done by pressing Up on the D-pad while in your vehicle.
4. Select “Wheels” from the customization options. Here you’ll be able to choose from a variety of different wheel types, sizes and colors.
How to get Custom Tires in GTA V Online/Story Mode
How to Get Atomic Tires – Gta 5
Most people don’t know this, but you can actually get Atomic Tires in GTA 5. Here’s how:1. Go to any Los Santos Customs and purchase the “Atomic” Tire Upgrade for $50,000.
2. Head to any Pay ‘n’ Spray and have your vehicle sprayed with the “Atomic” paint job. This will cost you an additional $100,000.
3. Once you’ve done that, simply drive around until you find a random event where someone has lost their tire.
Take the tire and replace one of your own tires with it.
4. That’s it! You now have Atomic Tires on your vehicle!
Conclusion
There are a few ways that you can get custom tires in GTA. You can either buy them from a mod shop or find them in the game world. If you want to buy them from a mod shop, you will need to find one that sells tires.
There are a few of these shops around the city, but they are not always easy to find. If you know where to look, you should be able to find one without too much trouble. Once you have found a mod shop that sells tires, you will need to purchase the tire of your choice.
The prices for tires vary depending on the type of tire and the size of the tire. You should be able to find a tire that fits your budget and needs. If you cannot find a tire that you like at a mod shop, you can always try looking for them in the game world.
There are often tires scattered around the map, especially in areas where there are cars parked. You may have to search for a while before you find what you are looking for, but it is possible to find custom tires this way.

How to Soften Dirt Track Tires
This is a question that I get asked a lot, and it’s one that can be difficult to answer. There are a few different ways to soften dirt track tires, and each method has its own set of pros and cons. In this blog post, I’ll outline a few of the most popular methods for softening dirt track tires so that you can make an informed decision about which method is right for you.
- If you’re looking to soften your dirt track tires, there are a few things you can do
- First, try running them at a lower pressure
- This will help the tire to deform more and get a better grip on the track
- You can also try adding some weight to the car – this will help transfer more force to the rear tires and give them more traction
- Finally, make sure your tires are clean and free of debris – this will help them grip the track better and prevent slipping
Credit: www.youtube.com
How Do You Soften Stiff Rubber Tires?
One way to soften rubber tires is to place them in hot water. This will make the tires more pliable and easier to work with. Another way to soften rubber tires is to use a chemical softener.
This can be applied directly to the tire or added to the hot water. Be sure to follow the directions on the chemical softener bottle for best results.
How Do You Prepare Dirt Track Tires?
A good dirt track tire prep starts with a clean surface. Any dirt, grime or grease on the tire will prevent the adhesives and chemicals in the tire prep from working properly. So the first step is to clean the tires with a degreaser or solvent.
Once the tires are clean, they need to be abraded so that the prep can get a good grip on the surface of the tire. The easiest way to do this is with a wire brush. Just make sure to brush in one direction only so you don’t damage the tire too much.
After scrubbing with a wire brush, you should rinse the tires off with water to remove any loose debris. Once they’re rinsed, you can start prepping them for racing.There are many different products available for prepping dirt track tires, but most of them fall into one of two categories: adhesive or chemical.
Adhesive-based products work by creating a physical bond between the tire and track surface. Chemical-based products work by chemically altering either the tire or track surface (or both) to create better traction.The type of product you use will depend on your personal preference as well as what type of racing you’re doing (sprint car, late model, etc.).
Some racers even use a combination of both adhesive and chemical products to get maximum traction.
Will Acetone Soften Tires?
No, acetone will not soften tires. In fact, it can actually harden them and make them more difficult to work with. Acetone is a strong solvent that can break down many materials, including some types of plastics.
Will Paint Thinner Soften Tires?
Paint thinner is a solvent that can be used to remove paint from surfaces. It can also be used to clean up oil and grease stains. Paint thinner is made from petroleum products and is highly flammable.
It should be used in well-ventilated areas and kept away from heat sources. Paint thinner will not soften tires.
HOW TO Soften up hard WPL tires (best and free method)
What Chemical Will Soften Tires?
Most people don’t think about the chemicals that are used to soften tires, but they are an important part of the process. There are a few different chemicals that can be used to soften tires, and each has its own advantages and disadvantages. The most common chemical used to soften tires is sulfuric acid.
This chemical is very effective at softening tires, but it is also very corrosive. It can cause damage to the tire if it is not used properly, so it is important to be careful when using it. Another chemical that can be used to soften tires is potassium hydroxide.
This chemical is less corrosive than sulfuric acid, but it is not as effective at softening tires. It is also more expensive than sulfuric acid, so it is not as commonly used. The last chemical that can be used to soften tires is sodium hydroxide.
This chemical is the least corrosive of the three options, but it is also the least effective at softening tires.
Conclusion
If you’re running on a dirt track, you want your tires to be as soft as possible. But how do you soften them up? Here are a few tips:
1. Use a tire softener. This is a chemical that you can add to your tires that will help to soften them up.2. Scuff them up.
You can use a wire brush or something similar to scuff up the surface of your tires. This will help to create more grip.3. Soak them in water.
This will help to soften the rubber and make it more pliable.4. Use heat. You can use a heat gun or even a hair dryer to heat up the tires before you race on them.
This will help to soften them up even more.